To avoid these ads, REGISTER NOW!

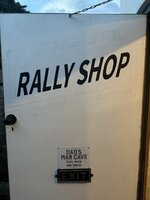
Between 265 & 485 SQ/FT Dr. B's Rally Shop

Workspaces sized between 265 and 485 squarefeet.
OP
C

Cris B

Well-known member
Joined
Mar 21, 2011
Messages
442
Location
Lancashire, UK
As part of the 'save the shed' mission undertaken 6 years ago, I just replicated the barn doors anew. These have done the job just fine ever since, but as we are now extending the house and consuming some of the space between the shed and house with the works, there was no way the doors would be able to open once the work was complete. So before the builders start I needed to change the shed design:

29779359110_791136e357_c.jpg

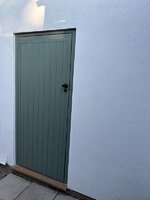
I have previously made doors, but this time for speed and convenience I bought the door and a frame which was a good move and allowed me to get all of this done in half a day:

52158640503_934595c655_c.jpg

And after adding in a few more noggings into the stud wall in the rest of the day I had it secure and water tight.

52157617997_0c31545ce9_c.jpg

With both the barn doors off, I started painting whilst we had some good warm weather. Enjoy it while it lasts and get this job done was the priority so the wood was weather proof.

Once that was underway, between coats I started pulling nails so I could salvage the featheredge.
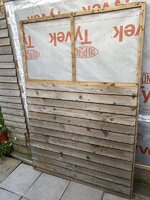
52168823880_12826b0cf5_c.jpg

And with all the featheredge cladding removed, it was just a cased of disassembling the doors. With the cost of timber being so high at present I am going to save as much of this as I can and re-use it for future projects.

52168341236_45b9bb73d8_c.jpg

Tonight I took the doors apart and tucked the wood away into storage. The rain started tonight too and I was pleased I had the painting done on the new door. Next phase is to make good where the barn door hinges had been fitted and clad the new section.

I need to order some ironmongery for the door (handles, escutcheons and anti-thrust plates) to finish things off.
 
Last edited:
To avoid these ads, REGISTER NOW!
OP
C

Cris B

Well-known member
Joined
Mar 21, 2011
Messages
442
Location
Lancashire, UK
Found some time in the week day evenings to make a start with the cladding. I also painted the screws and bolts on the hinges black... because aesthetics.

52172834594_271314e189_c.jpg

Today I finished getting the featheredge back up. I was pleased that there was just enough to do the job and make the repairs where the old hinges were. I also plugged and glued all the old nail holes in the cladding.

52173066770_279289c4d2_c.jpg

This evening I cut in the first of the door locks so the door is fully usable now. Ironmongery due on Monday.
 
OP
C

Cris B

Well-known member
Joined
Mar 21, 2011
Messages
442
Location
Lancashire, UK
Doesn't feel like there is much to show for most of a day working but made good progress, tidying after all the jobs in the last week or so. Sorted all the timber from the old barn doors into what is being kept and what is now firewood. Massive tidy up inside the shed and extended the timber storage rack to give me some more capacity. Cut some pine to size to frame out the inside of the door. Bit disappointed that the table saw won't fit into the shed where I had wanted it to go... guess I'll have to sell it and get a DeWalt one that I had always wanted at some point. In the mean time I will make it fit.

I also cut and shaped the wood to make the door frame for the IKEA hack cabinet that I have been working on. I have started gluing and pinning that together. I miscalculated the glass size so I will need to chop that down to it and hope I don't break it. I bought a glass gutter last month for some work on my mother's greenhouse so I have had some practice recently. Pics of the cabinet to follow. I need to have a think about how to do the shelves in the mean time.

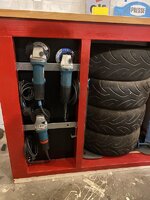
Another job checked off the list is the angle grinder storage. Several years ago these. brackets came out of a data centre refurb and I thought that they would come in useful, sure enough, cut to length and bent to shape we have mountings, finished in a decent BZP finish. The glue on some stickers that were on them seems to have discoloured the finish. It looks worse in the photo than it does in real life.

52174896426_7f69253148_c.jpg

The hooks are some stainless steel ones from the local hardware shop. I am pleased with this setup, it makes the grinders much more accessible than before and had to be better than them being thrown in a drawer altogether.

52174901388_4da4fca429_c.jpg

I have not yet worked out how I am going to do my g-clamp storage. My current Plan A it to use some shelving brackets. I have not sourced those but will keep a look out for options.

Recently a local seller has a very large Peugeot sign for sale. The dealership had cut ties with Peugeot and switched to dealing with another brand so all of the material was being disposed of. It was a bit of a gamble because at 4' x 5' I wasn't sure it would fit in the back of the Audi. In preparation and just in case I took the rear bench seat out so the boot floor was totally flat with the rear seats folded down and I took ratchet straps and sheets and padding in case it had to be strapped to the roof.

Turns out we managed to get it inside, it was a super tight fit. And it was definitely easier getting it in that it was getting it out once I made it home. Anyway it was extracted without any damage so I was happy. I only had two questions for the seller, do the lights work and do you have the fittings to mount it?

I was assured that it worked, but it came with no plug and when I went to collect it there were no fittings. Now the fittings I think I can make without much hardship. The lights were fitted with a plug and with some excitement I switched it on. There was an initial promising, but instantaneously very bright light and then a sound that can be best described as a chain of firecrackers going off and a bit of smoke as all the lights blew :oops:

52174901423_1482dec174_c.jpg

Turns out it was chains of LEDs and as there was no transformer they'd just all been fried by 240v mains. So stripped out the stinking remains and ordered some ribbon LEDs online, deciding to go for the ones where you can change the colour with a remote control. That order arrived over the weekend so I wired that setup together tonight and gave it a test run.

52175386465_66499d36f9_c.jpg

No pyrotechnic display this time :D

Will sort the brackets and aim to get it up on the wall by next weekend.
 
Last edited:

mwbailey

Well-known member
Joined
Jun 30, 2012
Messages
821
Location
Rock Hill, SC
After your comment about Pop Smurf and Ole Paint, I HAD to peruse your thread. Wow, is there a project you hesitate to undertake? Great work at finishing the projects well. My habit is to get the project functional and move on. That's not gonna work with Pop, I'm afraid.

I spent 25 years in manufacturing, then worked a decade teaching high school -- many of my students called me Dr. B. I guess if I call my workshop Dr. B's I'd be trespassing on copywrite issues ;)

Keep on truckin'!
 
OP
C

Cris B

Well-known member
Joined
Mar 21, 2011
Messages
442
Location
Lancashire, UK
It's been a while but I have been checking in every now and then to see what's happening here. Been very busy with a major renovation of the house. Mostly that 100% occupied any time I had for messing in the garage, but in between I progressed the rally cars and as we come out of the other side here's a few progress updates.

I did finish the ironmongery on the single man door to the shed. It now looks like this.

53158595317_6b8926080f_c.jpg

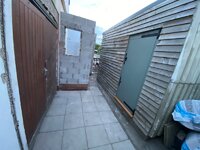
The extension to the house in filled part of the space between the back of the garage and the shed, but the renovation freed up a lot of bricks and as we needed to have the back of the house rendered, I decided to remove the double doors at the back of the garage (one of which I had never opened) and to convert it to a single man door to match the one on the shed. It used the exact same frame, but I reused the original door - it had to be made narrower and squared up as it was wonky.

53159178421_5ee042bc69_c.jpg

I did the brickwork, but left the rendering to the professionals. I am pleased with how that came out once I'd painted it up.

53159385644_9e9189733c_c.jpg

Many years ago, I picked up a race seat to make a pair for a car I was building from a guy out on the Cheshire plain, not too far from Oulton Park Circuit. The seller had done pretty well in life and had an amazing garage and workshop. He had an old race car wheel on the outside of the building as a hose reel. It's been a long standing ambition to do the same.

With the house extension done, I found a great deal on a Compomotive Rally wheel and then picked up a hub and knuckle from an Audi. A bit of metal work later I had made a bracket to wall mount it and it's in action.

53159670128_64a88a5faa_c.jpg
 
Last edited:
OP
C

Cris B

Well-known member
Joined
Mar 21, 2011
Messages
442
Location
Lancashire, UK
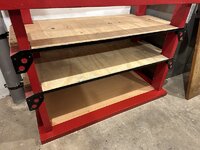
Inside the garage, I built a storage unit for spray cans out of left over materials from the house renovation. I wanted to consolidate them from 5 different locations into one, it's saved loads of time. Oh the times I spent looking for that can - that you know you bought but can't find. Not any more (y)

53159384474_53201f05aa_c.jpg

I also added a base to my secondary workbench as after I extended and based the main work bench this one sat 2" lower and occasionally I want to span the gap. It's also meant my De Walt TSTAK cases are sliding on wood not concrete which sounds less expensive every time one is needed from the bottom shelf of the unit.

53159604950_07cd07fa7a_c.jpg

53158594722_d572d763b5_c.jpg

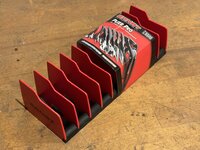
I also imported a load of Ernst tool storage parts to organise my sockets - really like these setups and it has transformed how I used my tools now. So much so that I also invested in proper soft plastic spanner racks too (I went for Sealey WR08 and WR09s). Somewhere along the way I discovered I needed a full set of long handled Snap On spanners... they filled a gap :cool:

53159178841_4f288341bc_c.jpg

53158595262_191e77bef4_c.jpg

As part of the house renovation I had new electrical supplies fed into the garage. One dedicated 16A circuit for the welder and another for a future electric car charger. We haven't gone EV for any of daily drives, but when we replace the current cars it seems the logical step to replace one with an EV - so many of our journey are no more than 10 miles to the local store or sport grounds.

Unfortunately the electrician wasn't that familiar with the demands of welders and I am still waiting for him to come back and fit a correct breaker on the circuit. Hopefully he'll get it right on the 4th attempt :cry:

My dad came to stay and helped me re-wire the main bench side of the garage, We went for 2" square box ducting with new back boxes and double sockets. This has really helping things look neater. I will need to get some pics when the garage is less filled with rally car parts and mid-project mess. The garage is in a shameful state of tidiness (not photo worthy in the slightest). We are still selling off kitchen appliances and other remnants of the house pre-renovation and once that is gone I am expecting several pallets of exterior porcelain tiles to pave outside the back of the house. Once that is done I should be able to move cars around and get to wiring the other half.
 
Last edited:
OP
C

Cris B

Well-known member
Joined
Mar 21, 2011
Messages
442
Location
Lancashire, UK
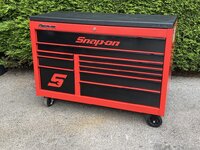
So back in May last year I bought this nice Snap On Cab.

52046409574_980a6a9f03_b.jpg

And as part of integrating it into the workbench I ended up with the steel hardtop being surplus to requirements.

52154386295_064686982d_b.jpg

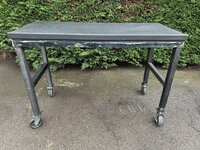
After working on a few different projects recently I decided I definitely needed a welding table - getting a bit old for welding on the ground. So I repurposed the two 8ft lengths of 6mm angle iron that had been freed up as part of the house renovations. I had some 4mm wall 50mm box section tubing and so I put together this table:

53358004693_ac6890620b_b.jpg

There's a subframe of 3mm angle iron tack welded on the top for now that replicates the top of the roll cab for securing the hardtop. I have done this so that I can think a little about how and whether to put a welding plate on top instead on the Snap On top. It's also coasting around on a set of Snap On roll cab wheels that were sitting in a box taking up space.

In the mean time it gives me some much needed extra storage space and allows me to replace and dispose of this cobbled together setup which used some old office desk legs that were being thrown out.

53357780641_468edd58cc_b.jpg

And yes that is another engine sitting under that table because surely every man needs a number of engines greater than the number of cars they own... just in case ;)
 
OP
C

Cris B

Well-known member
Joined
Mar 21, 2011
Messages
442
Location
Lancashire, UK
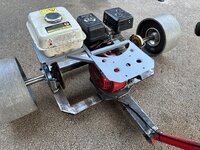
This is one of the projects that I have been working on with my two sons. Little bit of welding and fabrication:

53358295910_3135599a77_b.jpg

And we have a Honda powered drift trike with a GT BMX front end.

53356964577_365da2e3ee_b.jpg

This was a work in progress shot, we took a Go Kart chain cover, shortened and plastic welded it to fit and ditched the rear disc brake. It's a good giggle getting some speed and going sideways.

53358295895_fb28cec189_b.jpg

There's also a stainless steel exhaust to go on, but I need to do some TIG work on that first. May post some photos when we get it going again next summer. Currently getting the clutch rebuilt and some mods done over the winter.

And as this thread has been a bit light on car content, so here is a classic British Rally Car:

53357053887_379d19c765_b.jpg

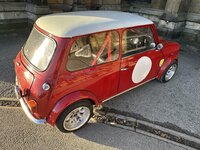
For those not well-versed in very small front wheel drive European cars this is an Austin Cooper S. It is the same model of car that Paddy Hopkirk won the 1964 Monte Carlo Rally in and is a 1300cc riot to drive. They really connect the driver to the experience and this one looks the business in a fast road/tarmac spec.

This is not my car, I spotted it locally yesterday and took some photos to share with my dad. He used to rally these back in the day, competing in the British RAC Rally. His was grey with the wheel arch spats smoothed into the body rather that the bolt on ones on this car, although he did say they look better in red - this was a cracking example and immaculate - clearly someone takes a lot of pride in this and rightly so.

53357780571_01d9a69a5a_b.jpg

I have both of my cars at various states of repair the Sadev gearbox in the carbon maxi bodied car is currently getting rebuilt and refurbished with new ratios. Lovely gearboxes, but not for those weak of wallet. The red Rallye is midway through having the boot floor and inner rear wheel arches replaced. Quite the job, I am plugging away but keep finding more little nuggets of rust that need cutting out. It's taking a lot longer than expected.
 
Last edited:
OP
C

Cris B

Well-known member
Joined
Mar 21, 2011
Messages
442
Location
Lancashire, UK
Mrs B bought me an Amazon Echo for Christmas to go in the garage - I think mostly for messaging purposes. Decided I needed a suitable home for it but was looking for a low effort way of putting something together. We did a trip to IKEA today and I managed to pick up a suitable plastic box container. A bit of chopping and shaping to make it into a shelf:

53427385508_5dc71042d1_b.jpg

Couple of holes drilled and we have a workable solution...

53427655365_d5ab028eb0_b.jpg

53427385578_1bc03d64f7_b.jpg

Some wiring to do on this side of the garage so I will put in a dedicated power outlet for it to tidy up the cabling.
 
OP
C

Cris B

Well-known member
Joined
Mar 21, 2011
Messages
442
Location
Lancashire, UK
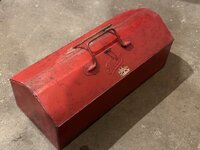
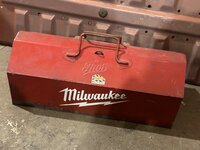
A while ago whilst I was thinking about the now abandoned TIG Cart, I bought this old Thor toolbox. Thor are best known for their copper and rawhide faced hammers that used to be supplier with early Jaguars for removing the wheel locking spinners. The box is has what some might call patina, to be fair it is very crusty underneath and once I'd cleaned it up it had a couple of coats of red oxide primer. Other that that it was pretty good for it's age and made out of some decent thickness steel.

53442622934_0cd6688e11_b.jpg

53442440728_9c0ff2b134_b.jpg

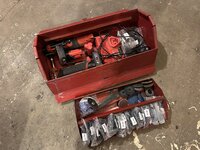
It's been sat for a while in a corner of the garage whilst I contemplated what do do with and over the New Year holiday I was thinking about the fact that as I was working on the car I kept having to get up and go get consumables for the die grinders. I considered that Milwaukee M12 tools would probably fit in the Thor box. Yup it does.

53442302271_5843b623d8_b.jpg

I've been really impressed with the Roloc discs, but always seem to have a few on the go so nice to be able to have those on the top. I have searched a few times for storage solutions and haven't see any yet. The charger probably won't spend much time in the box, those batteries don't last long when the tools are in bodywork use.

53442622849_3260290a35_b.jpg

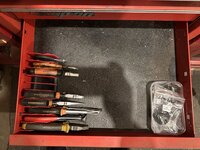
That has meant this draw is reclaimed for new uses. I am not sure why I put off getting one of these Ernst tool organisers for so long, but this time when I checked I managed to get one at a decent price and delivered quickly. It's better than I expected and has helped tidy things up.

53443178960_dbbba88be8_b.jpg

53442302201_6dec4bf6dd_b.jpg

53442714720_24561d30e0_b.jpg
 
OP
C

Cris B

Well-known member
Joined
Mar 21, 2011
Messages
442
Location
Lancashire, UK
I picked up some new tools over the holidays. This very good condition Roper Whitney Inc, Punch No. 5 Jr. for putting spot weld holes into sheet steel. Takes a bit more effort than I was expecting for 1mm steel.

53442622929_fe8a3f6bbb_b.jpg

53441375517_6d63fe8e57_b.jpg

Over the holidays whilst working on an electrical problem I blew the resistor in my old and cheap analogue multimeter, so I decided it was time for an upgrade.

53442714695_147d4ec9d2_b.jpg

The other little update is this Steel box. It came with the DeWalt Router I was given by my father in law. I've bough a TSTAK case for the router and this was going spare. It's turned out to be a great seat for working on the car. The problem was that it wasn't designed for that and the lid didn't have enough to rest upon before it was sat upon. I added a bar of 4mm steel to the front and that seems to have worked pretty well.

53442440833_725690586f_b.jpg

I have through about adding castors on outriggers, but it'll do for now sliding around on these aluminium feet. I think I will keep other consumables in this for now - finger belt sander abrasives and the discs for the angle grinder.

53442622854_281cbaa080_b.jpg
 
OP
C

Cris B

Well-known member
Joined
Mar 21, 2011
Messages
442
Location
Lancashire, UK
So I don't forget what's inside I stuck a big sticker on the red Thor box :cool:

53448112033_5e75841e72_b.jpg

It's been cold here, not Nebraska and 12" snow cold, but cold enough that when I went out to the garage the other morning about 7.30am you could see the frost around the edge of the frame and cross braces and the areas of door that were thinner and the escaping radiant heat had meant the frost had not stuck.

So last Saturday I decided that it was time to insulate the last part of the garage that had not been tackled.

53447984366_35f449b4f0_b.jpg

The door was handmade by a previous owner of the property who was a carpenter. When I converted the double doors at the back of the garage down to a standard single sized man door I decided that I would re-use this door, but had to narrow it about 5 inches. I don't like to criticise the work of others, but the door must have been a Friday afternoon job because the top rail was about 1/2" out of square and I had to also shorten the length of the door and add a wedge piece to bring it back to square. Result is it fits the frame and no uneven gaps.

Mrs B buys fancy food for the cats that comes fresh delivered in insulated cardboard boxes with ice packs. They use wool-based insulation and I have been saving it and have a large stash of it in the loft of our main house. It seemed perfect for the job and was free, so that's a bonus. I'll not get points for aesthetics, as it's not pretty but it does the job.

53448112053_0b190db5d5_b.jpg

All my wood working gear is at my mothers as I am helping fit some extra units in her kitchen. I measured up carefully and headed over to the local woodshed and had them rip an inner skin for the door out of 9mm marine ply. A little prep work for the ironmongery and many screws later and it's buttoned up.

53447060817_428625b3b0_b.jpg

The most satisfying aspect of this job is completely unexpected: The door now closes with a very satisfying soft 'thunk' noise, a bit like a heavy air tight door closing.

This is the perfect blank canvas for some garage art. Design is in my head, updates to follow.
 
Last edited:

samb

Well-known member
Joined
Apr 15, 2011
Messages
124
Location
UK
Just read the entire thread, brilliant work. You can seemingly take your hand to anything, very admirable. ~ also very jealous of that sizable garage (by UK standards anyway its huge!)
 
OP
C

Cris B

Well-known member
Joined
Mar 21, 2011
Messages
442
Location
Lancashire, UK
Just read the entire thread, brilliant work. You can seemingly take your hand to anything, very admirable. ~ also very jealous of that sizable garage (by UK standards anyway its huge!)
Thanks Sam! Good to see the progress on your projects (y)
 
OP
C

Cris B

Well-known member
Joined
Mar 21, 2011
Messages
442
Location
Lancashire, UK
So been a while (busy with life), but here's a few updates...

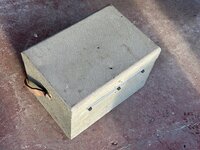
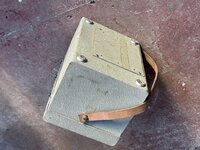
For a long time had an old wine box as a first aid box in the garage it was far too big for the contents and the lid wasn't a very good fit so I was on the look out for an alternative.

53738298696_34598285b5_b.jpg

After a lot of searching this came up on eBay and was just what I wanted and the condition was really good.

53738298726_e6448cbcaa_b.jpg

Chucked all my first aid kit in it and very happy with the storage provided

53738491648_7a354b6b8a_b.jpg

I then needed a solution to mount it on the wall and after a few false starts found I had a length of IKEA kitchen shelf in the wood shed so chopped that down and drilled an extra mounting hole and fitted that up

53783000821_a5dfbf6f8b_b.jpg

Box fitted and I'm calling that job done!

53782063702_c6d12a743f_b.jpg
 
OP
C

Cris B

Well-known member
Joined
Mar 21, 2011
Messages
442
Location
Lancashire, UK
Picked up some swag from the team over at Donut - enjoy their YouTube content and find it good motivation to keep going with my projects. So chequered flag banner up on the wall...

53513830139_dccaa8e1aa_b.jpg

...and some magnets

53513684288_ff189317d4_b.jpg

The French made the new gears and some other parts for the Sadev gearbox so at the end of last month went down to Essex to pick that up. Have a few other projects on the go, but once I get those done so I can move things around in the garage I need to get this back in the Maxi kit car...

53738665048_fb0fab3906_b.jpg

53738472526_5bee4b4d33_b.jpg
 
To avoid these ads, REGISTER NOW!
OP
C

Cris B

Well-known member
Joined
Mar 21, 2011
Messages
442
Location
Lancashire, UK
So a few months ago I insulated and boarded the man door into the garage. After several coats of primer and a lot of sanding, I had a good base to do some garage artwork on it. So first up was a design:

53783133481_c3412002a4_b.jpg

Then to make it true scale, it had to be printed onto several sheets of A4 and overlapped so I could tape them all together. A large scale printer would have saved a chunk of time...

53737369542_95a05977cd_b.jpg

Trimmed for fit and then started to outline the graphic

53738628184_74167fbe90_b.jpg

More trimming and cutting out and we have a full outline

53738628134_87f313d6b9_b.jpg

Time to start hand painting....

53783422550_a1f9c68a91_b.jpg
 
OP
C

Cris B

Well-known member
Joined
Mar 21, 2011
Messages
442
Location
Lancashire, UK
Been a while, just maxed out with work and being away from home a lot on business. Time at home was prioritised on family stuff, then we had the house roof replaced and the next thing you know we're rolling into 2025 and all the chores that come with spring and a new season in the garden.

Back on with things in the garage now. Had to clear a few accrued things that had built up over the last six months or so, but with the Wahoo winter training rig tucked away we can get some things going again. A few things since the last update. Door sign finished!

54469573881_39df0ddee6_b.jpg

There was a bit of pebble dash left on one of the brick piers so that was chiseled off and the brickwork painted. I then bought some 2" square conduit and tidied up all the electrical wiring. That necessitated drilling through the brick pillar to get a nice clean cable run rather than having the cable surface tacked on the outside. With the electrics and decorating taken care of, I had a bit of a tidy up of my metal stock and decided that I needed to get some racking.

In the end I went for some heavy guage twin slot and which seemed to work quite well. I need to come up with a way of stopping the stock rolling off the shelf struts, but with some strategically placed square stock we're all good for now.

54467358600_9e56b1126e_b.jpg

54467358610_95ce835df9_b.jpg
 
OP
C

Cris B

Well-known member
Joined
Mar 21, 2011
Messages
442
Location
Lancashire, UK
Went over to Ireland for a short break and dropped in to see Dave Hunt at Red Hill Motorsport in County Sligo. Dave is well known for his outstanding builds and workmanship - there's several articles over at Speedhunters. Some times you just need a little inspiration to get those projects back underway.

54466164652_7db8b51645_b.jpg
 
OP
C

Cris B

Well-known member
Joined
Mar 21, 2011
Messages
442
Location
Lancashire, UK
Back in November '23 I made this to tidy up a corner of the garage. It currently has two engines and gearboxes underneath it (I don't know if I should be proud of the fact I have a n+1 approach to cars and engines, but there we go). It was built out of some recycled 6mm angle iron and some newer box section and was design to let me mount the work top off my Classic 78 roll cab that I have mounted into my main workbench.

53358004693_ac6890620b_b.jpg

After remodelling the shed and improving storage, I have created a bike work area and have repurposed the Snap On roll cab top as a dedicated bench top. So this meant the table was going to be *******, unless I did something about it. I decided that I wanted to create a dedicated welding and fabrication area for the long term so it was time to get serious. I worked with Dunk Lamont from 7050PS to finalise a design for my new table top.

Based up in Dundee, he's far from local but I had long admired his portable welding tables and other offerings so knew he was more than capable of doing the business. He pulled out all the stops to secure a great price on shipping and within a very reasonable timeframe a half pallet with the table top arrived from Scotland. Needed a hand from my sons to lift it up onto the table and then machined it to fit mounting bolts.

54759434093_2fc5dc3508_b.jpg

10mm thickness with 16mm diameter holes on 100mm centres. Sanded down and repainted the top part of the bench before mounting, but not the legs (yet).

54759547285_bd7f84aca6_b.jpg

In addition, I want to incorporate my TIG setup into the bench. Many years ago I made a TIG trolley, but wasn't happy with it so abandoned that project and scrapped most of it, with the exception of the gas bottle and TIG rod holder section that I made (the rods sit in capped 50mm diameter PVC tubes and the gas bottle is secured with a 2" wide heavy duty velcro strap. That's now been incorporated onto the left hand side and already has dust on it!

54758366707_6e0dfb23b4_b.jpg

I need to make a lower shelf for the gas bottle to sit on. That'll be detachable from the table, so I'll use some weld-in threaded bosses for that. That's the next job and then I'll have a think about where the TIG's going to go....
 
OP
C

Cris B

Well-known member
Joined
Mar 21, 2011
Messages
442
Location
Lancashire, UK
I mentioned in the previous post that I remodelled the shed. Recognising that most major work was now done on the house, I decided that I could sort through and get rid of a lot of timber that I had been saving. With that recycled, I set about a grand plan to reorganise the storage quarter of the shed and to increase the size and provide better use of space in the bike storage quarter (the other half of the shed is a garden room space).

I had been meaning to do this for ages, but the original roof had transparent fibreglass sections that were leaking. So the first job was to get new roofing panels and that has made a huge difference to the light in the space (the old fibreglass had really yellowed and lost a lot of its transparency). It also helped me decide that the mezzanine had to stay where it was, even if that limited the length of things that could be stored up there.

Putting this all into action meant remodelling the partition wall, shifting all of the remaining timber storage to the other side, rebuilding the mezzanine storage area (to increase headroom underneath) and fitting in as much storage as possible through benches and shelving. I did not capture the full glory of the situation before starting this work. These photos were from after I'd done the big purge after sorting the timber. The partition wall did allow you to pass between the two sides before the work began.

54758604172_570852f8ef_b.jpg

When we had the extension on the house I had power run into the shed. Right now, the only working electrics are the double sockets in the exterior weatherproof unit. The shed needs a new roof in the next couple of years and until that's done, it's never seemed worth while to get it re-wired. As part of this tidying up work, I did run a cable through to the garden room that has eliminated the trailing white cable you can see in the before pics.

54759461581_9f36284b57_b.jpg

Partition went in without much drama. Cost wise it was four 8x4' sheets of 1/2" ply, everything else was time I had in storage so very pleased with that outcome. The hoarding paid off :cool:

54759686874_f856f2468d_b.jpg

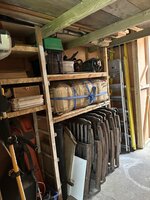
Mezzanine takes 8' lengths, racking on the right takes longer lengths (the ladder is now on dedicated mounts for ease of access). That racking was from IKEA over 25 years ago - we are getting good value out of that investment!

54759686824_a0f2429fba_b.jpg

I realised as I was posting this I did not have any pictures of it 'more finished' or from the bike quarter - will try and share those in the next update.
 
OP
C

Cris B

Well-known member
Joined
Mar 21, 2011
Messages
442
Location
Lancashire, UK
Ha! I am on vacation and have been catching up with many of you and your inspirational spaces. I have a fair few updates to share, including adventures in bricklaying :unsure: plus VW bus and Porsche ownership 😎

Updates when I get back to the UK and access to a laptop…
 
OP
C

Cris B

Well-known member
Joined
Mar 21, 2011
Messages
442
Location
Lancashire, UK
Lots of updates needed. I think like many on here who have projects on the go, there are MANY things that get in the way and distract you from working on the garage or the cars in it. This has been the ongoing story for the last 10 years!

To be fair in that time we've rebuilt and extended the back of the house and then once that was done we had the whole roof of the house replaced. No shingles here, we’re talking Victorian Welsh slates which all had to be stripped off the roof and re-laced, but before the new materials could go back up we ended up getting a load of the Victorian timbers replaced and both chimney stacks rebuilt.

Sometime after all that my good lady said that it would be very nice if the gate posts at the bottom of our drive could be widened. Fair enough, they were built in an age when cars were a lot smaller than those today. So this is the story of The Wall.

Gateposts.png

One of the things that had put me off getting started on this job was this breather pipe for the sewerage pipe. So the first thing to do was dig down and explore that. Having excavated that pipe it turned out to have been severed when the drive was laid, so fortunately there was no need to mess about with that plumbing.

Breather Pipe.JPG

So I demo’d the existing left hand-side gate post. I decided I wanted to re-use the bricks so it was a chisel in the SDS hammer drill and taking them done layer by layer. Fortunately they were laid with lime mortar so the clean up on the bricks was pretty straightforwards, but seriously time consuming.

Lime mortar.JPG

To move the post 18” to widen the entrance, obviously some of the wall had to come down. The ivy had done its work and was really holding the wall together. A lot of the bricks could be removed by hand. I think lived in hope that it would just be the bit by the gatepost that would need to be done. The reality was it was all bad.

Ivy damage.JPG

With the gatepost rebuilt and the paved foot path along the side of the drive extended, I decided that I needed to do the whole wall. In addition to the ivy, there were a couple of mature trees really close to the wall, I figured my chainsaw skills could deal with two of them, but I got our tree guy to come and deal with the other two.

tree stump.JPG

I discovered that the wall used to have a footpath and gate posts a bit further along - I found the foundations of the two buried. I then decided that I’d put two further post piers in. When I did the measurements and calculations to work out the position of these, it turned out that one of them was pretty much exactly on top of one of the brief foundations. So I decided it was mean to be.

Old foundation.JPG
 
OP
C

Cris B

Well-known member
Joined
Mar 21, 2011
Messages
442
Location
Lancashire, UK
This of course meant that I would need more bricks, so after a lot of searching for my odd sized handmade Victorian bricks, I found some in a reclamation yard about 60 miles away, but for the quantity I needed they weight was over the capacity of the van so I had to get them shipped. They were a really good match for size, shape and colouration, but they were all in need of cleaning.

Brick cleaning.JPG

I also needed more bricks because the boundary post pier with my neighbour was only half thickness, so we’d agreed that I would build that into a full sized one. When I tore into that it was cobbled together with a load of bits of brick and most couldn't be reused.

Half post.JPG

As I was working on the wall, I ended up having dig roots out of pretty much the full 3’ behind the wall, to remove roots and roots balls (many towed out with the van).

Rootball removal.JPG

Roots.JPG

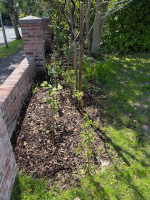
After this, I decided that I would plant a hedge. I gave a 20” gap to the wall and planted a staggered double row of English Hedgerow mixed set of species, including hawthorn, blackthorn sloe, scotch burnet rose, wild pear, cherry plum, crab apple, alder buckthorn and hazel. I put cardboard down around the hedging to stop the weeds coming up and then put down a thick layer of wood chip to help trap the moisture and give the hedge a good starting point.

Hedging.JPG

The final problem was I now had three post piers that needed capping stones. The original two were cast concrete with stone chips. Whilst I was planting the hedge one of our neighbours across the street popped over and said they had one if I was interested. Turned out to be the exact, size, shape and construction as the two I already had. After much searching, I decided that I wasn’t going to find another two.

So plan B, make some. I made a plywood box and then used plaster to make a mould. I wrapped one of the pier caps in clingfilm and then poured the plaster in around it. Made two of them and then left them to cure for three weeks before applying some concrete colouring and getting them fitted. I managed to get them pretty close in terms of colouring, I am confident that they will weather to match pretty quickly.

Casting.JPG

Finished Caps.JPG

All finished. During the build I had lots of compliments from the neighbours and passers by. It was a really good way to get to know people on our street, many of whom I hadn't met despite having been here for over a decade. A couple of people stopped cars and asked if I was available for hire! Quite flattered by that, but not ready for a change in career just yet.

finished.jpg

Hedge has been coming on well with some watering over the recent hot weather.

Hedge.png
 
OP
C

Cris B

Well-known member
Joined
Mar 21, 2011
Messages
442
Location
Lancashire, UK
After we had the roof done we had a rather large pile of slates in the front garden. This led to three further projects, with the ultimate aim of using up all the remaining bricks and slates.

The Soakaway
The area around the back of the lean to shed was a problem, because it doesn’t get a lot of light and just couldn’t get grass to grow.

Drainage 1.JPG

That mean every time it rained everything got mudsplashed. Also the downpipes routing on the gutter wasn’t ideal. So I dug out for a soaraway and core drilled the concrete so that the downpipe could be buried and tied into the soak way system.

Drainage 2.JPG

Bit of brick edging and filled with slates.

Soakaway.jpg
 
OP
C

Cris B

Well-known member
Joined
Mar 21, 2011
Messages
442
Location
Lancashire, UK
Slate Bashing

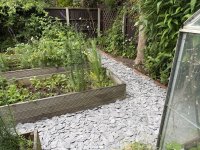
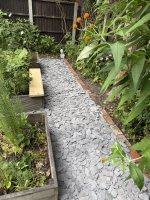
The plan to get rid of the majority of the slates was to break them up and turn them into a path around the raised beds down the far end of the garden. We’ve had grass paths for years, but they’re a PITA to maintain, so anything that results in less grass cutting and strimming gets my vote. Unfortunately before the slates go down I needed to edge all of the flower beds to contain the slate.

Slating 1.JPG

Slating 2.JPG

Fortunately with the surplus of bricks from the wall and the one we had left over from the house renovation I had enough to do the lot. This included properly laying some bricks in front of the greenhouse for the platers to sit on. Mrs B has said she is done with the greenhouse, so there will be a summerhouse type shed being made to replace that in a future instalment.

Slating 3.JPG

Slating 4.JPG

There was some satisfaction in seeing the pile reduce. It was a lot of work, each slate being broken with a lump hammer and then loads at a time tumbled in the cement mixer to take the sharp edges off.

Slate Plle.JPG

Then they had to be wheelbarrowed and carried in plastic flexi tubs from one end of the property to the other and distributed. Can't say I was sorry to see the back of this job. There was slate dust everywhere during the process, but we've been very happy with the end result.

Slating 4.JPG

Slating 5.JPG
 
Last edited:
OP
C

Cris B

Well-known member
Joined
Mar 21, 2011
Messages
442
Location
Lancashire, UK
The Edging

There were also enough bricks to finish the rest of the edging in the back garden. It's a project that I’d started a couple of years ago, and each winter we work on improving the levels on the lawn, which is no less bumps and hollows and more flat. The lawn is now levelled and brick edged on 3 sides. The 4th slide has vertical slate edging and I may need to replace those in future.

Edging.JPG

IMG_4892.JPG

After that I was done with the garden for this year. There's less maintenance now and it's easier to do some of the tidying up jobs.
 
OP
C

Cris B

Well-known member
Joined
Mar 21, 2011
Messages
442
Location
Lancashire, UK
The bike wash area

With four riders and an n+1 approach to the optimum number of bikes, there is always a bike that needs washing and working on.

There is a small courtyard area between the back of the garage and the big shed is well set up for this as it has the hose reel, and is close to the bike tools and the garage. So we can setup a portable bike stand and get to work as needed. This is fine in summer, but for at least half the year by the time we get back from any mountains, it's dark and the area was not well lit.

When we secured planning permission for the back of the house renovation, I had the architect put into the plans that were approved that we would connect the shed to the house and cover the courtyard. We never saw eye to eye on the roof design and I wasn't going to pull the trigger on something that I didn't like so that was never done during the build.

Pagoda 1.JPG

However I decided that the time was right to make a start and that I could tie this into the lighting problem over the courtyard. I ordered a 15m extension to our LED string lights and bought a load of treated timbers and joist hangers.

Pagoda 2.JPG

A bit of wood work around the existing feather edge and we had a structure. We had some of the charred timber facing from the back of the house left over so I used that to create a fascia panel. This structure is on the same horizontal plane as the shed roof when the current slope is taken into account. That gives me some options and less work for how we recover it in future.
 
To avoid these ads, REGISTER NOW!
Top Bottom