If you can't get it to electronically retract & have the tool to screw in the pistons, it should work on the Escape. I know it does on the 2018 Edge with the electric e-brake.Rode the chair. Started the war with the Escape brakes. Sledge hammer removal of one rotor. Found out they sent me 2 different front rotors. Started the return and resend process. Finished the one front. Went to start on the rears. The car is refusing to retract the ebrakes. I tried every stupid pet trick I could think of. It's possible that the TPMS error is blocking the ebrake. I had something like that on the Journey. Tried the scan tools, which are supposed to work. Nope. The box lied. Well eff me. I was too disheartened and exhausted to continue. Tomorrow I'll try refreshing the TPMS modules. And I also bought a new updatable scanner and whatnot device. I'm going to win one way or another.


You are using an out of date browser. It may not display this or other websites correctly.
You should upgrade or use an alternative browser.
You should upgrade or use an alternative browser.
What did you do "IN" your garage today?
- Thread starter mayhemman
- Start date
SMOKEYBEAR
Well-known member
- Joined
- Jan 3, 2016
- Messages
- 504
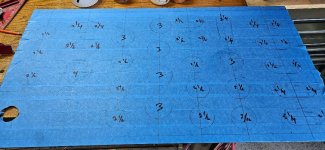
Working on some organization for my truck cleaning cart. The larger wheels/ tires work great for moving it through the yard, in/out the shop and off the concrete..however everything falls over with every use. Using a sheet of King Starboard to make an organizer to hold everything upright. The GOAL is to have a slot for everything I use. The secondary / collateral deals is maybe I'll stop buying and collecting products I end up not using. Should streamline my mess a decent bit.
Just need to complete a bit more work, connect the holes for the oval shaped bottles and some light weight aluminum angle and rivet to the cart and Starboard. Should get it wrapped up this evening.
Just need to complete a bit more work, connect the holes for the oval shaped bottles and some light weight aluminum angle and rivet to the cart and Starboard. Should get it wrapped up this evening.
Attachments



OccupantRJ
Well-known member
A step there is begging for a shoe drawer underneath.I was thinking 2x8 cedar and make it look like a deck. Or I’ll just clean this one up and have it rhino lined.
bmwrd0
Well-known member
Started bringing the drawers over for the new storage fixture, and more clean up on the jewelers lathe.
Also, got more junk out of there, and piled more in.
Also, got more junk out of there, and piled more in.
Beerhippie
Well-known member
Remember, this was a Labor Day project--I was limited to what I had in spares. An in-use cover would be better and I'll probably put one on there.@Beerhippie - Maybe you want to consider this cover style to keep the dust out. They'll seal better than what you have now.
Amazon - Taymac.

Thanks for the tip, I'll give that a try.Use some broad-leaf herbicide, full strength on the freshly-cut (like minutes fresh) stumps and those will never grow back. Apply with a chip or acid brush and use PPE.
Jeff Ivers
Well-known member
That is a neat "air" sign (lamp?).The cleanup comtinues....
Spent most of the day out shopping with the wife. Picked up a bunch of supplies for the garage/shop including wood trim, paint, tape, screws, etc. as well some cardboard boxes.
Once I got back to the garage, I spent some time boxing up a lot of the loose supplies, parts and tools laying in front and on top of the 56" tool cabinet. Before I knew it, I had the top of my box back and access to all the drawers.
That's about all I had time for today, so tomorrow I'll get a fresh start. Plans are to paint the 3" wood trim I purchased today, satin black, then nail it to the right side wall where it will devide the top white and lower gray colors continuing the color theme. After that I'll play it by ear.
Hmmmm....every time I look at my logo sign, it reminds me I still need to finish pinstriping the outlines of the wings.
Couple pics....

Beerhippie
Well-known member
FFS, the damned kids working (I use the term loosely) in the kitchen managed to tear the three-bay sink away from the wall. It was anchored with two #10 X 5" construction screws and they were pulled all the way out of the studs.
I mean, really? Are they wrestling in the sink?
I replaced the screws with 3/8" X 5" flange-head lag bolts. That should do the trick.
Damned kids....
I mean, really? Are they wrestling in the sink?
I replaced the screws with 3/8" X 5" flange-head lag bolts. That should do the trick.
Damned kids....
Last edited:
Beerhippie
Well-known member
I spent ten minutes searching for my set-screw collection yesterday. I looked just about everywhere before it occurred to me to look in the small fastener organizer... yep, there they were!Spent a bit of time reorganizing some storage bins and shelves. Made me realize I’m pretty good at putting things away… and terrible at remembering which box I put them in
Outlawmws
Well-known member
Working on small things today. in one case literally and decided to show how I fix C-Clamps that are not lining up:
This one is a 1" but I've done 6" as well in the past using the same techniques
The issue - likely caused by clamping something then wrenching it loose, thus tweaking the clamp - (Came this way I just de-rusted it and noticed the tweak yesterday.) Bent in 2 directions:
.

And the fir in one direction - I usually catch the corner of the C instead of the screw head, and without the lead jaw covers could have here as well, but didn't - yes I had to unbend the head section of the screw later too...

and the frame twist fix - this one had the threaded part of the clamp frame bent, so you need to determine what is actually bent before clamping and applying the crescent wrench. I've use up to a 15" crescent for bigger clamps:

All doable cold since they are "malleable"
This one is a 1" but I've done 6" as well in the past using the same techniques
The issue - likely caused by clamping something then wrenching it loose, thus tweaking the clamp - (Came this way I just de-rusted it and noticed the tweak yesterday.) Bent in 2 directions:
.
And the fir in one direction - I usually catch the corner of the C instead of the screw head, and without the lead jaw covers could have here as well, but didn't - yes I had to unbend the head section of the screw later too...
and the frame twist fix - this one had the threaded part of the clamp frame bent, so you need to determine what is actually bent before clamping and applying the crescent wrench. I've use up to a 15" crescent for bigger clamps:
All doable cold since they are "malleable"
Last edited:

M.Brane
ALLIANCE MEMBER
Cut a 3' piece off a stick of 1/2" EMT. Stuffed a RCA to 1/8" TRS cable through it with the help of a little WD, and a TIG welding rod. It didn't eliminate the hum I was getting in the living room stereo, but it's greatly reduced.
Outlawmws
Well-known member
Cut a 3' piece off a stick of 1/2" EMT. Stuffed a RCA to 1/8" TRS cable through it with the help of a little WD, and a TIG welding rod. It didn't eliminate the hum I was getting in the living room stereo, but it's greatly reduced.
Do all your sources hum? If a TT, check the grounding unit to unit.
Hooked
Well-known member
Thanks for this 'how to' as I have a couple 8" clamps I've bent over the years but was reluctant to try fixing for fear of breaking them.Working on small things today. in one case literally and decided to show how I fix C-Clamps that are not lining up:
This one is a 1" but I've done 6" as well in the past using the same techniques
The issue - likely caused by clamping something then wrenching it loose, thus tweaking the clamp - (Came this way I just de-rusted it and noticed the tweak yesterday.) Bent in 2 directions:
.
And the fir in one direction - I usually catch the corner of the C instead of the screw head, and without the lead jaw covers could have here as well, but didn't - yes I had to unbend the head section of the screw later too...
and the frame twist fix - this one had the threaded part of the clamp frame bent, so you need to determine what is actually bent before clamping and applying the crescent wrench. I've use up to a 15" crescent for bigger clamps:
All doable cold since they are "malleable"
Hooked
Well-known member
Got the replacement for the replacement power window motor for my wife's Sequoia passenger door. It also is wired incorrectly. I called Dorman last week regarding the problem. Seems they are aware of the problem and a customer gave them a fix -- swap a couple wires and it's okay to simply cut and connect the wires correctly. However, being as I'm not in the mood to fix their problem I'll simply keep returning them to Amazon until they run out of the bad batch and send me one that works, out of the box. I'm on number 4 at this point. I'll report back with the final count. 
Wrench97
Well-known member
Either that or they'll(the kids) break the 2x4 in half..........FFS, the damned kids working (I use the term loosely) in the kitchen managed to tear the three-bay sink away from the wall. It was anchored with two #10 X 5" construction screws and they were pulled all the way out of the studs.
I mean, really? Are they wrestling in the sink?
I replaced the screws with 3/8" X 5" flange-head lag bolts. That should do the trick.
Damned kids....
Beerhippie
Well-known member
More like, pull the entire wall down.Either that or they'll(the kids) break the 2x4 in half..........
Asked the kitchen manager to say something to them about it.
They'll all be back in school soon, where what they break is someone else's problem.
Wrench97
Well-known member
Well there are a couple 53' containers left of that batch, then they'll be back ordered for 9 months and may or may not have the fix applied.Got the replacement for the replacement power window motor for my wife's Sequoia passenger door. It also is wired incorrectly. I called Dorman last week regarding the problem. Seems they are aware of the problem and a customer gave them a fix -- swap a couple wires and it's okay to simply cut and connect the wires correctly. However, being as I'm not in the mood to fix their problem I'll simply keep returning them to Amazon until they run out of the bad batch and send me one that works, out of the box. I'm on number 4 at this point. I'll report back with the final count.
M.Brane
ALLIANCE MEMBER
No ground on the '73 Marantz 2230, and it's all unbalanced connections. If I unplug the USB cable from the FM transmitter the hum goes away so I'll try shielding that next.Do all your sources hum? If a TT, check the grounding unit to unit.
Outlawmws
Well-known member
Got back to the 242 Mil Spec Franken lantern:
the vent parts are being soaked for rusted areas, I'll pickle that with something temp resistant to prevent future rust, and try the high temp JB weld to see if it can get back to being a one piece.
I still needed a vert short 1/2" wrench for the "tool kit" and was scrounging in the collection and found not one but 2 1/2" wrenches already shortened by a PO as well as a 9/16 I'll pit in the lantern tools maybe for a future Mils spec that does need a 91/6. two were parts of a Williams Superwrench DOE a PO had bent sharply to 90 degrees and broke. I'm using the Plomb/Proto 1/2 I found, and the 7/16 Proto I made up previously for generator replacement can be used as an extension if needed:

This gives me all the wrenches for the main valve and pricker lever packing nuts and the burner frame nut. I still need to scrape up a 5/i6 drive screwdriver bit (coffee can of bits around here somewhere) for the fuel cap screw and I can use that with the 5/16 pricker wire wrench. That will get me self contained for all tools needed for maintenance.
I also rounded up a pack of old Silklight mantles to go with the pump cups an Fuel cap O-Ring and it all fits in the parts compartment - Generator spare is already spring clip mounted to an air tube:

I also made up a copper wire "cotter pin" to replace the steel one I installed the funnel chain with. I wanted to get the steel out to eliminate a potential rust source, and shorter so its not hitting the globe edge, so I can turn the chain as needed.

Progress made! need to get the transport box sorted out now!
the vent parts are being soaked for rusted areas, I'll pickle that with something temp resistant to prevent future rust, and try the high temp JB weld to see if it can get back to being a one piece.
I still needed a vert short 1/2" wrench for the "tool kit" and was scrounging in the collection and found not one but 2 1/2" wrenches already shortened by a PO as well as a 9/16 I'll pit in the lantern tools maybe for a future Mils spec that does need a 91/6. two were parts of a Williams Superwrench DOE a PO had bent sharply to 90 degrees and broke. I'm using the Plomb/Proto 1/2 I found, and the 7/16 Proto I made up previously for generator replacement can be used as an extension if needed:
This gives me all the wrenches for the main valve and pricker lever packing nuts and the burner frame nut. I still need to scrape up a 5/i6 drive screwdriver bit (coffee can of bits around here somewhere) for the fuel cap screw and I can use that with the 5/16 pricker wire wrench. That will get me self contained for all tools needed for maintenance.
I also rounded up a pack of old Silklight mantles to go with the pump cups an Fuel cap O-Ring and it all fits in the parts compartment - Generator spare is already spring clip mounted to an air tube:
I also made up a copper wire "cotter pin" to replace the steel one I installed the funnel chain with. I wanted to get the steel out to eliminate a potential rust source, and shorter so its not hitting the globe edge, so I can turn the chain as needed.
Progress made! need to get the transport box sorted out now!
Beerhippie
Well-known member
Search for "ground loop isolator". We used those to fix this problem back in the day. They go between the two pieces of equipment--in your case, the FM tuner and the amp. I mostly used them between the turntable and amps.No ground on the '73 Marantz 2230, and it's all unbalanced connections. If I unplug the USB cable from the FM transmitter the hum goes away so I'll try shielding that next.
I've also added grounds to the cases of old equipment that didn't have them.
Beerhippie
Well-known member
Don't forget the 9/32th for the gen tip!Got back to the 242 Mil Spec Franken lantern:
the vent parts are being soaked for rusted areas, I'll pickle that with something temp resistant to prevent future rust, and try the high temp JB weld to see if it can get back to being a one piece.
I still needed a vert short 1/2" wrench for the "tool kit" and was scrounging in the collection and found not one but 2 1/2" wrenches already shortened by a PO as well as a 9/16 I'll pit in the lantern tools maybe for a future Mils spec that does need a 91/6. two were parts of a Williams Superwrench DOE a PO had bent sharply to 90 degrees and broke. I'm using the Plomb/Proto 1/2 I found, and the 7/16 Proto I made up previously for generator replacement can be used as an extension if needed:
This gives me all the wrenches for the main valve and pricker lever packing nuts and the burner frame nut. I still need to scrape up a 5/i6 drive screwdriver bit (coffee can of bits around here somewhere) for the fuel cap screw and I can use that with the 5/16 pricker wire wrench. That will get me self contained for all tools needed for maintenance.
I also rounded up a pack of old Silklight mantles to go with the pump cups an Fuel cap O-Ring and it all fits in the parts compartment - Generator spare is already spring clip mounted to an air tube:
I also made up a copper wire "cotter pin" to replace the steel one I installed the funnel chain with. I wanted to get the steel out to eliminate a potential rust source, and shorter so its not hitting the globe edge, so I can turn the chain as needed.
Progress made! need to get the transport box sorted out now!
Beerhippie
Well-known member
How are you plugging a USB into a '73 Marantz? My amps of that vintage only had punch-card for digital input.No ground on the '73 Marantz 2230, and it's all unbalanced connections. If I unplug the USB cable from the FM transmitter the hum goes away so I'll try shielding that next.
Outlawmws
Well-known member
How are you plugging a USB into a '73 Marantz? My amps of that vintage only had punch-card for digital input.
probably like this or similar (RCA?):

Beerhippie
Well-known member
I'd no idea that was a thing!probably like this or similar (RCA?):
Outlawmws
Well-known member
Don't forget the 9/32th for the gen tip!
Is that a 9/64th? (9/32 is over 1/4")
And I'm shocked I don't have one in my extensive ignition wrench collection - I have two at least at 1/8. but no 9/64th?

Last edited:
M.Brane
ALLIANCE MEMBER
The USB cable plugs into the FM transmitter to keep it powered as the battery doesn't last long. The FM transmitter is fed audio from the tape out of the Marantz so it transmits the chosen source to the other stereos on the property, and any neighbors within a 1/2 mile radius. I'm sure not many are hip to the signal or my taste in music.How are you plugging a USB into a '73 Marantz? My amps of that vintage only had punch-card for digital input.
Beerhippie
Well-known member
You should be able to find a USB cable with a ferrite bead-type choke RFI filter. If not, you can buy the choke and install yourself. You may have to cut and splice the cable as the end probably won't fit through the choke.The USB cable plugs into the FM transmitter to keep it powered as the battery doesn't last long. The FM transmitter is fed audio from the tape out of the Marantz so it transmits the chosen source to the other stereos on the property, and any neighbors within a 1/2 mile radius. I'm sure not many are hip to the signal or my taste in music.
Outlawmws
Well-known member
Don't forget the 9/32th for the gen tip!
Is that a 9/64th? (9/32 is over 1/4")
And I'm shocked I don't have one in my extensive ignition wrench collection - I have two at least at 1/8. but no 9/64th?
Measuring I'm getting 5/32, and I should have a couple of those but I'm not finding them...
Beerhippie
Well-known member
Five thirty-tooths it is.Measuring I'm getting 5/32, and I should have a couple of those but I'm not finding them...
CRS *****.
Skyman
Well-known member
The USB cable plugs into the FM transmitter to keep it powered as the battery doesn't last long. The FM transmitter is fed audio from the tape out of the Marantz so it transmits the chosen source to the other stereos on the property, and any neighbors within a 1/2 mile radius. I'm sure not many are hip to the signal or my taste in music.
Details about this transmitter and how well it works, please? TIA.
Skyman
Well-known member
Five thirty-tooths it is.
CRS *****.
Be glad you've only reached the CRS stage. My condition has degenerated to full-blown CRAFT.
M.Brane
ALLIANCE MEMBER
It's a cheapy I got from Jeff's jungle probably 7 or 8 years ago now. It works pretty good considering what it is. IIRC it was around $100 back then. Better than running a bunch of wires everywhere.Details about this transmitter and how well it works, please? TIA.
A quick search of Jeff's jungle didn't show the one I have, but many that are very similar.
Fordguy1964
Well-known member
I got back on my K code bumpers. Here you can see I just spent a little time rubbing the bumper. This was some buffing compound I had for paint on a Terry cloth rag. Just a small stripe down the middle of the bumper. I had already proven that it was working by doing the top of the bumper.

This is the bumper done. Not perfect but perfect wasn't what I was shooting for... yet.

Definitely presentable. Small steps
Then I went out and finished getting my old cement mixer ready for work. I think for an old piece of garbage I pulled out of the trash it is doing pretty good.

Keep it up and it may earn a sand blasting and paint.
This is the bumper done. Not perfect but perfect wasn't what I was shooting for... yet.
Definitely presentable. Small steps
Then I went out and finished getting my old cement mixer ready for work. I think for an old piece of garbage I pulled out of the trash it is doing pretty good.
Keep it up and it may earn a sand blasting and paint.
Outlawmws
Well-known member
Keep it up and it may earn a sand blasting and paint.
And maybe tires if you plan on taking it off site?
Skyman
Well-known member
It's a cheapy I got from Jeff's jungle probably 7 or 8 years ago now. It works pretty good considering what it is. IIRC it was around $100 back then. Better than running a bunch of wires everywhere.
A quick search of Jeff's jungle didn't show the one I have, but many that are very similar.
Thanks.
DGersic
Well-known member
I'm going to win one way or another.
Chair or no chair, it’s good to have you back Kay.
2001ZR2
Well-known member
Put the final paint coat on my rear sway bar. No worries since the post office kept the parcel promised for today until tomorrow or....
Motorman55
Well-known member
Thanks! It's a "bitsa". Its made from a bit of this and a bit of that. Look all the way to the right of the photo and you will see a large motorcycle trophy on the shelf over the tool box. The bottom of that trophy is the original bottom of that white globe. I attached it to a wood base then added the vintage 1960's metal motorcycle trophy on top of it.That is a neat "air" sign (lamp?).
The Globe is mounted on another lamp base which I attached to an old random shelf bracket and screwed to a length of wood and wired it to work. I painted the AIR letters on it and added a small vintage 1940-50's era cast metal trophy top. It was meant to go near my compressor, but ended up by the door.
I have a collecion of old metal motorcycle trophy tops without any bottoms that I sometimes mount on different things to display them.
SMOKEYBEAR
Well-known member
- Joined
- Jan 3, 2016
- Messages
- 504


