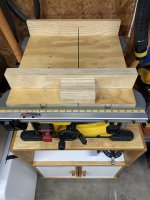
As I'm in the midst of doing my normal over analyzing procrastinating...this time on some table saw crosscut sled ideas I thought might start this to see what others have done...be it your basic crosscut, angle jigs, taper jig or something very elaborate and highly specialized....if its a jig for the table saw it fits!
I've been without an actual crosscut jig since I got the current saw, and attempting to use it more I've missed a sled more...time to fix it. The local Woodcraft had this partial sheet of 3/4 phenolic hexply(smooth black laminate in the bottom) at 24 x 48 so it came home with me and I'm thinking of turning it into 3 different sleds....
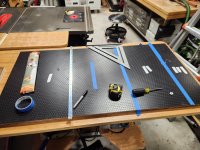
Sled 1: the left most one in the tape like layout on the sheet .... roughly 30 wide and 24 deep, planning to offset the blade kerf in this a bit so that the part of the sled left of the blade would be around 20 to 22". Either hardwood or plywood front and rear fence, T track in the top of the rear fence for some type of flip stop and clamps...maybe t track or matchfit groove in the base of the sled. Miter slot runner would be a Incra Miter bar. The miter bar and a blue tape to mark kerf are close to where final location would be
Sled 2: I envision this one is probably the most used ...24" wide x approximately 12 or 13" deep so after fences can probably cut 9 to 10" wide. Thinking blade is centered in this one, likely setup so any flip stops or toggle clamps can quickly move around from one to another. Runner here could be some type of shorter premade one or a UHMW or hardwood runner
Sled 3: less confident on the usefulness of this one but gonna give it a shot ....this is more just a fast cutoff jig. 24" wide x maybe 5" deep front to back. Rear fence only, may be setup so nothing on the right side of the blade and if cutting a lot I could make a basic drop off sled that could sit there to catch the tails. The thought(other than utilizing as much of the sheet as possible) is this is a easy to use jig for quick cut to lengths(no miter saw station right now) and frequently used when accuracy is 1/4" ish tolerance, nothing says couldnt be better but expecting it's used when it doesn't have to be better. Right now those cuts are done either with a more fidgity jessem miter gauge or by grabbing track saw, sawzall or walking to bandsaw...something I can drop right in the table saw and be done seems safer and more reliable.....maybe grasping at straws. Runner on this one is probably just a piece of hardwood planed to fit tight
What are you doing?
What do you love or hate about it?
Which can't you live without and which should be stripped for parts and setout for trash day?
I've been without an actual crosscut jig since I got the current saw, and attempting to use it more I've missed a sled more...time to fix it. The local Woodcraft had this partial sheet of 3/4 phenolic hexply(smooth black laminate in the bottom) at 24 x 48 so it came home with me and I'm thinking of turning it into 3 different sleds....
Sled 1: the left most one in the tape like layout on the sheet .... roughly 30 wide and 24 deep, planning to offset the blade kerf in this a bit so that the part of the sled left of the blade would be around 20 to 22". Either hardwood or plywood front and rear fence, T track in the top of the rear fence for some type of flip stop and clamps...maybe t track or matchfit groove in the base of the sled. Miter slot runner would be a Incra Miter bar. The miter bar and a blue tape to mark kerf are close to where final location would be
Sled 2: I envision this one is probably the most used ...24" wide x approximately 12 or 13" deep so after fences can probably cut 9 to 10" wide. Thinking blade is centered in this one, likely setup so any flip stops or toggle clamps can quickly move around from one to another. Runner here could be some type of shorter premade one or a UHMW or hardwood runner
Sled 3: less confident on the usefulness of this one but gonna give it a shot ....this is more just a fast cutoff jig. 24" wide x maybe 5" deep front to back. Rear fence only, may be setup so nothing on the right side of the blade and if cutting a lot I could make a basic drop off sled that could sit there to catch the tails. The thought(other than utilizing as much of the sheet as possible) is this is a easy to use jig for quick cut to lengths(no miter saw station right now) and frequently used when accuracy is 1/4" ish tolerance, nothing says couldnt be better but expecting it's used when it doesn't have to be better. Right now those cuts are done either with a more fidgity jessem miter gauge or by grabbing track saw, sawzall or walking to bandsaw...something I can drop right in the table saw and be done seems safer and more reliable.....maybe grasping at straws. Runner on this one is probably just a piece of hardwood planed to fit tight
What are you doing?
What do you love or hate about it?
Which can't you live without and which should be stripped for parts and setout for trash day?


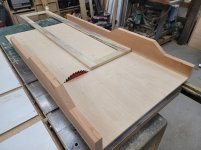
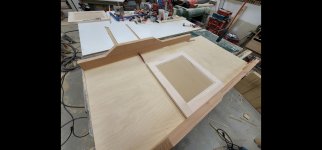

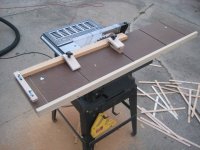


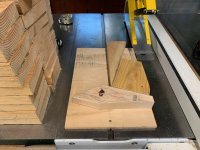


 Simple is good. I also made Norm's tapering jig, shelf pin hole jig & circle cutting jig.