To avoid these ads, REGISTER NOW!

Above 1200 Sq/FT The Underground Upgrade (or the opposite of The Flying Shop)

Wokspaces above 1200 squarefeet.

phred

Well-known member
Joined
Apr 23, 2009
Messages
531
Location
NC
Back about 6 years ago I started a thread “The Flying Shop” about a shop I built in the heart of Atlanta. https://www.garagejournal.com/forum/threads/the-flying-shop.343424/
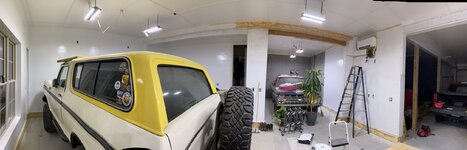
The saga is replete with the misery of dealing with bureaucracy of a large city government and the joys of seeing a plan finally come together. Well I finished the shop. Spent a lot of time and money landscaping creating the oasis in the city my wife and I wanted. The shop was fantastic. Yes it could have been bigger but it served me well. I did a lot of cool stuff and built some nice cars and trucks for folks.
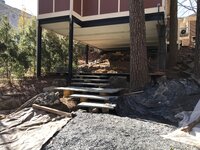
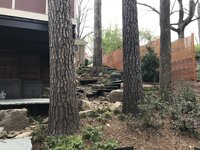
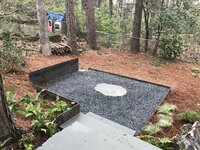
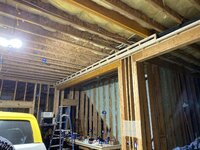
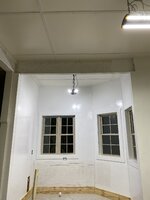
Well all good things must change or do they? My wife gets an offer from a fortune 300 company to take over the #6 spot in the company, but it comes at a price, move to NC and set up a new division. The job comes with some great perks but move and leave what we just worked so hard to finally get finished. The house was completely renovated, the shop built and landscaping compete and filling in. ARGH. So the search began in December of 19 to find a new place. Just in time for the world to shut down. I’ll stop here with a few shots of what we left and a hint of where we ended up.
 

Attachments

  • C47F3184-0C43-4C3C-A8EB-469D75CEEC7F.jpeg
    C47F3184-0C43-4C3C-A8EB-469D75CEEC7F.jpeg
    1,019.3 KB · Views: 921
  • 678D2B7B-C7A3-4EC5-A16D-40E3B855AD7C.jpeg
    678D2B7B-C7A3-4EC5-A16D-40E3B855AD7C.jpeg
    930.4 KB · Views: 701
  • F8E6DAC8-558A-4334-A48C-E8C072E934B4.jpeg
    F8E6DAC8-558A-4334-A48C-E8C072E934B4.jpeg
    1,010.6 KB · Views: 643
  • 3C02DD84-6004-4013-B75B-F3FFD1D88DEC.jpeg
    3C02DD84-6004-4013-B75B-F3FFD1D88DEC.jpeg
    1.1 MB · Views: 636
  • 3DCC9695-C16E-4AFB-A991-C5E2808CE5A0.jpeg
    3DCC9695-C16E-4AFB-A991-C5E2808CE5A0.jpeg
    1.2 MB · Views: 616
  • 6BB1D615-FAA4-4421-83DC-4EC8609CFE01.jpeg
    6BB1D615-FAA4-4421-83DC-4EC8609CFE01.jpeg
    1.5 MB · Views: 589
  • E405F1DE-4629-4758-A37A-ECDE7F59056F.jpeg
    E405F1DE-4629-4758-A37A-ECDE7F59056F.jpeg
    956.5 KB · Views: 590
  • E54899D3-1688-4BCB-850F-CFBC4A814ECD.jpeg
    E54899D3-1688-4BCB-850F-CFBC4A814ECD.jpeg
    1.1 MB · Views: 672
  • 690501DB-3E6F-461A-ACD1-69540D9E7B66.jpeg
    690501DB-3E6F-461A-ACD1-69540D9E7B66.jpeg
    1.5 MB · Views: 772
To avoid these ads, REGISTER NOW!
OP
P

phred

Well-known member
Joined
Apr 23, 2009
Messages
531
Location
NC
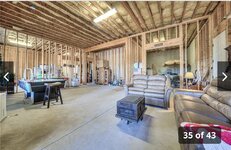
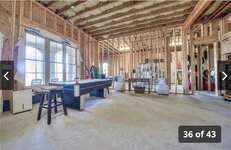
So after spending a good bit of time on line looking for my wife an apartment to live in while we transition. We get her settled and the search truly begins. No way are we living in a neighborhood with an HOA. We need some acreage. The realtor, as sweet as she was had a hard time getting the specifics so my wife and I did a lot of the leg work to sort through the very limited housing market, that is within 45 min drive of her new office with some land and oh be on or near water. These all seem simple right!? And did I mention building something completely new was not realistic due to time constraints on the moving and buyout package. After a couple promising finds turn out to be not so good we happen to see one that kinda might work but boy is it not our taste. (Im an architect by training, a custom home builder for years so I’m pretty particular). We go look at it only because there is absolutely nothing else close to what we want available. Ten minutes in my wife sits down with the realtor satisfied this is it. Why you ask? It’s on the lake 1, it has a large open floor plan 2, great master suite with garden tub 3, the basement is 2500sf with a full bath garage door on one side and it has 12’ ceilings 4. Winner. The basement becomes my new shop. All I have to do is fit it out. A few more teaser shots while I try to organize what we have done.
 

Attachments

  • 0E709220-4DEA-4695-B969-1D12D0111591.jpeg
    0E709220-4DEA-4695-B969-1D12D0111591.jpeg
    884.6 KB · Views: 750
  • 76104CA0-B0E5-4D5A-9E6B-C794B621EFA5.jpeg
    76104CA0-B0E5-4D5A-9E6B-C794B621EFA5.jpeg
    903 KB · Views: 725
  • 40838C2B-CBAA-4131-B1C8-E57A6B67B4C9.jpeg
    40838C2B-CBAA-4131-B1C8-E57A6B67B4C9.jpeg
    907 KB · Views: 674
  • 87BD274F-3B00-4F29-870A-80C53F76D7D1.jpeg
    87BD274F-3B00-4F29-870A-80C53F76D7D1.jpeg
    890.1 KB · Views: 663
  • 4E44B53D-EB0B-4FE4-B80B-0D8DF426926B.jpeg
    4E44B53D-EB0B-4FE4-B80B-0D8DF426926B.jpeg
    787.3 KB · Views: 737
OP
P

phred

Well-known member
Joined
Apr 23, 2009
Messages
531
Location
NC
With the new house under contract it’s now time to start preparing for the move. My wife always kidded me about my shop and the amount of tools being more than the total amount of furniture and other belongings combined. I was in denial and insisted that it couldn’t be so. Since this was a corporate move they sent in a company to assess the move. Now getting shop equipment moved was included, but it took some negotiating on my part. I agreed to move all the vehicles myself if the “company” would cover an equipment rigger on both ends of the move, load and unload the really heavy stuff. We reached an agreement so I could start planning the process. I had at the time one truck disassembled getting rewired, new suspension, new transmission and all new interior. Another future project sitting in the corner with no engine or interior. Both of these needed to be reassembled enough to load on a trailer. That was the easy part. Once everything was duct taped together enough that things could be winched on to a trailer I began the hard part, removing everything from the shop.
Obviously the lift is coming down, (the Mohawk A7weighs about 2500 lbs hence the equipment rigger) but all the airlines, welding tables, steel frames work benches, eye wash station, compressors and all the lights. Yes the lights. Big *** Fans only made their big *** lights for 5 years. The import lights are ok but nothing close to the quality. I replaced them with cheap big box brand lights. Once the shop was stripped and ready to be packed up I started the repairs to the main house. Replace some damaged soffit. Touch up paint here and there and it’s ready to list. We list the house and it sells in a couple weeks for almost the same money we pay for the new place. Gotta love a dollar for dollar swap, but gain 2000 more square feet, with 3 acres on the lake.
 
OP
P

phred

Well-known member
Joined
Apr 23, 2009
Messages
531
Location
NC
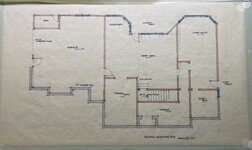
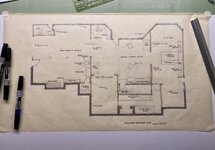
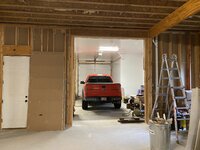
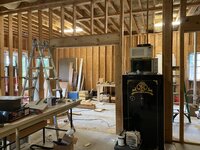
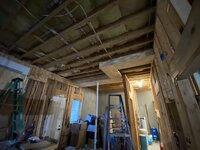
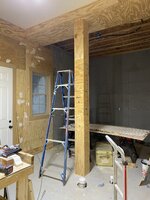
The big day comes and we take possession of the new house in late March 2020. Just as the Covid disaster is kicking in to full swing. The new place needs some work to make it ours. We have all the rooms painted satin white. The main level two car garage painted gloss white along with the lower level garage. I started looking at the unfinished basement and begin developing a plan. It has 12’ ceilings and is framed out for a great room, large guest suite, kitchenette and theater room. There is the bare minimum of receptacles and lighting. There were 2 50 gallon electric water heaters located in the basement that I immediately removed and replaced with a gas tankless unit. The extra 220 volt 60 amps circuit will come in handy. Here’s a rough layout of the space when we bought the place and a couple photos of the unfinished basement.
 

Attachments

  • 9D16E690-5E24-489D-BF93-704523CBE613.jpeg
    9D16E690-5E24-489D-BF93-704523CBE613.jpeg
    647.4 KB · Views: 685
  • 89AEB445-9A21-4C90-B7C9-D3558EB8C64B.jpeg
    89AEB445-9A21-4C90-B7C9-D3558EB8C64B.jpeg
    337.5 KB · Views: 643
  • 14D620E5-9FD7-4A85-A9F3-3465AA191869.jpeg
    14D620E5-9FD7-4A85-A9F3-3465AA191869.jpeg
    304 KB · Views: 612
Last edited:
OP
P

phred

Well-known member
Joined
Apr 23, 2009
Messages
531
Location
NC
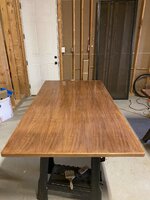
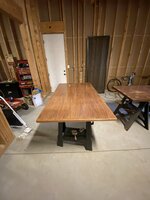
While the plan for the new space was jelling in my head the move in day arrived. The main level (living space) set up fairly quickly. Yes we had to make do with some things since the new space was completely different from our little 1920’s bungalow but it gave my wife a reason to shop for some furniture and for us to get rid of a few pieces that had lived past their useful lives. The first order of business was to move 1500 sf of shop equipment, tools, parts and vehicles into the basement. But before the vehicle could come home I need to remove some walls and make some new openings. So the vehicles remained in the old shop while I finished up the plan and refinished a piece of furniture or two. This is the top from a 1950’s office desk. It’s huge approximately 42” by 72”. It had seen a lot of use and I wanted it for my studio.
 

Attachments

  • 75FFC28C-2A27-42A9-AEA1-0203191BF32B.jpeg
    75FFC28C-2A27-42A9-AEA1-0203191BF32B.jpeg
    779.9 KB · Views: 524
  • FBA64132-373C-47B3-B97E-721D7FB9F02E.jpeg
    FBA64132-373C-47B3-B97E-721D7FB9F02E.jpeg
    428.4 KB · Views: 576
OP
P

phred

Well-known member
Joined
Apr 23, 2009
Messages
531
Location
NC
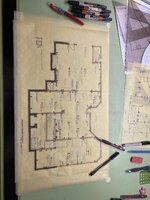
After we final had the house set up and furniture purchased for the new space I finally had time to put pencil to paper and layout a plan for the basement. Luckily the main floor is framed with TJI’s that run front to back. So the openings I need for vehicle access are simple enough and didn’t require overly large beams. One double 11 7/8” lvl beam and one triple and I can drive vehicles in and out.
 

Attachments

  • 9C8480EE-1A72-484E-878A-3DD845CD6984.jpeg
    9C8480EE-1A72-484E-878A-3DD845CD6984.jpeg
    573.8 KB · Views: 593
OP
P

phred

Well-known member
Joined
Apr 23, 2009
Messages
531
Location
NC
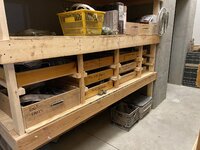
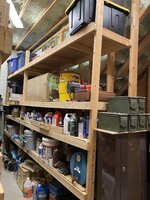
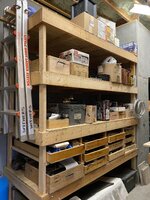
So the actual work in the basement begins mid summer 2020. It’s crowded as I have no where else to store all the tools and parts. The first thing I do is build some large heavy duty shelves and drawers. These go in the back section of the basement. These shelves hold parts and assorted things; holiday decorations, camping gear etc. The big stuff, transmission, doors, axles are also stored here on the floor under the shelves on dollys for easy access. This storage helped a great deal to free up space to work.
 

Attachments

  • 7159A569-45FE-4B23-89F0-6A15E2BFF0FF.jpeg
    7159A569-45FE-4B23-89F0-6A15E2BFF0FF.jpeg
    910.1 KB · Views: 545
  • 53B6D028-7039-4D99-A97C-49EC70CEDB8F.jpeg
    53B6D028-7039-4D99-A97C-49EC70CEDB8F.jpeg
    893.4 KB · Views: 406
  • 469337D9-E9A7-49B2-830B-90E717D57BEE.jpeg
    469337D9-E9A7-49B2-830B-90E717D57BEE.jpeg
    896.3 KB · Views: 492

Clemson13

Well-known member
Joined
May 30, 2015
Messages
425
So the actual work in the basement begins mid summer 2020. It’s crowded as I have no where else to store all the tools and parts. The first thing I do is build some large heavy duty shelves and drawers. These go in the back section of the basement. These shelves hold parts and assorted things; holiday decorations, camping gear etc. The big stuff, transmission, doors, axles are also stored here on the floor under the shelves on dollys for easy access. This storage helped a great deal to free up space to work.
I'm loving the build so far. Thank you for sharing!
 
OP
P

phred

Well-known member
Joined
Apr 23, 2009
Messages
531
Location
NC
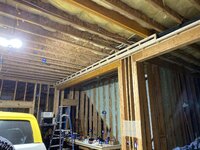
Once I had unpacked some more boxes and found most of my construction tools the real work began. I started by removing all the walls that had been framed for the guest suite and future bath. With the price of lumber nearly doubling from the time we made an offer on the house until the time I started the “conversion” I carefully removed all the studs and headers to be reused. The first new opening was opening access from the garage to the basement proper. Now I can move materials easily into the basement. Next I opened up the wall going to the future wood working area. Last the wall into the planned theater room is opened up. This was by far the most difficult beam install. Being a load bearing wall I built temporary walls on each side of the existing wall. Removing the wall was the easy part. Getting a triple 11 7/8” LVL up 11’ in the air by myself posed a problem. Luckily my brother lives 30 min away as does my nephew. They came over and kept me from dying. Now I can being there project trucks up from Atlanta. More to come
 

Attachments

  • DFA27868-099E-40B5-8664-3EFD96F2315B.jpeg
    DFA27868-099E-40B5-8664-3EFD96F2315B.jpeg
    770.4 KB · Views: 447
  • 2AB4B6BD-AEFE-4D8D-B6DE-D596568C6319.jpeg
    2AB4B6BD-AEFE-4D8D-B6DE-D596568C6319.jpeg
    351.1 KB · Views: 436
  • 4E407D8C-7FF8-45C4-994B-9A45A9EA93A0.jpeg
    4E407D8C-7FF8-45C4-994B-9A45A9EA93A0.jpeg
    747.4 KB · Views: 417
  • 6431BA57-C8DD-4917-9DC3-2731036D1CC4.jpeg
    6431BA57-C8DD-4917-9DC3-2731036D1CC4.jpeg
    855.1 KB · Views: 420

MadeByMiller

Well-known member
Joined
Dec 29, 2018
Messages
1,230
Location
Rapid City, SD
After we final had the house set up and furniture purchased for the new space I finally had time to put pencil to paper and layout a plan for the basement. Luckily the main floor is framed with TJI’s that run front to back. So the openings I need for vehicle access are simple enough and didn’t require overly large beams. One double 11 7/8” lvl beam and one triple and I can drive vehicles in and out.
I love your blue print/drafting style with that iconic "engineer" script handwriting. I wish I had been taught to write like that, there's something so cool about that all caps look.

I do have a question about the layout, why not swap the welding/fab/metalwork area with the general mechanic area with the lift? That way you don't have to drive through the metalwork area to get to the lift and the welding area would be adjacent to the chassis jig as well.

Very neat space, like Tony Stark's lab in the basement.
 
OP
P

phred

Well-known member
Joined
Apr 23, 2009
Messages
531
Location
NC
Thanks for the compliment. I’ve always loved to draw and eventually became an architect. I’ve been hand drafting since 1977. Learned autocad and arris back in 1988 but changed career focus in the mid nineties and worked as a consultant/trouble shooter on big commercial projects so I didn’t need the computer drafting skills and technology passed me by. Sadly I wish I had kept using it just for the few times a year I need a prototype part laser cut. I envy your skill on the screen using CAD and blender almost as much as your skill as a fabricator. I enjoy seeing how you make your space so efficient and productive.
The reason for the welding/machine work in that location is most of the walls are concrete so I don’t have to worry so much about sparks and open flames. Plus Im closer to the big door so heavy materials are easier to manage and I can easily roll my welding table outside, which I do quite often on nice days. (Easier to clean up grinding dust outside.) All of may big tools with the exception of mill and table saw are on castors for ease of reorganization or if I need to work on something large. I also store my daily driver next to the bath room and move it out if I’m welding. (A welding curtain is in the future plans for this space plus removing the 3 columns).
 

MadeByMiller

Well-known member
Joined
Dec 29, 2018
Messages
1,230
Location
Rapid City, SD
Thanks for the compliment. I’ve always loved to draw and eventually became an architect. I’ve been hand drafting since 1977. Learned autocad and arris back in 1988 but changed career focus in the mid nineties and worked as a consultant/trouble shooter on big commercial projects so I didn’t need the computer drafting skills and technology passed me by. Sadly I wish I had kept using it just for the few times a year I need a prototype part laser cut. I envy your skill on the screen using CAD and blender almost as much as your skill as a fabricator. I enjoy seeing how you make your space so efficient and productive.
The reason for the welding/machine work in that location is most of the walls are concrete so I don’t have to worry so much about sparks and open flames. Plus Im closer to the big door so heavy materials are easier to manage and I can easily roll my welding table outside, which I do quite often on nice days. (Easier to clean up grinding dust outside.) All of may big tools with the exception of mill and table saw are on castors for ease of reorganization or if I need to work on something large. I also store my daily driver next to the bath room and move it out if I’m welding. (A welding curtain is in the future plans for this space plus removing the 3 columns).
Thank you for the compliments, it means a lot!

Thank you also for the explanation, it makes sense. Looking forward to watching this progress!
 
OP
P

phred

Well-known member
Joined
Apr 23, 2009
Messages
531
Location
NC
Most of the major structural changes and framing are complete. My little 1hp, 20 gal craftsman air compressor that I’ve had for 40 years once again saved the day. I got this while in college and it has framed many houses and run a lot of air tools. It’s resting now that the shop got a new 5hp 60. I use it now in the upper level garage when need to air up tires.
 

Attachments

  • ABB802D4-7A9F-4CF0-B489-04446180C496.jpeg
    ABB802D4-7A9F-4CF0-B489-04446180C496.jpeg
    686.6 KB · Views: 365
OP
P

phred

Well-known member
Joined
Apr 23, 2009
Messages
531
Location
NC
With the framing out of the way it’s time to start planning the power and lighting. There were only 6 receptacles in the basement and 200 amp main panel has no room. I really couldn’t understand someone building a house with the planned expansion already framed and not have a larger panel or a sub panel for it. I looked at all the power requirements I thought I would need and planned for some extra room. I decided 150 amps would be plenty of power. It’s only me and the most that will be running at once is the compressor and welder along with the lights which are all LED. The mill will run via a phase converter on one of the abandoned 60 amp 240 water heater circuits located in the main. I had an electrician install a 150 amp breaker off the primary service to feed a new 150 amp sub panel.
 

Attachments

  • B97A90F4-0477-4F44-B1BC-AF8EF9B0F8C1.jpeg
    B97A90F4-0477-4F44-B1BC-AF8EF9B0F8C1.jpeg
    553.3 KB · Views: 318
  • EE3E38B8-C7E0-4BC5-8EEA-17CF5C89BC15.jpeg
    EE3E38B8-C7E0-4BC5-8EEA-17CF5C89BC15.jpeg
    895.8 KB · Views: 285
  • A4D8FDDC-48C7-459A-963E-5ADEDB1F9FC6.jpeg
    A4D8FDDC-48C7-459A-963E-5ADEDB1F9FC6.jpeg
    922.3 KB · Views: 288
  • CF72C0AE-846F-48B0-A1F0-AEBA3CF07F42.jpeg
    CF72C0AE-846F-48B0-A1F0-AEBA3CF07F42.jpeg
    702.1 KB · Views: 323
OP
P

phred

Well-known member
Joined
Apr 23, 2009
Messages
531
Location
NC
The wiring took me the better part of 2 weeks. I pulled all of the 120v in 12/3 and 10/3 depending on the anticipated loads. Anything run along the concrete walls is in MC armorlite cable. Now that there is power it’s time for hvac. It’s hot and muggy here in the summer and I was melting doing this in august. My dad used to sell heating and air not far from our new place. I called his old boss and soon a 5 ton Mitsubishi mini split with 3 air handlers was on the way. They ran the line sets up in the corner of the beam and ceiling so I could box them in.
One thing I did just before I started wiring was to spray foam the walls around the stairwell including the ceiling direct below the room my wife uses as a home office. This helps dramatically in mitigating noise. You can see the foam in the 2nd picture.
 

Attachments

  • 32D3C2F7-FBC3-4027-A6BF-19EA3A448247.jpeg
    32D3C2F7-FBC3-4027-A6BF-19EA3A448247.jpeg
    895.8 KB · Views: 299
  • 7E5B4F37-9347-48A1-AF78-C7F8FCF58F63.jpeg
    7E5B4F37-9347-48A1-AF78-C7F8FCF58F63.jpeg
    903 KB · Views: 281
  • AA3FF112-E8FF-4B12-AB9A-2813D321D65D.jpeg
    AA3FF112-E8FF-4B12-AB9A-2813D321D65D.jpeg
    857.8 KB · Views: 267
  • 643A49D1-206C-4BB9-BE8E-092B196039D9.jpeg
    643A49D1-206C-4BB9-BE8E-092B196039D9.jpeg
    501.4 KB · Views: 288
Last edited:
OP
P

phred

Well-known member
Joined
Apr 23, 2009
Messages
531
Location
NC
Once the HVAC was in and running I wrapped up all the miscellaneous blocking, framing and deadwood. Then it was time for the part I hated most. Insulation! Argh I dislike insulation almost as much as drywall. Well anyway, it’s wasn’t going to insulate itself, before I started the itchy fun I need to get some materials organized and ordered. With the “panic” in full swing, no one working and materials becoming more expensive and harder to obtain I realized that the MDO panels I had used for walls in the Atlanta shop were out of the question. No one within 50 miles of our new location could get them. My supplier in Atlanta had access to a couple hacks of 1/2 MDO but the price had tripled from 30 bucks a sheet to over 100. Nope 10k for panels was not gonna happen. I found a local lumber yard that agreed to sell me a hack of 1/2” sheathing for 24 bucks a sheet. Still too much for what it is but with a coat of PVA primer and 2 coats of oil based gloss white it should be ok. Materials for walls and ceilings ordered.
So 2 weeks later, a lot of 6” r-19 batts, some razor blades and staples and it’s insulated. At least I could work with the A/C running and not sweat.
No pictures of the insulation progress but here’s the plywood and ceiling panels being delivered.
 

Attachments

  • B664DE01-8F5F-43B3-AE8E-AC77BCA837D2.jpeg
    B664DE01-8F5F-43B3-AE8E-AC77BCA837D2.jpeg
    890.1 KB · Views: 243
  • EA0B7D49-5C03-4610-B15E-A21468FD09BC.jpeg
    EA0B7D49-5C03-4610-B15E-A21468FD09BC.jpeg
    787.3 KB · Views: 315
To avoid these ads, REGISTER NOW!
OP
P

phred

Well-known member
Joined
Apr 23, 2009
Messages
531
Location
NC
With the plywood and Masonite on hand and the insulation complete my brother and I started putting making the walls complete. We started with the base boards and crown. Backwards I know but there’s logic to it. The base is SYP 2x10. This acts as a bumper and run rail. Almost all my big tools are on wheels and this help protect the wall. I can push tools against the wall and never actually touch the painted surface since the base is 1” proud of the wall. The plywood panels sit on top of the 2x. Again this prevents the plywood from wicking up water, oil or anything else that may get spilled. The crown is 1x6 trim and serves as a hard edge for the plywood to die into as well hold the very edge of the Masonite ceiling panels flat between the joist. Once the plywood was up I used thinned Sheetrock mud to fill any voids. The thinned mud can go on fast, dries fast and requires very little sanding.
 

Attachments

  • 13B6F431-0DEB-4913-850D-FA9D8BE15642.jpeg
    13B6F431-0DEB-4913-850D-FA9D8BE15642.jpeg
    1,002.6 KB · Views: 268
  • 9EBACCE9-B88F-47BC-8FDC-53D08A086FC5.jpeg
    9EBACCE9-B88F-47BC-8FDC-53D08A086FC5.jpeg
    694.2 KB · Views: 262
  • 0121B835-A7DD-421C-AD8E-CC554F0C85E8.jpeg
    0121B835-A7DD-421C-AD8E-CC554F0C85E8.jpeg
    901.5 KB · Views: 249
  • 7A3882DA-331A-4F3C-AF5C-BD6ECE306EA4.jpeg
    7A3882DA-331A-4F3C-AF5C-BD6ECE306EA4.jpeg
    705.9 KB · Views: 229
  • 80FE9185-4A45-4C6F-AC8B-44BF1389884E.jpeg
    80FE9185-4A45-4C6F-AC8B-44BF1389884E.jpeg
    579.5 KB · Views: 242
OP
P

phred

Well-known member
Joined
Apr 23, 2009
Messages
531
Location
NC
With all the plywood needing to be cut as straight as possible I bought a (cheap) Bora track saw system. For what it is and for the money it works pretty well. Definitely not a festool competitor but for dirty framing it does ok. All the plywood joints would eventually get caulked prior to paint. The ceiling needed lattice strips to cover the seams. Precut lattice was $20 for a 10’ stick. A 10’ 2x4 was $6 so quick math and I could 80’ of strips out of one 2x4. A lot of saw dust later and I have all the strips I need. Prepainted the strips are to go.
 

Attachments

  • F1CD7EF2-4D43-4319-BD44-92587A6FB3F5.jpeg
    F1CD7EF2-4D43-4319-BD44-92587A6FB3F5.jpeg
    859.1 KB · Views: 229
  • 73D453C1-5548-4E38-9C97-706B06166D32.jpeg
    73D453C1-5548-4E38-9C97-706B06166D32.jpeg
    397.6 KB · Views: 213
  • EFCECDC8-D614-4540-8BD5-F6D0E34EAEE2.jpeg
    EFCECDC8-D614-4540-8BD5-F6D0E34EAEE2.jpeg
    977.8 KB · Views: 210
  • 2E40E43C-E0ED-4D80-A436-15E574AF9120.jpeg
    2E40E43C-E0ED-4D80-A436-15E574AF9120.jpeg
    1,004.9 KB · Views: 204
  • FA191D0E-A9A1-4B9E-8349-332FD473759C.jpeg
    FA191D0E-A9A1-4B9E-8349-332FD473759C.jpeg
    871.1 KB · Views: 200
  • 0296F905-FBAE-4018-BD50-796B1F9BBC4B.jpeg
    0296F905-FBAE-4018-BD50-796B1F9BBC4B.jpeg
    579.5 KB · Views: 192
  • 85E4E452-24C6-4920-A714-0C987434F564.jpeg
    85E4E452-24C6-4920-A714-0C987434F564.jpeg
    694.2 KB · Views: 193
  • 7979F970-497E-4989-ABFB-8C64ED75FD2C.jpeg
    7979F970-497E-4989-ABFB-8C64ED75FD2C.jpeg
    771.1 KB · Views: 195
  • 42C7BBD1-6B60-4112-87B5-DAE3DD6C37E5.jpeg
    42C7BBD1-6B60-4112-87B5-DAE3DD6C37E5.jpeg
    599.4 KB · Views: 185
  • 5890FE4D-1CDC-44E4-A224-8F5EFF4EBBF8.jpeg
    5890FE4D-1CDC-44E4-A224-8F5EFF4EBBF8.jpeg
    901.5 KB · Views: 219
OP
P

phred

Well-known member
Joined
Apr 23, 2009
Messages
531
Location
NC
With all the plywood needing to be cut as straight as possible I bought a (cheap) Bora track saw system. For what it is and for the money it works pretty well. Definitely not a festool competitor but for dirty framing it does ok. All the plywood joints would eventually get caulked prior to paint. The ceiling needed lattice strips to cover the seams. Precut lattice was $20 for a 10’ stick. A 10’ 2x4 was $6 so quick math and I could 80’ of strips out of one 2x4. A lot of saw dust later and I have all the strips I need. Prepainted the strips are to go.
 
OP
P

phred

Well-known member
Joined
Apr 23, 2009
Messages
531
Location
NC
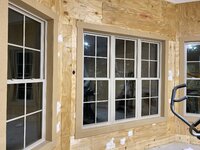
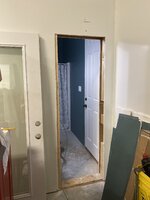
The plywood went up fast. The ceiling no so much. Working overhead is not a lot of fun. My brother and I worked a couple nights a week for about a month and finally finished up the ceiling. Working on a bakers scaffold is great but there I no convenient way to hold tools. We whipped up a simple tray out of some scrap plywood and a pvc pipe that slips over the uprights on the scaffold. Once all the walls were complete I began casing and trimming the doors and windows. Like everything else trim was more expensive than I wanted to pay. I purchased 6 sheets of 1/2” mdo and ripped them into 4” wide strips. I did all that work outside with a respirator. Man that stuff is dusty. We also made a opening from the shop to the lake side bathroom.
Oh and don’t pay attention to all the junk and boxes everywhere. I kept having to move stuff around until I was able to build cabinets and work benches.
 

Attachments

  • 6E39D9D1-8039-481C-9F5E-73EB0ABCAF59.jpeg
    6E39D9D1-8039-481C-9F5E-73EB0ABCAF59.jpeg
    739.6 KB · Views: 192
  • A65D1711-F60A-4198-9F71-72BD4FD1799E.jpeg
    A65D1711-F60A-4198-9F71-72BD4FD1799E.jpeg
    771.1 KB · Views: 185
  • AAC47F3A-1029-4208-9670-25B17B9990A5.jpeg
    AAC47F3A-1029-4208-9670-25B17B9990A5.jpeg
    866.3 KB · Views: 178
  • 2057E973-7851-42D0-81EC-20579C49B6BD.jpeg
    2057E973-7851-42D0-81EC-20579C49B6BD.jpeg
    493.1 KB · Views: 167
  • 0A9E4796-37B5-4976-A73B-CCA7E8792354.jpeg
    0A9E4796-37B5-4976-A73B-CCA7E8792354.jpeg
    294.2 KB · Views: 159
  • A044A5E0-3EDB-44DE-9BC4-6B3B1459BED5.jpeg
    A044A5E0-3EDB-44DE-9BC4-6B3B1459BED5.jpeg
    426.5 KB · Views: 172
OP
P

phred

Well-known member
Joined
Apr 23, 2009
Messages
531
Location
NC
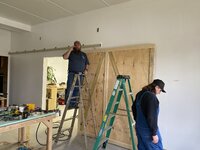
Last framing item was to box in the waste pipe from the master bath. Once that was completed it was time to build a door. I used some 1/2” plywood and 1x4’s. My brother and nephew came over and helped me hang it. Once up I could close off the woodworking area and make dust without covering the rest of the shop.
 

Attachments

  • C49624B8-B49C-4532-B272-74FE70310F0C.jpeg
    C49624B8-B49C-4532-B272-74FE70310F0C.jpeg
    773.8 KB · Views: 137
  • 4E59E606-8DE9-41B8-B17E-8DE7E67CF4D7.jpeg
    4E59E606-8DE9-41B8-B17E-8DE7E67CF4D7.jpeg
    775.6 KB · Views: 137
  • 085758EE-24D4-46F1-98B5-FEBAED6C012C.jpeg
    085758EE-24D4-46F1-98B5-FEBAED6C012C.jpeg
    637.5 KB · Views: 139
  • 596E3341-59AA-42BD-9A71-671CFD1F1D9B.jpeg
    596E3341-59AA-42BD-9A71-671CFD1F1D9B.jpeg
    741.6 KB · Views: 149
  • C2A70781-EAF8-4187-9969-FE501EBD3172.jpeg
    C2A70781-EAF8-4187-9969-FE501EBD3172.jpeg
    678.1 KB · Views: 243
OP
P

phred

Well-known member
Joined
Apr 23, 2009
Messages
531
Location
NC
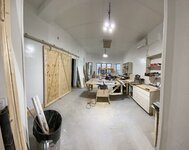
You’ll notice that the room in which we built and installed the barn door is painted. I painted each room as I finished the plywood and ceiling. I used an oil based PVA primer and then 2 heavy coats of pure white high gloss oil from Sherwin Williams. There’s a lot of paint on these walls. A bit over 20 gals including the primer. I like high gloss oils because they clean easily, reflect light and are much tougher than latex.
 

Attachments

  • FB392BB0-14D3-4E9F-9DBC-DA9DD4748099.jpeg
    FB392BB0-14D3-4E9F-9DBC-DA9DD4748099.jpeg
    660.8 KB · Views: 252
  • EA97FD34-F4FA-4569-B906-6723DC5B48E5.jpeg
    EA97FD34-F4FA-4569-B906-6723DC5B48E5.jpeg
    432.5 KB · Views: 235
  • C637D9FB-56AD-4F48-AF8B-94C54B98A6D2.jpeg
    C637D9FB-56AD-4F48-AF8B-94C54B98A6D2.jpeg
    602.2 KB · Views: 233
  • 02D2E0FD-ED00-4375-8BCD-62F56F3DA908.jpeg
    02D2E0FD-ED00-4375-8BCD-62F56F3DA908.jpeg
    269.5 KB · Views: 222
  • 090B11B3-BCAA-4854-9764-A85F39BE4B6C.jpeg
    090B11B3-BCAA-4854-9764-A85F39BE4B6C.jpeg
    405 KB · Views: 237

theoldwizard1

Well-known member
Joined
Feb 22, 2011
Messages
43,442
Location
SE MI
Snow in NC. STAY HOME !! It will melt in a day or two.

No one in NC knows how the drive in snow and like GA, they have very little equipment to deal with it. Plus if you live on the west side of NC they have some good hills.
 
OP
P

phred

Well-known member
Joined
Apr 23, 2009
Messages
531
Location
NC
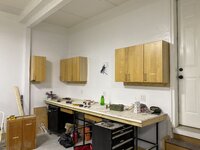
So with the barn door up, the wood working area of the shop can now be isolated. It was time to install a work bench and some prefab wall cabinets so I can get some stuff off the floor and out of boxes. The work bench is built of 1x1x.120 wall tubing topped with a 2x4 frame 3/4” plywood and white Formica.
 

Attachments

  • BD9CCE17-E6F3-4EFA-B7B2-F6B961FC1890.jpeg
    BD9CCE17-E6F3-4EFA-B7B2-F6B961FC1890.jpeg
    538.6 KB · Views: 216
OP
P

phred

Well-known member
Joined
Apr 23, 2009
Messages
531
Location
NC
Cabinet time! I built a outfeed table and side wings for my little job site table saw and started building cabinets. The little saw does ok for what it is. Holy smokes cabinet grade plywood has gotten ridiculously expensive and the quality has gone down as well. The veneer is literally paper thin.
 

Attachments

  • D3EC42EA-137A-45D5-9A48-4241EAC7D828.jpeg
    D3EC42EA-137A-45D5-9A48-4241EAC7D828.jpeg
    601.1 KB · Views: 197
  • A35EF81A-930F-4E2A-A836-6AA896D78B5F.jpeg
    A35EF81A-930F-4E2A-A836-6AA896D78B5F.jpeg
    799.3 KB · Views: 168
  • 0161A188-F418-4165-BFFA-04ABEF3CCDCE.jpeg
    0161A188-F418-4165-BFFA-04ABEF3CCDCE.jpeg
    561.5 KB · Views: 157
  • EE80E29F-38EA-435C-8F35-782E1A34D940.jpeg
    EE80E29F-38EA-435C-8F35-782E1A34D940.jpeg
    527.7 KB · Views: 147
  • A2250C0F-6070-4C7C-B073-5A445D82FF5D.jpeg
    A2250C0F-6070-4C7C-B073-5A445D82FF5D.jpeg
    741.9 KB · Views: 139
  • FA13116B-CCCC-4AA5-969B-A8F7A68617B5.jpeg
    FA13116B-CCCC-4AA5-969B-A8F7A68617B5.jpeg
    674.5 KB · Views: 129
  • 192C1C45-C8F5-42F9-94CB-82E92882692F.jpeg
    192C1C45-C8F5-42F9-94CB-82E92882692F.jpeg
    705.3 KB · Views: 157

gearhead1

Well-known member
Joined
Oct 14, 2013
Messages
1,935
Location
NC
Welcome to NC! Nice work!

If I understood correctly, you used Masonite panels on the ceiling? Like 1/8” thick? How’d you attach it?
 
OP
P

phred

Well-known member
Joined
Apr 23, 2009
Messages
531
Location
NC
Thanks Blackbyrd and gearhead1. It is nice to be back home. I grew up in NC about 10 miles from where we are now. As it turns out I was in a car accident on this same road when I was 18. (Stupid kids doing stupid stuff on a dirt road 30 plus years ago 😂). Yes the ceiling is 1/8” Masonite with a white Melamine finish. I used a pneumatic crown stapler to fasten the panels. They are small enough that you do not really see them.
 
OP
P

phred

Well-known member
Joined
Apr 23, 2009
Messages
531
Location
NC
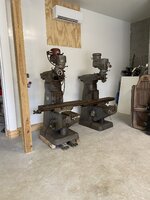
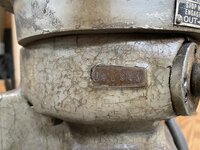
Right in the middle of the shop build out my brother finds a deal too good to pass up. I’ve been looking for a mill for quite a while but few were in the price range I was willing to spend and those that were became no bargain once I figured in shipping. An old machinist about 30 miles away was selling out and had 2, yes 2, Bridgeports listed for sell for 1100 bucks. I immediately drove down and checked them out. One was a old “j” head, circa late ‘60’s and 90% complete. The other was a “2j” head with the vari-drive circa ‘80’s. Unfortunately it was disassembled and appeared to be mostly complete less a few handles. I offered 1000 for both and we shook hands. I hired an equipment rigger to pick them up and deliver them to my shop. I shoved them in the corner until I could have time to work on them. Much more to come on these later. I called a friend that owns a marine engineering company and ask about parts (because I know he has a lot of older machines). He was kind enough to sell me a couple power feeds for cheap.
 

Attachments

  • DB5B1975-D7E1-40E8-86FF-A51DFF75A4A8.jpeg
    DB5B1975-D7E1-40E8-86FF-A51DFF75A4A8.jpeg
    68.9 KB · Views: 140
  • 0A630EE3-209D-49BA-80F8-5FCAE0874ED0.jpeg
    0A630EE3-209D-49BA-80F8-5FCAE0874ED0.jpeg
    721.7 KB · Views: 128
  • 76552708-FFAF-47D3-AF50-74E9FD765602.jpeg
    76552708-FFAF-47D3-AF50-74E9FD765602.jpeg
    772.9 KB · Views: 141
  • 0CB76F31-CBED-4D3F-A82B-3E457EADE0C2.jpeg
    0CB76F31-CBED-4D3F-A82B-3E457EADE0C2.jpeg
    780.7 KB · Views: 143
  • F3BB2E1A-80C9-4D94-A63C-1BD737E5B855.jpeg
    F3BB2E1A-80C9-4D94-A63C-1BD737E5B855.jpeg
    1.1 MB · Views: 142
  • 5B7BFB13-96A1-4EF6-8BED-B316072BDFBA.jpeg
    5B7BFB13-96A1-4EF6-8BED-B316072BDFBA.jpeg
    1,024 KB · Views: 128
  • 037552D2-2510-4F13-BFB1-491D021B49ED.jpeg
    037552D2-2510-4F13-BFB1-491D021B49ED.jpeg
    906.6 KB · Views: 122
  • 6F40E1DC-FB9C-4C45-978D-FA6D1833D992.jpeg
    6F40E1DC-FB9C-4C45-978D-FA6D1833D992.jpeg
    1 MB · Views: 201
OP
P

phred

Well-known member
Joined
Apr 23, 2009
Messages
531
Location
NC
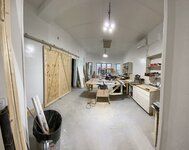
Here’s a few more shots of the 3 main work areas: woodshop, mechanic space and metal working area.
 

Attachments

  • CCA4749B-8B82-4DED-920F-C33073AFF335.jpeg
    CCA4749B-8B82-4DED-920F-C33073AFF335.jpeg
    660.8 KB · Views: 186
  • 6A3120EE-57C1-43DC-ADCB-801272F62105.jpeg
    6A3120EE-57C1-43DC-ADCB-801272F62105.jpeg
    432.5 KB · Views: 190
  • CC2DABF9-C4E4-4D90-BF44-83A7B69C67A9.jpeg
    CC2DABF9-C4E4-4D90-BF44-83A7B69C67A9.jpeg
    481.5 KB · Views: 260
OP
P

phred

Well-known member
Joined
Apr 23, 2009
Messages
531
Location
NC
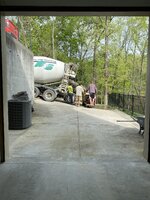
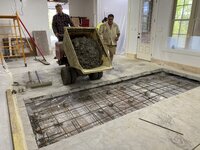
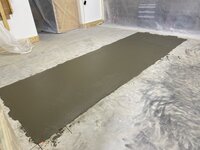
Now for something different. The floor slab was of unknown strength and thickness. Best guess was 3000 and 4”. Turned out to be a little less than 4”. The Mohawk lift requires 6” of 4000 minimum. In a monolithic slab. Since this slab was no where near spec my option was to cut a 5x14 section out. Excavated down 14”. Put in 2 - 12”x12” #4 rebar grids, 1 at 2” above grade and 1 at 4” below top of slab. We also doweled into the existing slab. We poured 12”of 4000. All this is per the Mohawk recommended retro fit requirements.
 

Attachments

  • E4982C12-553F-47C0-8E0D-9C0603B276C6.jpeg
    E4982C12-553F-47C0-8E0D-9C0603B276C6.jpeg
    927.7 KB · Views: 252
  • BB64AE6D-9A4B-4362-9E96-9EDC4B4B64F6.jpeg
    BB64AE6D-9A4B-4362-9E96-9EDC4B4B64F6.jpeg
    1.2 MB · Views: 223
  • 018B85EA-9168-44B9-8CEC-9A91E7AB1F63.jpeg
    018B85EA-9168-44B9-8CEC-9A91E7AB1F63.jpeg
    851.5 KB · Views: 213
  • 525547D5-FA5B-47EF-B148-672A86620174.jpeg
    525547D5-FA5B-47EF-B148-672A86620174.jpeg
    604.3 KB · Views: 219
  • DBB3040B-AD11-46BB-9988-58E272CD6CB3.jpeg
    DBB3040B-AD11-46BB-9988-58E272CD6CB3.jpeg
    821.4 KB · Views: 218
  • 0B016233-83A3-4EF3-9E1E-221714460145.jpeg
    0B016233-83A3-4EF3-9E1E-221714460145.jpeg
    807.1 KB · Views: 423
To avoid these ads, REGISTER NOW!
Top Bottom