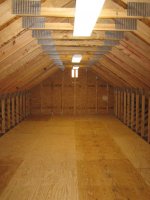
Broadway Wrecker Service Garage update
So I wanted to update the "progress" of our garage renovation.
(Warning: Long post.)
Unfortunately we have hit several snags to the progress of our project. Initially we planned to complete the exterior of our garage in two phases as two completely separate jobs with our contractor. The first phase is what has already been covered in this thread and was completed last year. We were due to start phase two of the project, essentially finishing the rest of the exterior. Unfortunately our original contractor was not able to work on the second round job on our project, so phase two has been on an indefinite hold due to unexpected delays.
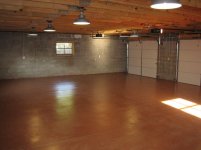
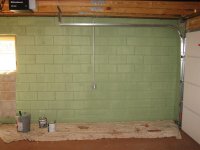
Since parts of the job have been on hold, we decided to try to complete some work ourselves in the meantime, most notably staining and sealing the interior concrete floor -- something we knew nothing about at the time.
We did not want to epoxy the floor or just apply a clear seal. The original idea was sort of an "old" look to the floor, so we wanted a semi-transparent brown, almost a dirt color with some of the original concrete texture showing through.
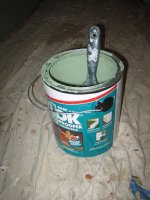
We decided to try an acrylic based concrete stain along with a clear sealer for the garage floor. Based on a bit of research (and the lack of concrete stain products available locally at the big box stores and paint stores), we decided to order online
Seal-Krete products for the job. I actually called
Seal-Krete directly and gave them the details of our job so I knew to order the right amounts/products.
Seal-Krete customer support recommended the following, which we ordered:
- SEAL-KRETE Clean & Etch
- SEAL-KRETE Concrete Colors Semi-Transparent Stain (Terra Cotta)
- SEAL-KRETE Concrete / Garage Floor Sealer
The plan was to clean/etch, followed by one coat of stain rolled on, followed by one coat of clear sealer rolled on. We cleaned the concrete floor using a cleaner/degreaser. Rinsed the floor and allowed it to dry several days. Following the instructions, we then applied the Clean and Etch with a sprayer and brushed in with a stiff brush/broom. The instructions said you should see smoke and a foaming action when brushing (the acid eating tiny holes to profile the concrete) and to leave it on a bit until the foaming stops. We saw very little smoke or foam coming from the floor, which was the first red flag. Since we didn't realize that was a problem, we continued and finished applying the clean/etch to the entire floor, followed by lots of rinsing.
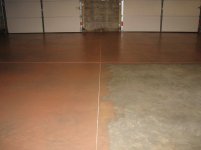
A few days of drying time later, we began rolling on the Terra Cotta color concrete stain. The Terra Cotta color wasn't exactly what we were looking for, but it was the closest choice of the available colors. This was a really difficult application and took a really long time to complete -- 1200 square feet of rolling on the stain. This process did not work well for us and we were not happy with the look of the stain as a result. At the time, we did not know if it was the stain, the amount being applied, the condition of the concrete, our application/workmanship, etc.
So a few days of drying time go by. We were ready to apply the final single coat of clear sealer. There were a few leaves in front of one of the garage doors that had blown in while the door was slightly raised during drying. I picked up a push broom to sweep out the door area, and proceeded to put streaks with the broom into the stain with little effort. Oops.
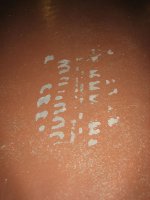
Obviously the stain had not taken to the concrete. A call to
Seal-Krete support suggested that I do a "tape test" and put a piece of duct tape down and rip it up after a few minutes. The duct tape removed all of the stain cleanly off to reveal grey concrete underneath. The acid/application of our Clean & Etch was not strong enough to etch the power trowled concrete floor, which meant the stain was not penetrating the concrete and was simply floating on top with no bond.
Told support the results of the tape test, and they confirmed the bad news: We would have to remove all of the stain, re-etch the concrete with stronger muratic acid, then reapply the stain and sealer all over again.
Ugh.
The good news is that
Seal-Krete sent us a replacement batch of stain free of charge and reimbursed me for purchasing muratic acid locally -- so kudos to them for standing behind their product and working to help solve our project woes.
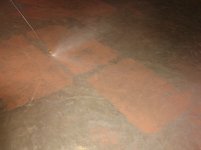
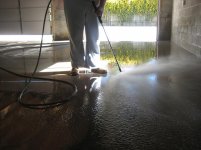
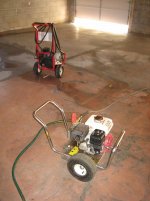
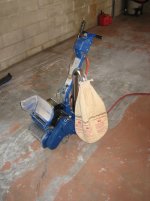
So the suggested method to remove the failed stain was to use a pressure washer to blast off the stain. We borrowed a pressure washer and started the removal -- unfortunately the pressure washer worked very very slowly and only did a so-so job removing the stain. Some random spots (where the stain had penetrated a bit) would not come off with a blast of water. What did come off took many days of work to remove. It took so long that we eventually broke the borrowed pressure washer, causing a few oil leaks and marks on the concrete as we cleaned it. So we rented a replacement pressure washer to try to finish, but our rental time ran out before we could finish the entire floor.
(Continued in the next post...)

")