To avoid these ads, REGISTER NOW!

Between 265 & 485 SQ/FT 1950s Craftsman Garage retro remodel

Workspaces sized between 265 and 485 squarefeet.

69lm69gp

Well-known member
Joined
Jul 26, 2007
Messages
57
Location
Northwest, CT
I have the same saw, but the lever for the rip fence is missing. Could you post a close up of the exploded view of the rip fence so I can get idea of its shape so I can make a new one.
 
To avoid these ads, REGISTER NOW!

Wingnut65

Well-known member
Joined
Apr 21, 2010
Messages
3,170
Location
Tampa Bay, FL
Nice score, Dave! ( I would have paid twice that! :lol:) Glad it is now in the hands of a good caretaker. You have a good eye and a great heart. Thanks for thinking of others in your vintage tool quest!
 

Trey T

Well-known member
Joined
Aug 3, 2011
Messages
3,749
Location
Houston, TX
Local CL 1940s wood lathe for $150. Might be good to your collection. I see a lot of value in it but it's not for me.
 

Attachments

  • CM Lathe.jpg
    CM Lathe.jpg
    91.8 KB · Views: 181
  • 3F93M33H65Na5G25E3d3h1a24b573353f10a2.jpg
    3F93M33H65Na5G25E3d3h1a24b573353f10a2.jpg
    679 bytes · Views: 1,638
  • 3K23J63N45La5E45K1d3h8b7f3f4d50991258.jpg
    3K23J63N45La5E45K1d3h8b7f3f4d50991258.jpg
    914 bytes · Views: 1,639
Last edited:

jose's garage

Well-known member
Joined
Oct 16, 2012
Messages
112
Location
LI, NY
That tool chest is "to die for". That is one of the top items I have seen in a long time. Someone needs to kick Sear's backside back to 50's-60's and make them reproduce those cabinets in the same quality as the one you have.
I am sitting here with your magazine spread open "Retro Remodel" and wondering what you did with all your "other" stuff during the shoot? You got lotza stuff not seen in the article.
BTW: Your an inspiration and I really enjoyed the magazine article. Where did you get inspired on the Art Deco touches?
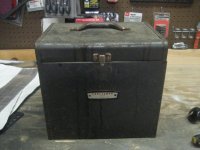
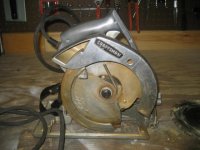
Here are some pics of a 1960's Craftsman 7 1/2" Circular Saw I am restoring.
No parts thru Sears, but I am getting by with standard hardware.

i found the same saw at a garage sale with the box too. one side polised.
 

Attachments

  • IMG_2759.jpg
    IMG_2759.jpg
    41.8 KB · Views: 62
  • IMG_2768.jpg
    IMG_2768.jpg
    40.8 KB · Views: 73
  • IMG_2823.jpg
    IMG_2823.jpg
    42.6 KB · Views: 95
OP
R

Red Leader

Well-known member
Joined
May 15, 2011
Messages
2,689
Location
Denver, CO
How is the black paint holding up that you did on the garage door track? I want to do mine as well.

Holding up good! While I used the cheap $.97 flat black spray paint at HD, I did wipe down the metal bits with rubbing alcohol for better adhesion.
 
OP
R

Red Leader

Well-known member
Joined
May 15, 2011
Messages
2,689
Location
Denver, CO
Local CL 1940s wood lathe for $150. Might be good to your collection. I see a lot of value in it but it's not for me.

I'm pretty curious about that light. It may just be an average shop light, but if is an actually Craftsman shop light, it is probably worth more than the lathe and justifies the asking price.


Old tools are funny like that!
 
OP
R

Red Leader

Well-known member
Joined
May 15, 2011
Messages
2,689
Location
Denver, CO
Nice score, Dave! ( I would have paid twice that! :lol:) Glad it is now in the hands of a good caretaker. You have a good eye and a great heart. Thanks for thinking of others in your vintage tool quest!

Thanks Jeff. But, truth be told:

"You have a great heart" - being a little generous


"I have no room in my garage" - being a little realistic


:lol:
 

FunkyfullWidth

Well-known member
Joined
Oct 3, 2011
Messages
1,238
Location
Three Rivers, ma
I'm pretty curious about that light. It may just be an average shop light, but if is an actually Craftsman shop light, it is probably worth more than the lathe and justifies the asking price.


Old tools are funny like that!

That was the first thing In the picture that I noticed! Might be worth a peek to someone. I'm always on the look out for old lights. I've been hoping to find one for my atlas 618.
 

Huxley

Well-known member
Joined
Mar 4, 2008
Messages
210
Location
Colorado
I hadn't noticed the disc sander before. Pretty cool.

I wonder what OSHA would say about that belt arrangement.
 

bluebolt

Well-known member
Joined
Dec 28, 2008
Messages
5,447
Location
Benton LA
I'm pretty curious about that light. It may just be an average shop light, but if is an actually Craftsman shop light, it is probably worth more than the lathe and justifies the asking price.


Old tools are funny like that!

I am pretty sure that light is newer, I have one that looks identical that is only about 15 years old.

I have the identical lathe, don't have it set up yet. Paid $85 for it I think but no tools.
 

DynoDave

Well-known member
Joined
Mar 25, 2005
Messages
1,685
Location
Michigan
i found the same saw at a garage sale with the box too. one side polised.

I'm assuming these saws are rebuild-able? I have a 1955 models that I love, but one of the bearings failed during the final stages of construction of my new garage. I kept it, hoping to be able to rebuild it someday.
 

Attila

New member
Joined
Oct 19, 2011
Messages
4
Location
Ontario, Canada
I always found your thread to be very cool. That said you also seem to be a pro in all things craftsman. I wanted to ask you a question about a belt sander for sale here in my home town I'm interested in purchasing. I build fences and decks part time. I love buying tools from my local Kijiji. I saw this old sears craftsman model and I thought of you first. I would only be using it occasionally but would be used. I'm not interested in a museum piece. I do wonder if I can get belts for it. The gentleman is asking 35 dollars for it.

Cheers,
Attila
 

Attachments

  • $T2eC16Z,!ykE9s7t)2i(BRSfZMSo7w~~48_20.JPG
    $T2eC16Z,!ykE9s7t)2i(BRSfZMSo7w~~48_20.JPG
    48.6 KB · Views: 47
  • $T2eC16J,!zUE9s38-I5FBRSfdpwR7g~~48_20.JPG
    $T2eC16J,!zUE9s38-I5FBRSfdpwR7g~~48_20.JPG
    48.1 KB · Views: 47
  • $T2eC16F,!)kE9s4Z-T6JBRSfYdws)!~~48_20.JPG
    $T2eC16F,!)kE9s4Z-T6JBRSfYdws)!~~48_20.JPG
    54 KB · Views: 52
OP
R

Red Leader

Well-known member
Joined
May 15, 2011
Messages
2,689
Location
Denver, CO
I always found your thread to be very cool. That said you also seem to be a pro in all things craftsman. I wanted to ask you a question about a belt sander for sale here in my home town I'm interested in purchasing. I build fences and decks part time. I love buying tools from my local Kijiji. I saw this old sears craftsman model and I thought of you first. I would only be using it occasionally but would be used. I'm not interested in a museum piece. I do wonder if I can get belts for it. The gentleman is asking 35 dollars for it.

Cheers,
Attila

I believe that one would probably be your standard 3"x18" belt. I think the oddball Craftsman one was 3"x21" and it is hard to get belts for. I've got the cousin to your sander, a Montgomery Ward from the same era. I picked it up for cheap because it was sparking like a firestarter. Took it apart, cleaned the area where the brushes contact - and now it is my go-to sander.

That sander will probably serve you well.
 
To avoid these ads, REGISTER NOW!

Bob Heine

ALLIANCE MEMBER
Joined
Oct 24, 2009
Messages
10,708
Location
Boca Raton, Florida
I believe that one would probably be your standard 3"x18" belt. I think the oddball Craftsman one was 3"x21" and it is hard to get belts for....

That sander will probably serve you well.
Red Leader,
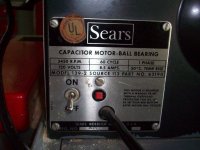
The label says it takes a 4"x24" belt. Those are still available but the large size means they are a bit more expensive. The label also says it's a ball and needle bearing with 1.5 hp motor. Under the old rating system, that's a beast of a belt sander. If you are doing decks and big jobs, that's a perfect machine. Starting price for a belt sander that size is around $200 these days.
 
OP
R

Red Leader

Well-known member
Joined
May 15, 2011
Messages
2,689
Location
Denver, CO
I'm assuming these saws are rebuild-able? I have a 1955 models that I love, but one of the bearings failed during the final stages of construction of my new garage. I kept it, hoping to be able to rebuild it someday.

I would like to think that it is. I don't have much experience sourcing bearings for hand-held power tools, but it would be worth a shot. I'd also check with Sears.
 
OP
R

Red Leader

Well-known member
Joined
May 15, 2011
Messages
2,689
Location
Denver, CO
Red Leader,
The label says it takes a 4"x24" belt. Those are still available but the large size means they are a bit more expensive. The label also says it's a ball and needle bearing with 1.5 hp motor. Under the old rating system, that's a beast of a belt sander. If you are doing decks and big jobs, that's a perfect machine. Starting price for a belt sander that size is around $200 these days.

Good to know! Most sanders are going to either be 18" or 24".

The Porter Cable sanders I have take the 24" belts. I'm not sure when motor ratings started getting exaggerated...that might be what you are referring to. Even still, I agree - a big motor!
 

Climb On!

Well-known member
Joined
May 30, 2010
Messages
81
It'd be great if you had time to upload all those publications to the Vintage Machinery site!

Chuck
 

TireTracks

Well-known member
Joined
Nov 11, 2009
Messages
2,397
Location
Yakima,Washington.
I always found your thread to be very cool. That said you also seem to be a pro in all things craftsman. I wanted to ask you a question about a belt sander for sale here in my home town I'm interested in purchasing. I build fences and decks part time. I love buying tools from my local Kijiji. I saw this old sears craftsman model and I thought of you first. I would only be using it occasionally but would be used. I'm not interested in a museum piece. I do wonder if I can get belts for it. The gentleman is asking 35 dollars for it.

Cheers,
Attila


4x24 are a standard size. Thats a late 60's one, because it's a 2 speed.

Get it, and wecome to the club-

View media item 24377View media item 24380
I got mine for $25. Missed out on one with the dust bag by a few minutes. This thing is a beast. It's from 1964.
 

madoc1

Well-known member
Joined
Dec 11, 2012
Messages
1,242
Location
spicewood, tx
I would like to think that it is. I don't have much experience sourcing bearings for hand-held power tools, but it would be worth a shot. I'd also check with Sears.

if you pull the bearing, you should find a # on it. evn if you cant find a #, most competent bearing houses can match almost any bearing. most of these tools used the same type and size of bearings. nothing exotic ! good luck:beer:

was a small tool repair shop owner in the 70's. remember just a bit.!
 
Last edited:

HSpencer

ALLIANCE MEMBER
Joined
Nov 28, 2010
Messages
2,854
Location
South Central US
@Red Leader

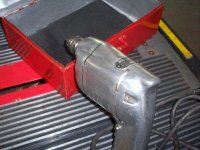
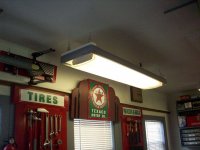
Here is my feeble attempt to create some "art deco" using a Texaco sign. Hoping you would approve it. Also showing my 1962 Sears (not craftsman) table saw which is still a daily driver going strong. Also my 1950 ish Craftsman Drill, also still going strong. The pair of doors shown will get some art deco when I figure out what to do. Also on the light fixture over the bench, I made it from simple plywood and some roof edging sprayed silver. Looking for some kind of old industrial art deco from around the 1930's. I have seen a Texaco sign and a shop fixture like these in a station somewhere. Recreating as I go, some good, some not so good!!
Let me know what you think!

Herb Spencer
 

Attachments

  • shop_010.jpg
    shop_010.jpg
    116 KB · Views: 133
  • shop_009.jpg
    shop_009.jpg
    137.7 KB · Views: 129
  • shop_008.jpg
    shop_008.jpg
    112 KB · Views: 136
  • shop_007.jpg
    shop_007.jpg
    117.2 KB · Views: 162
  • shop_006.jpg
    shop_006.jpg
    125.3 KB · Views: 164
  • shop_002.jpg
    shop_002.jpg
    104.3 KB · Views: 167
  • shop_001.jpg
    shop_001.jpg
    101.5 KB · Views: 192
OP
R

Red Leader

Well-known member
Joined
May 15, 2011
Messages
2,689
Location
Denver, CO
@Red Leader

Here is my feeble attempt to create some "art deco" using a Texaco sign. Hoping you would approve it. Also showing my 1962 Sears (not craftsman) table saw which is still a daily driver going strong. Also my 1950 ish Craftsman Drill, also still going strong. The pair of doors shown will get some art deco when I figure out what to do. Also on the light fixture over the bench, I made it from simple plywood and some roof edging sprayed silver. Looking for some kind of old industrial art deco from around the 1930's. I have seen a Texaco sign and a shop fixture like these in a station somewhere. Recreating as I go, some good, some not so good!!
Let me know what you think!

Herb Spencer

Herb,

Looks great! I could never get into Texaco stuff because I probably couldn't devote the $$ needed to have any of it! You've done a great job with creating your own displays. I love this kind of stuff.


To everyone that has been following this thread, I am still alive! And no, the garage build is not done:D For nearly the entire time period of Feb-Apr, local Colorado 'issues' had me *******. I don't want to say too much about it since this forum is not the place for such things, but let's just say that if you saw any news about CO in the last couple of months, you'll get my drift. I have been disappointed by the outcome of things, but life goes on and I do have a positive outlook on the road ahead.

As far as the garage, we are planning a local 'CO Fest' for vintage tools on May 18!! I am hoping to donate some stuff:D. I need to clean up the garage quite a bit.

My next project will be either tackling the overhead storage area/ceiling, or the workbench. Those are the two big projects on the list for 2013.

For the overhead storage, the plan is to use the empty space above the garage door (when open) for storage of materials, mainly wood. It will have the same curved shelves as the main shelves in the garage. Both projects are exciting, but also daunting.

The good news is that I think I can carve out some time in the evenings because the kiddo goes to sleep around 7:30pm and sometimes the wifey is doing her own thing in the evening. This gives me some time to play around out there:)

Now I just need to find the motivation...
 
OP
R

Red Leader

Well-known member
Joined
May 15, 2011
Messages
2,689
Location
Denver, CO
hey red leader how you doing on that radial arm saw

I wish I could say 'progress' but the saw is in the same condition that I bought it in...which is complete, but sad:(

I'm planning to hold onto it, though! Eventually, I will get around to it!

-Dave
 

HSpencer

ALLIANCE MEMBER
Joined
Nov 28, 2010
Messages
2,854
Location
South Central US
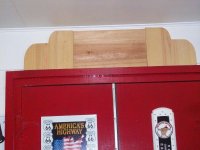
Adding to my above post and showing you progress on the over door deco I was mentioning. Thanks for your thumbs up on what I have done so far. Also had to add a shot of "Wild Woodpecker". Not sure if you would remember him?
 

Attachments

  • Friday_in_Shop_006.jpg
    Friday_in_Shop_006.jpg
    110.9 KB · Views: 66
  • Friday_in_Shop_007.jpg
    Friday_in_Shop_007.jpg
    95.4 KB · Views: 71
  • Friday_in_Shop_008.jpg
    Friday_in_Shop_008.jpg
    127.8 KB · Views: 66
  • Friday_in_Shop_005.jpg
    Friday_in_Shop_005.jpg
    100.8 KB · Views: 58
OP
R

Red Leader

Well-known member
Joined
May 15, 2011
Messages
2,689
Location
Denver, CO
Very nice!

By the way, our CO Fest is confirmed for next weekend. I should have some pictures of it up by then as well. I know everyone loves pictures of old arn!

-Dave
 
OP
R

Red Leader

Well-known member
Joined
May 15, 2011
Messages
2,689
Location
Denver, CO
It Works!!!


I have some exciting news.


My vintage 1934 Frigidaire is now breathing new life!!!


A few days ago I was cleaning out the garage (like I always have to do haha) and for the longest time wanted to move the fridge around to the back wall of the garage, and move the two Art Crest cabinets next to each other. As I'm pulling out the fridge...I start looking at it...

And start wondering...


hmm....


Maybe I could take another look at it?


P6079203-vi.jpg


I finally got a working multimeter, so I plugged it in and started doing some testing. First things first...make sure I have juice at the line:

P6079204-vi.jpg


Check.

Next, time to test some connections:

P6079205-vi.jpg


P6079206-vi.jpg


Here is what the underneath of the 'Meter Miser' compressor looks like:

P6079208-vi.jpg


Here is a shot of the junction box that sends power from the line to the compressor. I believed this is where the problem was:

P6079209-vi.jpg


Here is what the inside looks like:

P6079210-vi.jpg


Now, here is the cool part. Whoever assembled the fridge back in 1934 was awesome enough to include a handy little wiring diagram:

P6079212-vi.jpg


Close-up:

P6079213-vi.jpg


Here is the top of the fridge, under the hood. In addition to the junction box, there is a little box on the top as well:

P6079214-vi.jpg


P6079216-vi.jpg


And here is the inside of this awesome little box. It turns out that this part acts as a mechanical thermostat switch:

P6079217-vi.jpg


Those two wires create a loop from one leg of the power line into the fridge. When the fridge is running, they are connected, forming a solid connection back down to the junction box and on to the motor. When the fridge doesn't need to run anymore, the connection is mechanically broken and one power leg is removed from the motor. The easiest analogy is that of a light switch, electrically.

P6079218-vi.jpg


Again, here is how things are wired up - the wires you see are from when I originally attempted a repair and replaced the power cord and the cord leading to the motor:

P6079219-vi.jpg


This fridge has 'industrial art' written all over it:

P6079221-vi.jpg


Testing for continuity:

P6079222-vi.jpg


P6079223-vi.jpg


P6079224-vi.jpg


P6079225-vi.jpg


P6079226-vi.jpg


At first I did this testing with it still hooked up to the 3 leads of the motor, but then I realized that all 3 leads on the motor had continuity with each other, so I had to remove those connections.

P6079228-vi.jpg

Underneath the fridge, showing the 'Meter Miser' compressor.


Lines removed:

P6079230-vi.jpg


P6079227-vi.jpg


Now, once I started testing the junction box for continuity, I found one of the legs that didn't seem to have any continuity with any of the lines from power cord leg. Something was telling me that wasn't right. When the two legs for the thermostat were bridged, that should lead somewhere, but it didn't, so I got a little suspicious. The junction box innards were hollow- pinned to the bakelite case, so I took a drill bit and chucked it up in the Atlas and proceeded to remove the flange off the pins, allowing me to take it out. I wanted to be as least invasive as possible.

Here is what I found on the other side!

P6079231-vi.jpg


Now, before I mention anything, I want you to look real hard at that image and see if you can find something amiss.


Did you see it?


If you still can't see it, a close-up may give it away:

P6079233-vi.jpg


As you can probably now see, there is a spring type wire that has become separated and, if looking at the evidence of burn marks, had a somewhat violent separation.

P6079234-vi.jpg


Now, how this happened, I am not sure. I am not even sure what this wire is made of. It is extremely soft material. If it is steel, it is the softest steel I've ever seen. I don't know if age affected it, or its normal operation, but it had the consistency of lead.


I figured this would at least be a good place to start diagnosing things, but just to make sure I wasn't being hasty, I sat on it for a few days. Then, just tonight, I decided to drill out the remaining wire on the broken side, re-bent the spring coils to a uniform consistency, and reattached it to the other side. It is a somewhat temporary repair. If it worked, I really could not guarantee for how long.

So I somewhat casually wired up the junction box innards to the rest of the fridge. I then decided to plug it in.


The hum of a motor could be heard!


What an awesome moment! Who knows the last time that that Meter Miser was spinning, but it could have easily been 50 or 60 years. I breathed a huge sigh of relief when all the symptoms pointed to an electrical issue and not a refrigerant leak. This fridge uses Dichlorotetrofluoromethane, otherwise known as R-114, the predecessor to R-12. It is still available, but still very hard to find and very expensive. I could not find anything less than a large cylinder of the refrigerant for sale (and $800 at that) which would have created a huge roadblock to the repair.


Now, the real test was to see if it would get cold.


I decided to give it some time to get cold (if it would) by giving the fridge a rest and focusing on another project that I am working on in the garage, the restoration of a 1930s/1940s executive office desk:

P6079235-vi.jpg


P6079236-vi.jpg


I found the desk at a thrift store for $35 and decided to a preservation-type restoration on it. It was in good shape overall, with moderate wear and tear, but no chunks of wood missing, nor any peeling/damage to the walnut veneer top.

The main issue was the top had a TON of scratches and dents and entire sections (including one about the side of a small plate) where the finish had been completely worn away.

I decided not to strip the top of the desk but instead do a functional finish repair with lacquer. Its going to have a LOT of cool patina under the protected finish. I did not want to get invasive, but only repair what was necessary. This decision has turned out to make the top restoration about 1000x harder, as I have had to fill in, fill in, fill in, sand, sand, fill, sand, fill, sand, sand - there were literally hundreds of spots on the top that needed filled in. I've been learning a lot about vintage/antique furniture, furniture finish, and hand finishing. It can be very, very laborious work, but it should be very rewarding once completed.


So I sand the top of the desk for about an hour and go back to the fridge - it is starting to get cold!!!!!

P6099242-vi.jpg


P6099243-vi.jpg


I have a little tupperware cup filled with water in the little ice tray part of the fridge and will leave it there overnight to see if I wake up to a cup filled with ice. Keep your fingers crossed!!!:fingersx:

Getting this fridge running has given me new motivation towards it. I started doing some paint polishing/conditioning earlier this evening, and let me tell you - it's looking absolutely killer. I don't have any pictures yet, but just wait. One of my next posts will be doing a before/after comparison once I am done with a little cosmetic preservation. I'm very impressed with how well it is cleaning up and will be excited to show it off soon.


Thanks guys for staying with me. I'm not as active as I would like to be due to housing/yard projects taking the priority, but I'm still around (and celebrating a b-day tomorrow! Whoohoo!)

Keep an eye out for more!!! I still need to get pictures from our CO Fest up!


Thanks!


-RL
 
Last edited:
OP
R

Red Leader

Well-known member
Joined
May 15, 2011
Messages
2,689
Location
Denver, CO
Well, quick update...


I woke up the other day to find a lukewarm cup of water sitting in the fridge, haha, fridge off.


I'm hoping it was just a wire that came loose. We'll see!

The sparkle of hope is that the fridge DID run!


More to come later!
 

Wingnut65

Well-known member
Joined
Apr 21, 2010
Messages
3,170
Location
Tampa Bay, FL
Nice work with the meter to troubleshoot. I would have no clue what to test for to see where power should be, shouldn't be, or isn't the right voltage. I know enough with a meter to know to get someone else to check it. But continuity is no problem

Good luck on resuscitating that classic! Again.
 
OP
R

Red Leader

Well-known member
Joined
May 15, 2011
Messages
2,689
Location
Denver, CO
Well, I'm not entirely sure what happened. I busted out the meter and started checking connections and nothing seemed to amiss, so I plugged it back in and it fired right up! It has been going strong for several hours now and the cup of water I put in there now has a sheet of ice over it! And I have proof! (pics to come:rocker::D)


Hard to believe...but 79 years later, and the thing is still churning out the chills...


:cool:
 
To avoid these ads, REGISTER NOW!
Top Bottom