To avoid these ads, REGISTER NOW!

VISE REPAIR 101 all vise repairs, lubricants, sources for parts and the tricks to fix

OP
D

drivesitfar

Well-known member
Joined
Oct 23, 2013
Messages
36,177
Location
Pacific Northwest
KC: if you are going to take the vise all apart many of the guys prime the inside of the static and under neath the swivel. just don't paint the parts that contact each other and need to move and remember that if you use wax, BLO or some other product they need to be re applied fairly often unless you don't mind a little surface rust. make sense?

if it isn't too cruddy around the vise nut's base i'd probably leave it in place too and just run a rag or paper towel through the vise nut to clean it out. then maybe leave a paper towel in the threads if you want to spray or brush on primer inside the static. if the vise nut is fairly loose you might want to push the pin out and then after cleaning and before replacing the pin maybe use one of the designs some of the guys have made to eliminate the slop/slack instead of just bending the pin. lots of good ideas on this thread or ask if you can't find one and maybe some member can post his or hers if they have a picture handy. my favorite vise nut holder is on the Craftsman 519x's that is pretty slick, so some sort of that might work on your Reed for an upgrade.

good luck
 
To avoid these ads, REGISTER NOW!

kcheves

Active member
Joined
Jul 10, 2016
Messages
25
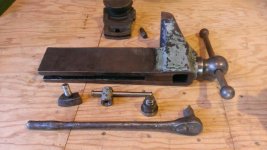
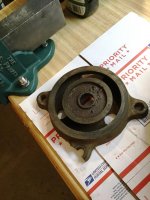
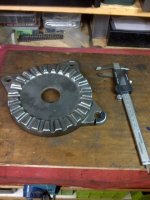
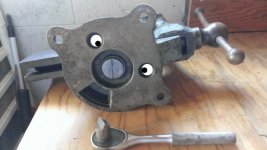
drives: Thanks. Got the swivel base off with no effort. The bolt was only finger tight, and it came right off with a wide flat screwdriver. The main nut is tight, so I'm leaving it alone. Will start the degreasing and wire wheel cleanup this weekend and post more pictures.
 
OP
D

drivesitfar

Well-known member
Joined
Oct 23, 2013
Messages
36,177
Location
Pacific Northwest
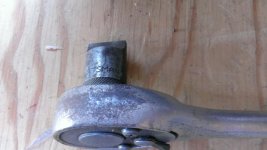
KC: i can't recall at the moment what this socket is called that works great for those huge Reed screws in the base of their vises, but they were fairly common in old socket sets in case you don't already own one. also feel free to post up a ton of pictures and also give progress reports with pictures and questions if you have any. good luck
 

Attachments

  • user218165_pic51056_1433176540.jpg
    user218165_pic51056_1433176540.jpg
    48.5 KB · Views: 42
  • WP_20150530_012.jpg
    WP_20150530_012.jpg
    124.1 KB · Views: 43
  • WP_20150530_028.jpg
    WP_20150530_028.jpg
    143 KB · Views: 40

Tomthumb717

Well-known member
Joined
Aug 5, 2016
Messages
179
Location
Hanover, PA
Picked up a Reed 203 1/2 today that is in nice shape overall however the swivel base rear bolt casting has been broken off, the swivel lock mechanism is missing and someone had replaced the original handle. I think i could either make do with the current handle but wouldn't mind locating a new swivel base and lock down mechanism. I have no issue purchasing said items and paying for any associated shipping costs if someone would happen to have the parts.

On a side note, how were the original handles assembled on these old vises. Specifically, how were the ball knobs applied to the ends. I might be able to fins an older suitable handle that i could swap out at some point.
 

Attachments

  • IMG_1580.jpg
    IMG_1580.jpg
    142.9 KB · Views: 24
Last edited:

454ragtop

Well-known member
Joined
Mar 24, 2008
Messages
5,011
Location
Carver, MA
Tomthumb, I found one of those same vises a few years ago, missing the swivel base. Looked around for one for a while, unsuccessfully, so ended up drilling a hole on the other side and bolting it to a pedestal stand. Worked out well, use it all the time. On yours, I think I'd bolt it down on the base you have, just use a heavy washer where part of the ear is broke off. Then if you find a better one, just swap it out. Probably have to fab the swivel lock bolt, although Kevin Scott probably has a lock down handle/nut that would work.
 
OP
D

drivesitfar

Well-known member
Joined
Oct 23, 2013
Messages
36,177
Location
Pacific Northwest
TOM: another member IHMachinery made a foot repair out of JB Weld earlier in the thread on his old Reed and as far as i know it still works fine. if you need a swivel base and 360 basis you might just make a stand and then bolt it like 454 mentioned to the stand for 360 access.

good luck
 

IHmachinery

Well-known member
Joined
Apr 28, 2015
Messages
134
Location
Pacific Northwest, Canada
TOM: another member IHMachinery made a foot repair out of JB Weld earlier in the thread on his old Reed and as far as i know it still works fine. if you need a swivel base and 360 basis you might just make a stand and then bolt it like 454 mentioned to the stand for 360 access.

good luck


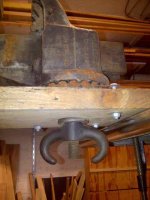
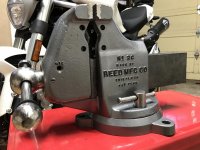
Here are a couple pics. But in my case, it was an old style swivel (Reed #32) that is primarily held down by the heavy central bolt that serves as swivel, and hold-down (with the big Rams horn nut on the underside of the bench). The tabs on the base just keep the base from shifting around. On the newer versions, those tabs take a lot of stress, so my repair method would not be suitable. However, one could do essentially the same and use brazing or tig welding rather than JB weld.

IMG_0173.JPGIMG_0165.JPG


Sent from my iPad using Tapatalk
 

IHmachinery

Well-known member
Joined
Apr 28, 2015
Messages
134
Location
Pacific Northwest, Canada
Here are a couple pics. But in my case, it was an old style swivel (Reed #32) that is primarily held down by the heavy central bolt that serves as swivel, and hold-down (with the big Rams horn nut on the underside of the bench). The tabs on the base just keep the base from shifting around. On the newer versions, those tabs take a lot of stress, so my repair method would not be suitable. However, one could do essentially the same and use brazing or tig welding rather than JB weld.

IMG_0173.JPGIMG_0165.JPG


Sent from my iPad using Tapatalk


Post #1582 has more pics of the repair in case you're interested


Sent from my iPad using Tapatalk
 

kcheves

Active member
Joined
Jul 10, 2016
Messages
25
KC: i can't recall at the moment what this socket is called that works great for those huge Reed screws in the base of their vises, but they were fairly common in old socket sets in case you don't already own one. also feel free to post up a ton of pictures and also give progress reports with pictures and questions if you have any. good luck
Awesome, just ordered on on Amazon. Will need it for the re-assembly.
 

bulletpruf

Well-known member
Joined
Nov 28, 2013
Messages
11,283
Location
San Antonio
On a side note, how were the original handles assembled on these old vises. Specifically, how were the ball knobs applied to the ends. I might be able to fins an older suitable handle that i could swap out at some point.

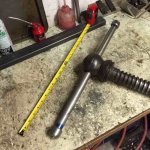
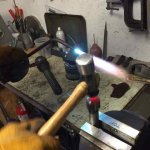
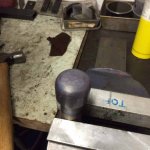
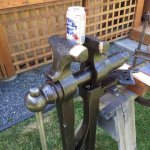
KMScott can explain this better, but if you buy one from him or someone else, it will come with one ball end installed. You have to heat and peen the other one after it's been installed in the vise.
 
OP
D

drivesitfar

Well-known member
Joined
Oct 23, 2013
Messages
36,177
Location
Pacific Northwest
KC: happy to help and maybe a little grease or oil on the threads of that big screw might help in case you need to take the vise apart in a few years.

good luck and post up some pictures when you have time. also keep asking questions if you have any cause there are some very talented members here to help you if you might need a little.

IH: thanks for popping in and posting your thoughts and the information where to find your JB Weld fix. it would be interesting to hear if your fix would work on a regular bench vise's broken mounting foot since your vise did have the extra bolt going through the bench to help take off some of the pressure.

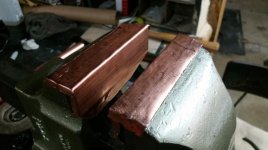
ALL: for those of you that might want to know how to make a fairly cheap pair of copper jaws General Geoff on post # 48,200 of the main vise thread and here's the link for those of you that don't know which thread that is.

http://www.garagejournal.com/forum/showthread.php?t=44782&page=2

here's GG's write up:

These are copper jaw inserts that I made out of 1" copper pipe. I cut the pipe down to two pieces about 5" in length, then sliced them lengthwise with an angle grinder (tin snips would work even better, I just don't have any straight-cut ones) and used a couple pairs of vise-grips to pull them apart into a sheet. I then took one sheet and clamped it into the vise, and form-fitted them around the edges of the jaws with an 8oz ball peen. Repeated with the other sheet for the other jaw. Took about a half hour from cutting the pipe to somewhat crude but extremely effective copper soft jaws!

The copper inserts are just rigid enough to 'click' into place on the vise, but malleable enough to pop them off with just a bit of effort.

The copper pipe was about $5 for a foot length, enough to make the inserts. Beats the heck out of $50 for premade ones!


these jaws gave him enough grip to make a tough job repairing his 1911 a lot easier than what other guys have had to deal with that is for certain.
 

Attachments

  • 20160925091101-8022b8f9-xl.jpg
    20160925091101-8022b8f9-xl.jpg
    83.6 KB · Views: 99
  • 20161011223436-ff2af538-me.jpg
    20161011223436-ff2af538-me.jpg
    130.2 KB · Views: 83

IHmachinery

Well-known member
Joined
Apr 28, 2015
Messages
134
Location
Pacific Northwest, Canada
KMScott can explain this better, but if you buy one from him or someone else, it will come with one ball end installed. You have to heat and peen the other one after it's been installed in the vise.


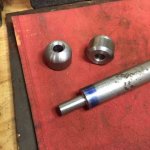
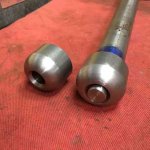
Here are a couple pictures from a large vise handle we made recently. Turned shaft and ends on lathe, and the rest is pretty self-explanatory ...

IMG_1366.JPGIMG_1367.JPGIMG_1365.JPGIMG_1370.JPGIMG_1371.JPGIMG_1372.JPGIMG_1377.JPG


Sent from my iPad using Tapatalk
 

slowone

New member
Joined
Sep 9, 2016
Messages
4
Just did a restoration on my Reed 2C with information I found on this thread. Thanks!

I am also looking for a pipe jaw for the 2C if anyone is selling one.
 

Attachments

  • IMG_2187.jpg
    IMG_2187.jpg
    149.8 KB · Views: 47
  • IMG_6414.jpg
    IMG_6414.jpg
    147.8 KB · Views: 43
  • IMG_6866 3.jpg
    IMG_6866 3.jpg
    139.6 KB · Views: 59
  • IMG_6871 2.jpg
    IMG_6871 2.jpg
    136.7 KB · Views: 49
  • IMG_6867 2.jpg
    IMG_6867 2.jpg
    142.3 KB · Views: 54
  • IMG_6875.jpg
    IMG_6875.jpg
    133.9 KB · Views: 51

AmericanMechanic

Well-known member
Joined
Dec 30, 2014
Messages
404
Here are a couple pictures from a large vise handle we made recently. Turned shaft and ends on lathe, and the rest is pretty self explanatory.

That's awesome! How did you determine the shape and size of the groove between the parts, how much the shaft should protrude before peening, etc.? Experience or is there some sort of formula or rule of thumb?

Thanks
 
OP
D

drivesitfar

Well-known member
Joined
Oct 23, 2013
Messages
36,177
Location
Pacific Northwest
IH: That handle you and Vintage Nut made in your shop for that huge blacksmith vise was amazing. what's more amazing is all the work VN (and maybe you) did to repair that old vise and bring it back to maybe better than new working condition. is that braze welds on the end of each of the jaws.

thanks for posting

Slow: not sure if you might know a machinist, but if you do maybe you can take the one jaw you do own and have him duplicate it for you. just a thought. i'm glad i started this thread so guys and gals like you have a good place to look when you want to save an old vise like you did. that said this thread wouldn't be anything without all the other members so i'm going to thank them to with you for all the effort and time and skills they've shared here.

WELL DONE EVERYONE!!!
 
To avoid these ads, REGISTER NOW!

Shiftless

Well-known member
Joined
Mar 9, 2014
Messages
14,779
Location
East Bay SFO
Drives said...

"i'm glad i started this thread so guys and gals like you have a good place to look when you want to save an old vise like you did. that said this thread wouldn't be anything without all the other members so i'm going to thank them to with you for all the effort and time and skills they've shared here."


I think we all appreciate a specialized place to share not only knowledge and experience but also some need encouragement when the going gets tough.
Thanks DIF!
 

schor

Well-known member
Joined
Apr 16, 2013
Messages
531
Location
Ajax, Ontario
I did not like the shape of the anvil on my bullet so I put it on the milling machine to clean it up.

ZRTnWQeAUSpPnbAmE671cW6WZF10SArkD9ELt6RywWxTyhNsBBu_rVuICCX9FVBD_6mZThJx1UZAZtfbSfgf4O2vrZugCLTuFrAhboGXmAi3iVtTSEBJd7whz8dI1JDdBVuJo0B_lQbQU-J76KA4nRm4RzkfLh745cgtcX7ajvZW_JUCGdiZT_f06XL4pxtS-YR2ttNmqYiKEK0lfTBvc9dSNpJNnrxqTOxHPGwUY9-8XYOYdOJ5L6axM51NZiBtNGOl4hEtG843OfadRLsN1S90Dgj4U-1U_BiBLMbrRDNPTJH8CIhcQScb7xBM4bYS-gPbeLrgjvxXzjiLSqk_nZ_jb2doFKVQd49c4OFSaxAGVHHSN2b_v0aIpEEnTSw_ASUDTXCJIDvcBrTZBOcgM7CGlw5CTCAYhPk3uUgRc5aTFf1y6QtJpdjEg8hO2Ptgj47vDZ0p2UCAApQhgVk_FouaZuEH4pYwtowXfW47SRtAPG9ulFus9LtxnUhPnBQkhTFRiyH9mYF8hsSO-l3lgRAEyH-FfURPqYVp3tzkUjOjsaVJ3QO_-gpwoavslL6YvmNkB2chhmf-6DxxaIQchnPvsvralV6l714tL60T63wgHqNh=w1296-h729-no


a_0GQDpGaVfFTveYoc4eLg4uJCx9QwrJdCFeaKm0ZfwuxnY_Cvqr6NaTauveBhctiVZ2acndlhZJa6I4ADpqd1yqTBHOeA_7tpvMQ0MNOheT22j6Pf7vPtJ9UCRkLQf0bng5n6MQnvu3d3w4h8jILwgsJovKQ-XqbTh0fN0YbtM97_sf5S8kcWT-NmlRJRGMT9_m5cwWHTKQVUG8awd3R84bPTcq35mPndBlyE_fAB0YmfOZDLQ67tHhrBvyJ4wOX3G-k8pwCjviGBUALLIvc8C2OJ6sZUtxAwPWMzlwlLW5T4URarKaC9dn1IBbFBYtj1mwzsuNNb7e9lmyZ12xw9rR99lWvhIYFKeBSRFuxRdTvdeA4LrOIzx1cDDAzJwmulRRay8-0UGX96kx0qRk6Og1t5z5gPVffjCSVnbxv_vM_OUAps8N97HFkxbmR0vo28eweOANBfAWz6OJ3Z0pTs9IffPCum6eqlWIjbD5H8vhvlqhdMjnZle8faComRxk162iOpvAg7vEEDXcqk9D_RzWnNr8ozyHLEH0JDVl7_h03KROwYj0f1mBEwQtGOhNJdaSL8arJeImDXfx3b2ij37l68CE1YHertfUrwl8seW-6bNK=w1296-h729-no


Milling always leaves a pattern, this is flat to the touch, you really cannot feel the pattern.

DG37YZJ0oyf5PR7USGlMzOsK2CntTio18F7BH5bplDbnEfmLW6jmteu9cVM02aI76l65-EV4IkxnrkGUwqniZOYPznwdXE3kMSLl06muJ264O0v5bdM6If8YkkL0I6gDLwsSoJDAn7-cy1giy1gCUTHGGoAJ_tZHx9fStdLesDwGxekDInQLMr6VHYbB-MbBfxSHjCzQ5WQ9ha2DmE3Gvm2Yxb9owQWd4p-tRmFhZ_V_LsZDSLOxlXw7nRnWHE-GDS8fNOQPA_tt1b0cnTmucYivr2RGr7lrHttccuAFyHkVvd86bFD2VOvN-FgyW7tAvXAPhIQ2HHGiCIspDoaBWiJKOVJsuJV6anP2_cfw-5uW9wCYsSJV29zBrbcttv08GeIqW8mZeDgaKa7Q_XDA1-is97VEU37-p2ADRc8dwoXKi_r7V67p7isV-GAl68LNGhtLQUm28WTmeg2P2_XnprvISY-bAlORYK-pvDkwU209mHDTix8P6yvwVNH7dB2UGO3TEZA4xUgqoHDbxM2OcgqT4Wwb-we2gJGF31tUXJEsSk8w2CVctSViecODSdv5iugga-KIVNCq8Z49eVjAlgF6qOxSJ5qbHj2PNpoiyuYusAta=w1296-h729-no


Some hand filing to remove the pattern.

s3L0-zztbtqC0sDTF1VOO94dzgELGkioAW1dypmB3-Q4uQqZHUsOP6CbAVzLJ6X6Rtqzwnizqq1UjxmPz6klDaJuFGK12ULsPDU1FFgwgkaj8hh0zAHOgOqdyfi_xU6atHeZ1P_Y3yEMGW6KVI4gatyWnxAARerTExNSkdqYzCQDzoalMD5jkTzmed3-7Jh2lzlUnsiLZXDHCkjQBQKcMvMn4HNLsR0RXY3gvpaKTFeja2LgjP2vgj2rzPAs37VaZ1urvGYHjD92RqLtGyeurSWLU3BcOJMU7UeuX4PHIdQJPWrX69ylB1ooyP4x9hpZDiOPE2XejoTA_txjR3TbCH95gpVcxdM42PRIzAYW83xN-Fh-GIkef5pShF87JSoH9mzNMN6SLJYrCXelgwTmaFLNOi3Uyy3KfzNcxtsG4Q0XkUxPBZFDvc4xZ1BQRHZ7sNgSUTjxXasUm4QRHFai4sFNXYJm6dG3z4RjK79aIrPWS5_dSE_-k4SrpHnBuUSqpgSqW2rrvPFMA31raovPAbB_cSezlOIqNs0aw10PyccVnRJTBIxtPSYQDGHoqWceuhXS_x9Yl2ejLQm9tg5VDHBdbbDC0dfr82JoB5ZD_rlwakdA=w1296-h729-no


But I wasn't happy with just the filing so I hit it will the sander and a bit of polish. This will be a user vise in the end but it will start out pretty.

Ts_W_NcrgvoL3fm06QWMs6r8DLJa2_rcjyHL8BALUpNh3Zjp6dZNLRzM4R-kG1RDZmg1PAQiabbxOBmrk1VQxm6yXaIAZX8T2A5GoAPXPaXq7y2F24lfHeeObCplO4Q5zwdkbFqhZ9JUlQic8_lfUFORnlCD1LmNFV1WCCetw29KZTHr7742z90gYSK0uE8SiB2ywsSgMS4NuzIYNIpIM8qUuLF7CCmKsRmBH5DPoUBRJyOU0RDLcwqAV_2GitFKb8DJWZVbONITc168ZyDXjEcd0EOdd9Fxrl2WTNzyEtedl46BSJL-oh-GB1MaLeDBvehtNmdEoCAJMxGSBi5w3acfuRaaWxVF4joHzJ4_0Qzf7AMv1fPGQSA-TL30z8dTvao22SWknlbKyFKGvp3n8K-Y_qBeSoLBcaku9vVMqppg5QsnShMQIcBks0DyCic861DeydshNmHEP8v68ETj66Ejw2lG65jQgSAO8NuuZQH2W6BrIJo0ogguxJ0yXMKzN9bOvhPI4JHGvgMbrzKAskrFgJq6oX2ZKxQapZkdTIoa9hRW6z63ZHX1JO6cWSFyvKAiIiChXEOCUQJVgIURo-bDZ32aI4Cb3HbC9KHlx5vq4_KW=w1296-h729-no


MdVlkUWFiNfLwUef-9MK1W8PT86cruB6n8tc3xreI5BUyAjObhog5-O2VPpdi_AcUYCHLlZTi93618_F7lzdDQCWis_MHo6f0DR_ALZKivbgz385cdrWo8Rff8WwoapSfvBcKTdCHiC-j_HLEl8hPerdd7QClfECbwwuFFPd9WJ4Mz5_iyLtO5gynEAhsvQLOReXlog6-I2R2l-FbvkIZKh-kC0I_0GAmVNSBvr2798y_JRFKXOOeg4PXqTr69dERc-HMMlwlMIDO6LS-amxGVzFOuyAWyr3aITgwBRVziYGjS_7M21V_UacncY1ezb7qzfBFEb-dTnoE69GM9iOQdVaocvVGsV8brwLWuPLN-z-k0qd9Bsx_JXgv0xaiyEuDAs1l3NzPjBZ2j8EfwFeznXVW8LN49lBf417uCaoXxGPv38ASIzyOUNB97Hg8KHZ6QSFHOUtDjVRQu87YnYPsT2wyagl_oQuUkli554GyAU3Y6buZ_yptmdh8SpyPwzHgauEYVBgdHFjL1vLsC7xdPjdrPmjTQJLs5gIKSR5RGmE1yx2lWdteOcdminB5Q2TAEBE7_E0hm5KhMz7gJAmX4grAdYIFo11W50R6O8AqrE0DXbu=w1296-h729-no
 

G20-Budo

Well-known member
Joined
May 31, 2013
Messages
987
Location
Chandler, AZ
Nice work Schor! It looks great. I realize it will get dinged up here and there, but when you take the "finished" pic's, it will be looking great.
 

Outlawmws

Well-known member
Joined
Aug 9, 2011
Messages
39,503
Location
The Badlands
I did not like the shape of the anvil on my bullet so I put it on the milling machine to clean it up.


But I wasn't happy with just the filing so I hit it will the sander and a bit of polish. This will be a user vise in the end but it will start out pretty.


MdVlkUWFiNfLwUef-9MK1W8PT86cruB6n8tc3xreI5BUyAjObhog5-O2VPpdi_AcUYCHLlZTi93618_F7lzdDQCWis_MHo6f0DR_ALZKivbgz385cdrWo8Rff8WwoapSfvBcKTdCHiC-j_HLEl8hPerdd7QClfECbwwuFFPd9WJ4Mz5_iyLtO5gynEAhsvQLOReXlog6-I2R2l-FbvkIZKh-kC0I_0GAmVNSBvr2798y_JRFKXOOeg4PXqTr69dERc-HMMlwlMIDO6LS-amxGVzFOuyAWyr3aITgwBRVziYGjS_7M21V_UacncY1ezb7qzfBFEb-dTnoE69GM9iOQdVaocvVGsV8brwLWuPLN-z-k0qd9Bsx_JXgv0xaiyEuDAs1l3NzPjBZ2j8EfwFeznXVW8LN49lBf417uCaoXxGPv38ASIzyOUNB97Hg8KHZ6QSFHOUtDjVRQu87YnYPsT2wyagl_oQuUkli554GyAU3Y6buZ_yptmdh8SpyPwzHgauEYVBgdHFjL1vLsC7xdPjdrPmjTQJLs5gIKSR5RGmE1yx2lWdteOcdminB5Q2TAEBE7_E0hm5KhMz7gJAmX4grAdYIFo11W50R6O8AqrE0DXbu=w1296-h729-no

Hmmm, makes me think about adding a hardened tool steel plate to one of those "anvils" so it won't ding up so badly.. maybe silver solder on? (Thinking oven or lower temp on a furnace and slow cooling...)

Nice work!
 
OP
D

drivesitfar

Well-known member
Joined
Oct 23, 2013
Messages
36,177
Location
Pacific Northwest
Shift: thanks for the shout out and i agree with the support that is sometimes needed and usually given when we are at a crossroads.

Schor: thanks for bringing the Wilton's work over here from your little thread you have started on it's spiffing up. great work so far.

DoorFX: i agree with 454 & Outlaw that your big vise with the #6 on it is from Asia someplace and not a very high quality vise. it also doesn't weigh very much like Outlaw mentioned for a vise of it's size hence us not liking the quality much. they also come with big # 5's, 4's and i think #3's on them and usually no brand name. if it's cheap it might be a good welding vise if you need one, but not an expensive or very durable vise.
 

schor

Well-known member
Joined
Apr 16, 2013
Messages
531
Location
Ajax, Ontario
Hmmm, makes me think about adding a hardened tool steel plate to one of those "anvils" so it won't ding up so badly.. maybe silver solder on? (Thinking oven or lower temp on a furnace and slow cooling...)

Nice work!

The plate sounds like a great idea Outlaw, doesn't have to be very thick either since the real anvil will support any blows.
 

slowone

New member
Joined
Sep 9, 2016
Messages
4
Slow: not sure if you might know a machinist, but if you do maybe you can take the one jaw you do own and have him duplicate it for you. just a thought. i'm glad i started this thread so guys and gals like you have a good place to look when you want to save an old vise like you did. that said this thread wouldn't be anything without all the other members so i'm going to thank them to with you for all the effort and time and skills they've shared here.

WELL DONE EVERYONE!!![/QUOTE]

Thanks for the tip. I'll do some research and see if there's a machinist around my area. I am looking to spend the least amount of money possible for the replacement.

I never thought about a restoration until I saw the possibilities that are available on this thread. Knowing that a restored old vise can be 10x better than any new vise currently on the market, it was only natural to want a vintage.

Great job. What paint did you use?

I used Rust-o-leum Hammered Gray
 

IHmachinery

Well-known member
Joined
Apr 28, 2015
Messages
134
Location
Pacific Northwest, Canada
IH: That handle you and Vintage Nut made in your shop for that huge blacksmith vise was amazing. what's more amazing is all the work VN (and maybe you) did to repair that old vise and bring it back to maybe better than new working condition. is that braze welds on the end of each of the jaws.


thanks for posting


Slow: not sure if you might know a machinist, but if you do maybe you can take the one jaw you do own and have him duplicate it for you. just a thought. i'm glad i started this thread so guys and gals like you have a good place to look when you want to save an old vise like you did. that said this thread wouldn't be anything without all the other members so i'm going to thank them to with you for all the effort and time and skills they've shared here.


WELL DONE EVERYONE!!!


Thanks drives. VN did all the vise restoration, I just helped with the handle. What you see on the end of the jaws is just sunlight - the vise is mostly in shadow. But there was a rough-cut half-circle (about 1" dia.) in each jaw that he welded up and ground smooth. I think someone did this at some point to hold round parts vertically.


Sent from my iPad using Tapatalk
 

IHmachinery

Well-known member
Joined
Apr 28, 2015
Messages
134
Location
Pacific Northwest, Canada
That's awesome! How did you determine the shape and size of the groove between the parts, how much the shaft should protrude before peening, etc.? Experience or is there some sort of formula or rule of thumb?


Thanks


AM : I cut about a 1/8"-3/16" chamfer in the end of the knob and turned the stub on the end of the shaft about the same amount past flush. Basically by eye, trying to figure how much material would be peened into the chamfer. It worked out pretty good. My son did a nice job of peening so it looked quite nice with just a bit of wire wheel polishing (kind of a vintage look). But you could always grind/file/sand to shape of you wanted, or if you left a bit too much sticking out.

This is the way a lot of vise handles were originally made, and it is an extremely strong attachement.


Sent from my iPad using Tapatalk
 
Last edited:
OP
D

drivesitfar

Well-known member
Joined
Oct 23, 2013
Messages
36,177
Location
Pacific Northwest
IH: great job on the handle and the write up too. :thumbup:

also thanks for the 411 on the big blacksmith vise that your son Vintage Nut spiffed up. looks like it's ready to work and with all the stuff you and he do i bet it's already done a fair amount.

Slow: best of luck on finding your Reed 2C pipe jaw, but in the meantime your vise should work great without is as a regular vise.

i know you ended up WAYYY better off in the long run by buying and spiffing up an old vise rather than opting for one of those new throw away type vises that seem to be in the same price range.

educate your friends and also tell them how to use a vise cause many don't that is for certain.

ALL: case in point my nephew who is a 27 year old contractor and can build almost anything came over to help me with some siding and i had a big vise sitting on the floor ready to have a crate made for it to be shipped out to another member. he was moving my wheelbarrow and almost ran into the vise instead of moving an almost empty box. Luckily i stopped him before he did that and his comment was that the wheelbarrow wouldn't hurt that big vise. OMG even if it wouldn't have a little respect for your tools. he also learned most of this from his dad who will say that he really needs a new saw and then when he finally gets the money to buy it he'll leave it sitting in the back of his pickup in the rain getting rusty and possibly stolen when he stops in a store for something. GEESH!!

PLEASE RESPECT and take care of your tools and even if you don't want to collect them use them as they were meant to be used and most of the old ones will last almost forever.
 

Cope

Well-known member
Joined
Mar 8, 2013
Messages
2,067
Location
Houston, TX
Slow: not sure if you might know a machinist, but if you do maybe you can take the one jaw you do own and have him duplicate it for you. just a thought. i'm glad i started this thread so guys and gals like you have a good place to look when you want to save an old vise like you did. that said this thread wouldn't be anything without all the other members so i'm going to thank them to with you for all the effort and time and skills they've shared here.

WELL DONE EVERYONE!!!

Thanks for the tip. I'll do some research and see if there's a machinist around my area. I am looking to spend the least amount of money possible for the replacement.

I never thought about a restoration until I saw the possibilities that are available on this thread. Knowing that a restored old vise can be 10x better than any new vise currently on the market, it was only natural to want a vintage.


I used Rust-o-leum Hammered Gray[/QUOTE]
Thanks!
 

KMScott

Well-known member
Joined
Feb 14, 2012
Messages
4,655
Location
Daufuskie Island, South Carolina
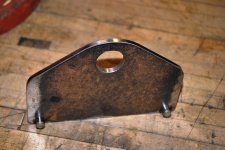
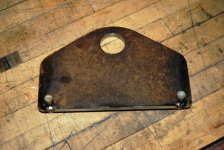
Here is a 1/4 inch plate I made to move around heavy vises. I used two 3/8 x 3/4 dowels for the pins, reamed and pressed in. I added a small tack weld underneath to keep them in place. Clamp down on the plate and lift. Makes muscling these guys around easier. The plate is 6" wide.
 

Attachments

  • Heavy Vise Lift (4).jpg
    Heavy Vise Lift (4).jpg
    150.5 KB · Views: 56
  • Heavy Vise Lift (3).jpg
    Heavy Vise Lift (3).jpg
    137.4 KB · Views: 62
  • Heavy Vise Lift (2).jpg
    Heavy Vise Lift (2).jpg
    146.6 KB · Views: 66
  • Heavy Vise Lift (1).jpg
    Heavy Vise Lift (1).jpg
    146.1 KB · Views: 75
  • Heavy Vise Lift (5).jpg
    Heavy Vise Lift (5).jpg
    142.1 KB · Views: 56
To avoid these ads, REGISTER NOW!
Top Bottom