To avoid these ads, REGISTER NOW!

Jim's Interim Shop of Horrors

OP
J

jimgood

Well-known member
Joined
Aug 4, 2014
Messages
2,394
Location
Marshall, VA
Thanks for the info, I know I have some bad habits from driving mostly very forgiving cars in the past. If I decide to do more track or autocross driving I'll want to take some driving classes and/or race schools. For some reason the clip above won't play for me.
JB
It's all good. Most times, even at an autocross, you can even find a more experienced driver to ride with you.

Not sure why the clip won't play. Try this link (headphone warning! I haven't figured out how to lower the volume the produced clips yet):
 
Last edited:
To avoid these ads, REGISTER NOW!

jbmatth

Well-known member
Joined
Jun 3, 2013
Messages
5,681
Location
Northern Ok.
For whatever reason it says the video is restricted and to try signing in with my google apps account. I'm signed in to youtube so no idea why just that one won't play. I did get it to work on my phone though. That would be a little hair raising, but glad it all worked out for you.
JB
 
OP
J

jimgood

Well-known member
Joined
Aug 4, 2014
Messages
2,394
Location
Marshall, VA
For whatever reason it says the video is restricted and to try signing in with my google apps account. I'm signed in to youtube so no idea why just that one won't play. I did get it to work on my phone though. That would be a little hair raising, but glad it all worked out for you.
JB
We'll have to chalk it up to the wonders of technology. :rolleyes:

It's really just an example of being quick with your hands. People harp all the time on being smooth. Yeah. Do that, but don't be slow.
 

jp828108

Well-known member
Joined
Jun 28, 2011
Messages
484
Location
Ohio
Awesome thread. I hadn't caught it until today. So enjoyed all the progress on the garage, and the transition into racing. It is awesome that you are pursuing a dream. I really enjoyed your videos. I have always been interested in trying autocross. Just never put the funds into a car, and never been willing to use my Daily Driver for it.
 
OP
J

jimgood

Well-known member
Joined
Aug 4, 2014
Messages
2,394
Location
Marshall, VA
Awesome thread. I hadn't caught it until today. So enjoyed all the progress on the garage, and the transition into racing. It is awesome that you are pursuing a dream. I really enjoyed your videos. I have always been interested in trying autocross. Just never put the funds into a car, and never been willing to use my Daily Driver for it.
Don't be afraid to autocross your daily driver. Autocross isn't as taxing on tires and brakes as track days. Just go do it. The learning you gain is well worth it.

Thanks for the compliments.
 
OP
J

jimgood

Well-known member
Joined
Aug 4, 2014
Messages
2,394
Location
Marshall, VA
I started my project car and took it out of the garage for the first time since last September. Went for a quick shake down drive.

Proof...
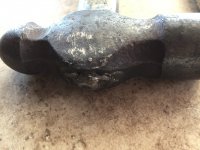
View media item 73020
View media item 73025
View media item 73019
I've been busy stripping the interior and the wiring harness. This is a 1998 BMW 323is, so it's an OBDII car. The wiring is complicated. I removed all but a handful of the wires necessary to start and run the car.

The BMW ECM has security programming built into it, like a lot of cars these days. So it requires a signal transmitted from the key to a security module which is then received by the ECM. If the key code doesn't match the code stored in the ECM, it won't enable the starter circuit, the fuel pump or the injectors. The starter circuit can be by passed, which I did. But the rest requires reprogramming to remove the security system.

I tried ordering just a replacement chip which required unsoldering the old chip and soldering in the new one. Like an idiot, I also continued removing wiring like a fiend. When I finally got the wiring stripped down to where I thought it should last winter, I tried starting the car. It would crank but it would not fire up. I had no way of knowing if it was my wiring or the soldering job on the chip. I gave up for a while.

A couple weeks ago, I started trying to diagnose the no-start issue. I had a feeling that it was the computer so last Monday I ordered a new ECM that had the security removed. It was only $125.

While I waited, I tried a few diagnostic things but my skills with a multi-meter are lacking. I did try to connect a code reader but it wasn't communicating with the ECM. That was another clue. I verified that my fuel pump was working by jumping the relay. But it seemed like the computer was not sending the signal to trigger the relay.

Friday I got the new ECM. I plugged it in, turned the key and she fired right up!

Today, I buttoned up the wiring, bolted the steering column back in place, installed the seat and took her for a drive. I don't have plates so I just ran a quarter mile up the road; back and forth a few times just make sure she got a chance to get good and warmed up.
:3gears:

None of the gauges are working so I have some work to do there. The wiring for the gauges is a little more difficult to trace as you have to jump back and forth between the pinout descriptions and the wiring diagrams.

Of the exterior lights, only the brake lights are wired. I decided to wait on other lights until I got the important stuff working.

So, I still have a lot of wiring work to do. Then I can start on the roll cage.
 
Last edited:
OP
J

jimgood

Well-known member
Joined
Aug 4, 2014
Messages
2,394
Location
Marshall, VA
Glad you made some progress Jim!


Sent from my iPhone using Tapatalk

Great to hear it is running now, and that is a serious seat you have there.
JB
Thank, guys.

Yeah, the seat is a Kirkey full containment road race seat. I'm not sure if I'll keep it or not. The left head restraint reduces the window exit area. If I need to GTFO and the door is stuck shut, I'm not sure there's room for my fat head, in the ginormous helmet, with a HANS attached, to squirm through there. I may have to lean the seat back and get a deeeep dish steering wheel.
 
OP
J

jimgood

Well-known member
Joined
Aug 4, 2014
Messages
2,394
Location
Marshall, VA
So I have this to look forward to this weekend. :mad: Have I ever told you how much I hate running the chainsaw? I can't tell what caused this tree to snap off 9' up. It happened yesterday and there was no wind at all. Thank God my wife wasn't riding a horse when this fell. I and the dogs heard it in the house but I just thought it was gun shots or traffic noise and wrote it off. Noticed it about an hour later when I went down the drive way to walk the dogs. The trunk must have fallen on a fence post because the post in the last pic was driven into the ground about 18".

View media item 73182
View media item 73185
View media item 73183
View media item 73184
 
OP
J

jimgood

Well-known member
Joined
Aug 4, 2014
Messages
2,394
Location
Marshall, VA
I'm still working on that cherry tree in the previous post. Only the trunk is left. I'm waiting on a guy to come cut it up for fire wood.

I haven't had much time in the shop but yesterday I was rummaging around in the toolbox on my tractor and found this broken hammer. I don't remember when I broke it but obviously I just threw it in the toolbox and forgot about it. So I decided to fix it. I didn't feel like tracking down an replacement wood handle so I found a piece of 3/4" tubing. I hammered one end down to an oval shape. The oval was too long to fit in the hammer head so I used cutoff wheel in the angle grinder to split it. Then hammered the two sides closer together. Had to do that a couple of times to get the right fit. Then I bashed the head onto the tube until the end of the tube was flush with the top of the head. I put a weld bead around the outside of the tube then filled in the hole with weld metal. I welded the tube under the head as well. I have some grip tape coming that I'll wrap around the handle

attachment.php


attachment.php
 

Attachments

  • IMG_2867.JPG
    IMG_2867.JPG
    112.6 KB · Views: 914
  • IMG_2866.jpg
    IMG_2866.jpg
    54.9 KB · Views: 912
OP
J

jimgood

Well-known member
Joined
Aug 4, 2014
Messages
2,394
Location
Marshall, VA
Got some grip tape on the hammer and it's back home in the tractor toolbox.

I'm on vacation through the end of the year as of yesterday. Have a long list of things to do but the priorities are:

  1. Replace rotten fence boards and posts in the west paddock.
  2. Trim tree limbs hanging down in the northwest paddock and throw them on the burn pile
  3. Clear space for steel coming for the welding table as some of it is too short and heavy for my wall unit. Figure out what to do with my table saw because it takes up too much space and I'll need that for the welding table.
  4. Pick up steel from BMG in Manasshole for the welding table build.
  5. Start the welding table build :rocker:
  6. Make an extending wall hanger thing for my drill bit box.

Got three posts pulled and two replaced this morning. One more to drill and pack. I forgot how hard it is to jump into physical labor after being a desk jockey for so long. It's only 11 am and I'm already whooped. And it's not doing my screwed up shoulder any favors.

I have not used my auger in years. I had loaned it to a neighbor a few years ago and got it back earlier this year. I had to do some work on it before mounting it on the tractor. :mad:

After I began drilling the first post hole, I hit some rocks and had to go get the breaker bar and post hole digger. One of the blades was curled on the post hole digger. Banged that back into shape then, just for giggles, I heated the ends and quenched them. So, they'll either resist bending now or they'll break off. :dunno:

Taking a break for lunch then I have to get back to it. My goal is to finish the fencing by the end of the day. Tomorrow, I'll try to get the limbs trimmed. Another killer for my shoulder. The pole saw just whoops my ***.

Edit: Forgot to mention...20 oak fence boards and 3 posts came to $244! :scared: I had no idea they were that expensive!
 
Last edited:

jbmatth

Well-known member
Joined
Jun 3, 2013
Messages
5,681
Location
Northern Ok.
Sounds like you are making a good amount of progress, hope to see how everything falls out when when you get a chance to post photos of it.
JB
 
OP
J

jimgood

Well-known member
Joined
Aug 4, 2014
Messages
2,394
Location
Marshall, VA
Thanks, JB.

Didn't have time to take pics of the fencing and tree trimming. But I did get it done. I couldn't tune my pole saw so it would not hold an idle at all. The idle screws are some kind of male hex screw and would require a special tool in order to adjust them it looks like. Really pissed about that. This is a Stihl saw with a replacement carb that I got back in October (the carb, not the saw). I had to use a squirt of starter fluid just to start the saw and then had to keep the throttle wide open in order to use it. Toward the end of the row of trees it started to bog down really bad. I was barely able to make the last cut. Done enough though.

Played around in the shop yesterday afternoon and today. Threw together a floor rack to hold my loose pieces of roll bar tubing. Just made from scraps I had on hand.

View media item 78590
Did a couple of things I've always wanted to try. First, I've wanted to try using a piece of pipe to for a radius for the end of a square tube like this. Just standard plumbing pipe I bought for pipe clamps. I cut off a 1" piece and split it in half with a cutting disc in the angle grinder. Then used the angle grinder and files to shape the end of the sq. tube. Mig welded the piece of pipe to the end of the tube and did a lot of grinding and filing to get to this point. I think it came out really nice.

View media item 78592
Then, I've always wanted to get a bushing to fit in a hole precisely. Can't really do that with drill bits. I've only recently been aware of reamers so I bought a 1/2". Drilled this hole slightly undersize and chucked the reamer in my drill press. Not ideal as my DP has a lot of run out. I had to let the work piece move around with the reamer while it did its thing. :eyecrazy: But it came out perfect; no slop whatsoever.

View media item 78591
 
OP
J

jimgood

Well-known member
Joined
Aug 4, 2014
Messages
2,394
Location
Marshall, VA
This "thing" in my previous post is starting to take shape. I've been dabbling with it on and off for a few days now. This will be a wall mounted support to hold my drill bit box; the goal being to mount it behind my drill presses and to be able to pull it forward so I can see what I'm grabbing.

The main pivot arm needs to be attached to the wall. I found that 1.5" X .12" wall square tube fits over the 1" square tube perfectly so I decided to make the mount out of that.

First cut it up into something resembling a bracket:

View media item 78766
View media item 78765

After a lot of grinding and filing, I have this:

View media item 78764
Fit looks good with the arm in this orientation. So, now to drill some holes so the bushing can pass through. Seems easy enough.

View media item 78763
Um...no. That was a lot of work only to have the holes misaligned!

View media item 78762
Gave up on using the 1.5" tube and made the bracket using 1/8" plate. Still a little cattywompus but workable. :headscrat

View media item 78761
Made the upper pivot arm and here's what we have so far. Next will be the plate that supports the drill bit box.

View media item 78760
 
OP
J

jimgood

Well-known member
Joined
Aug 4, 2014
Messages
2,394
Location
Marshall, VA
After adding the support plate for the drill box, the assembly is pretty heavy. I decided that the wall bracket was too wimpy. I added some vertical plates and some gussets to ensure that it can hold the weight of the drill box.

The plate will get attached to the bottom of the drill box. I drilled a 1/2" hole in the center of the plate. I ground down the head of a 1/4" bolt and welded it in the hole and ground it flush. I welded a bushing into the end of the arm so the bolt goes into the bushing and the plate rides on the bronze bushing.
That way it can be removed easily, though having the plate with the bolt sticking out of the bottom won't make it easy to set down anywhere.

So, only a few things left to do.
  1. Drill the holes in the block wall where this is going to be mounted behind the drill presses.
  2. Drill for the screws to mount the plate to the drill box.
  3. Paint it.
  4. Mount the plate to the drill box.
  5. Mount the whole mess on the wall.

View media item 78819
 
OP
J

jimgood

Well-known member
Joined
Aug 4, 2014
Messages
2,394
Location
Marshall, VA
Got the holes drilled in the wall and the Tapcon screws stuck in there so I don't lose them. I only have these four on hand. I also drilled the support plate and the drill box.

View media item 78839
It's too damn cold outside to paint so I set all the pieces on the heater to warm them up. Then took them outside to paint them and quickly brought them back in here to hang above the heater. One more coat and they should be good to go. All that remains after they dry is to assemble it and mount it on the wall.

View media item 78838
Such a silly project. :willy_nil
 
To avoid these ads, REGISTER NOW!
OP
J

jimgood

Well-known member
Joined
Aug 4, 2014
Messages
2,394
Location
Marshall, VA
OP
J

jimgood

Well-known member
Joined
Aug 4, 2014
Messages
2,394
Location
Marshall, VA
Thanks so much, Shorty!

I'm still ruminating on how I want to design my welding bench so I decided on another simple project I had to have. A few months ago I bought a Mitutoyo dial indicator. It didn't come with a decent box so I'm making one that might as well be a safe.

The thinnest steel I have is 16 gauge so this is going to be one stout little box. I started with a CAD template to make sure I sized it right.

View media item 79243
Cut some foam I had already on hand that was packing from something. It was about an inch thick and I only needed about 1.5" so I had to split one piece. Took a lot of patience and care with the sharp knife. I eventually glued the two layers together with Shoe Goo (we'll see how that works out).

View media item 79244
Quick test fit. Looks good enough.

View media item 79245
Marked up the sheet stock and cut it with an angle grinder with a cutting disc. I wish I had a band saw. :mad:

View media item 79246
The slats I'll be using for my welding bench top came in handy for bending duty. They're 1" x 4" x 36". I started clamping on the inside and bending the sides down. That works up until the final side. I did all the bending with a ball peen hammer.

View media item 79247
To do the last side, the side itself has to be clamped in place and the bottom bent. And that changes where the bend occurs. Next time I'll just clamp the sides and bend the bottom. That way they're all consistent and I don't have to try to figure out where to clamp relative to the bend line.

View media item 79248
I welded the corners up. I tried to run a continuous bead and it burned through about 2/3 of the way up the corner. Instead, I used successive tacks, letting each one cool to the point it wasn't glowing. Here it is after grinding the corners smooth and testing fitting everything. Tomorrow I'll make a lid.

View media item 79250
 
OP
J

jimgood

Well-known member
Joined
Aug 4, 2014
Messages
2,394
Location
Marshall, VA
I ran into a little trouble with the box. It wasn't deep enough so I decided rather than start over, I'd just split it in half, top and bottom, and graft in a quarter inch strip of metal.

Nice, huh? :lol_hitti

View media item 79481
So, I decided to start over. Yep. I junked the one above and cut up a new piece of sheet. It's about 1/4" deeper and longer. Here it is right after I welded it up.

View media item 79479
Penetration is pretty good. It would probably be perfect if I could get my travel speed right. But this turned out much better than the first one where I had globs of filler pushing through into the insides of the corners. All the corners looked pretty much like this.

View media item 79480
After a little grinding and filing, here's the gauge trying out its new home.

View media item 79477
Yeah. No comparison.

View media item 79478
Had to make a new lid too. I'm not sure what I'm going to do about the bronze rod. I'm tempted to just cut it to length, drill a hole in each end and put a pins in the holes.

View media item 79476
View media item 79475
 

jbmatth

Well-known member
Joined
Jun 3, 2013
Messages
5,681
Location
Northern Ok.
That is a pretty cool project, and the new box turned out much better than the old one for certain. Well done,
JB
 
OP
J

jimgood

Well-known member
Joined
Aug 4, 2014
Messages
2,394
Location
Marshall, VA
That is a pretty cool project, and the new box turned out much better than the old one for certain. Well done,
JB
Thanks!

Brass rod = self lubricating hinge! Looks awesome.

CT
Thanks! That's what I was going for.

This morning I was able to cut a circumferential groove in the ends of the rod with a hack saw. I had some tiny C-clips on hand and they work pretty well. Not a perfect fit but good enough. I'll post up a pic in a bit.
 
OP
J

jimgood

Well-known member
Joined
Aug 4, 2014
Messages
2,394
Location
Marshall, VA
Here's a pic of the C-clip applied. My first attempt at cutting the groove was by chucking the bronze rod in the drill press and holding the hacksaw to it. But it was hard to keep the saw exactly where I wanted it. I ended up cutting that part off and just doing it by hand with the rod in a vice. I just did the best I could. Looks pretty good and it works so that's about all we need, right? That and a little paint. ;)

View media item 79492
 
OP
J

jimgood

Well-known member
Joined
Aug 4, 2014
Messages
2,394
Location
Marshall, VA
The floor under my drill presses is very unlevel. It's about a 1/4" different left to right and almost an inch back to front. So I made this platform with leveling feet to mount them on.

Here it is leaning against the wall with the base plate for the big DP mounted on it.

View media item 79666
Here's a detail of the "leveling feet". I was going to buy some real ones but TS doesn't carry any so I made do with 3/8" carriage bolts and coupling nuts. Yeah, the miter cuts on the angle are mismatched. I decided to just go with it. :sad:

View media item 79665
I leveled it up in both directions.

View media item 79667View media item 79668
Everything back in place. I plan on putting some anchors for the legs on stand for the little DP another day.

View media item 79669
 
OP
J

jimgood

Well-known member
Joined
Aug 4, 2014
Messages
2,394
Location
Marshall, VA
Got sidelined from my welding table build. I want to drill the slats on the DP but I don't have anything to support them (and I'm not buying or renting a goddamn mag drill!!). So I decided to build an adjustable support. I had some 1.25" x .12" wall square tube and, with a little massaging, a 1" tube will fit inside it. So I had everything I needed to do this on hand.

All I was able to finish today was the base. I designed it triangular so I don't have to be concerned with uneven floors (I'll be adding feet to it at the heel and toes). Fully extended, it will be almost 60" high.

View media item 80058
This is my first attempt at hand screws. They work great! In fact, I didn't really need two as just one holds the inner tube in place. The slats this will be supporting during drilling weigh well over 40 lbs so having two might be a good idea. Not the prettiest welds.

View media item 80059
For the top, I'm thinking something like the next pic. I want to be able to adjust it to keep it level or even with whatever it's supporting. I'm not sure about the geometry of this but that diagonal brace is intended to have set screws at each end. The idea is that when the head is tilted, the brace will slide behind the bolt in the vertical strut. I don't know if this can work or not. I'll work it out when I can get back into the shop. I was hoping that if the top can pivot then the slotted brace doesn't have to be curved to match the radius as long as both ends are the same distance from the pivot.

View media item 80060
 

larry4406

Well-known member
Joined
Jan 27, 2006
Messages
18,999
Location
Northern Virginia
Jim - lots of neat stuff in here! Your making more headway than I!

I really like the articulated arm you built to hold your drill bits.

I'm close to you in Warrenton.
 
OP
J

jimgood

Well-known member
Joined
Aug 4, 2014
Messages
2,394
Location
Marshall, VA
I took another look at my design for the top of the stand in post #314. I just realized that it makes it impossible to collapse the stand all the way down. It's not a big deal but I'd like as much range as I can get.

I have a couple of options. I can use the central pivot bolt to do the holding and eliminate the brace altogether. That's going to require a good deal of torque if there's a lot of weight on one end of the support, so a thumb screw may not work. The other option is to move the bolts for the brace closer to the pivot so it will be able to collapse further. Even with the latter, there's a clearance issue where the brace would pass by the plates for the pivot. So I'm limited in how close the bottom bolt can be.
 
OP
J

jimgood

Well-known member
Joined
Aug 4, 2014
Messages
2,394
Location
Marshall, VA
Yeah...I nixed the brace idea. It's done enough to move ahead. I love the thumb screw idea but it was just not going to work for the top support. It requires quite a lot of torque.

So here it is supporting one of the 1 x 4 x 36 slats. I call that a result. :rocker:

View media item 80138
View media item 80136
I'll cut this bolt off as soon as I cut myself on it a couple of times.

View media item 80137
 
OP
J

jimgood

Well-known member
Joined
Aug 4, 2014
Messages
2,394
Location
Marshall, VA
And, of course, I had to paint it. I found a process for rattle can painting outdoors in the winter that might be useful to others. My interest is more in preventing rust than having a perfect, shiny coat of paint so take this for what it's worth.

I have one electric baseboard heater in my workshop that I keep on during the winter to prevent the pipes from freezing. I hang the pieces I'm going to paint above the heater (sometimes even set them on top of the heater if they're small). After they're warm to the touch, I take them outside and hit them with two coats of etching primer followed by two coats of paint. I don't really wait between coats. Then I bring them inside and hang them over the heater again to dry. It definitely goes against the manufacturer's instructions but it seems to work well enough.

View media item 80233
 

xtremek

Well-known member
Joined
Apr 13, 2012
Messages
11,603
Location
St. Johns, Mi
The leveling base for the DP is nice, and the bod is REALLY cool, but I absolutely love the stand. Nice jobs all around. And I so hear you on the band saw.
 
To avoid these ads, REGISTER NOW!
Top Bottom