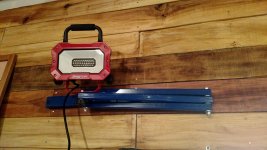
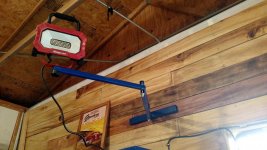
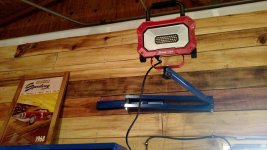
Cut, ground, and welded, bolted together some tube. Painted and installed said tube to make a couple movable mounts for a set of flood lights for my shop wall.
Attached are pics of one. Each arm is 20 inches, allowing 40 inchs of stick out and it will allow 360 dregrees of the light to move. And also the light can be tilted 90 degrees down if need be. Probably Overkill but it will allow me to move the lights as I need them above my bench and front of shop to help avoid Shadows and help put more light where I need it.
I mounted them as high as I could without needing a ladder/stepstool/bucket to move them. I'm 6'2" so its still decently high.
They fold up nice and flat for general everyday use.
I'll only have to really pull them out for more focalized light, when I am rebuilding and engine or such.
Tomorrow I'll drill and tap some holes in the tube to allow me to use small plastic or rubber insulated metal clamps On the tube and down the wall to the electrical socket for the light cord.
If there was ever to much light in a shop, I have never encountered it.