OP
rattle_snake
Well-known member
No can't use regular thermostats with just a on/off style control wire(s). This is one drawback of the ductless mini's, but at least there are other options. I was able to get OEM interface for same price.Interesting. The one in the Amazon link appears to be a WiFi connected IR blaster, for $130... With mixed reviews. At least someone tried to create a product to interface with room ACs and Minis.
Once you get it setup, the scheduler will be awesome.
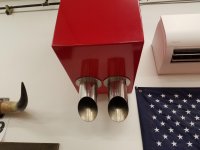
Could you hardwire a scheduling thermostat to the unit instead of the remote only option?
CT
I did finally get the wifi interfaces to connect. It was the exact reason I hate doing IT stuff;
I did the same exact sequence 6 times and the last one worked whereas the previous 5 failed.
Doing the same thing repeatedly and expecting a different outcome is the definition of insanity. Often that is the only path forward as there may not be any options to change.
I'll blame my flaky powerline network. Going to have to upgrade the network in the home and to shop with cat 5 at some point, like next winter, when it's nice up in the attic.
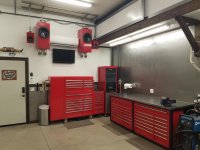
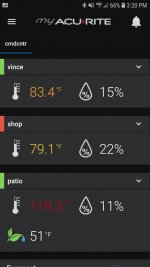
It looks like the mini's I have do not support the power consumption/energy meter feature in the Daikin app. I pulled the sub panel cover and measured current to the A/Cs. In auto mode (at low speed) at 105+ degree outdoor temps, each unit uses just 2.2A@230V. When they are at setpoint and only indoor fan is on, they use 0.6A. For comparison my 22x, double T8 lighting uses 9A@120V. So both A/Cs on low use less power than the lights.
Max power consumption at 18K BTU is spec'd at 6A (1.4kW)
The units cycled on lowest speed on a decently hot day.

I put a temp sensor on the other side of the building near the overhead doors, it read +2 degrees so not to bad in static conditions.
Last edited:


")


![20180724_201623[1].jpg](/forum/data/attachments/658/658155-32b415d77e5c6047c706fd14d350b1d6.jpg)