mikeswrenches
Well-known member
- Joined
- Apr 20, 2015
- Messages
- 170
Wow! Already up to an even 700. .
Don’t I wish! Unfortunately I tend to use random numbers.

Wow! Already up to an even 700. .

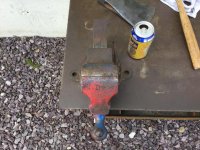

Not having a swivel base for the 4" Wilton, worked up a vise stand.
Repurposed a drill press base. Bought a 2.5" thick wall steel pipe.
Cut out a 3/8 steel mounting plate(welding farmed out).
Base had three tightening points underside of base plate.
Did not like the pipe stability, so drilled/tapped three more towards the top offset from the bottom three.
Vise is at a excellent working height.
Pipe is level and rock solid now.
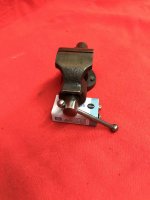
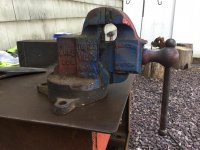
Looks like someone put the screw there to make sure they didn't lose the swivel jaw pin.

Swivel jaw pin? I’m a rookie here. I tried moving that pin on top with Channel Locks but it wouldn’t budge. What is it for? BTW...it’s not obvious to me how to remove/replace the jaws.
The jaws are cast in and not replaceable. The pin on the top behind the rear jaw holds that rear jaw in place to keep the jaws parallel like a regular vise. When you pull that pin, it allows the rear jaw to swivel and you can clamp irregular shaped objects in the vise.
Your pin is just rusted in place like mine was too. Disassemble the swivel base and remove the main nut and you will be able to get a punch through the bottom to punch the pin out from underneath
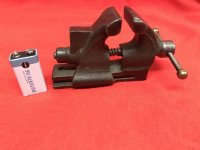
Nice job Burn1,
Really like your round bar jaws.
Well done
Royce
Hi Dave, Thx Man. A project I wanted to build for years.I’m liking the look of your workbench!! Vintage legs with a butcher block top looks nice. Have you posted pics of it anywhere?
Iv been looking for nice smaller swivel base prentiss for over a year now and never seem to find anything remotely close to the right size, good shape, nevermind a good price tag to go along with it... until yesterday! Found a very neglected little prentiss no. 90 with 3 1/4” jaws that is in awesome shape under all the dirt dust and grime. It even has the graffiti like casting on the side I love. Can’t wait to get this one cleaned up
Another one for the spreadsheet.
Prentiss No. 300 Anchorline. The smallest of this series.
1 1/4 inch jaws, 1 inch opening
Weight: 13.5 ozs.


Any info on this Wee one?
Yes it’s purple and sparkly.
My 5yo daughter said she wanted a vise.

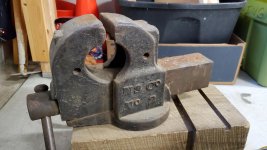
Found in a garage I bought. Old and beat up, but a beast!
Any info on this Wee one?
Yes it’s purple and sparkly.
My 5yo daughter said she wanted a vise.
Looks very similiar to a "Smith Pattern" combination vise, made by National Supply Co. of Toledo OH. Various companies made the "Smith Pattern" vise over the years, including The Oswego Tool Co. The No. 2 weighed about 70 lbs.
Hopefully someone else will chime in.
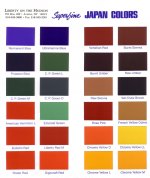
The vise is nice, but the fact that your daughter wanted one is way nicer! The catalog scan is from 1900.


sgtgeo :
Wow!
1. Soak in undiluted simple green for 2 days to loosen up greasy dirt inside and also to make old paint fall off. If you can heat the SG all the better.
2. Move the vise out to your patio or driveway.
3. Using a pressure washer, blast the crud out by holding the wand right up to the hole in the front for a while and then reverse flow by blasting from the back end.
4. Dry thoroughly with compressed air and a heat gun.
Does anybody else use this method?
.
Oh yes, De-greasing: Grez-off - its my new favorite de-greaser. Amazing results!
akasrick,
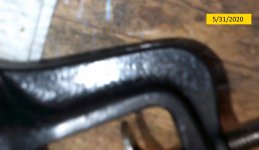
You might want to be careful with taking off the black. From 1911 until about 1950 they were finished in a black & orange enamel.
In 1950 pipe jaws were added and the color changed to a gray & red finish.
In 1964 it was changed to dark blue(a very dark blue, almost black).
Information from Antique & Collectible Stanley Tools by John Walter. Pretty much the Bible on all things Stanley.
akasrick:
With the Simple Green soak, I have found that old factory paint sticks the best. The paint on top of that applied by users over the years was rarely applied in a careful manner and comes off quicker once the part is in the SG bath. You can take advantage of this by checking on progress and stopping the paint removal before it’s ALL gone. Just pull the part out and agitate the surface with an old toothbrush or similiar tool.
Room temperature SG works rather slowly, like days...Hot SG works in a few hours.
If it’s another vise with a thin coat of spray paint, I’ve had good luck with that just wiping with a rough textured rag soaked in Acetone. Work outdoors with that stuff. Health hazards with inhalation and it’s also super flammable.
Methylene Chloride based paint strippers work the fastest but that stuff is off the market except to certain professionals. It is nasty stuff.
akasrick,
I found a No. 763 in my collection, that is the ugly brown color. It is marked 'Victor Jersey" Stanley Rule & Level Company. Thus before the merger in 1920. I had another brown one I sold that also had the S R & L Co. stamp.
In answer to your question, Walter makes no mention of the brown color japanning on any vises. He just notes under finish: Japanned
I’m going to go out on a limb and guess that the color change happened at the same time as the merger. Probably the guys from the Stanley Works asked the guys at Rule & Level why they had their vises painted that 'god awful' brown color, and lacking a good answer, decided to change it. Just a guess.
Good luck on your restoration!
The jaws are cast in and not replaceable. The pin on the top behind the rear jaw holds that rear jaw in place to keep the jaws parallel like a regular vise. When you pull that pin, it allows the rear jaw to swivel and you can clamp irregular shaped objects in the vise.
Your pin is just rusted in place like mine was too. Disassemble the swivel base and remove the main nut and you will be able to get a punch through the bottom to punch the pin out from underneath


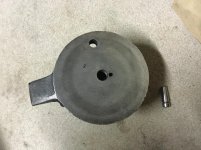
Any tips on getting the rear pins out of a bullet Wilton. I swear there is no holes on the inside of the sleeve to push the pins out. I don’t get it. Any ideas?
Looks very similiar to a "Smith Pattern" combination vise, made by National Supply Co. of Toledo OH. Various companies made the "Smith Pattern" vise over the years, including The Oswego Tool Co. The No. 2 weighed about 70 lbs.
Hopefully someone else will chime in.
Kevin, here’s another one for the spreadsheet.
It is faintly marked on the front jaw;
"Union Vise Co., Boston, Mass, 1 1/2 inch". Although it says 1 1/2 the jaws are closer to 1 5/8 in. It weighs in at 2 lbs. 3 ozs.
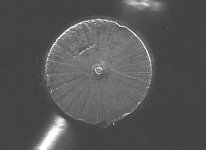
The last picture is intended to show the method of retaining the main shaft.
Union was a short lived company. It was started by Amos H Brainard sometime in 1865, probably to manufacture this style vise. He was issued a patent for it on January 3, 1865, no. 45,693. During the winter of 1870-1871 the company was sold to Quimby Backus of the Backus Vise Co. This company ultimately merged with Millers Falls. Apparently Union at one time made over 40 different types and sizes of vises. In 1871 Union Vise co. Was destroyed by a fire.
You can get a better idea of what went on by following the link below.
http://oldtoolheaven.com/biography/backus.htm
I have one where hole was only drilled through on one side of the nut. I said heck with it and did not fully disassemble it. Only option I can think of is drill it out.
Here is a catalog cut from 1869.Union was a short lived company. It was started by Amos H Brainard sometime in 1865, probably to manufacture this style vise. He was issued a patent for it on January 3, 1865, no. 45,693. During the winter of 1870-1871 the company was sold to Quimby Backus of the Backus Vise Co. This company ultimately merged with Millers Falls. Apparently Union at one time made over 40 different types and sizes of vises. In 1871 Union Vise co. Was destroyed by a fire.
Thanks!
Is there anyway to tell the year of mfg? Value?