To avoid these ads, REGISTER NOW!

VISE REPAIR 101 all vise repairs, lubricants, sources for parts and the tricks to fix

Carla

MEMBER EMERITUS
Joined
Nov 27, 2010
Messages
672
I personally wouldn't. The best thing you can use for caked on grease/crud is paraffin/kerosene and either a cloth or a green nylon pan scourer, (if you want a bit more cleaning/scrubbing action than a cloth alone), coupled with some elbow grease. Paraffin/kerosene is not detrimental to the paint nor metal in any way or form either, so no problems with flash rusting, paint removal etc. You can also use white spirit/mineral spirit, but that's not quite as effective at cutting through grime as paraffin/kerosene, IMHO.

Concur......well said, Mr Fretters........ : )

Its not often one finds a piece of older equipment on which the original paint finish may be cleaned and preserved......but its a nice feeling when one may see the original finish, very nearly as it looked when new, many years ago.

Scrubbing gently with a mild solvent, such as paraffin/kerosene, and the least 'gritty' sort of kitchen scrubbing pad is a tedious job, to be sure, but worth the time/trouble if you like 'preservation'.

After cleaning away all the years of grime, the original paint may have a 'dried-out' look. Rubbing the paint down with a good preservative oil (I like the 'Break-Free' brand sold as a weapons oil) and a soft cloth, the softer the better, will bring back the lustre, as nearly as may be.

cheers

Carla
 
To avoid these ads, REGISTER NOW!
OP
D

drivesitfar

Well-known member
Joined
Oct 23, 2013
Messages
36,046
Location
Pacific Northwest
Fretters: I seem to remember that Simple green and maybe the Citrus cleaners are safe to dump on plants. not sure about drinking any, but maybe they won't kill you. that said i do like your kerosene on a rag or sheep's cloth with some elbow grease. as always thanks for your wisdom and yes there are still great people in the world.

Carla: speaking of great people how are you feeling? i hope better and happy to see you are posting your amazing thoughts and wisdom on our thread.

take care and our prayers have been sent for your speedy recovery to good health.
 

octane_matty

Well-known member
Joined
Jul 21, 2014
Messages
314
Location
Melbourne, Australia
GJ friends,

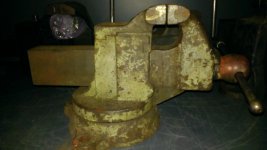
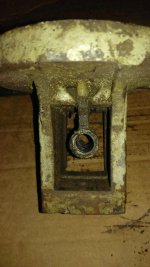
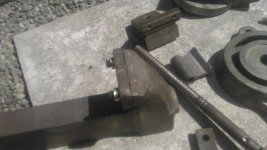
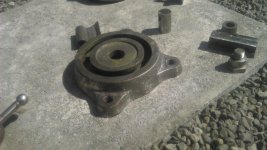
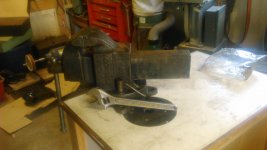
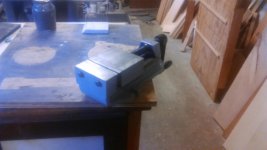
Wondering if anybody would be able to help me identify this vice.

It has removable jaws 5 1/2" and swivel base, no markings as far as i can see.

Any help would be appreciated :)

Update: Too many pictures to upload so put them into flickr https://www.flickr.com/photos/octane_matty/sets/72157650847983274

I've checked almost every inch of the vice and still can't find any markings. Bought it on ebay and the previous owner could only tell me it was at least 30 years old. It's in very good condition though, only surface rust and little to no play.

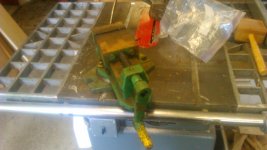
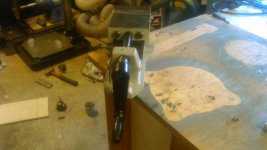
Drivesitfar I've included a few pictures of the small clamp on vice for you, this was my grandfathers, so probably at least 20 years old. Only reason i pulled it out was to put together some speedflow fittings since i didn't have any other vice at the time.

Update: Thanks to user "bagbig" it seems the vise is from russia
http://www.metallist-udm.ru/content/blogcategory/3/34/lang,english/
Possibly an older version of the TCC-140
 

Attachments

  • 11212783_10155585221650228_698427448666170429_n.jpg
    11212783_10155585221650228_698427448666170429_n.jpg
    91.6 KB · Views: 55
Last edited:

caesar2001

Well-known member
Joined
Feb 19, 2012
Messages
74
Location
Livonia, MI
Welcome Octane!

Additional pictures might help to figure out who made that vise. There might be some kind of mark on the bottom of the swivel base?
 
OP
D

drivesitfar

Well-known member
Joined
Oct 23, 2013
Messages
36,046
Location
Pacific Northwest
Octane: more details and pictures would help for sure. it looks like a European made vise so jaw width and any markings or #'s you see will help. i'm guessing a 8 inch wide jaw and maybe a 1960's or earlier made vise. any idea how heavy it is? also what is that little vise to the right of it on your bench that looks like a small clamp on type vise?

any history you can share about the vise might help us help you too.

welcome to the forum.
 

vintage nut

Well-known member
Joined
Mar 17, 2015
Messages
1,272
Location
west coast of canada
I haven't shipped any vises yet, but I have shipped a number of chainsaws. My procedure is a heavy box stuffed with bubble wrap, and wrap the box in all directions with duct tape. Looks like something red green packed, but its about as close to indestructible as you can get without using plywood

you can never have too many tools
 
OP
D

drivesitfar

Well-known member
Joined
Oct 23, 2013
Messages
36,046
Location
Pacific Northwest
Vintage: sorry to hear you had a hard time removing that one jaw screw on the Rock Island #851 swivel jaw vise you received from me. did you happen to take pictures and maybe post the remarks you just did on the vise thread over here? Vise jaw screw removal is probably one of the toughest parts of the vise to disassemble so the more posts about it here the better for other members to see and learn how.

it sounds like the bead blaster took off most of the old paint so if you didn't get many before pictures here they are.

good luck
 

Attachments

  • WP_20140706_051.jpg
    WP_20140706_051.jpg
    101.4 KB · Views: 40
  • WP_20140706_053.jpg
    WP_20140706_053.jpg
    99.3 KB · Views: 34
  • WP_20140706_054.jpg
    WP_20140706_054.jpg
    96.9 KB · Views: 31
  • WP_20140706_052.jpg
    WP_20140706_052.jpg
    111.7 KB · Views: 31
  • WP_20150508_032.jpg
    WP_20150508_032.jpg
    145.7 KB · Views: 31
  • WP_20150508_082.jpg
    WP_20150508_082.jpg
    140.5 KB · Views: 32
  • WP_20150508_073.jpg
    WP_20150508_073.jpg
    131.9 KB · Views: 29

vintage nut

Well-known member
Joined
Mar 17, 2015
Messages
1,272
Location
west coast of canada
Unfortunately I forgot to get pictures of the removal process. Just lots of drilling, easy outs, penetrant, torch, ect. If I break a screw in the morgan I will take pictures. Or the next time we have a screw removal in a non vise project.

And I do have some before pictures! My phone just didn't want to post any this morning. I have only blasted the swivel jaw so far. We finally reorganized the shed, and got my blaster set up again yesterday. Most of my blasting was for my drill press project

you can never have too many tools
 

vintage nut

Well-known member
Joined
Mar 17, 2015
Messages
1,272
Location
west coast of canada
I would try blasting the morgan, but I doubt it would fit, and if it did, it would probably fall through the bottom grate in the cabinet...

you can never have too many tools
 

vintage nut

Well-known member
Joined
Mar 17, 2015
Messages
1,272
Location
west coast of canada
I guess I do have one trick I can share that I'll grab pictures of tonight. It's the only way I managed to remove the other 3 screws.

you can never have too many tools
 

Fretters

Well-known member
Joined
Jan 25, 2014
Messages
4,217
Location
South Yorkshire, England
Carla: speaking of great people how are you feeling? i hope better and happy to see you are posting your amazing thoughts and wisdom on our thread.

take care and our prayers have been sent for your speedy recovery to good health.

I must've missed the mention of Carla being ill, so my belated well wishes Carla. :) Whatever ails you, fingers crossed for a speedy and successful recovery. :)
 

vintage nut

Well-known member
Joined
Mar 17, 2015
Messages
1,272
Location
west coast of canada
Here's some rock island project updates.
uploadfromtaptalk1432125056294.jpg
3-52 date stamp! It's an oldie!
uploadfromtaptalk1432125100702.jpg
Here's how I cleaned up the jaws. They were hit on the pedestal buffer first with greaseless 240 grit, then black compound after this, for a nearly mirror polish. I used rolocs in the die grinder for most of it, starting with 80 grit sanding discs, then maroon scotchbright.
uploadfromtaptalk1432125119198.jpguploadfromtaptalk1432125251680.jpguploadfromtaptalk1432125278778.jpg
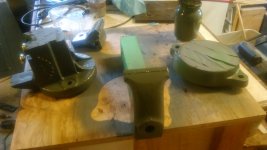
The swivel base was the roughest casting finish I had ever seen, I suspect it was the first mold poured in the batch while the iron was hottest. This often causes it to penetrate into the sand more. I used a carbide burr in a straight die grinder to smooth it out. I took enough off to make it look good, while still leaving it a cast finish. Basically taking all the big bumps off. The 5+ different colors of paint on it hid it pretty well!
uploadfromtaptalk1432125463340.jpg
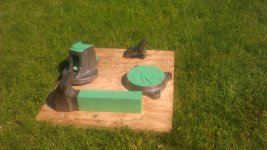
Here's the parts all masked off. I shot them with etching primer, and once dry brushed on the first coat of gloss gray thinned out with lacquer thinner. The thinner not only makes for a better finish, but also makes the paint cure a bit harder. A quality artists brush makes for a finish as smooth as sprayed, while also helping to fill the casting pores.
uploadfromtaptalk1432125636343.jpg
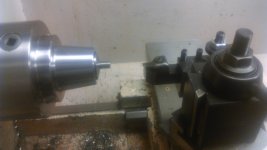
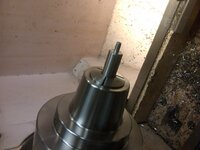
And here's the first part of the new swivel lock handle in the collet nose of the lathe. My dad took on that project. I'll get some more pictures of it tonight.


you can never have too many tools
 

vintage nut

Well-known member
Joined
Mar 17, 2015
Messages
1,272
Location
west coast of canada
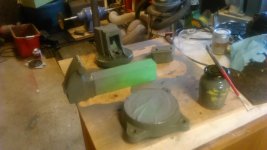
Here's the little rock island 851 after it's second coat of gloss gray. I'll let it dry today, then bake it in my kiln at 175 degrees for 20 minutes (kiln is totally overkill, but I'd rather use my heat treating equipment than have my stepmother kill me for using the kitchen oven). I'm going to do the lettering in black.
uploadfromtaptalk1432131860892.jpguploadfromtaptalk1432131882857.jpg
I still need to make a taper pin for the swivel jaw, and my dad offered to make the jaw screws on the lathe, as the originals are all either stripped or broken, and they are definitely not standard screws.

Since I'm stuck waiting on this one now, I'm going to assemble my mill vise tonight, and possibly start on the big morgan 160.

you can never have too many tools
 
OP
D

drivesitfar

Well-known member
Joined
Oct 23, 2013
Messages
36,046
Location
Pacific Northwest
Vintage: great write up and even better work you are doing to your Rock Island 851 swivel jaw 72 year old vise. keep up the great work and i'll (we'll) be waiting and watching for new updates as you can post more.

BTW you'll need to get out the big muscles out for that Morgan 160, but i'm excited to see how you make that one shine.

cheers and good luck and thank your Dad for us because he is doing his magic on the lathe and i'm guessing you learned a couple things from him too.
 
To avoid these ads, REGISTER NOW!

vintage nut

Well-known member
Joined
Mar 17, 2015
Messages
1,272
Location
west coast of canada
It's really nice having my dad's help with this! I can run a lathe decently, and could probably make the parts myself, but he has quite a bit more experience, and will likely do a bit better job. I think I'm going to make the swivel jaw pin myself though for a bit of practice.

Unfortunately I'm going to have to use wire wheels for the morgan, as it would fall through the bottom of my bead blaster if I tried that...

you can never have too many tools
 

vintage nut

Well-known member
Joined
Mar 17, 2015
Messages
1,272
Location
west coast of canada
Here's the mill vise I have been working on. Ready for use! I restored the swivel base too, but I didn't install it because it would get in the way for it's intended use on the drill press. I kept it incase I ever put this vise on a mill. The vise is a light gloss gray I had the local hardware store mix. They have the standard rust paint (tremclad, rustoleum, ect) in tint base, so you can pick any paint chip you want, and have them mix your enamel in that color. The crank handle is rattle can black hammertone. Here's a before and after
uploadfromtaptalk1432153364369.jpguploadfromtaptalk1432153386528.jpguploadfromtaptalk1432153409371.jpguploadfromtaptalk1432153429925.jpguploadfromtaptalk1432153447507.jpguploadfromtaptalk1432153465057.jpg

you can never have too many tools
 
OP
D

drivesitfar

Well-known member
Joined
Oct 23, 2013
Messages
36,046
Location
Pacific Northwest
Vintage: that drill press mill vise certainly looks a lot nicer than when i handed it to you. awesome job and thanks for sharing your pictures and process of making that change. :thumbup:
 

vintage nut

Well-known member
Joined
Mar 17, 2015
Messages
1,272
Location
west coast of canada
Thanks guys!
I'm pretty happy with it. Even used scotchbright rolocs to polish all the bare metal, and polished all the bolt heads on my baldor buffer. The rock island is out in the sun curing the paint. I think I'm going to pull the big morgan apart and start cleaning it up.

you can never have too many tools
 

vintage nut

Well-known member
Joined
Mar 17, 2015
Messages
1,272
Location
west coast of canada
Morgan is apart and cleaned up. All the grease is off, time to wire wheel the paint and rust off the big castings, and bead blast the small parts. I have the day off tomorrow, so I might actually get it primed and maybe even a coat of paint on tomorrow!


you can never have too many tools
 

jr3ruffneck

Active member
Joined
Mar 24, 2015
Messages
32
Location
Jones, OK.
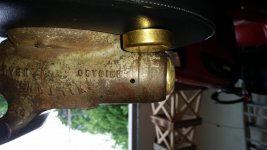
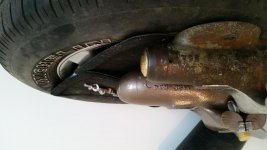
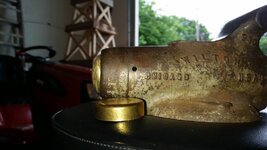
After much reading on using a freeze plug for a dust cap I figured I'd give it a go on my 3" wilton...... I tried the steel plugs first and they didn't seem the shape very well so I tried a brass one. after flaring it out with a ball ping hammer for about 30 minutes and trimming it down shorter this is what I came up with........ 1 5/8" plug is perfect by the time you finish shaping it and fits snug. hope this is helpful for someone
 

Attachments

  • 20150520_182719.jpg
    20150520_182719.jpg
    146.5 KB · Views: 77
  • 20150520_182713.jpg
    20150520_182713.jpg
    142.4 KB · Views: 63
  • 20150520_182119.jpg
    20150520_182119.jpg
    140.5 KB · Views: 61

octane_matty

Well-known member
Joined
Jul 21, 2014
Messages
314
Location
Melbourne, Australia
I've checked almost every inch of the vice and still can't find any markings. Bought it on ebay and the previous owner could only tell me it was at least 30 years old. It's in very good condition though, only surface rust and little to no play.

Drivesitfar I've included a few pictures of the small clamp on vice for you, this was my grandfathers, so probably at least 20 years old. Only reason i pulled it out was to put together some speedflow fittings since i didn't have any other vice at the time.

<a data-flickr-embed="true" href="https://www.flickr.com/photos/octane_matty/17888813026/in/dateposted/" title="IMG_2462"><img src="https://farm9.staticflickr.com/8799/17888813026_1900cd197e_z.jpg" width="640" height="480" alt="IMG_2462"></a><script async src="//embedr.flickr.com/assets/client-code.js" charset="utf-8"></script>
<a data-flickr-embed="true" href="https://www.flickr.com/photos/octane_matty/17292636144/in/photostream/" title="11212783_10155585221650228_698427448666170429_n"><img src="https://farm9.staticflickr.com/8869/17292636144_962bdda086_z.jpg" width="640" height="640" alt="11212783_10155585221650228_698427448666170429_n"></a><script async src="//embedr.flickr.com/assets/client-code.js" charset="utf-8"></script>
 
Last edited:
OP
D

drivesitfar

Well-known member
Joined
Oct 23, 2013
Messages
36,046
Location
Pacific Northwest
JR: thanks for the post and an awesome find of a new part to replace the missing dust covers on the Wilton Bullet vises. BTW was the brass plug purchased at the auto parts store or where and for how much?

OM: your flicker link didn't work. unless you only have the ability to post one picture at a time please just post pictures and you can post up to 7 picture per post so take up as many posts as needed. then maybe we can solve your mystery.

ALL: on the main vise thread tonight Vintage's Dad became a new member so he could show us how he made a swivel pin for Vintage's Rock Island 851. he did an amazing job and maybe he'll post it here too.
 
OP
D

drivesitfar

Well-known member
Joined
Oct 23, 2013
Messages
36,046
Location
Pacific Northwest
Matt: thanks for taking me on several vacations and i like the way you take pictures because i take the same kind when i get a chance to. i still don't have any clue to who made your big blue vice that is probably European. what part of the world do you live or do you just travel the world and live in high rise hotels? my guess is the vise was made prior to 1980 and maybe quite a bit older and it looks solid. how much does it weigh and how wide are the jaws when they are closed?

Jr: thanks and again nice job because your little Wilton looks great now.
 

Carla

MEMBER EMERITUS
Joined
Nov 27, 2010
Messages
672
Here's the little rock island 851 after it's second coat of gloss gray. I'll let it dry today, then bake it in my kiln at 175 degrees for 20 minutes (kiln is totally overkill, but I'd rather use my heat treating equipment than have my stepmother kill me for using the kitchen oven). I'm going to do the lettering in black.
uploadfromtaptalk1432131860892.jpguploadfromtaptalk1432131882857.jpg
I still need to make a taper pin for the swivel jaw, and my dad offered to make the jaw screws on the lathe, as the originals are all either stripped or broken, and they are definitely not standard screws.

Since I'm stuck waiting on this one now, I'm going to assemble my mill vise tonight, and possibly start on the big morgan 160.

you can never have too many tools

Well done, vintage nut........ : )

You've demonstrated an excellent example of the really optimal way to recondition an old vise......every step you've illustrated is the 'best practice' to make a 'best quality' proper job of the 'finished product'.

cheers

Carla
 

vintage nut

Well-known member
Joined
Mar 17, 2015
Messages
1,272
Location
west coast of canada
Well here it is! Just need the jaw screws now. And I think the swivel jaw pin needs a little fancier top. Should give a good life of service
uploadfromtaptalk1432261844316.jpg

you can never have too many tools
 

ironhorsemachinery

Well-known member
Joined
May 20, 2015
Messages
64
Since you asked :)

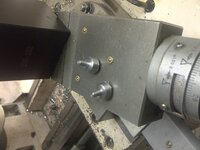
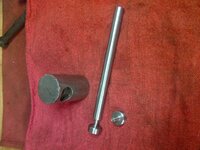
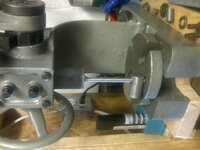
I made the handle for the swivel lock from 3/8" drill rod (W1 tool steel). On the lathe, I drilled 3/16" holes in each end a little over 1/2" deep.

Knobs are from 9/16" drill rod which fits loosely in the recesses on the swivel lock. On each knob I turned a small stub about .375" long, and just slightly over .187" so as to have a light press fit onto the holes on the ends of the 3/8" shaft.

I used a drop of red loc-tite and squeezed it all together on the arbor press. Pictures illustrate this more clearly. Turning was done on the lathe using my new collet nose (which is perfect for jobs like this).

b3cb9f48956a65d6c64f022451a29f4e.jpg6a74353081626c95917e0a6d082438fb.jpg7ef220f93205988dad254a08afc14a13.jpg30679e9a15ca4c737f52f9f7525699f4.jpg04bfe15f0aec71fd31b07ee9d508ced0.jpg1648c41ec60d9b6d169cc6edabc8c13a.jpg


Sent from my iPad using Tapatalk
 
OP
D

drivesitfar

Well-known member
Joined
Oct 23, 2013
Messages
36,046
Location
Pacific Northwest
Carla: another great post and what might also make you smile is Vintage just turned 18 so please share all the wisdom you can with him and us because you have more than most of the guys on GJ. still sending mine (our) prayers for your health to improve.

Ironhorse: thanks for the post and for also raising a great kid. Vintage has a lot of talent, smarts good manners and a good heart and i'm sure a lot of the credit goes to you. :thumbup:

when you or Vintage finally does cut the swivel pins off the Morgan 160 can you post a picture of them because i'm not sure I've ever seen any bent in that corkshoe design that actually still worked?
 

vintage nut

Well-known member
Joined
Mar 17, 2015
Messages
1,272
Location
west coast of canada
Actually still 17! Few weeks until my birthday yet.
And thankyou very much drives!
I'll definitely post pictures of them, and I could even save them for you if you want!

you can never have too many tools
 
OP
D

drivesitfar

Well-known member
Joined
Oct 23, 2013
Messages
36,046
Location
Pacific Northwest
Vintage: sure keep the Morgan 160's corkscrew swivel handles for me if you don't want to make something out of them.

i do like your idea about the lead jaws you mentioned on the vise thread and they might last years on the smaller vises. on the big vises maybe you'd have to melt them down and make a new set more often.

I'm hoping to find one of my benches this weekend so i can actually grease up a vise to mount one. i have a couple choices, but leaning to a Reed 404.5 or a Craftsman 5196 for my wood garage bench at home.
 

ssdave

Banned
Joined
Apr 11, 2015
Messages
2,913
Location
Eastern Oregon
I asked the other day about finding parts for a wilton woodworking vise, and couldn't find any. I have the ability to make parts, just prefer to buy if they're available. So, decided to make them and show the process.

Here is the vise, with a makeshift wooden handle. I think this was a $5 or $10 yard sale find, I've had it quite a while and found it cleaning out a bottom shelf last week.

DSCF0041_zpscjoxmci9.jpg


The shaft was somewhat beat up from having pliers or a pipe wrench on it. I cleaned it up with a file.

DSCF0043_zps5jgjd4oe.jpg

DSCF0097_zpsh9zuighq.jpg


I chucked a steel bar in the lathe, and drilled it 9/16" to fit the vise shaft.

DSCF0091_zpsan8kytva.jpg


Parted the piece off to the right length, reversed it in the chuck, and turned the nose to a nice shape:

DSCF0093_zpsknhvy5pr.jpg


The hole in the vise shaft was off center, apparently they drilled it and the nose piece together originally. Made it irritating to lay out and get the pin hole right:

DSCF0098_zps0snoq9kp.jpg

DSCF0100_zpssadcmcjd.jpg


Drilled it, and it looks good:

DSCF0101_zps5tcrleno.jpg


DSCF0102_zpsfpbdieg1.jpg


Ordered a few parts from McMaster Carr, came in two days. A 17/32" rod, two threaded ball ends, and a thrust bearing assembly, to upgrade the vise slightly.

DSCF0103_zpsnwkq75is.jpg

DSCF0104_zpsukgd2h6l.jpg


The vise jaw bearing surface was cupped shape from either original design or wear. Had to file it flat for the thrust washer to bear on.
DSCF0105_zps402fpa8b.jpg

DSCF0106_zps6zr3yqsv.jpg

DSCF0107_zpsppyjywuc.jpg


Bored out a recess in the end of the nose cap to hold the thrust bearing just a little less deep than the bearing assembly.

DSCF0108_zpsawdreuok.jpg

DSCF0109_zps7afbuafa.jpg

DSCF0110_zpsmxlwmck6.jpg


I threaded the ends of the rod for the handle, drilled the nose piece for the handle, and screwed it all together. Put a roll pin to hold the assembly on the shaft, and done:

DSCF0111_zpsmzw66d1j.jpg


The thrust bearing makes it unbelievably smooth to lock down and release. I like that so well, I think I'll take apart my 4" columbian and rebuild it with a thrust bearing.

Total time in this work shown was about 4 hours.

I'll polish this all on the buffer when I get a chance, and strip the paint off the vise and repaint. Another days project.

dave
 
Last edited:
To avoid these ads, REGISTER NOW!
Top Bottom