To avoid these ads, REGISTER NOW!

Gifo's Garage V2.0 22x11

iwantspeed

Well-known member
Joined
Aug 7, 2010
Messages
61
Location
Socal
Hey guys,
Thanks for sharing all of your ideas and I appreciate your willingness to document and show others how to do things properly.

Here is are some pictures to document upgrades to the garage, tools, and the car.

Its a 11 foot wide 22 foot deep garage with a short inlet to the door.
its a lot better than my previous garage.

Insulated
drywall
sprinkler system
attached to the condo
110v power
floor is nice and flat with no cracks in the cement.

after seeing all the garages on this forum it makes me not take anything for granted.

I'm renting a condo and cant get to crazy with this garage.


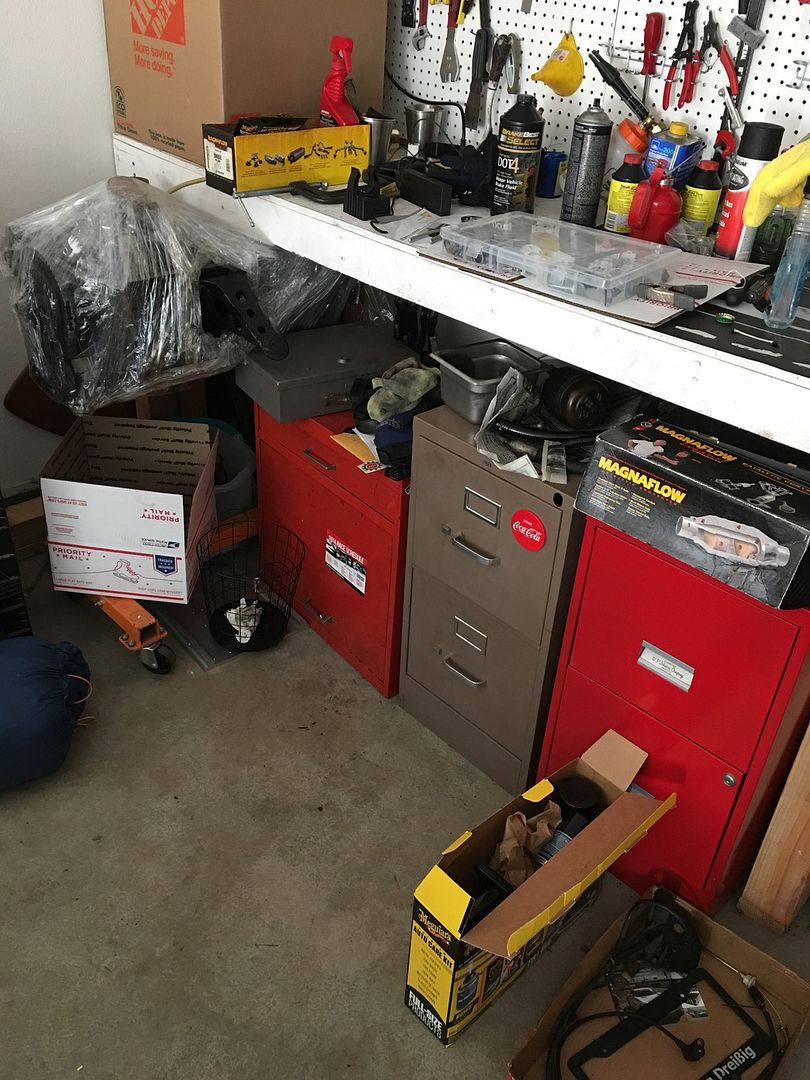
I cutoff of the prebuilt shelf off the wall and lowered it to work bench height.
i also added a pegboard wall.
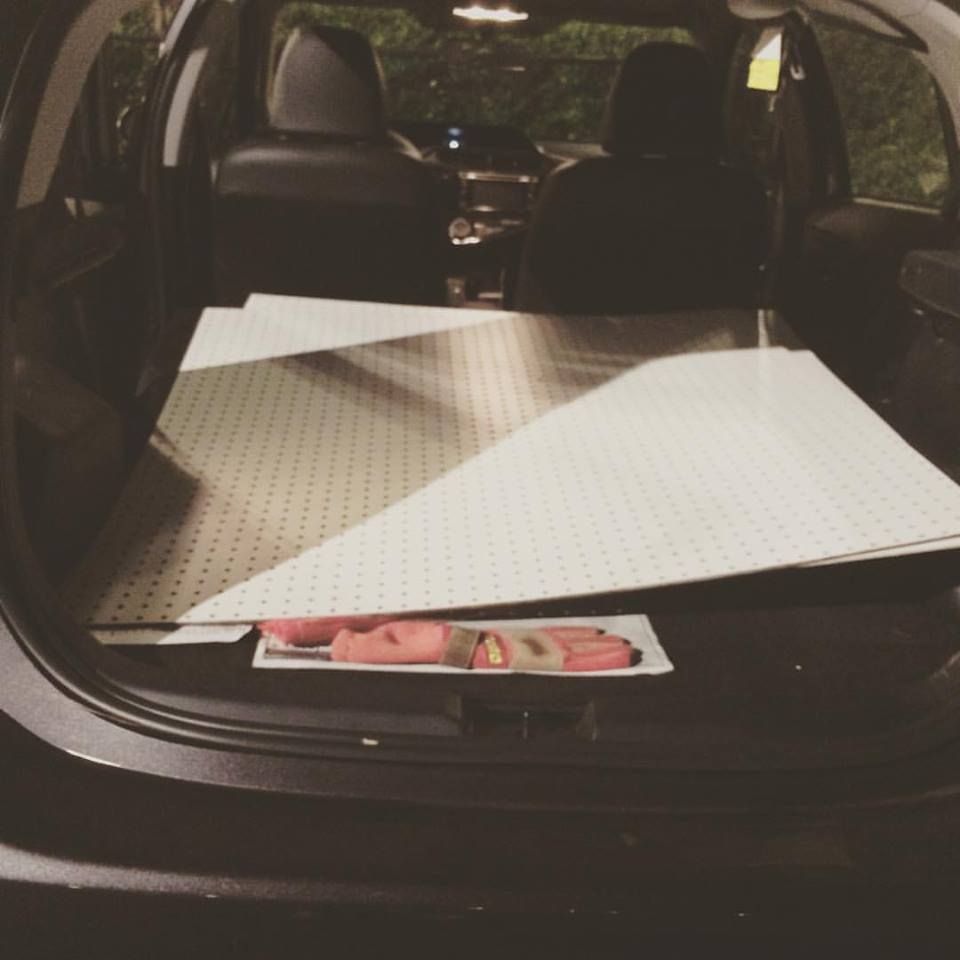
I borrowed my wife's car and it barely fit.


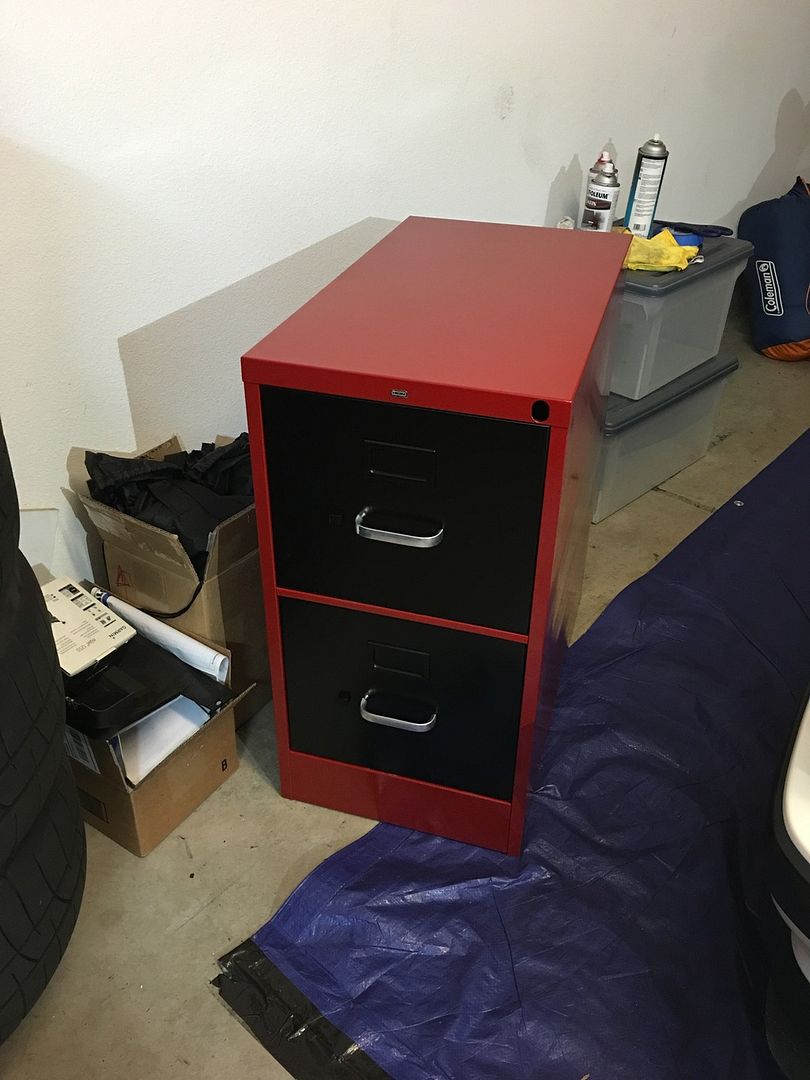
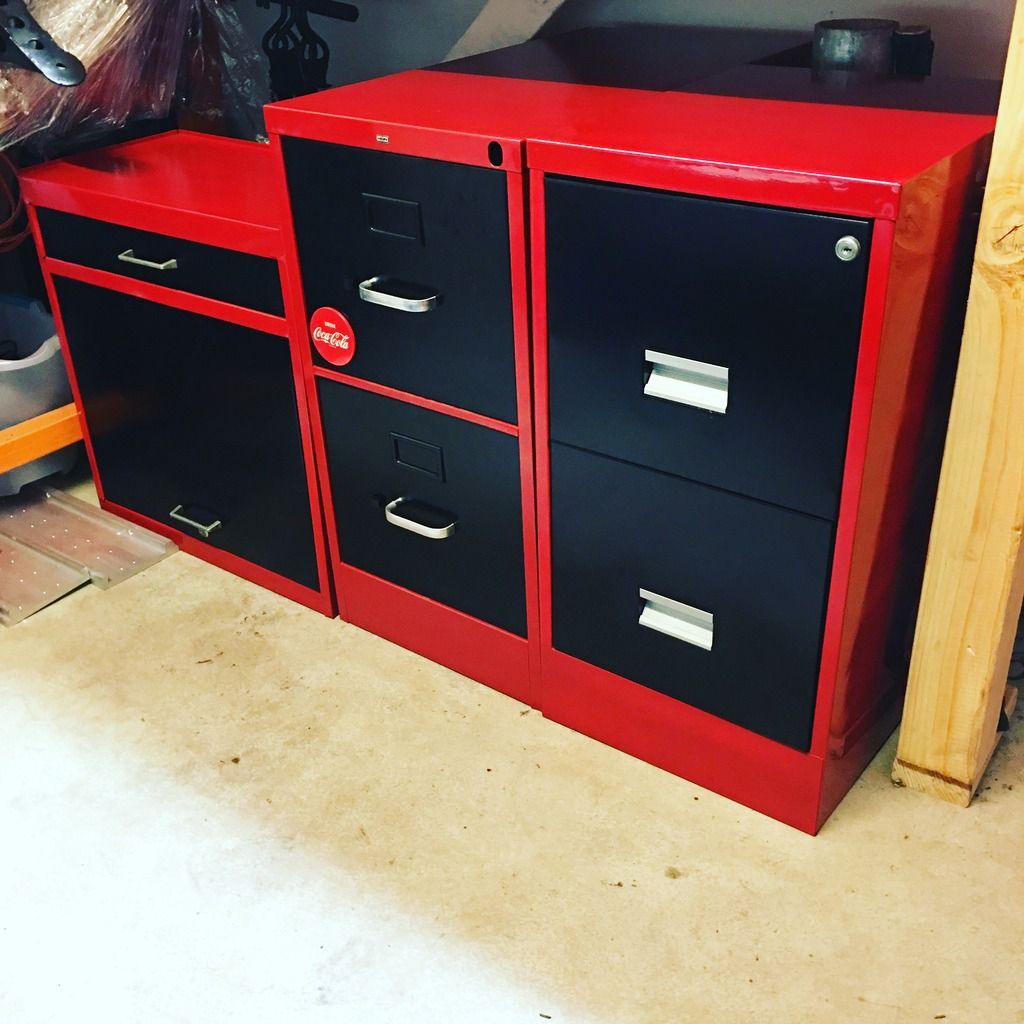
I have gotten some filing cabinets for free.
great for storing car parts, cleaning supplies, and paint cans.
but it doesnt match.


I took the drawers out, removed the handles, and the lock tumbler.


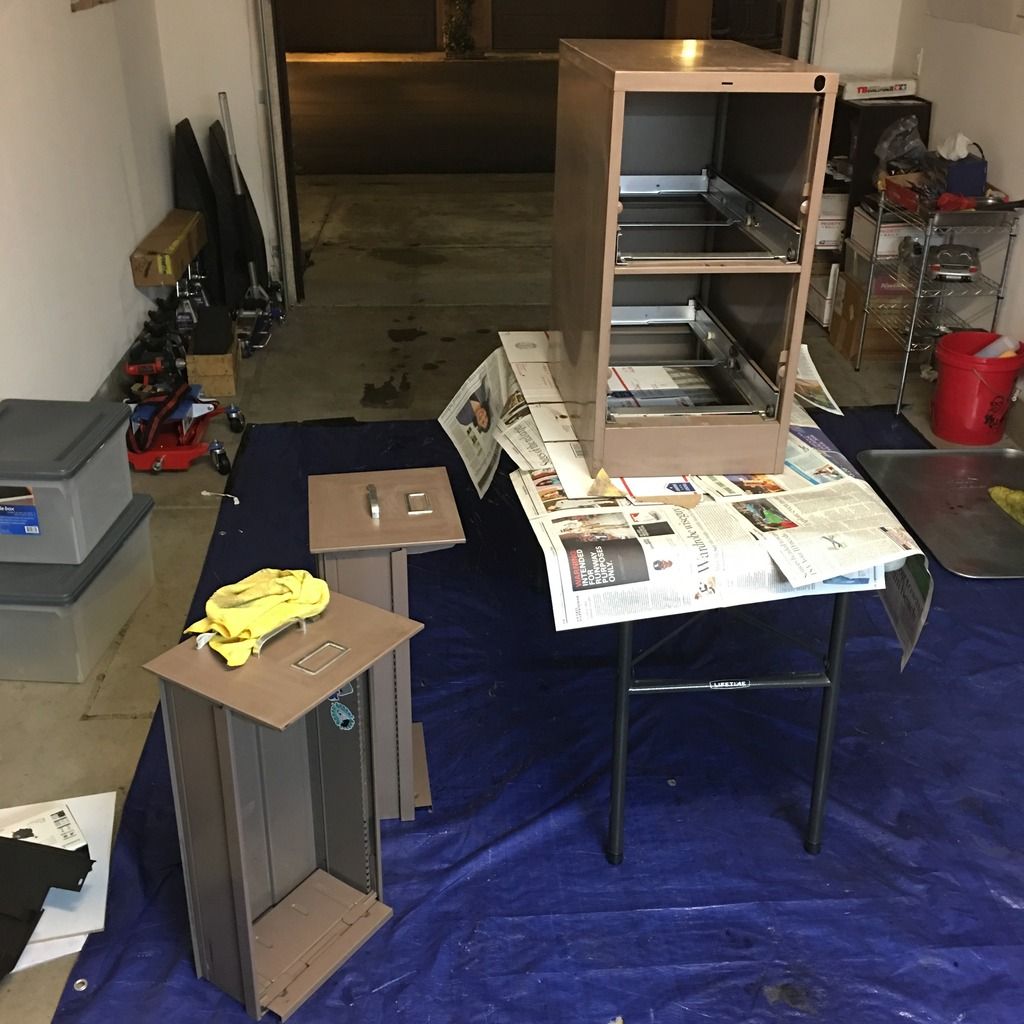
I'm going for a craftsman look. gloss red exterior black drawers silver handles


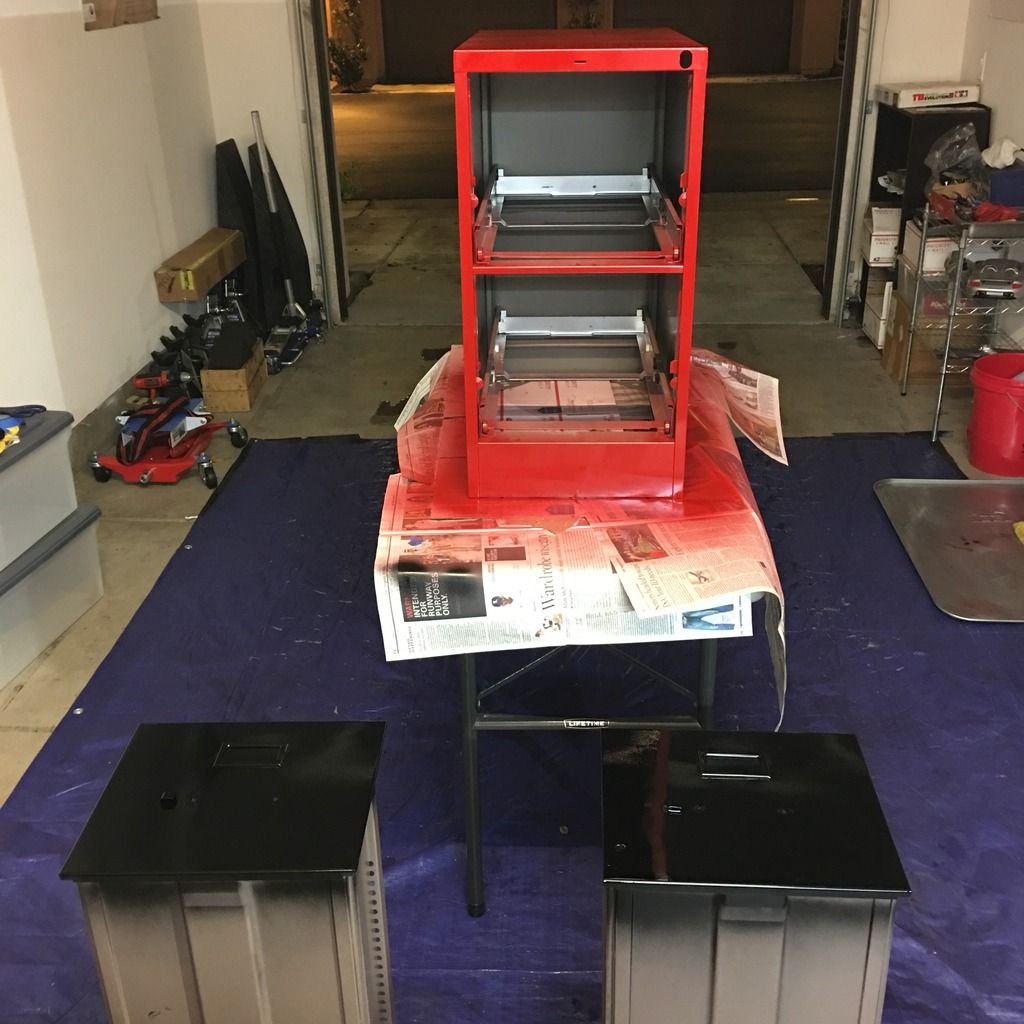
first file cabinet done.


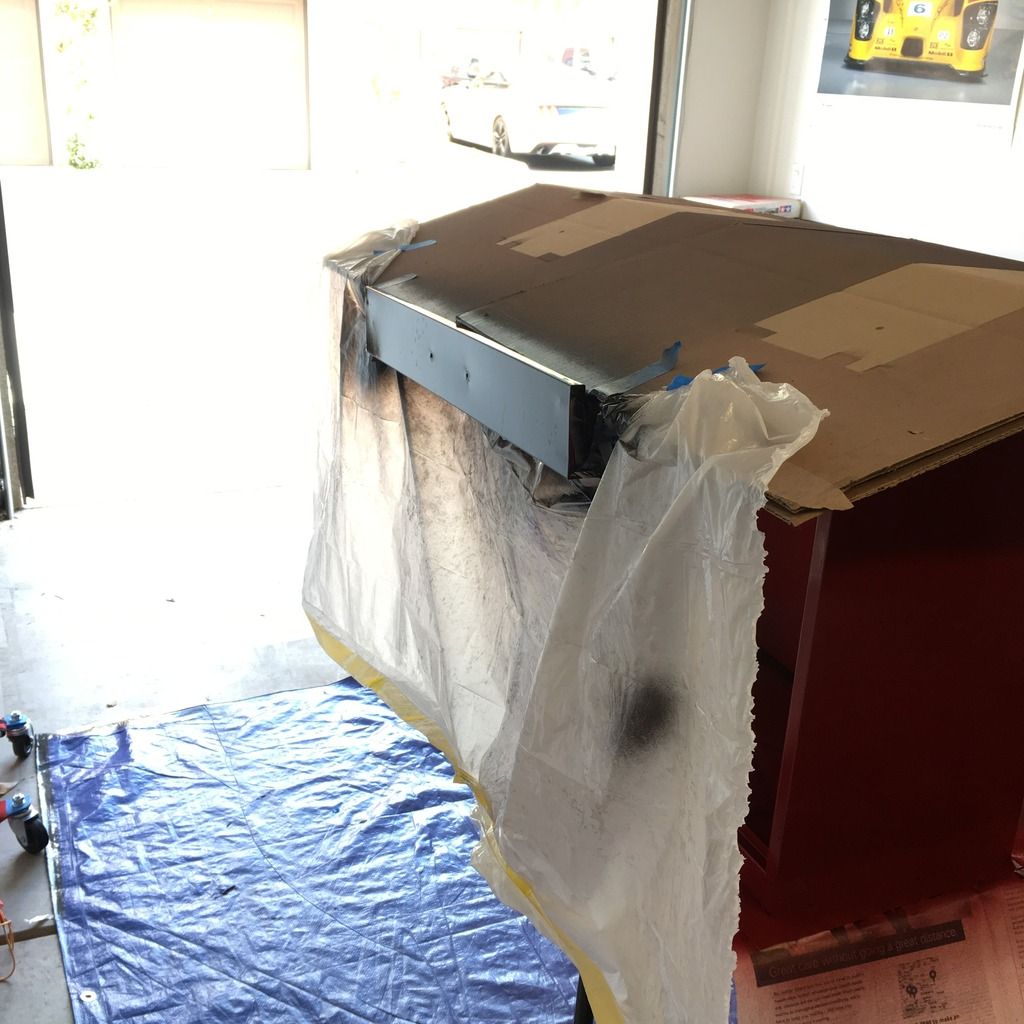
started working on the other ones.


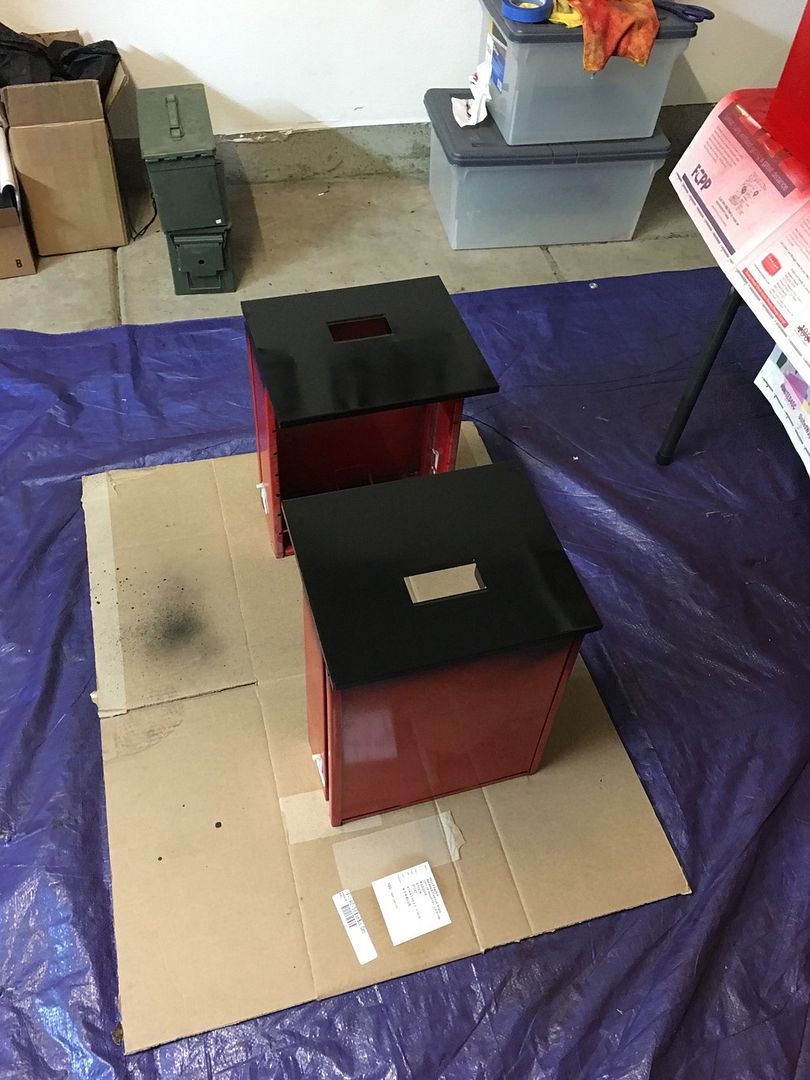
couldnt get the drawer out.
so i just masked everything to paint it black.
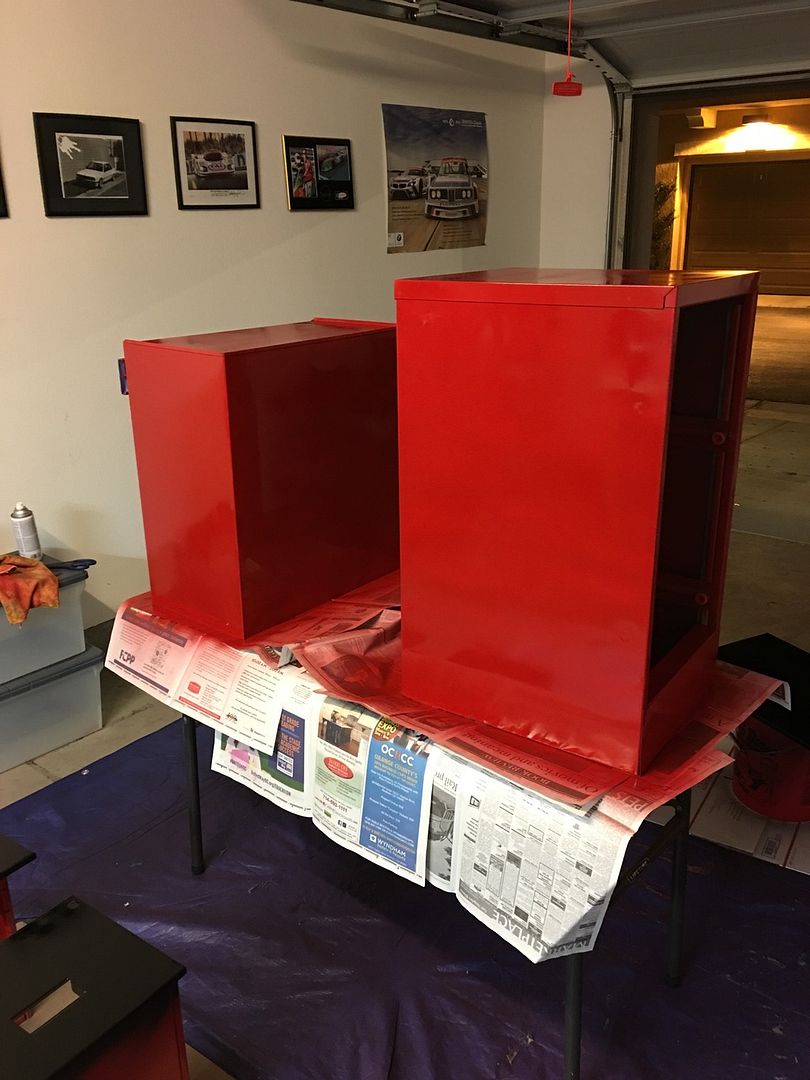

all done.
im happy with the results so I will do the engine stand next.
 
To avoid these ads, REGISTER NOW!

Purist

Well-known member
Joined
Jan 20, 2015
Messages
1,121
Location
MAsshole
Ah, a fellow BMW enthusiast! Love the E30!

Great job on those cabinets. Ditto Xporter's question, what type/brand paint did you use?
 
OP
I

iwantspeed

Well-known member
Joined
Aug 7, 2010
Messages
61
Location
Socal
Those came out nice, what brand paint?
Thanks rustoleum
Fun DIY project! nice results.
Thanks dubber
Ah, a fellow BMW enthusiast! Love the E30!

Great job on those cabinets. Ditto Xporter's question, what type/brand paint did you use?
Thanks

It's rustoleum regal red and satin black.

First I cleaned the cabinets with simple green and a microfiber.
Then I used 150 grit sand paper and rubbed down the cabinets and gave them a nice key.
You are trying to not sand the old paint but cut down on the gloss and give the new paint something to bite too.

This was followed up by some SEM solve wax,oil and grease remover.
Followed by a clean towel to get any excess.
Then immediately started spray painting with slightly warm paint cans.
Rustoleum satin black
Part number 7777

Rustoleum regal red
Part number 7765

SEM sem solve
Part number 38373


Last edited:

chrisisiced

Member
Joined
Jan 31, 2014
Messages
8
Wow. I have to say those cabinets came out amazing. I may do the same thing to a 6ft green cabinet that I have to match my color scheme.
 
OP
I

iwantspeed

Well-known member
Joined
Aug 7, 2010
Messages
61
Location
Socal
Wow. I have to say those cabinets came out amazing. I may do the same thing to a 6ft green cabinet that I have to match my color scheme.

Nice you can buy a huge tarp or drop cloth at homedepot.

One painting tip if you use the same paint I bought is if you miss a spot and it has dried for a few hours let it dry a full day before touching up any spots

It's best to give it a light even coat 5-10 minutes later give it a heavy coat and be done with it for 24 hours
 
Last edited:
OP
I

iwantspeed

Well-known member
Joined
Aug 7, 2010
Messages
61
Location
Socal
So after being happy with the results from the cabinets i wanted to paint my engine stand.

Problem how do I get the engine off the stand by myself.


Light bulb moment gears turning. Maybe I can get it down with my transmission jack.


I made some 4x4 blocks with 2 4x4 to set cars on so I can setup adjustable end links when I'm corner balancing them.

The idea is to place the trans jack on top of the 4x4's so I can slide out the stand once the jack supports the weight of the engine.


I added some ratchet straps.
And it worked.
Lowered the engine down and its sitting nice and flat on the stand with a jackstand as a back up in case it tips


Now i can dissasemble the engine stand and get it ready for paint.
 
OP
I

iwantspeed

Well-known member
Joined
Aug 7, 2010
Messages
61
Location
Socal
I got started on the engine stand.

Parts degreased and sanded a bit to key the surface.


First coat

Decided to let them dry on the bench so I could park my car in the garage.
 
OP
I

iwantspeed

Well-known member
Joined
Aug 7, 2010
Messages
61
Location
Socal
Well got some upgrades for the garage.
After reading many reviews and drooling over the tool box organization thread I pulled the trigger on a new toolbox
I rented a pick up truck from the local u haul.
And bought a 44inch harbor freight tool chest.
Part number 69387
They loaded it up with a fork lift.


Loaded up.

I strapped it in with one ratchet strap pinched between the tailgate.


I had a short drive home
I got home and tipped it on its back.

I took off the pallet and unboxed it and tipped it out of the truck with the help of two friends.
All set up
 

phule

Well-known member
Joined
Jan 11, 2016
Messages
312
Very nice! In for organized tool pics! I think im gonna pull the trigger on one of these soon.

Sent from my SM-N910P using Tapatalk
 

freebo86

Well-known member
Joined
Jun 19, 2015
Messages
362
Gonna follow along and see how you utilize the most of your space since my garage isnt the biggest either and I constantly keep finding myself just shuffling things around.
 
OP
I

iwantspeed

Well-known member
Joined
Aug 7, 2010
Messages
61
Location
Socal
Very nice! In for organized tool pics! I think im gonna pull the trigger on one of these soon.

Sent from my SM-N910P using Tapatalk

will do ill post some preliminary organization pictures
Gonna follow along and see how you utilize the most of your space since my garage isnt the biggest either and I constantly keep finding myself just shuffling things around.


i can post some panoramic pictures to give you a better idea.
 
To avoid these ads, REGISTER NOW!
OP
I

iwantspeed

Well-known member
Joined
Aug 7, 2010
Messages
61
Location
Socal
:willy_nilSome preliminary organization pictures
Hammer drawer.

Wrench drawer

Pliers and hand tool drawer

Screwdriver,pry bar, punches,chisels drawer
There is a second magnetic strip in there now. I'd like to rivet them to the drawer to keep them from moving.

Drill bit and hex bit drawer

Still working on setting up top drawer how I want.

Oil wrench drawer

Allen wrench drawer

Drill motor and drill bits

Dial indicators and machinist tools

Electronics drawer
 
OP
I

iwantspeed

Well-known member
Joined
Aug 7, 2010
Messages
61
Location
Socal
my friend moved into a new house and the previous owners left this nice table in the garage


he offered it to me and I went over, dissembled it and brought home in the wife's prius


got it home. its freaking heavy


mocked up for now


OP
I

iwantspeed

Well-known member
Joined
Aug 7, 2010
Messages
61
Location
Socal
I installed some magnetic strips into some of the drawers to help keep things in place.


Magnetic tray
Paper towel holder
Paint can holder

I went to bimmerfest at auto club speedway in Fontana California and got to ride with tony Jackson in his e46 m3 for part of a session. Very good driver and nicely setup car.
 
OP
I

iwantspeed

Well-known member
Joined
Aug 7, 2010
Messages
61
Location
Socal
Update
I got a nice piece of mdf cut to size on the panel saw at Home Depot
It's 41.5X17.5
It's going to be a spacer between the top of the box and the butcher block.


I took the top drawer thanks to the help of a YouTube video by user R.J. Workshop


Trying to get a game plan going.


Sears had a sale on this 4 inch black bench vice. So I picked one up.


The mounting holes had excess flashing so bad that the bolts wouldn't fit.

The vice couldn't only pivot half way before it got bound up.
More flashing in the way.


There are bits and pieces of flashing that had to be removed for it to operate smoothly.

Dremel and a carbide tool made quick work of the flashing.


I machined a nice base all squared up for the vice.


I machined some soft jaws also.


I bought hardware that ended up being to short so still have to wait on mounting the vice.
 
OP
I

iwantspeed

Well-known member
Joined
Aug 7, 2010
Messages
61
Location
Socal
It's 108 degrees out in Irvine yesterday but I got to work on mounting the vice.
Here is the new vice.
Soft jaws
Bolts
Nuts
Washers
Base plate


Mdf spacer attached to the bottom of the butcher block to act as a spacer between the tool box since it has a metal lip around the sides and back.


Measure 5 times and don't **** up this nice piece of wood.


Perfect.

The bolts are now going through the
vice
Aluminum spacer
Butcher block
Mdf
Top of the tool box
And nuts tighten from below.


First test holding my wife's bike
I got a wall mount bike rack at Home Depot to hold bikes in the vice.
 
OP
I

iwantspeed

Well-known member
Joined
Aug 7, 2010
Messages
61
Location
Socal
After reading a review for this bench vice on Amazon.
I reviewer posted that he added a large washer with 2 sides cutoff. Under the shoulder bolt to keep some slack out.

this mod requires the bolt to tightened almost all the way tight then back off and use Loctite when assembling.


After doing this you can really tell that washer was an upgrade
 
OP
I

iwantspeed

Well-known member
Joined
Aug 7, 2010
Messages
61
Location
Socal
we did an autocross last weekend here is the fastest time of the day

click for the youtube video


OP
I

iwantspeed

Well-known member
Joined
Aug 7, 2010
Messages
61
Location
Socal
so i got a side cabinet for christmas from my wife


here is the before shot


these holes had to be enlarged to get the side cabinet to fit nice and flush with the big tool box


i took the drawers out of the cabinet so i could load it on and off by myself


done
 
To avoid these ads, REGISTER NOW!
Top Bottom