I took another very long trip today to get drill presses #34 and #35.
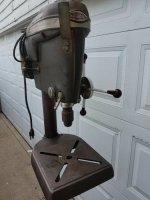
DP #34 (Jackson) is a Craftsman 100, model 103.23130. The seller told me yesterday that it ran great, and it does, and that it had no noticeable chuck wobble, oh yes it does! Drat!
I brought it home anyway because it seems to have very nice original paint and he lowered his price by 40% from his asking price. With parts from DP #33, a 150, I can put together one very nice hybrid machine. I already have a buyer waiting for a good machine.
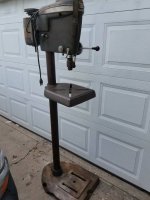
DP #35 (Farmington Hills) is a 15" Atlas Craftsman. I was drawn to it because of the extras in his picture (below). It's not my favorite style to work on, but I could not turn it down due to his asking price. It runs great and will clean-up nicely though.

Here's when it got really good. While I was checking it out, he said he had some other tools in a box and I could have them with the DP.
I opened the box and my jaw dropped.
There are quite a few different old brands of tools, but many are Craftsman. I gave him 60% more than his asking price. It was still less than I paid for #34 above.


")