To avoid these ads, REGISTER NOW!

The Glacier Garage - Attached Three Car Garage Build - 40 x 28

OP
R

RSr

Well-known member
Joined
Jul 20, 2010
Messages
155
Location
Pittsburgh, PA
Footer

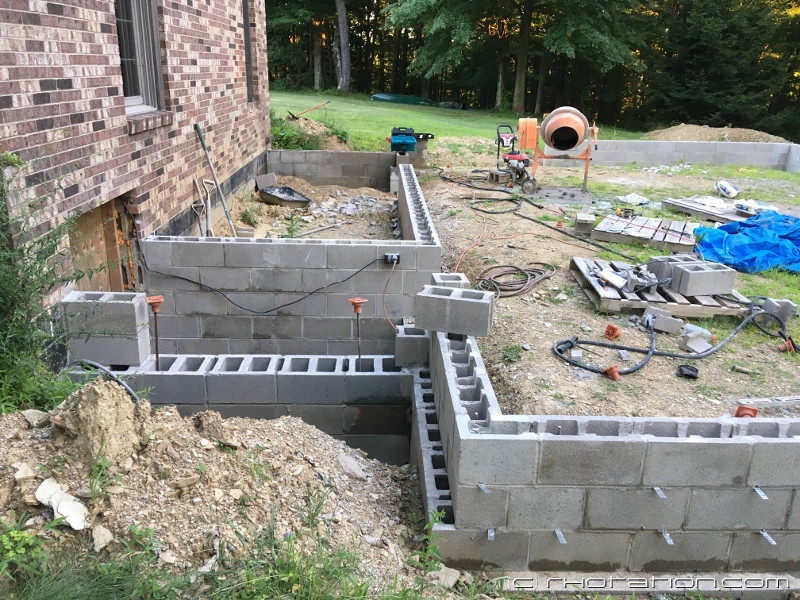
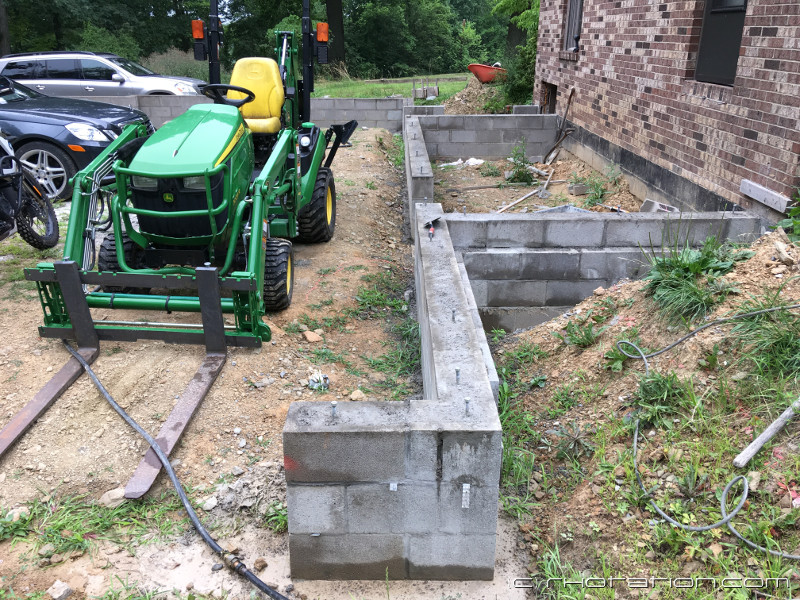
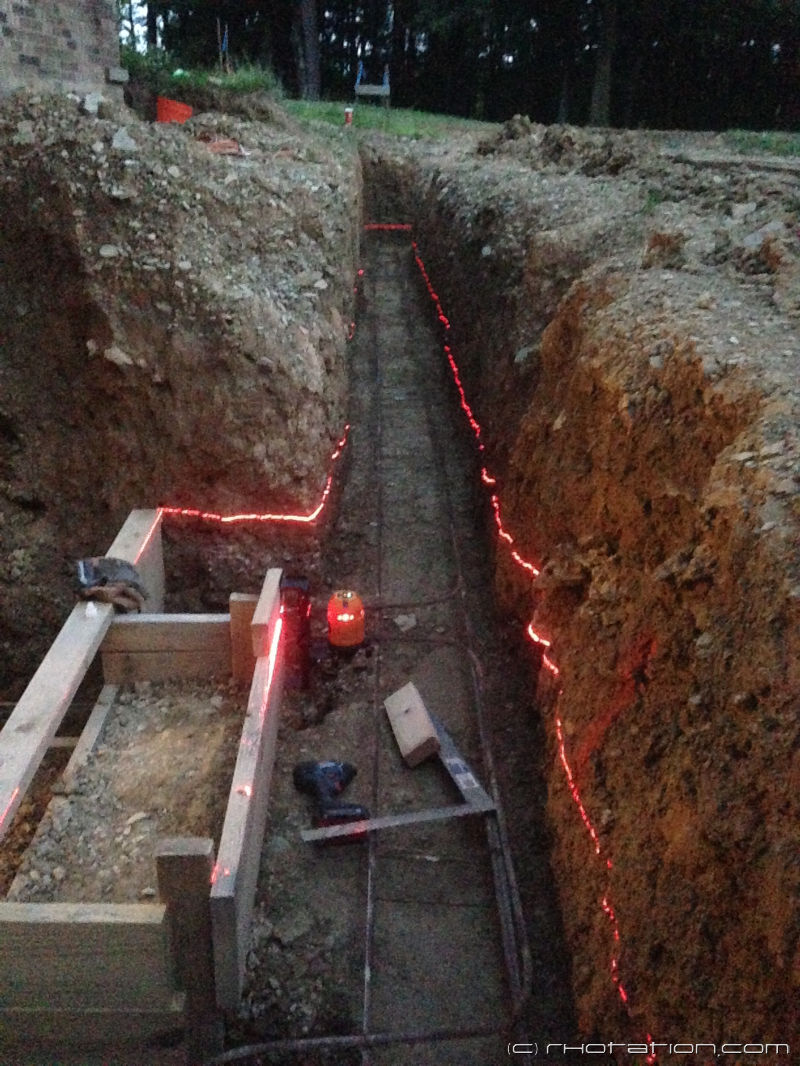
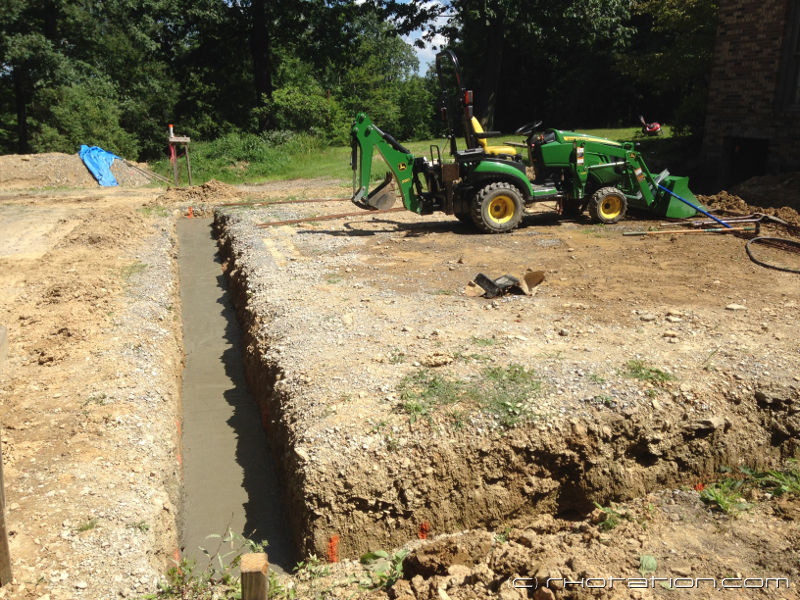
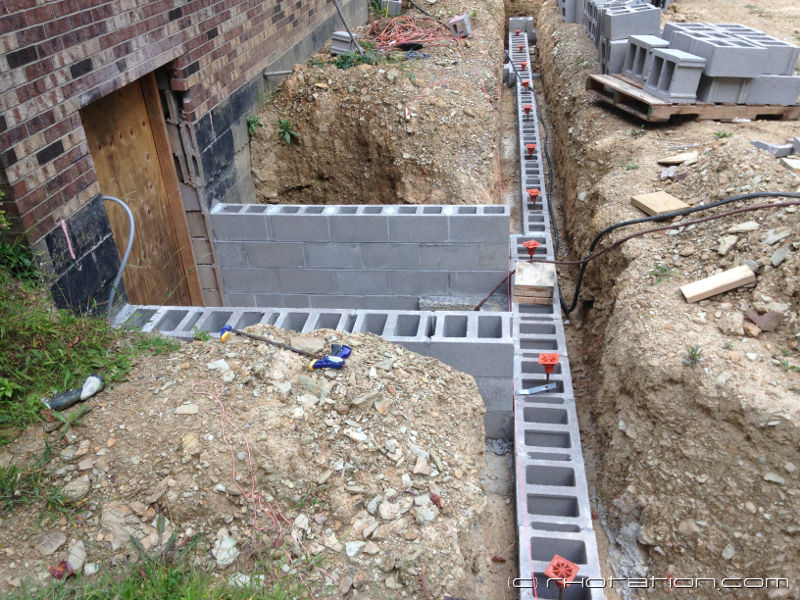
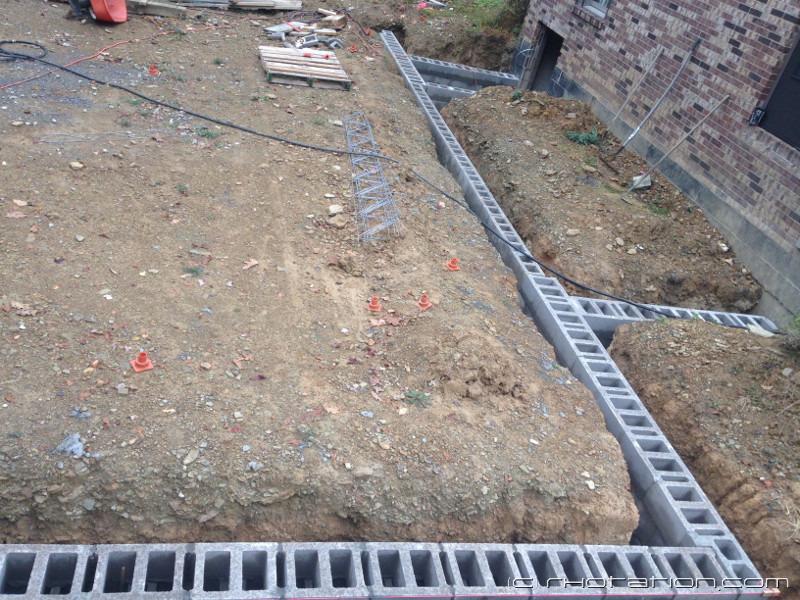
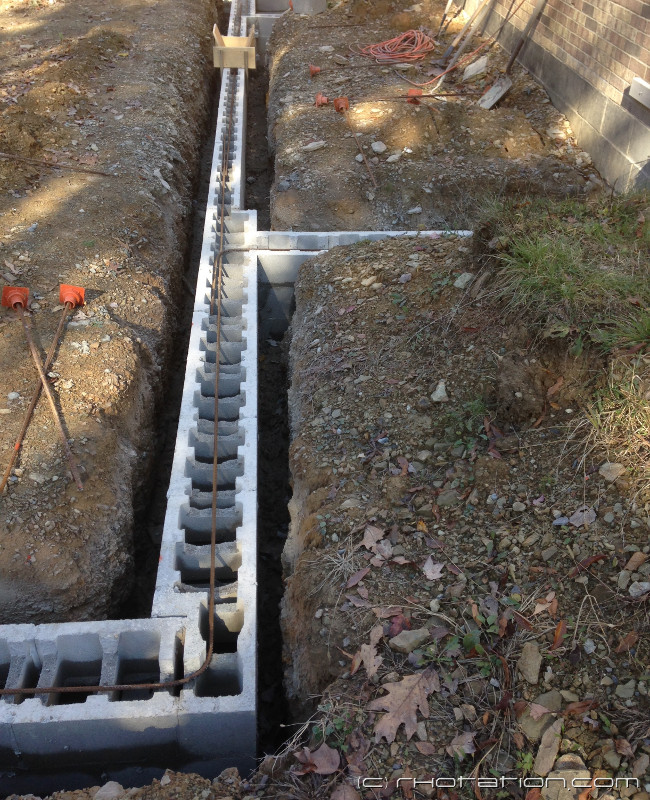
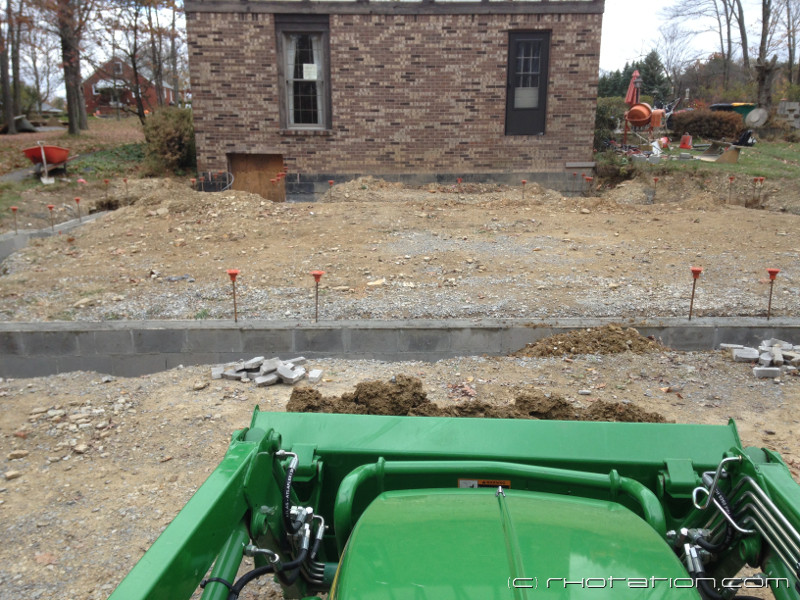
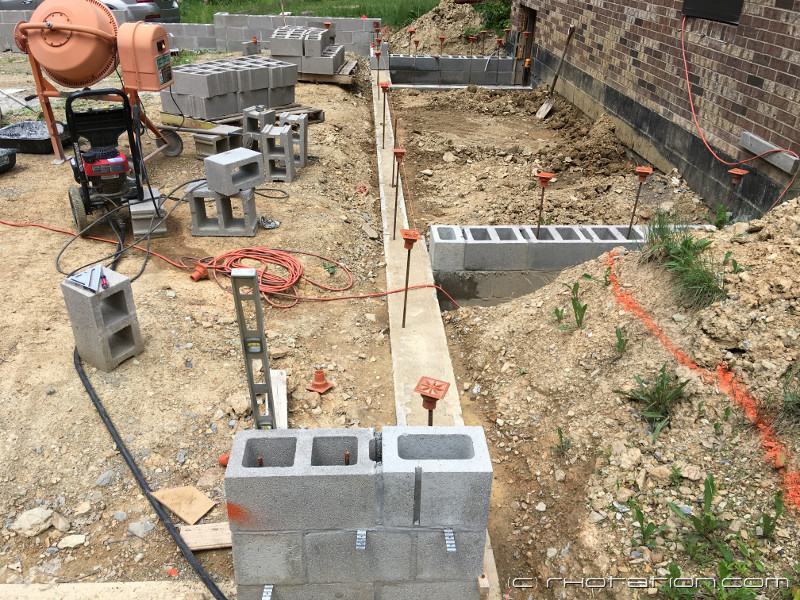
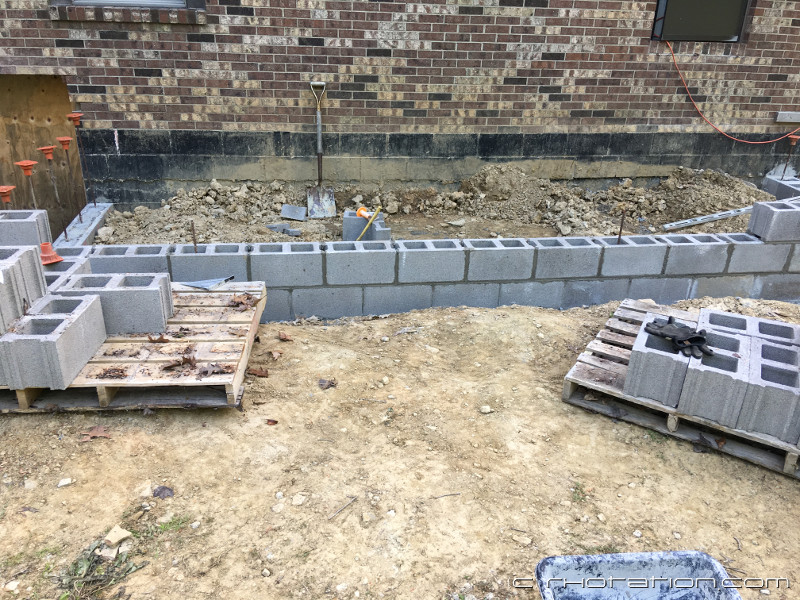
So 6 weeks of summer sun and fun (and rain) and this is what the footing trenches looked like at the end of July. Alot of silt had washed back into the trench and it was holding water in some low spots. Started off by shopvac'ing out the water as best as possible. Then we had to untie the rebar at the corners and lift it out in long pieces still tied to the chairs. Then came the unpleasent job of shoveling out all the muck. Here is a suggestion if you find yourself 3 ft deep shoveling mud from a trench. Don't take a full shovel of it and flip it upside down and then fling it because all that will do is make it explode when it hits the ground covering your shirt, arms, face, glasses and hat in mud. The stuff was so sticky we had to scrape it off and hose down the shovels just so they would function. This was not fun so I'll reiterate , if at all possible, excavate, inspect and pour your footing all at once.

glacier_garage_footer_01.jpg


glacier_garage_footer_02.jpg


glacier_garage_footer_03.jpg


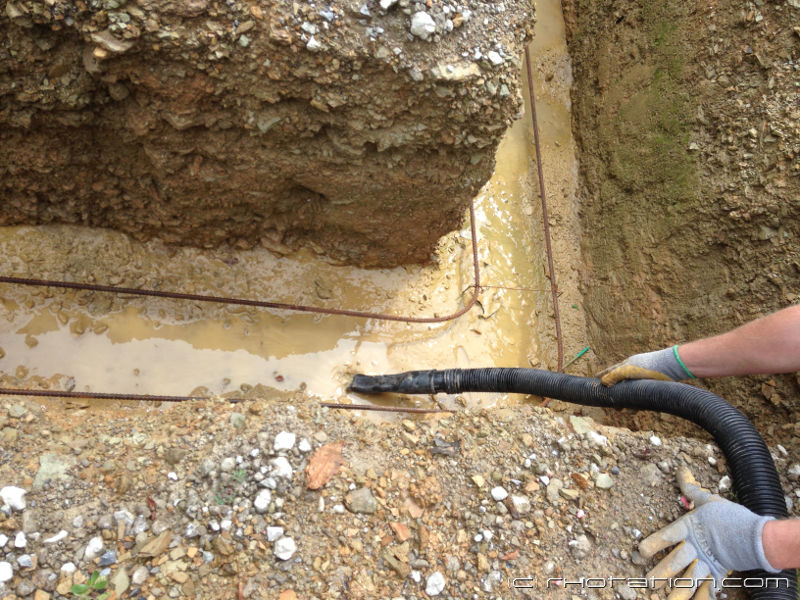
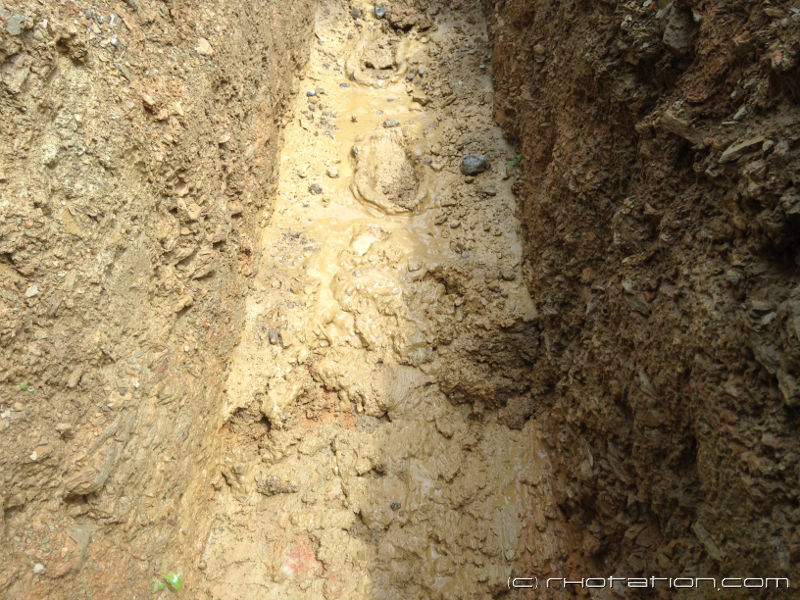
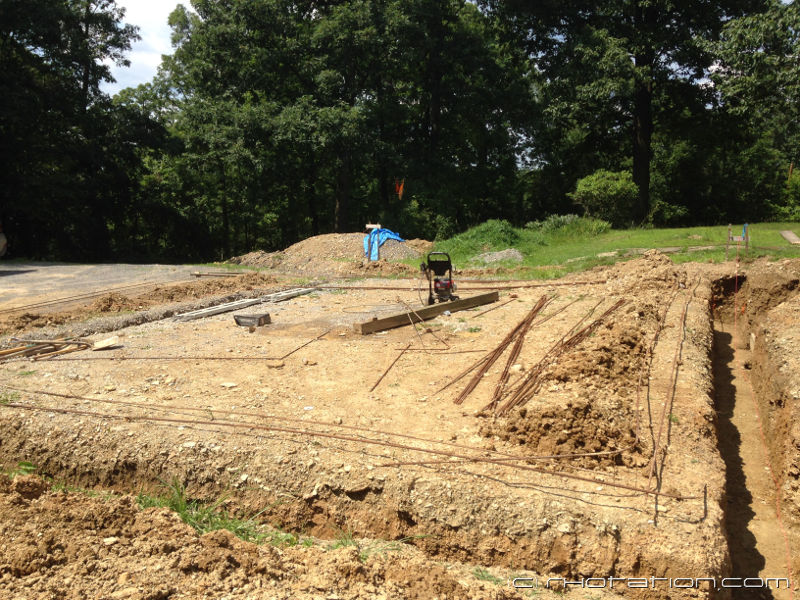
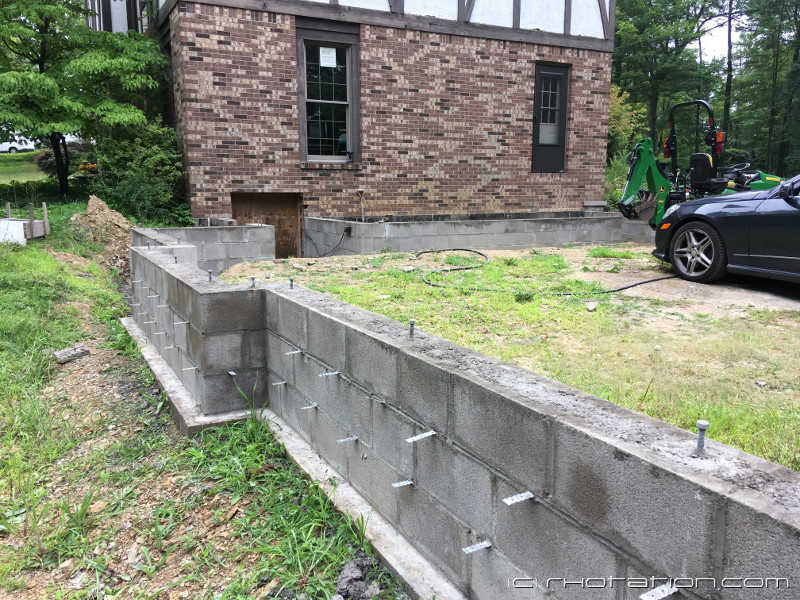
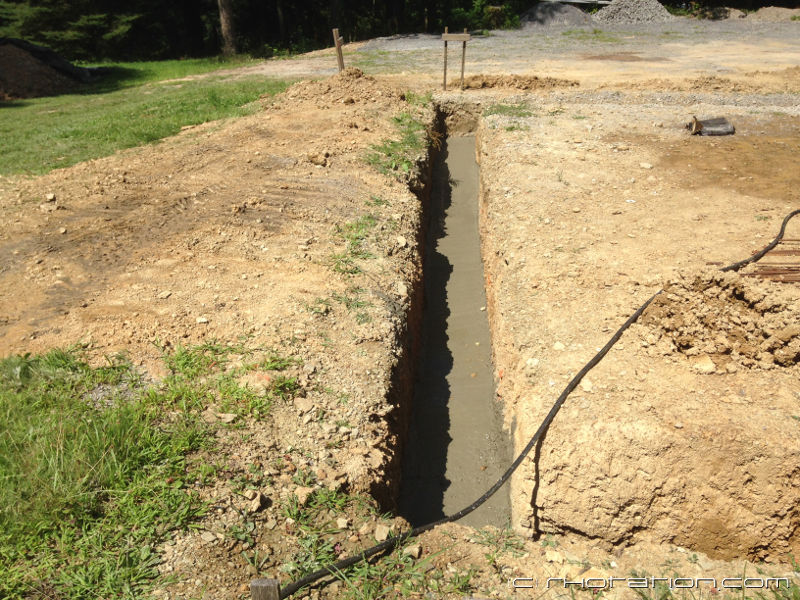
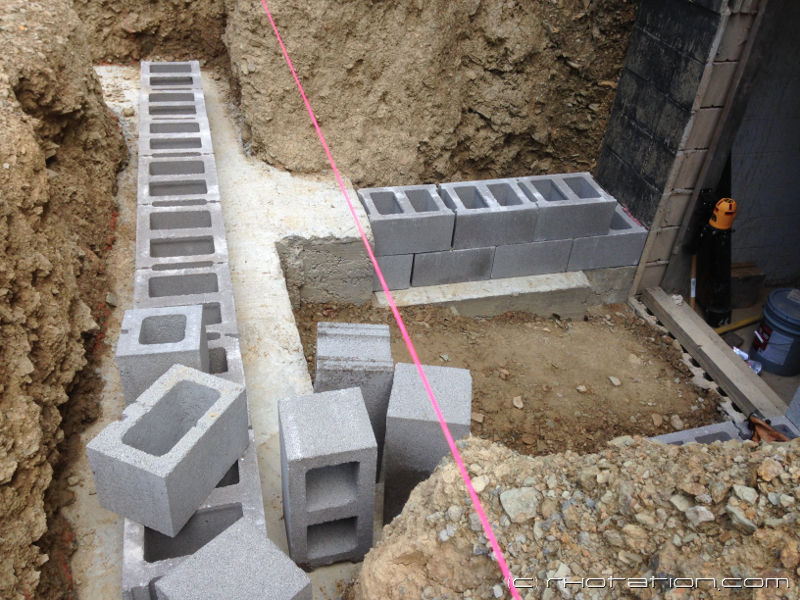
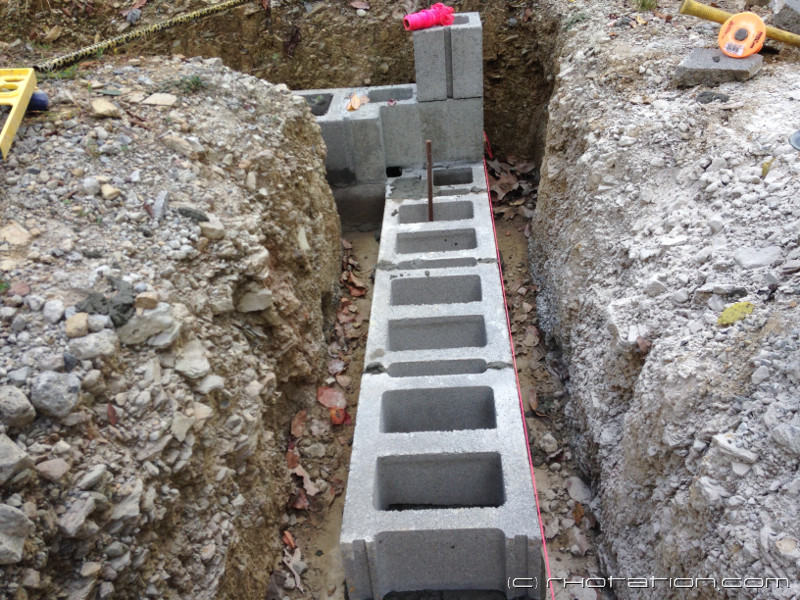
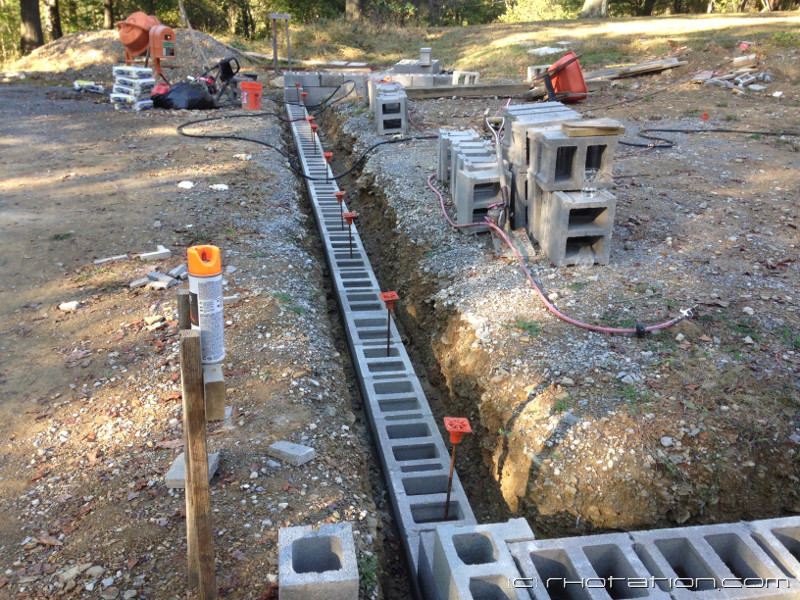
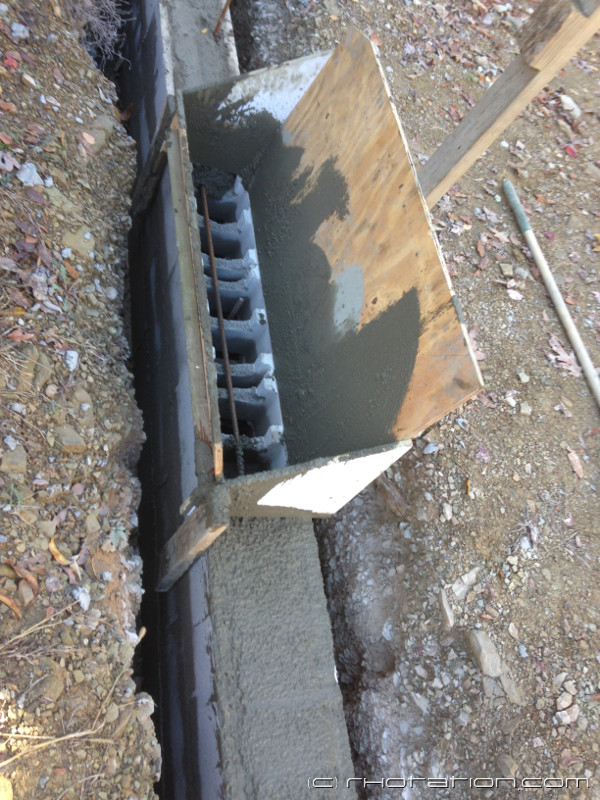
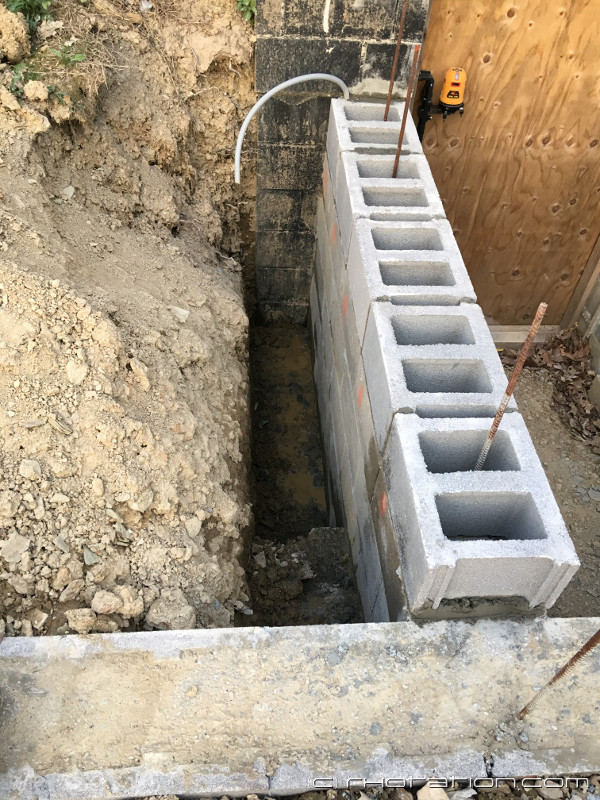
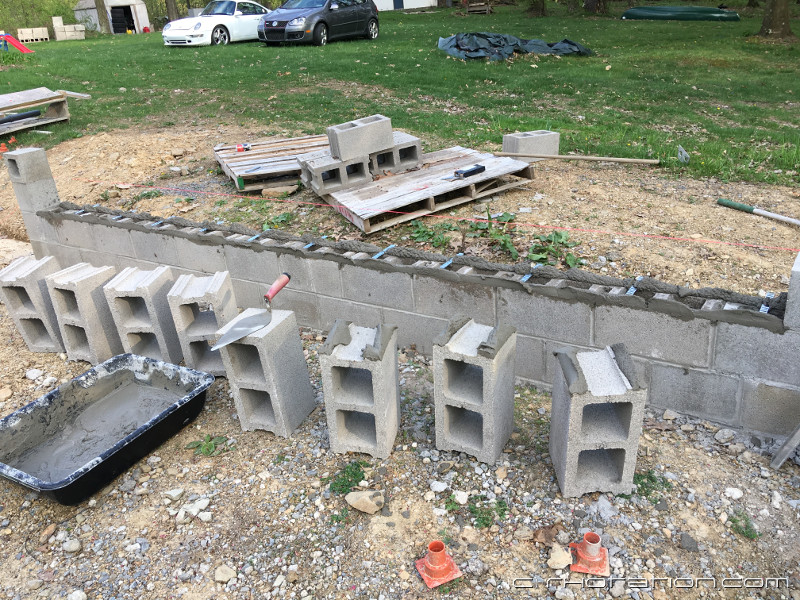
Started on a Saturday and by Sunday the trench was dried out and good as new. We reinstalled the rebar and expoxied it into the block foundation of the house. There were two things left to decide. First, what I was going to do about installing vertical rebar? Answer, I just didn't feel comfortable knowing exactly where the bars would go so I punted and would later drill and epoxy them into the footer. Second, how should I mark where the top of the footer should be? I was considering two techniques I'd seen. The first is to hammer rebar into the ground until the top was at footing level. The second is to paint down the outside of the trench walls until you hit footing level. I was weary of the first method just because there would be rebar going from the footing to the ground and rusting rebar can crack concrete so I used the second method. I took the laser level and set it even with the top of the form which I already knew was at correct height. I held a block of wood to the line then painted down to it which gave me a reasonably clean break.

glacier_garage_footer_04.jpg


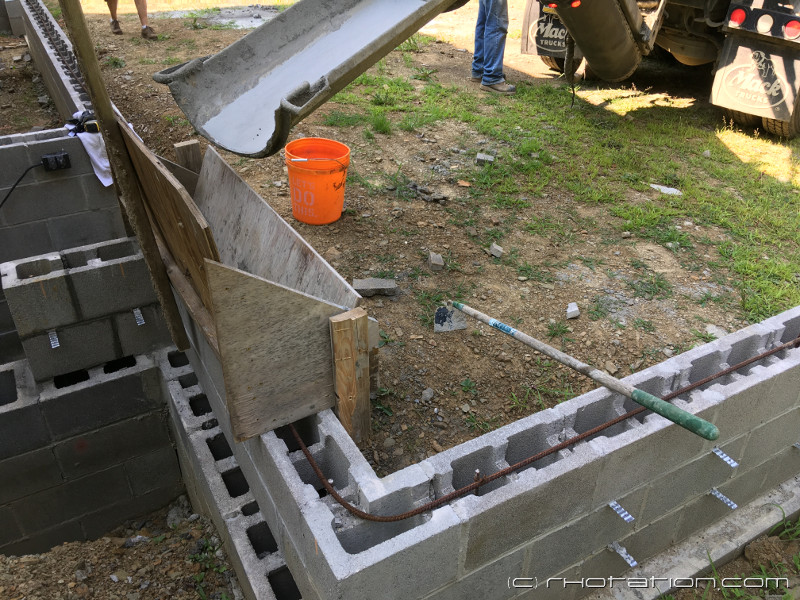
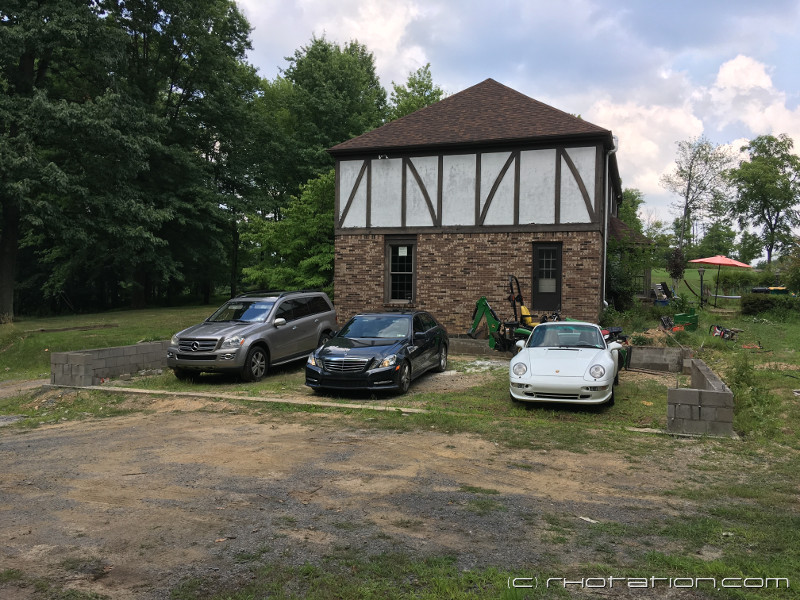
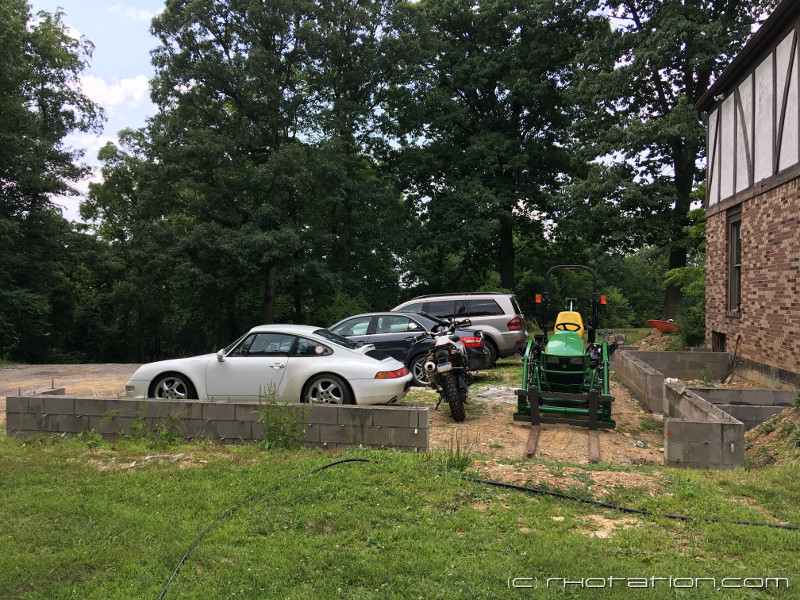
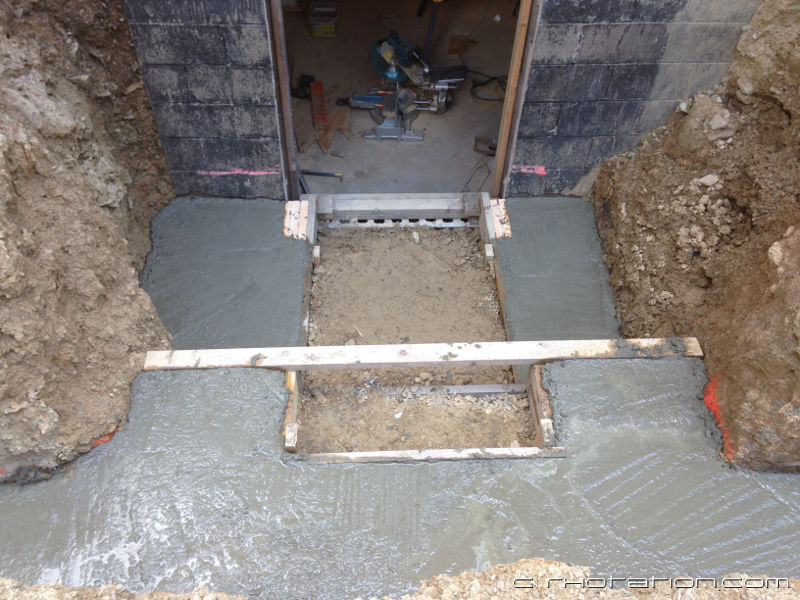
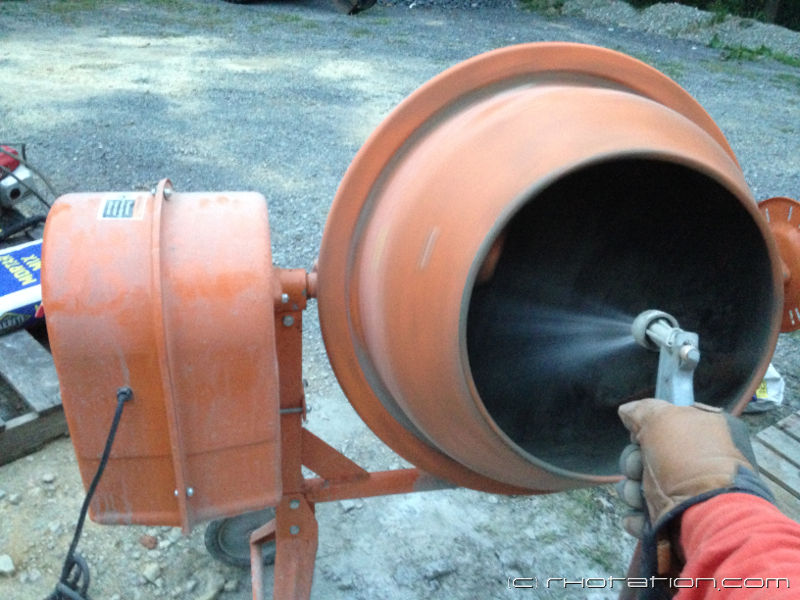
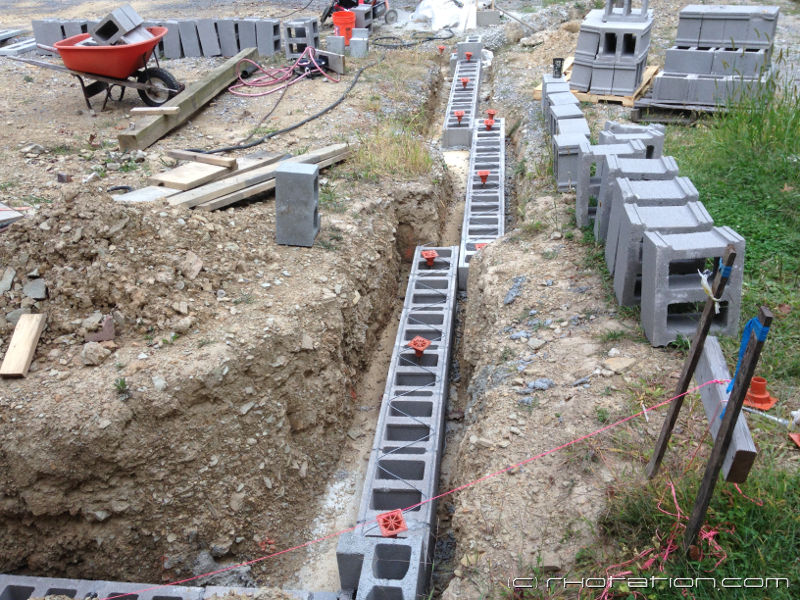
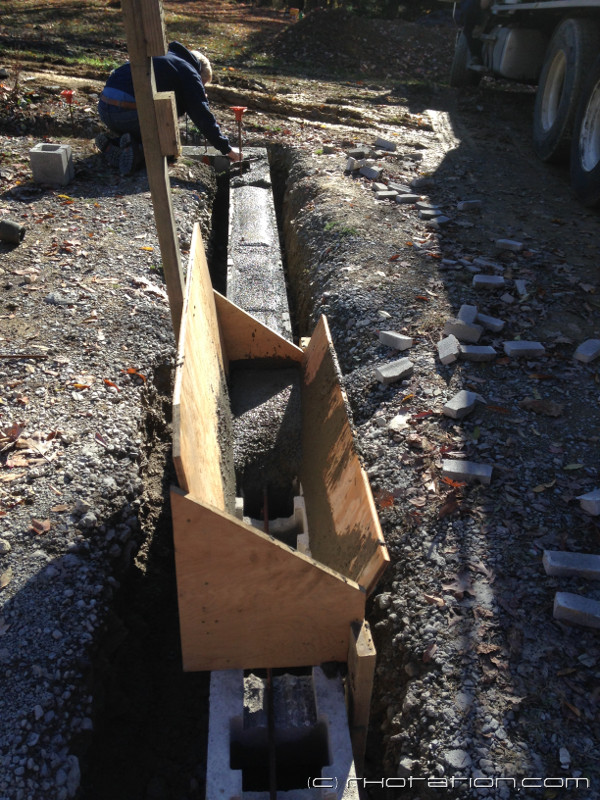
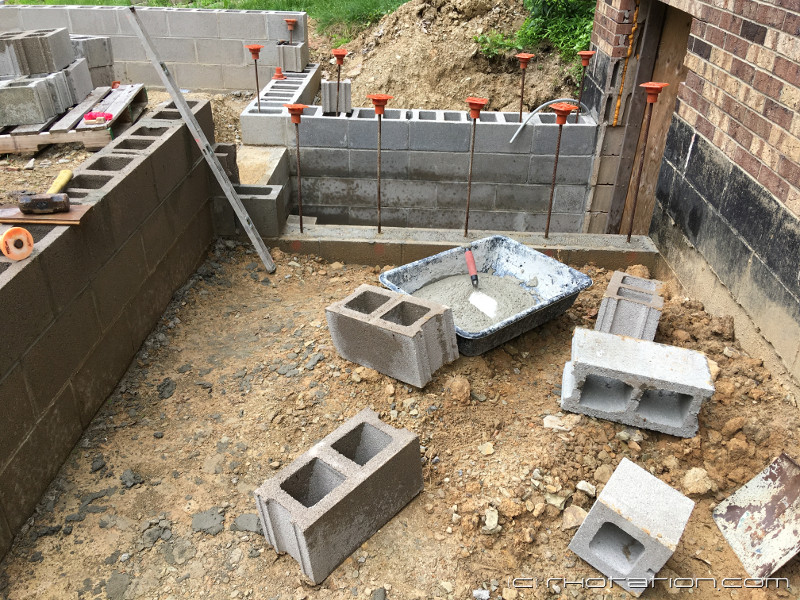
I'm using a company called Pittsburgh Mobile Concrete and they specialize in Volumetric mixers. Price was about 7-10% more than traditional readymix but well worth it for many reasons. 1) No Waste. I tried to cut my trench as consistent as possible but there was still variation in width and depth so I was going to have to over order readymix to ensure I didn't run short if I went traditional. This also means I wouldn't have to dump any unused amount on my property. 2) No Early Set. Since volumetric machines mix as its being poured, I didn't have to worry about when the truck actually left the plant or about how long it took to pour. Sure I'd have to pay $25/15 min overage charge past 1 hour but I wasn't rushing to empty a whole truck. 3) Adjustable Slump. Great for stepped footings and hard to reach areas as we'll see below.

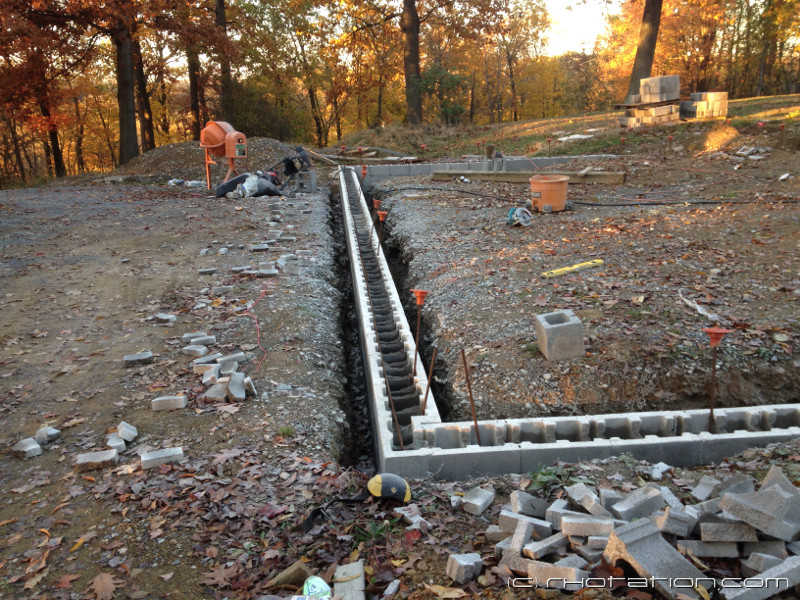
The truck pulled up the driveway as my friend did a final survey of the trench. I kinda 'apologized' to the driver that it would be amateur hour and there were only two of us and I did this while handing him some dead presidents. I wasn't expecting him to do anything other than operate the truck but figured starting off on a good foot would make the whole thing go smoother by leaning on his experience. He surveyed the site and suggested we start at the door opening.

glacier_garage_footer_05.jpg


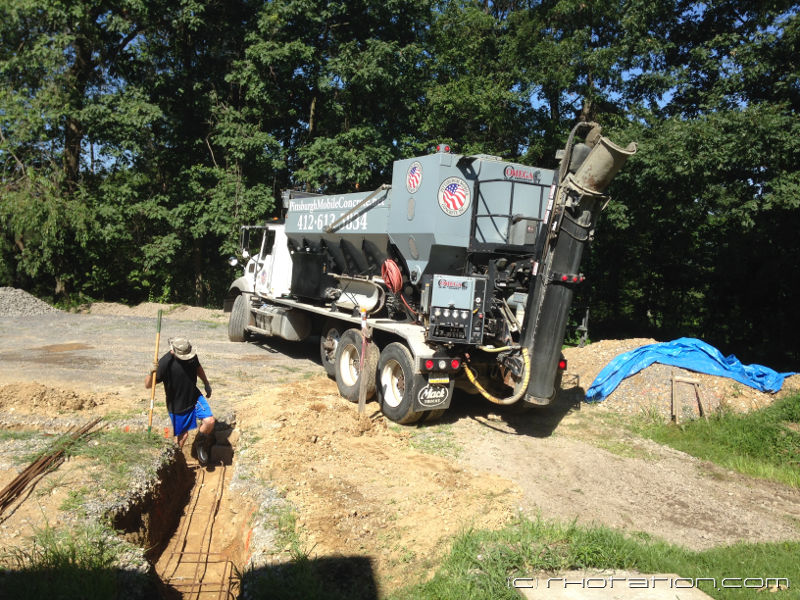
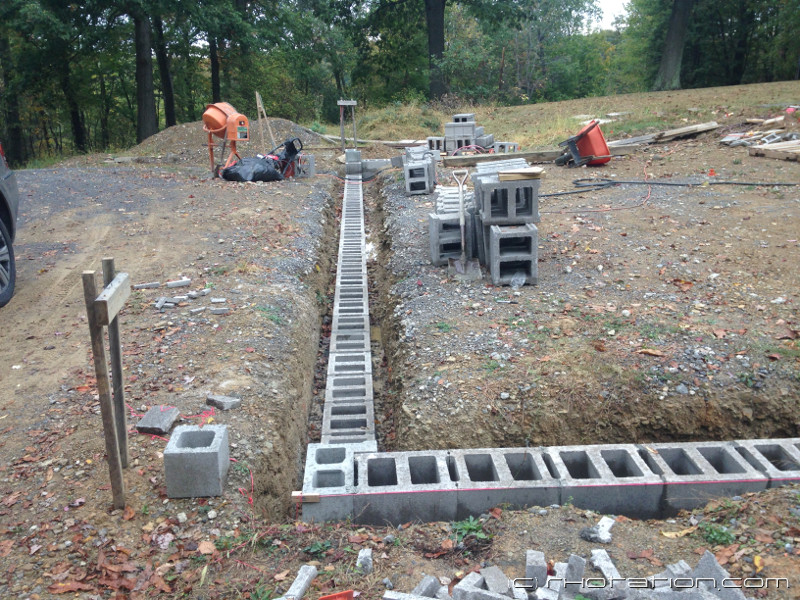
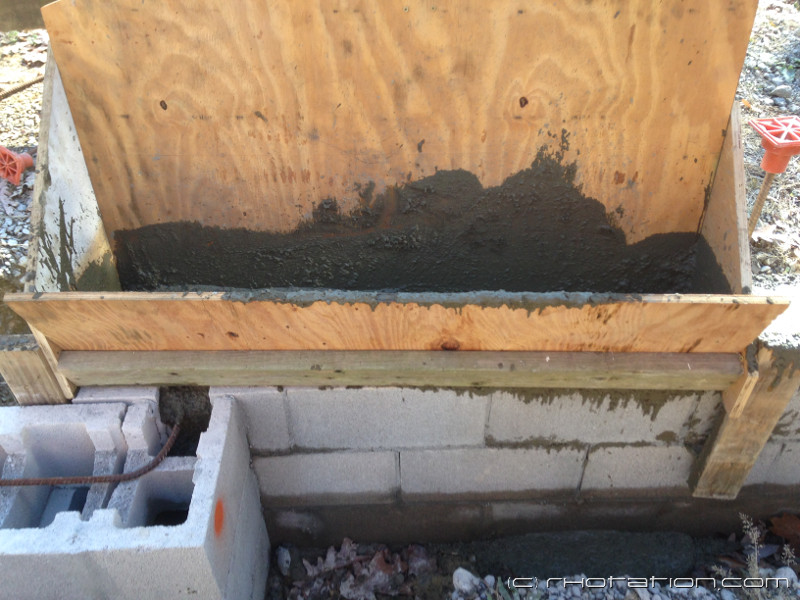
No in progress pics but it went something like this. He backed up as far as he could and put the shoot just past the corner, almost to the form. he suggested a higher slump mix so we could pull the flowable concrete with rakes down both stepped areas to the low part. When the low parts were very close to full, he changed the mix to a very low slump mix which we then shoveled into the step area. This created a 'plug' to prevent the weight of the higher concrete from pushing out the low stuff and it worked great. We went back to a higher slump mix and filled all around the top of the form work. You can see the orange paint lines we are filling up to.

glacier_garage_footer_06.jpg


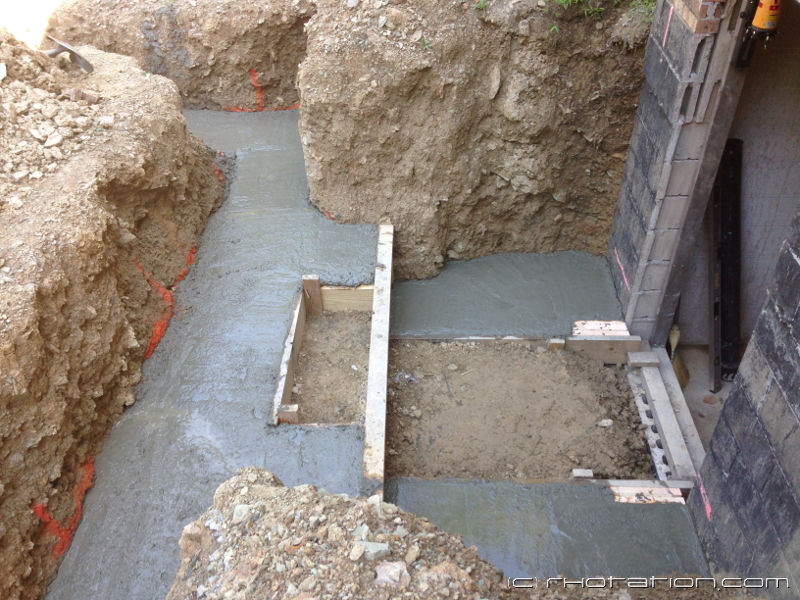
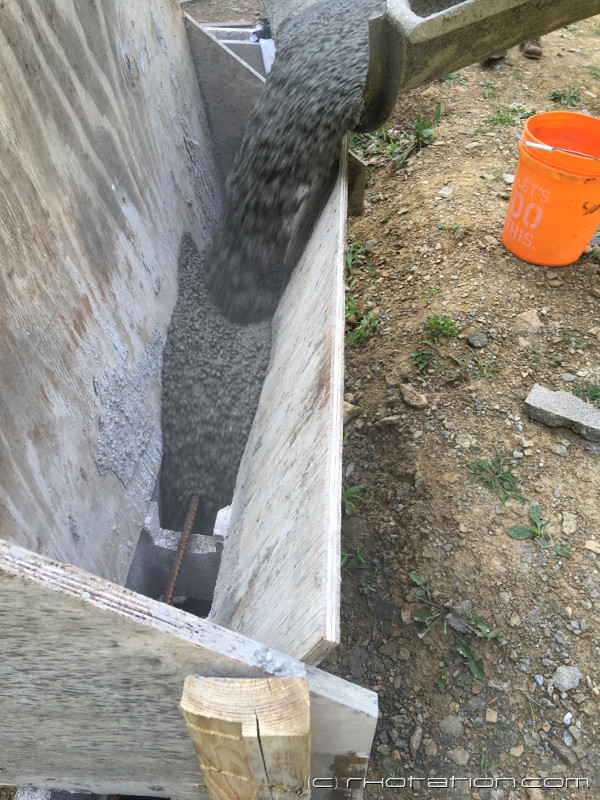
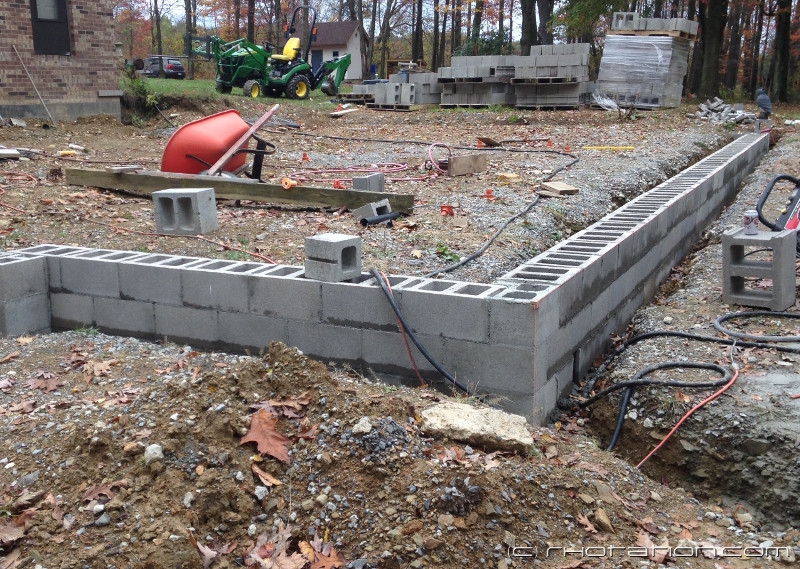
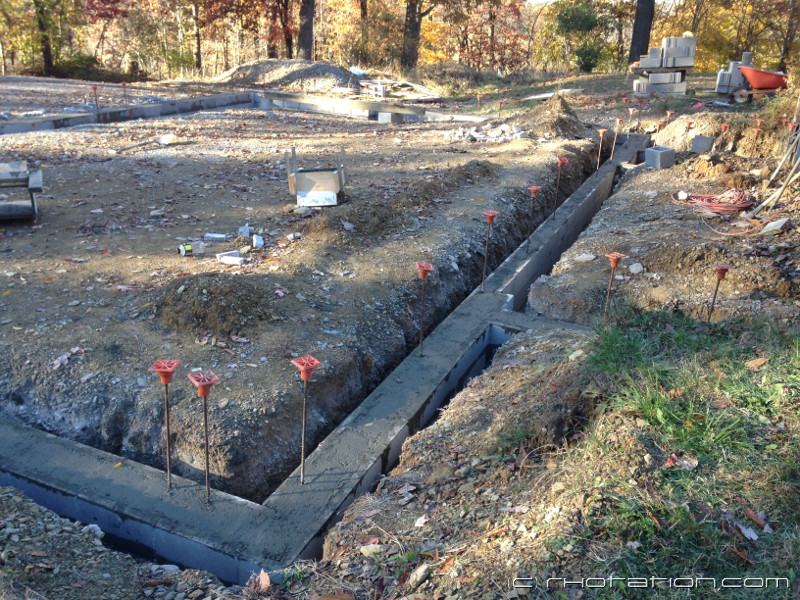
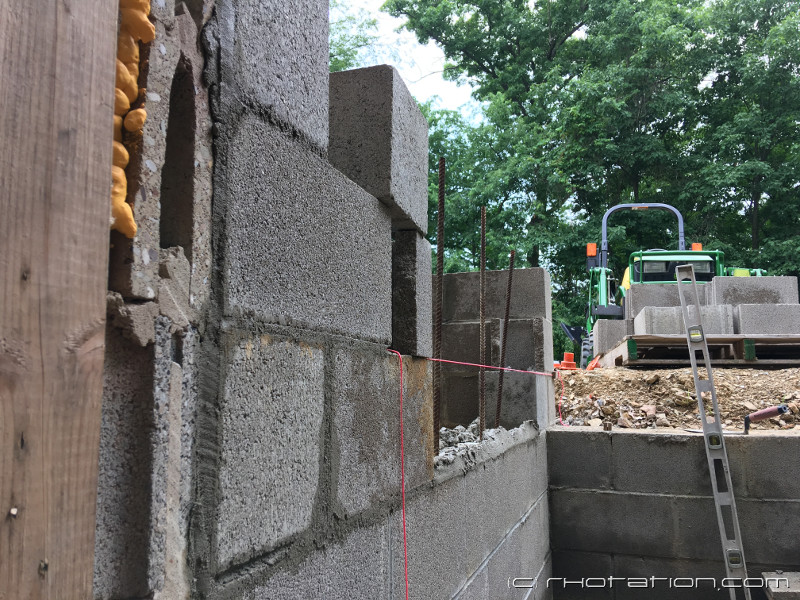
After that he just kept moving the truck a few feet at at time and we worked our way around the entire garage. When we got to the far side we had to water down the mix again so we could pull it into the trench parallel and closest to the house since the chute couldn't reach anywhere near far enough. I know I lost some PSI doing this but I'm not concerned.

glacier_garage_footer_07.jpg


glacier_garage_footer_08.jpg


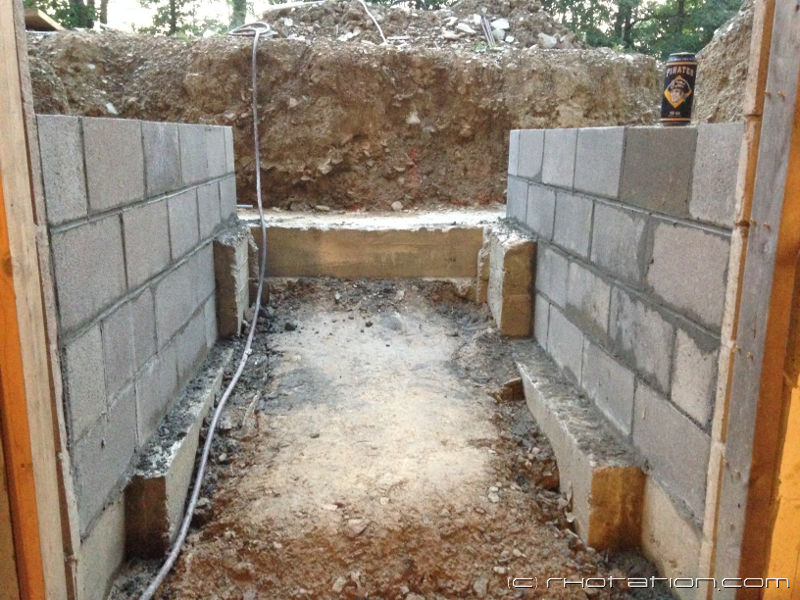
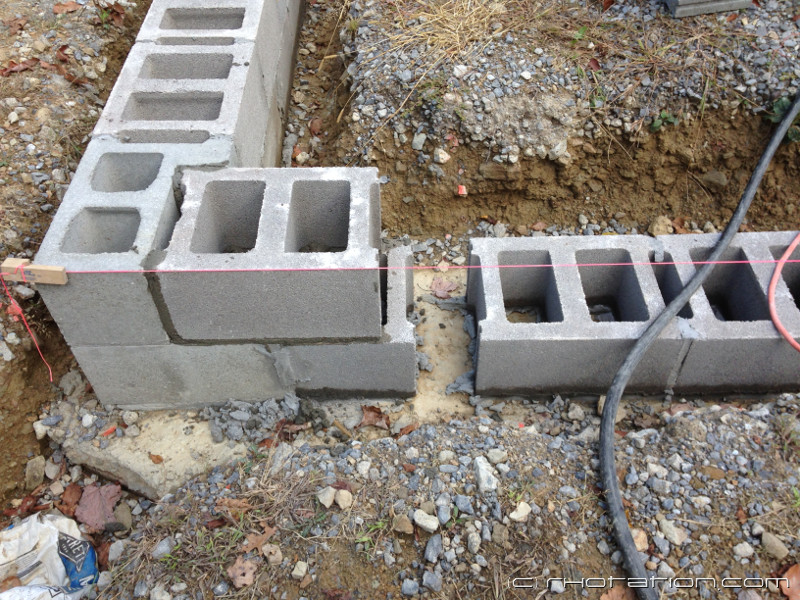
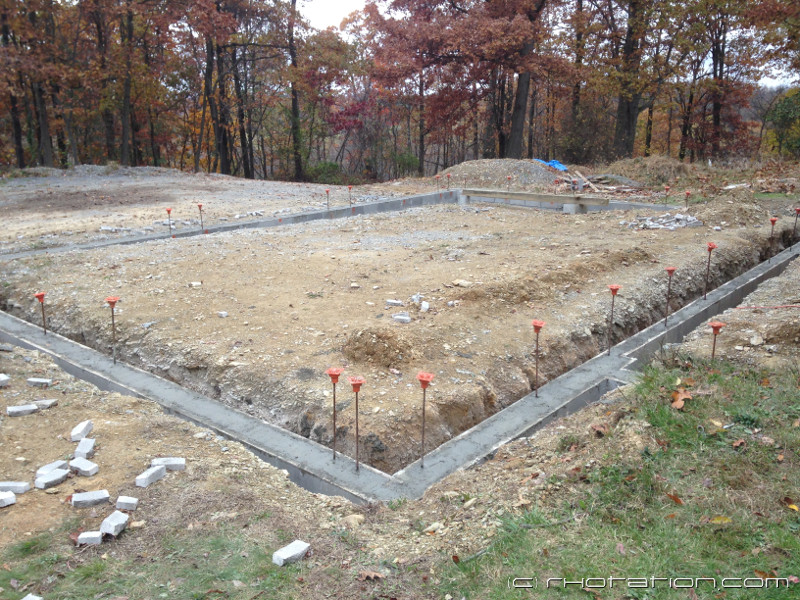
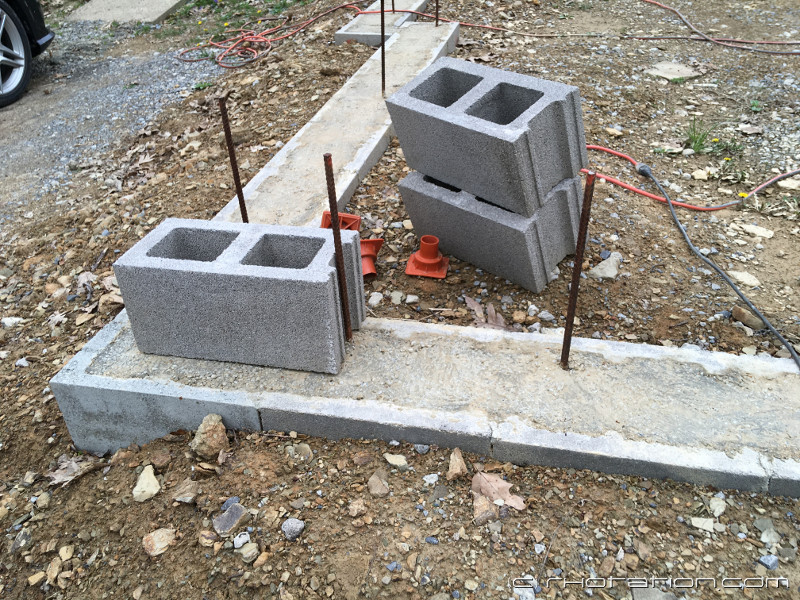
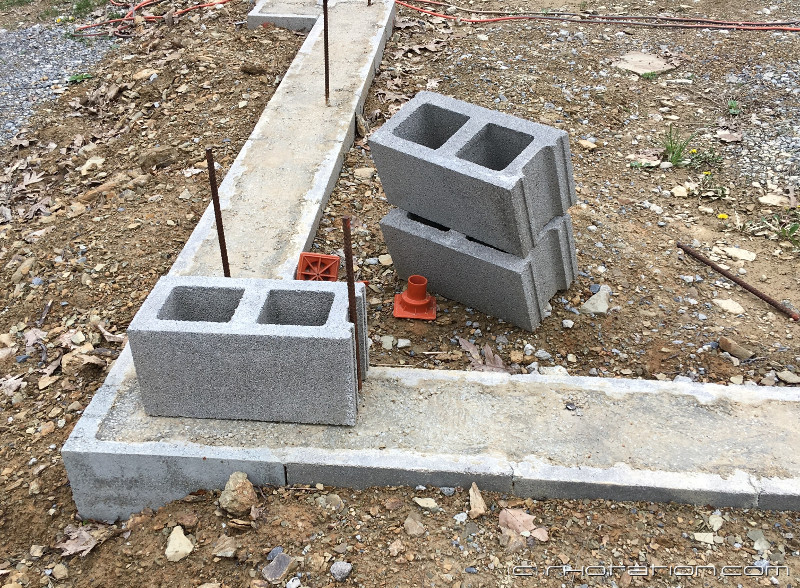
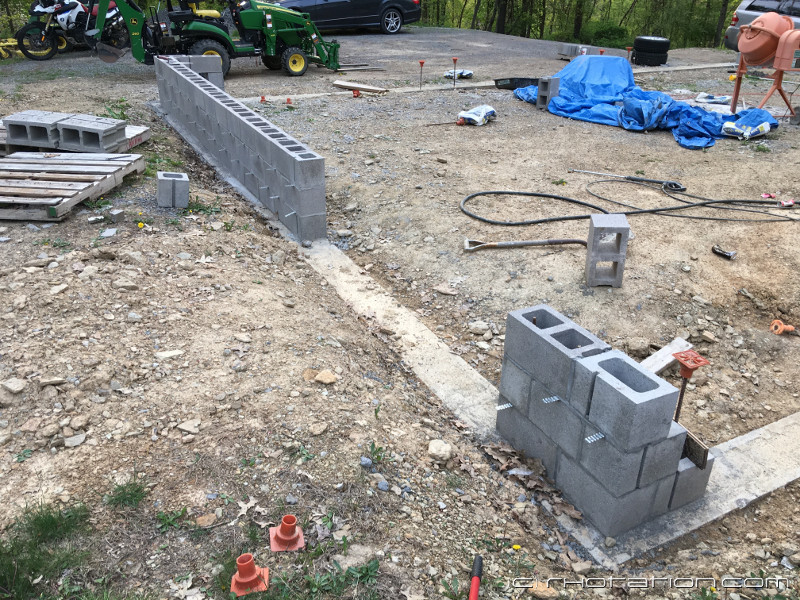
Overall, I was very pleased with how the whole process worked and with the service from Pittsburgh Mobile Concrete and the driver (if they stumble upon this, Thanks!). The only area that had a problem was one corner where I was leveling out an earlier section and my friend didn't notice he was placing too much and went over the orange paint about an inch for 4-6 feet . The rebar stakes would have really helped avoid this and in hindsight I would have found and used some form of non-corrosive plastic stakes to use. I'd end up having to cut off the bottom of some of the blocks to get it my first row of CMU level in that area.

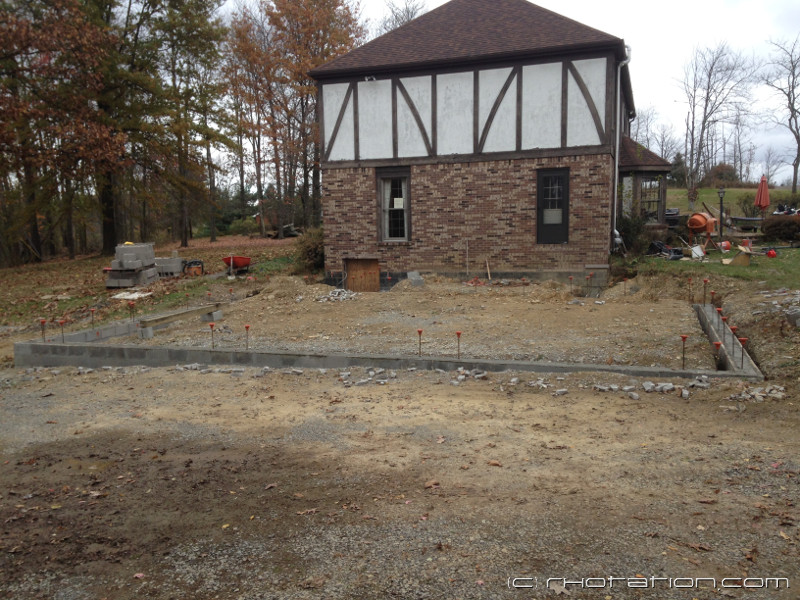
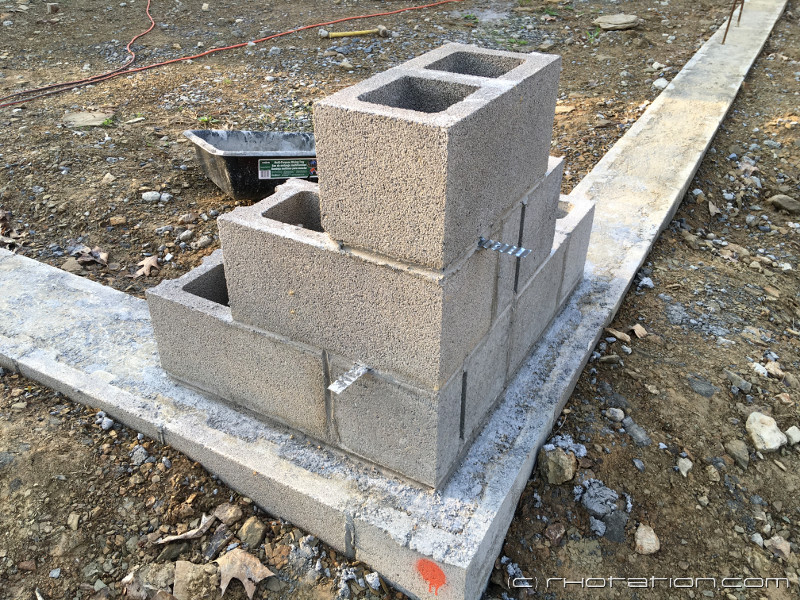
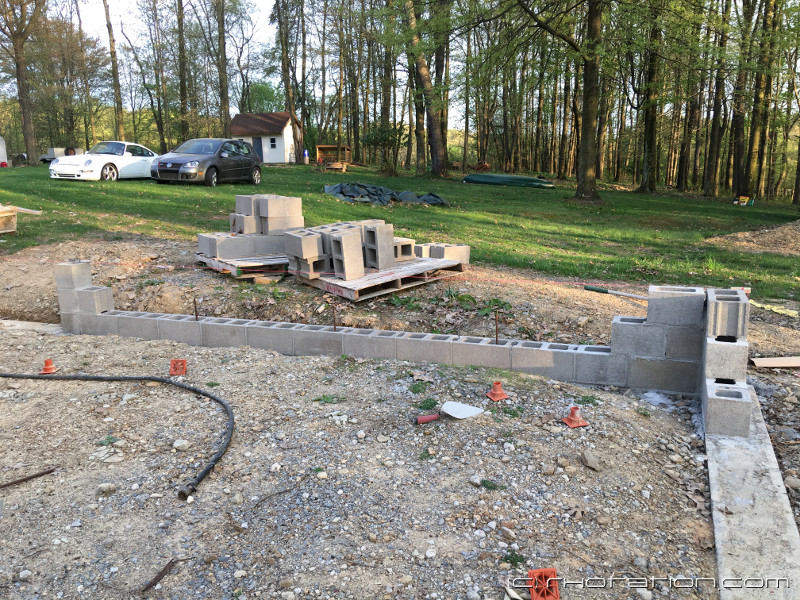
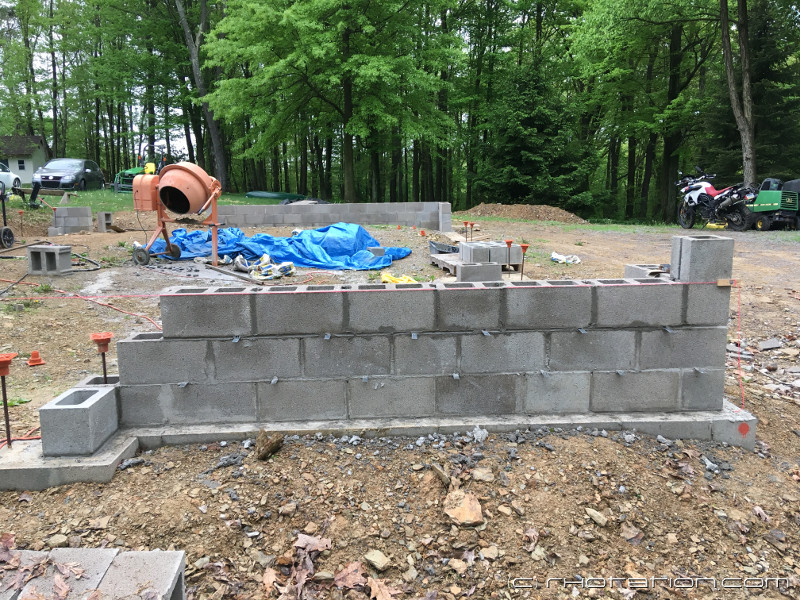
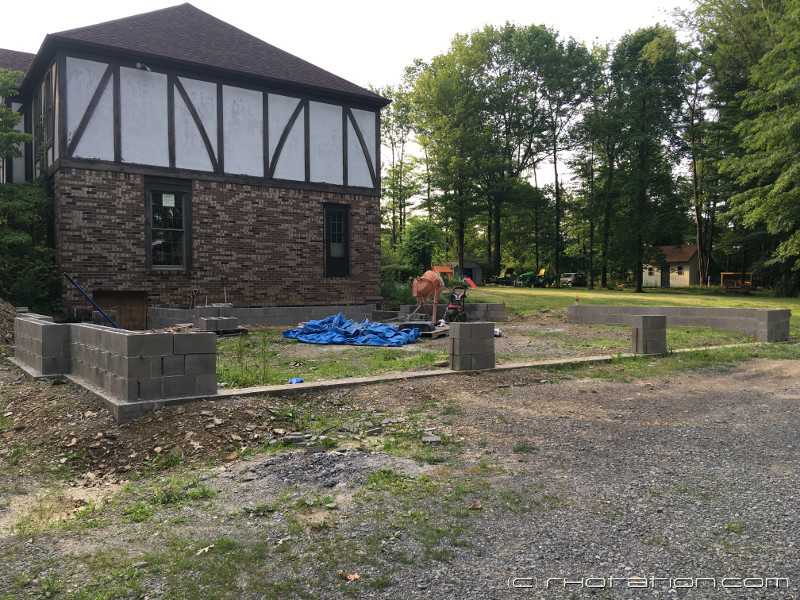
Great feeling to be building UP finally :rocker:

Until Next Time...:beer2:
 
Last edited:
To avoid these ads, REGISTER NOW!

dchance

Well-known member
Joined
Oct 3, 2016
Messages
614
Location
OKC
Interesting way to put in concrete. I have not seen that before.

Dwight
 

Luke.jenner

Member
Joined
Jul 23, 2011
Messages
13
This is one of the best threads on GJ. Please, please post updates ASAP! Your style of writing and detail in the pics is awesome! For what it’s worth I’ve just conpleted a similar project (1000 sq ft - 100 sq m) garage attached to an existing house using professional builders (Contractors) and your standard of work looks as professional as theirs, which was excellent!

I have had exactly the same issue during my build as you did with your fill, wife definately not a fan of strangers on the property or using the outside accessible toilet.

Subscribed!

Luke
 
OP
R

RSr

Well-known member
Joined
Jul 20, 2010
Messages
155
Location
Pittsburgh, PA
Hey Luke, thanks for the kind words. I'll do my best to keep up the detail and pics as I go along. I won't be able to keep up the pace of the posts though once they catch up to where I am in the build, this is the glacier garage after all. I hope to have updates maybe once every week or two when the weather breaks but if I go silent too long anyone should feel free to nudge me to get my *** back to building this thing.
 
OP
R

RSr

Well-known member
Joined
Jul 20, 2010
Messages
155
Location
Pittsburgh, PA
Stripping Forms and Block Delivery

Another logistical problem of my attached garage is that I actually need to park right next to it as construction is going on. While I was waiting on 3 good days of weather forecast to pour the footer, I did take some time to calculate out all the block I would need. The problem was I couldn't have it delivered until afterwards or the concrete truck couldn't fit/turn around. I checked several companies for pricing and Lowes was about 20-25% cheaper for standard 8" and 12" block. I don't feel bad using them because you still know they are sourcing them somewhere reasonably local due to weight. I put in an order for 4 pallets of 12" block and 3 pallets of 8" block 2 days after the footer pour. Delivery was backlogged for 2 weeks because we were at the peak of summer but the weather wasn't looking great anyways.

Time to strip out the footer. This was quite a pain in the *** because of how I built and backfilled the form. A decent amount was buried between dirt and concrete and there were boards that were pinned between concrete on three sides that had to be cut and hammered out. One thing you may notice are the double and triple 2x 'pad' boards where the house foundation opening meets the footer. Because we had to double the footer thickness due to the pipe, I also had to ensure the closest part to the opening wouldn't interfere with future steps. Hopefully those calculations were right or I'll be jackhammering part of the footer away.

glacier_garage_footer_09.jpg


Footer forms stripped, and another rain event covering my footer with silt.

glacier_garage_footer_10.jpg


While I waited on the delivery from Lowes, I had to go pick up all the specialty block. Lowes only stocked 12" 2 hole stretcher blocks (they have flanges on each end to help with mortar head joints). I had to buy 12" L-corner, 12" Half and 12" plain ended block. I also had to buy 8" Half blocks since the lowes pallets don't include the full blocks that are splitable into two halves.

All the specialty blocks from a local block seller loaded in my brothers trailer. Also picked up truss wire for between the 1st and second course with the third course being a rebar bond beam.

glacier_garage_block_01.jpg


Lowes showed up the 3rd week of August... and geez that only looks like 6 pallets of block *sigh*. I'm not sure how they f'd up but since I wasn't paying for masons I told them it was OK to deliver it a few days later.

glacier_garage_block_02.jpg


3 pallets along the back side, the other 3 in the driveway along the garage door side. It was about this time I noticed UPS and Fedex consistently leaving all packages at the bottom of the driveway. :rolleyes:

glacier_garage_block_03.jpg


Weather was looking good so I assembled my Harbor Frieght concrete mixer and scheduled 3 days off from work plus a weekend to hopefully get a nice chuck of the foundation out of the way.

Until Next Time... :bounce:
 
Last edited:
OP
R

RSr

Well-known member
Joined
Jul 20, 2010
Messages
155
Location
Pittsburgh, PA
Block I

I'd like to give a shout out to Mike Haduck and his youtube videos about laying block. I really like his approach and mentality to masonry and it made it less intimidating as a novice. One of the things he says alot is "there's no right or wrong way to do it" and a corollary "ask ten different masons and you'll get 10 different answers". I don't if that's literally true but I'm taking it to heart.

My friend and I spent the early part of the day pressure washing the top of the footers so the mortar would adhere best. It wasn't perfect but clean enough and then we broom swept it after it dried. It took probably 2-3 hours. Despite a clear day forecast, a 30 minute storm appeared from nowhere later that day and we were back cleaning them AGAIN :(

I'm going to build up the stairwell walls several courses before moving onto the garage perimeter. Mike is a big proponent of laying out a job dry before you start work so I'm starting in the stairwell doing just that. This was a very reasonable 6' 8" span to fill with a wall on one side that I could plumb and chalk line. I got 4 course on both sides of the stairwell and while I marveled at my handiwork while drinking a beer it hit me that it was only 38 blocks in an entire day.

Layin it out
glacier_garage_foundation_01.jpg


Making mortar in the HF mixer
glacier_garage_foundation_02.jpg


A beer to celebrate my minor accomplisment
glacier_garage_foundation_03.jpg


The next day I really wanted to get as much 1st course block installed as I could so I wouldn't have to ever clean up the footer again if it rained. Here is the front wall's first course. It seemed like too much of a pain to cut the block to interlock the parts of this wall. There is going to be a grouted bondbeam on the third course anyways along with grouted vertical cells at the corners so they aren't going to separate. You can see vertical rebar has been epoxied into the footer. They protrude maybe 12-14 inches and in hindsight I'd increase this to a minimum of 16 inches for more overlap with future rebar.

glacier_garage_foundation_04.jpg


The first course of the garage door side block installed. There is a gap in the distance to let rainwater flow out and I had to stop about 8 ft shy on the other side due to the high footer requiring cut blocks.

glacier_garage_foundation_05.jpg


I finished the first course on the other two sides and later moved the block off my driveway. I made a conscious effort to lift the blocks as little as possible. When breaking down the pallets I'd bring the tractor over with a empty pallet and lift it to the correct level so i was basically sliding the blocks onto it. Then I'd drive the tractor pretty close to the final destination, set the pallet about thigh high and pin a block to my leg, pivot and set it in position around the trench. OVER and OVER and OVER, but the technique was solid and I never woke up even one day with a sore back.

Splitting a pallet. Deere could move 1/3 pallet at a time.
glacier_garage_foundation_06.jpg


Block staged for laying
glacier_garage_foundation_07.jpg


One thing I knew I wouldn't do was leave exposed rebar during this project. A year ago I found 90 quality rebar caps on craigslist for sale from some Russian named Nikolai for $25 and I couldn't pass them up. I have two little kids that I take past the worksite to the car daily and want to do everything I can to make it safe. Not only that but the OP is prone to admiring his work late night after adult beverages and someone has to protect that idiot from impaling himself :D

First Course Finished (except the high spot of the footer)
glacier_garage_foundation_08.jpg


Truss wire embedded under second course corners
glacier_garage_foundation_09.jpg


Until Next Time... :cool:
 
Last edited:
OP
R

RSr

Well-known member
Joined
Jul 20, 2010
Messages
155
Location
Pittsburgh, PA
Block II

Reading some other members builds I'm always envious of the ones where the wife is a willing and consistent participant in the building process. I practically have to beg my wife to help with projects and it was like that even before kids. Laying all this block by myself is taking forever so one weekend I asked my parents to watch the kids at my place and my wife agreed to help by mixing the mortar and carrying it to me. It certainly helped speed things up a bit and it was nice to just have someone else outside to banter with. As the day got sunnier and hotter the mud started stiffening up and I'd have to retemper it. I got tired of using my trowel so I looked over at my wife, pointed to the tool and said "Bring me that mortar hoe". She had no idea that was the actual name of the tool and assumed I meant "Bring me that, Mortar Ho". :eek: I got the death stare from her and something like "What did you call me?"...."I didn't call you anything, I just asked for that mortar hoe leaning against the mixer". ANYWAYS, after the confusion was cleared up, we both had a good laugh about it :p123 ...and strangely enough the name stuck. For the rest of the day she was my Mortar Ho, dutifully bringing me mortar and I even got her applying the head joints to the blocks before I laid them into the mortar bed. It was the most productive day of block laying, I think we got 75 or so down in 6 hours.

Without the Mrs. it was back to laying block myself and I finally committed to dealing with the high corner of the footing. When I originally started laying the blocks, I cut one down to size so I could install it as the corner block and have it set to the correct position and height. I pulled a mason line and flipped blocks upside down next to it to mark the height for each. I pulled them from the trench, and marked around the block 3/8" higher for the bed joint and sawed all 4 sides with a circular saw mounted diamond blade. After breaking off the unneeded part, I scored the uncut center area with an angle grinder and chiseled the last part off.

glacier_garage_foundation_10.jpg


glacier_garage_foundation_11.jpg


While I was at it, I shortened a block lengthwise to make a gap for my garage floor drains to exit the foundation (and also keep stormwater flowing out)

glacier_garage_foundation_12.jpg


Finally, All the first course block was done and I wouldn't have to clean the footer again. Jobsite looks like a bit like a warzone though :rocketwho
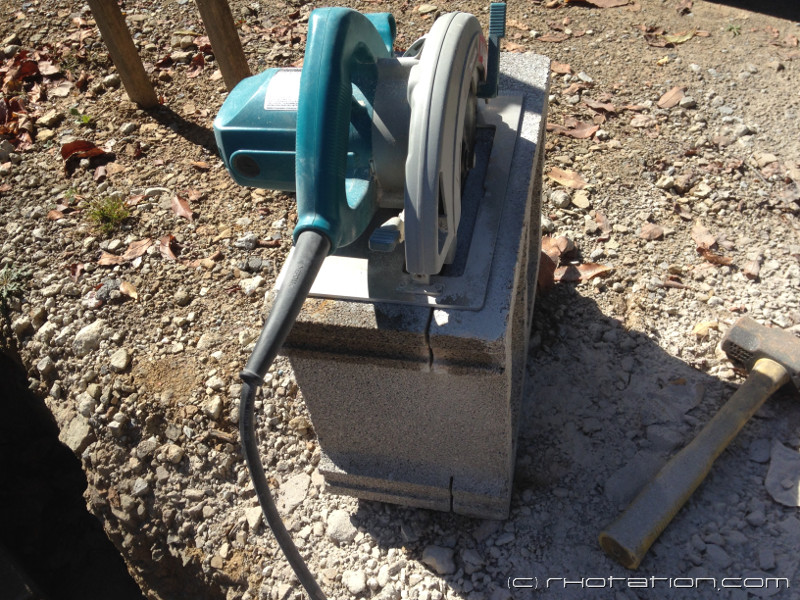
. Lets take a moment from our scheduled program to clean up this disaster. And no comment on the leopard print broom, I used what I found in the laundry room.

glacier_garage_foundation_13.jpg


Ahh, thats better :)

glacier_garage_foundation_14.jpg


The result of the hard work of me and my Mortar Ho. When she reads this post this will be what happens to me :twak:

glacier_garage_foundation_15.jpg


I've pretty much glossed over the epoxy stuff in this thread but will touch on it here though there is plenty of info on youtube. I'm using Sika AnchorFix1 which costs about 20 bucks a tube. I looked at their Product Data Sheet for it and it specs a 9/16" hole for #4 rebar and an embed depth of 4-6 inches so I went with 5 to keep at least 3 inches from bottom of the footing. I hammer drilled the holes, blew them out with compressed air (the ****), reamed them with a stainless wire brush and blew them out again. Only trick with the epoxy is to work fast, like real real real fast. At 80+ degrees the mixing spout will solidify in under 2 minutes. Two full squirts of epoxy in the hole, hammer rebar in, repeat. Just make sure you add enough it oozes out the top of the concrete when the bar is set. Then don't forget to cap them. Voila!

glacier_garage_foundation_16.jpg


Ok, this post needs to end so lets skip ahead a week or two.

glacier_garage_foundation_17.jpg


glacier_garage_foundation_18.jpg


It's the end of October, the leaves have changed and are starting to fall from the trees. Three courses are done and now need a bond beam and grouting.

Until Next Time... :pimpflash
 
Last edited:

spudley

Well-known member
Joined
Dec 27, 2016
Messages
702
Location
Northeast Wisconsin
Been watching your thread but just now read the mortar hoe story. My wife in the other room asked why I spit out my beer. Good tale mon ami, and good job on the block work.

Years back I was building a lake cottage with a full basement. Myself and three sons (16, 14 and 12) did 1400 10" blocks in a week, all mud mixed in a wheelbarrow. Hardest work I ever did. All three boys learned a great lesson and all have Masters degrees or better now.

They never wanted to work that hard again!
 
OP
R

RSr

Well-known member
Joined
Jul 20, 2010
Messages
155
Location
Pittsburgh, PA
Myself and three sons (16, 14 and 12) did 1400 10" blocks in a week, all mud mixed in a wheelbarrow. Hardest work I ever did.

Yikes. That's a ton of mortar to mix by hand (probably 4-5 tons actually).

Working smart, not hard, is one of my guiding principles of this project. I'm happy to save money but also will spend it when it saves me wear and tear. I've got a long way to go to the finish line.
 

madison069

Well-known member
Joined
Nov 5, 2010
Messages
4,123
Location
Monroeville, PA
Howdy neighbor!

When I saw your picture of the house I honestly thought it was the house down the street from me! Problem is I didn't see a new garage being built as it already had a 3 car built on the basement level.

As for the rain we did have an unusual amount of rain last summer huh. People thought we were going to have alligators in the street soon!

As for the cement, I was wondering if you could PM the cost of what you paid for their service and material, I've been planning and pricing material out for a driveway project but haven't called the cement/concrete company up yet. I also take it that you're having a great result from the cement mixer from HF, any regrets with it? I got some small projects that needs some concrete and I was planning to buy one of the HF mixer.

Either way, maybe we can get together one day and shoot the breeze!
 
OP
R

RSr

Well-known member
Joined
Jul 20, 2010
Messages
155
Location
Pittsburgh, PA
Hey, I just caught your thread a few days ago. That's nice find since it seems pretty much every part of Allegheny county restricts accessory structure sq ft and height severely now.

The stucco and half timber look seemed pretty popular in the 80's around here. I'm not a fan of the maintenance it requires and neither was the previous owner evidently. I'll have to replace most of it in the not so distant future, likely with Hardie siding.

I called for quotes at several ready mix companies and all were around 137/yard after tax. The volumetric company I'm using worked out to $150 after tax, fuel and hot water fees.
 

madison069

Well-known member
Joined
Nov 5, 2010
Messages
4,123
Location
Monroeville, PA
Yea I was fortunate to find the house I have with the big garage. Seems most of the folks on my street has a big garage of some size, across the street the guy has a building where they ran a machine shop out of for awhile until they moved the operation to another city! The garage of mine was built in the 60's-70's so they were able to make it taller and bigger then we could today.

I do agree that the stucco/timber deal is popular and as you stated it's high maintenance. Fortunately my house is brick with vinyl siding. I suspect the old wood siding that was on it was a high maintenace deal but luckily the previous owner changed the wood to vinyl before I bought it.

That's not a bad price for the cement, so it might be fesible if I do all of the prep work myself. Maybe I can past the purchase of a tractor with a front loader by the wife if I can show her the saving and the use I can get from it!:bounce:
 

madison069

Well-known member
Joined
Nov 5, 2010
Messages
4,123
Location
Monroeville, PA
Drove by the house I was talking about, heck it could of been the same builder as your house!
 

Attachments

  • IMG_20180208_134005664_HDR.jpg
    IMG_20180208_134005664_HDR.jpg
    156.6 KB · Views: 162
OP
R

RSr

Well-known member
Joined
Jul 20, 2010
Messages
155
Location
Pittsburgh, PA
Yeah its sitting up on a hill, brick color is close and the proportions look pretty similar for building width and height as well as the center reverse gable bump out. Those eyebrow gables over the windows are "interesting" and so is the tiny window in the center, must be a bathroom.

It was a strange time and lots of strange houses were built. My house has some of the good and some of the bad from the time period. Love that the floors joists are trusses and wiring and plumbing are easy to install. Hate that the stucco is EIFS panels and the house uses let in metal bracing instead of sheathing for shear walls. Creaks like a wooden boat when it gets real windy. I'll be sheathing it when I replace the siding
 
OP
R

RSr

Well-known member
Joined
Jul 20, 2010
Messages
155
Location
Pittsburgh, PA
Grouting I

The weather was alright but below freezing temperatures were showing up in the 10 day forecast so I called to see if I could get a concrete truck in before that happened. Luckily they had an opening in two days so my friend and I worked on getting the block cut and rebar ready for the bond beam. We used a diamond blade on a circular saw to cut the insides of the block and then a tap from a hand sledge broke the centers out. I hadn't been covering the block so we also shop vac'd each core to get out any leaves that may have fallen in. We cut and bent all the rebar and staged it around the foundation.

glacier_garage_foundation_19.jpg


Where the truck couldn't reach we made small jig to fill the cores of the block using a 5 gallon bucket

glacier_garage_foundation_20.jpg


Orange spray paint marked the location of the rebar coming up from the footer so we had an easy reference where to place them after the grout was in.

glacier_garage_foundation_21.jpg


So the grouting went something like this. The truck showed up loaded with 3/8 pea gravel to make the grout (I'm using a volumetric truck again). A large jig was made for the areas the truck could reach. We'd fill up the jig with grout and when the cores were full we'd drag it a few feet and fill it up again. There are two 2x4's on the front side at the edges and one on the back in the middle. If I had two on the back at the edges then the jig couldn't slide past the outside corners and straddle the inside corners. As we went along I would stab the vertical rebar where the paint marks were and my father-in-law troweled the grout flat. It was really a 1 man operation using the large jig so my friend and I took turns hustling 5 gallon buckets to the small jig on the one wall the truck couldn't get to. It took about 50 minutes to fully grout the wall with 5 cubic yards of grout.

The Jig and my FIL troweling the grout.

glacier_garage_foundation_22.jpg


glacier_garage_foundation_23.jpg


Stick a fork in 'er...

glacier_garage_foundation_24.jpg


She's done!

glacier_garage_foundation_25.jpg


Pics from the next day under "better" overcast light.

glacier_garage_foundation_26.jpg


glacier_garage_foundation_27.jpg


It's mid-November and below freezing overnight temperatures were a few days away and here to stay so I decided this was the stopping point until spring. I blew all the leaves out of the trenches and backfilled with dirt.

glacier_garage_foundation_28.jpg


Until Next Time... :beer:
 
Last edited:
To avoid these ads, REGISTER NOW!
OP
R

RSr

Well-known member
Joined
Jul 20, 2010
Messages
155
Location
Pittsburgh, PA
I'm going to try and start taking a photo from a consistent location as I go along as a pseudo time lapse. I cut down a nice tree before starting the project because it was leaning towards where the garage was going to be built and dropped berries. It was a shame because it was a fantastic shade tree but I knew the berries were going to drive me crazy and it was easy/cheap to cut it now. At least it left me with a stump that I'll stand on for these pictures. The first and last photos I was on the stump, the second and third I was slightly to the side standing on a gravel pile. I do need to make sure the house is in the same position each time going forward.

glacier_garage_site_01.jpg


glacier_garage_excavation_08.jpg


glacier_garage_foundation_07.jpg


glacier_garage_foundation_27.jpg


glacier_garage_foundation_38.jpg


Nicely done, especially with the jig. If I ever have to fill block wals, I'm stealing that idea for sure!

Steal away my friend, for I stole most of the jig design from others on the internet. Only thing I'll credit myself for was the 3 vs 4 leg idea.
 
Last edited:
OP
R

RSr

Well-known member
Joined
Jul 20, 2010
Messages
155
Location
Pittsburgh, PA
Still sitting in a holding pattern due to the weather. March and April so far have been complete no-go since nighttime temps have been below freezing (ruins mortar) and the days where it warmed up inches of rain fell. On a positive note I got SUPER lucky and scored practice round tickets to the Masters from the ticket lottery after 7 years of entering. I spent a great Easter weekend with my dad, father-in-law and friend down near Augusta, memories I'm sure to cherish for a long time. If you're a golf fan and ever get a chance to go you need to... its an incredible experience.

glacier_garage_winter_01.jpg


And back to reality... this is April 10th and more fresh snow this morning. In the 10 days in April, 7 days of snow and 6.3 inches of snowfall.

glacier_garage_winter_02.jpg
 
Last edited:

memphisnate

Well-known member
Joined
Jan 8, 2010
Messages
398
Location
Memphis, TN
Man, the Masters experience is incredible. I was lucky to go a couple years ago to a practice round as well. The condition of that course is beyond belief.
 
OP
R

RSr

Well-known member
Joined
Jul 20, 2010
Messages
155
Location
Pittsburgh, PA
Block III

Winter, snow, a month never above freezing, Spring, rain, more rain, and more snow all came and went. There were actually some nice weekends I could have started earlier but out of town trips and visitors interfered and kept pushing me back. The glacier is however officially moving again so lets recap where we left off...

In the last picture of my grouting post you may have noticed that I was about to backfill with dirt. I really didn't want to but you play the cards you're dealt. The day I was grouting the temperature was almost 60 degrees when we started at 1PM and by midnight it was a still pleasant 50. By morning it was 35 and still dropping with a forecast overnight temp of mid 20's. Just to be on the safe side I rushed to backfill to provide some temperature and wind protection. I tarped over the tops of the block and when I ran out of tarps I simply piled dirt several inches thick on certain sections. It wasn't much but it was the best I could do in a pinch.

The tarps were removed a few weeks afterward during a warm spell but there was dirt still on top of half the foundation. Time to scrape and shovel it all away and then follow up with a pressure wash.

glacier_garage_foundation_29.jpg


The dirt along the stair well also slumped over the winter and I never got a chance to apply foundation coat due to the weather so dug a 12" trench and pressure washed the wall... and put down some block just to get my feel back.

glacier_garage_foundation_30.jpg


glacier_garage_foundation_31.jpg


I'd like to give a shout out to the Essential Craftsman and his youtube videos about house construction. He really hasn't even begun the build but his videos about planning and due diligence were very informative. One of the things he talks about is the cost of making changes related to how far you are into a project. After reading a few threads that popped up over the winter I realized it would be better to go with 10' wide doors. I already had placed rebar in the locations needed for 9' doors so there is a cost to cut those off and drill and epoxy new rebar. But that cost was relatively cheap compared to living with 9' wide doors. Plus the masonry will lay out much better with the 40 foot width divided into 3-10-2-10-2-10-3.

The rebar on the right is exactly where the wall needs to end for the garage door opening.
glacier_garage_foundation_32.jpg


A grinder makes quick work of it. I'll have to set a new one 4 inches to the left
glacier_garage_foundation_33.jpg


Now it was time to build my 4 corner leads. Because of the 4" brick ledge, the corner rebar land in awkward locations. I bought a bunch of 12" half block that I'm using as foot long single cell 8" block. I could have cut normal 8" block down with a grinder but it wasn't worth the dust or cost. Overall the corners turned out alright. With three courses they should have been 24" tall but my mortar was loose/wet and constant adjusting caused them to be 1/4" low with inconsistent bed joint size per row. Each corner was plumb though.

glacier_garage_foundation_34.jpg


glacier_garage_foundation_35.jpg


Ok, MOMENT OF TRUTH, its all dry and now its time to check wall lengths and diagonals. With the aid of my trusty laser measure and a beer to celebrate with or console me based on the results.

glacier_garage_foundation_36.jpg


Short walls both came in at 27' 4" 1/8. Long walls came in at 39' 4" 1/8 for one and 1/16 for the other. The two diagonal measurement can be seen in the picture. :thumbup:

glacier_garage_foundation_37.jpg


I still have about 9000 more pounds of block to lay but it should go quicker since I'll mostly be laying to the line now that the corners are set and accurate. I guess I better get my lumber take-off from last year requoted and prepare for the sticker shock. :shocking:


glacier_garage_foundation_38.jpg


Until Next Time... :beer:
 
Last edited:
OP
R

RSr

Well-known member
Joined
Jul 20, 2010
Messages
155
Location
Pittsburgh, PA
Not a big update but its been two weeks and I don't want the thread to go silent for too long. I'm currently about half way through with the final 3 course of block. I also ended up being a self-inflicted victim of the "Buy Nice or Buy Twice" adage. :twak:


glacier_garage_foundation_39.jpg
 
Last edited:
OP
R

RSr

Well-known member
Joined
Jul 20, 2010
Messages
155
Location
Pittsburgh, PA
Marshaltown seems to be what both the big box stores carry. That one was $15 bucks and the next one up was $40 so I took the gamble and lost. The expensive one is forged from 1 piece vs having the blade welded on.
 
OP
R

RSr

Well-known member
Joined
Jul 20, 2010
Messages
155
Location
Pittsburgh, PA
Block IV

Its been a month since I've checked in with this thread but don't worry, it will not go dark until the garage is finished. In my last large update I had put up the 4 corner leads for the garage, (~30 block) so now it's time to fill up all the empty space between them (~230 block). I was mostly laying 12-15 blocks a night, which is one bag of mortar, on days where the weather was good. I'll highlight each wall individually.

First things first, a trip to the block yard. The nice lady that owns the place said I could take as many as I want, something about being an eye sore and killing the backyard grass... I'm not sure I wasn't really listening. Behind the block yard you can see the brick and paver yard. The previous owners really liked over ordering materials and I approve. :)

glacier_garage_foundation_40.jpg


glacier_garage_foundation_41.jpg


Rear Wall

No real challenge to this wall which is why I started off with it. In fact, its so boring I won't even describe it.

glacier_garage_foundation_42.jpg


glacier_garage_foundation_43.jpg


glacier_garage_foundation_44.jpg


Front Wall

Now I could hit my stride because this is the wall that's completely straight with no openings. AWW WTF. Why is there a bump out for the reverse gable here? I need to find the person who drew these plans and smack them upside the head a few times... what a pain in the ***. I was also running low on 12" length block and had to resort to making them. You know the deal: measure, chisel, flip, measure, chisel, break and hope that both sides broke where you wanted or you get to repeat the process.

glacier_garage_foundation_45.jpg


glacier_garage_foundation_46.jpg


glacier_garage_foundation_47.jpg


glacier_garage_foundation_48.jpg


House Wall

Okay, onto the wall/walls closest to the house where I left out a piece of rebar during the first grouting so I could get back in with the tractor. I removed as much dirt as I could from the breezeway crawlspace area and pressure washed the block. Evidently when I dumped dirt on the grout last fall it really stained it. I built the two leads for the long wall first and then filled in that area. Then I was ready to build the lead against the house and complete the L. The wall that intersects the back of the house is complete minus 5 blocks which is where my on-site mortar supply ran out.

glacier_garage_foundation_49.jpg


glacier_garage_foundation_50.jpg


glacier_garage_foundation_51.jpg


glacier_garage_foundation_52.jpg


glacier_garage_foundation_53.jpg


glacier_garage_foundation_54.jpg


glacier_garage_foundation_55.jpg


Driveway wall

Yeah those pillars are just dry staked for the time being. Since I decided to change door widths I need to cut flush the existing rebar and epoxy in threaded rod in the outer cells bordering each opening. I'll cover that in the next update which will include grouting the wall and setting anchor bolts.

glacier_garage_foundation_56.jpg


Until Next Time... :3gears:
 
Last edited:

wasfast

Well-known member
Joined
Apr 10, 2014
Messages
874
Location
San Diego CA
It would appear you have a lengthy summer ahead. That's a lot of work by yourself. Mix mortar, distribute mortar, set blocks, trowel smooth....
 

madison069

Well-known member
Joined
Nov 5, 2010
Messages
4,123
Location
Monroeville, PA
Looks like progress!

The weather has been nice for a change, too bad it's going to be a heat wave this weekend!
I'm digging a trench for a 4" drain pipe for the downspouts and french drain around my property. My goal is to get the main branch completed this weekend and that involves digging in very rocky, compacted driveway of mine.

Wonder if digging with a demolition hammer and shovel is easier then mixing mortar and stacking blocks?
 
OP
R

RSr

Well-known member
Joined
Jul 20, 2010
Messages
155
Location
Pittsburgh, PA
It has been a slow process and a lot of work but it’s great to see the garage outline coming up from the ground. Really excited to switch to framing.

I definitely would rather be laying block than digging trenches. When it’s as hot as it’s supposed to be this weekend I like spending the days with the kids instead of breaking myself under the blaring sun. Good luck and stay hydrated.
 
OP
R

RSr

Well-known member
Joined
Jul 20, 2010
Messages
155
Location
Pittsburgh, PA
Grout II

Finally the end of the foundation was in sight so I tried my best get some momentum going and finish it. My wife had other plans which included us going for a whole weekend to visit friends at Penn State :wtf:
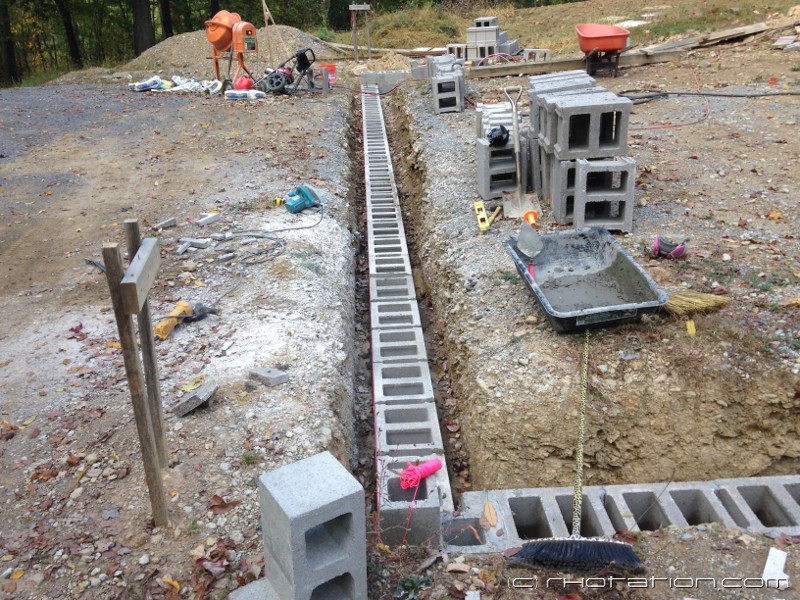
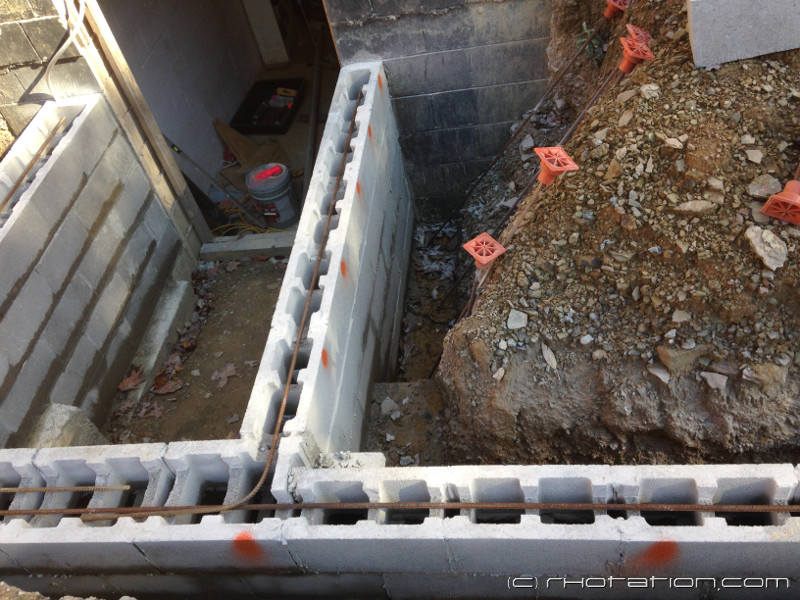
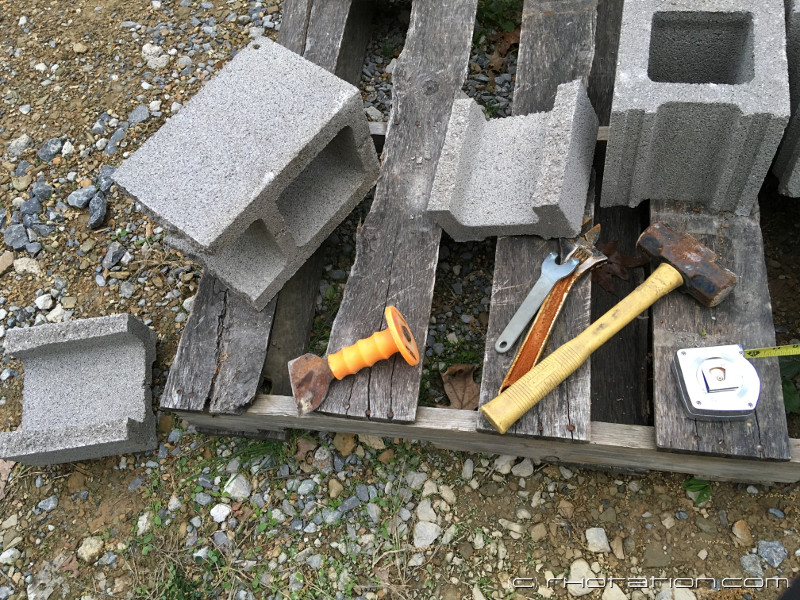
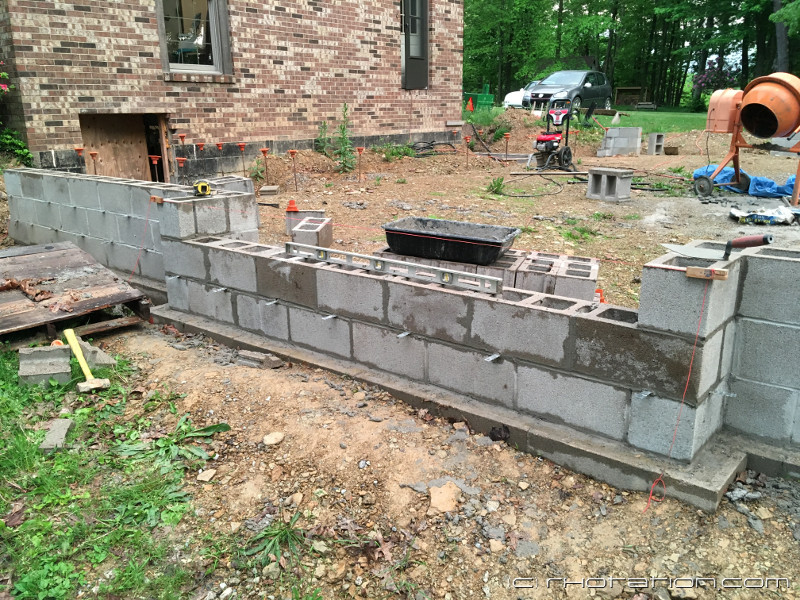
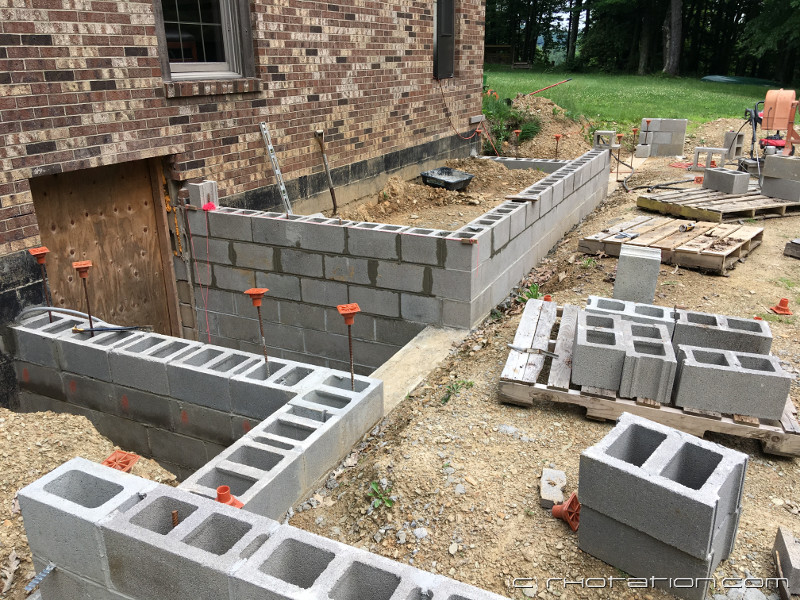
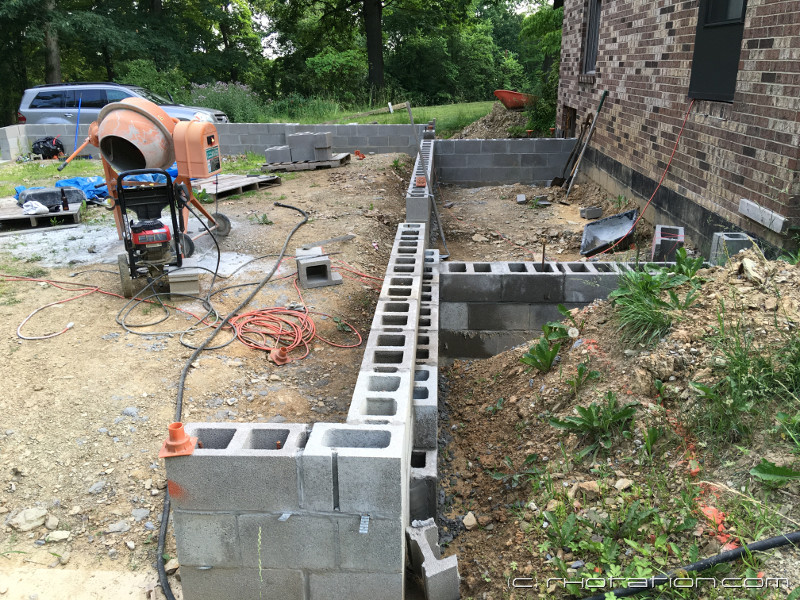
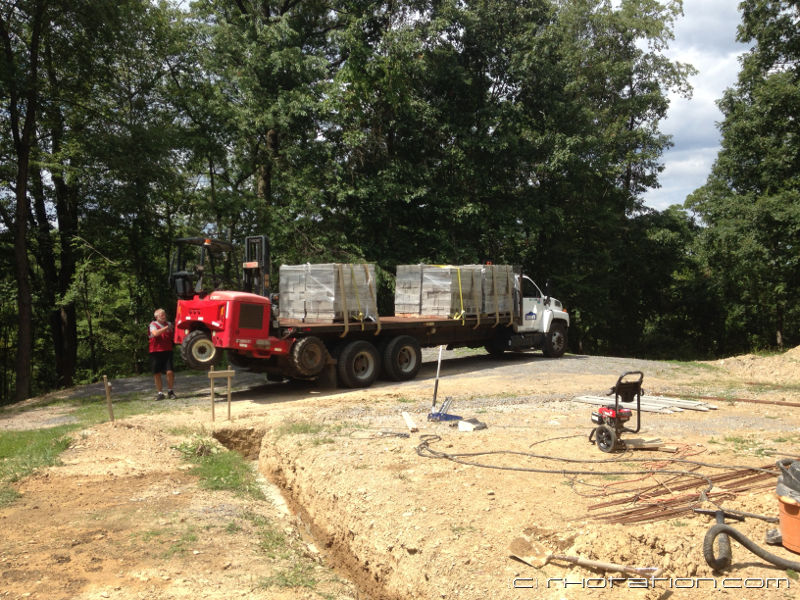
. It all worked out anyways since the heat index was almost 100 both days and I wasn't getting much work done in that heat. When I got back I decided it was time to rig up outside power on this side of the house rather than running extension cords through an open door. After that was done I cut the bond beam channels in the block and laid and tied the rebar, epoxying it into the house foundation on the return walls. . At this point the $15 dollar diamond blade (DEWALT DW4712B) in my circular saw had cut through over 200 block (including first grouting) and was kaput.

glacier_garage_foundation_57.jpg


Pittsburgh Mobile Concrete's volumetric truck was on site Monday and I used 3.5 yards of 3000PSI pea gravel grout. Total price was just shy of $600 which is pretty much in line with what I would have paid a redi-mix truck since I'd have ordered 4 yards to include a waste/safety factor. My grouting jig looks a bit worse for wear since it sat outside all winter but the torx screws came right out and I sized it down for an 8" block wall and went to work. Unlike my last pour, the concrete truck could drive inside the foundation so there were minimal buckets used for tight spots. But unlike last time I didn't have a friend to help me out and it was hard work lifting and re-positioning the jig, especially on that stupid front side with the bump out. My parents did stop by and helped by setting the anchor bolts where I marked out.

glacier_garage_foundation_58.jpg


The jig doin' its thang!

glacier_garage_foundation_59.jpg


All done!. I went back and screeded the grout from the top of the blocks and about an hour later wet the walls since the temp was cooking outside. I couldn't install the garage door walls because the truck needed to back in during the pour.

glacier_garage_foundation_60.jpg


Man it feels good to be done with the block work. It was also nice to have all the **** cleaned up, so I did what everyone one else here would do.... bring my stable in to check out their new digs :pimpflash.

The proportions seem a bit silly at this stage but there will be work benches and storage on the side walls which will knock off 4 ft of usable space but should still leave a very generous parking area. I'll try to roughly detail some of my interior plans

glacier_garage_foundation_61.jpg


The SUV will probably go in the middle bay but I staggered them this way for depth comparisons. Porsche is definitely staying in its position so I have full access to the side garage door entrance.

glacier_garage_foundation_62.jpg


The tractor is dreaming... this area is motorcycle parking during the good months and will also have a tv, fridge and some seating. The opening in the block wall is just for crawlspace access, the stairs up to the breezeway will be further down past the end of the tractor

glacier_garage_foundation_63.jpg


This wall will be parts and tire storage and eventually I will put a 4 post lift in this bay.

glacier_garage_foundation_64.jpg


The left bay will be my wrenching area and have the tool chests, work benches and either a 2 post or scissor lift.

glacier_garage_foundation_65.jpg


glacier_garage_foundation_66.jpg


So its on to framing now which I'm very excited about. I'll probably hold off on building the final 2 stem walls until the wall framing is finished and I get the 28' trusses inside the garage.

I plan on adding a "lessons learned" post to this thread covering things I encountered building the foundation. If anyone has questions on areas I didn't cover please let me know and I'll include them. Reply to the thread or shoot me a PM. I will be posting detailed costs as well, no need to ask.

Until Next Time... :beer:
 
Last edited:

GLTHFJ60

Well-known member
Joined
Oct 31, 2013
Messages
821
Location
Durham, NC
Damn man, just damn. Awesome work.

Very curious what this cost you vs paying someone to put the foundation up.
 
To avoid these ads, REGISTER NOW!
Top Bottom