To avoid these ads, REGISTER NOW!

21" Royersford Excelsior Restoration

ClappedOutBport

Well-known member
Joined
Mar 30, 2016
Messages
998
Hi all.

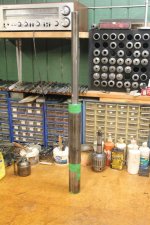
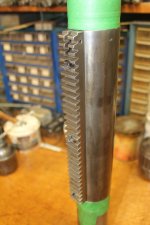
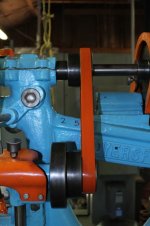
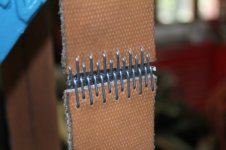
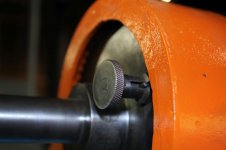
I've started in on restoring one of these drill presses and thought I might document the process. You see a lot of these restored but not many documented. If you're interested, come along for the ride. I'm sure I'll have some questions as well.

attachment.php

attachment.php

attachment.php


First video: Disassembly

More pictures at the end of the video.
 
Last edited:
To avoid these ads, REGISTER NOW!
OP
C

ClappedOutBport

Well-known member
Joined
Mar 30, 2016
Messages
998
Hey that's awesome. I'm subscribing and look forward to following your restoration!

Thanks!

good job, does it require any lead babbit pouring on your part?


I was personally hoping not before getting it (bought sight unseen), as I've never poured any babbit before. Luckily, this thing has hardly ever been used. I judged condition based on the number of pecks in the table and it seems like that was a fair assessment. The babbits look great. I may have to make new shims as the old ones are pretty oil soaked and weak. Not sure. I'm looking for a bit of expert advice on that.
 

larry_g

Well-known member
Joined
Apr 28, 2007
Messages
16,879
Location
oregon
Looks like a cousin to my Buffalo. I have some pictures of it in my build below, last pages. I also have an album with more pictures. Good luck on your restoration.

lg
no eat sig line
 
OP
C

ClappedOutBport

Well-known member
Joined
Mar 30, 2016
Messages
998
Looks like a cousin to my Buffalo. I have some pictures of it in my build below, last pages. I also have an album with more pictures. Good luck on your restoration.

lg
no eat sig line

Very nice drill press, Larry. Looks like the Buffalo is a bit smaller, MT3? Looks like your custom table lift works pretty well, you sure wouldn't want to have to pick it up by hand!

--

2nd video:

attachment.php


attachment.php
 

Attachments

  • IMG_8705S.jpg
    IMG_8705S.jpg
    110.1 KB · Views: 585
  • IMG_8711S.jpg
    IMG_8711S.jpg
    103.7 KB · Views: 584
OP
C

ClappedOutBport

Well-known member
Joined
Mar 30, 2016
Messages
998
Update:


Now I've got to braze up the back-gear shaft and machine it back, then get the motor ready, make some bearing spacers and order some belts. The flatbelt pullies were all cleaned up off camera; my dad did most of the work on those. I was hoping to have them blasted but ended up just going with a needle scale and rust-converter. They look good though. I'll try to grab a picture before long.

-------------

I've had a lot of fellas asking about the quill stop, so I modeled it in CAD and made a drawing. Send people the permalink to this post or to the google drive link if you see someone looking for information on one. Currently I have the little ****** removed as it's hellaciously in the way and limits quill travel from 7" to about 4". I may put it back in if I start doing a lot of repetitive work where I want to walk away and leave the drill.

https://drive.google.com/open?id=1gz...RDZJkYl0HkJTfu

attachment.php

attachment.php

attachment.php
 

Attachments

  • IMG_20190210_161629774.jpg
    IMG_20190210_161629774.jpg
    139.8 KB · Views: 471
  • IMG_20190210_161637635.jpg
    IMG_20190210_161637635.jpg
    108 KB · Views: 470
  • IMG_20190210_161645506.jpg
    IMG_20190210_161645506.jpg
    126.6 KB · Views: 472

AdrianBoomer

Well-known member
Joined
Jan 16, 2015
Messages
235
Location
Novato, California
Im enjoying your thread. I am currently rebuilding a 1890-1910-ish 20" "Milwaukee" . Im having fun. It has a planetary, back gears, power feed like yours. Ill share some pics with you sometime if you are interested. One thin I would like to see more of, is how to took the quill apart and what you found inside. I am wondering if its just bushings in there or what. I think I am going to finish re-essembling my drill press and then re-pull the quill on put it on the bench. Mine is MT3.

Anyhow, please post some more stuff!
 
OP
C

ClappedOutBport

Well-known member
Joined
Mar 30, 2016
Messages
998
Im enjoying your thread. I am currently rebuilding a 1890-1910-ish 20" "Milwaukee" . Im having fun. It has a planetary, back gears, power feed like yours. Ill share some pics with you sometime if you are interested. One thin I would like to see more of, is how to took the quill apart and what you found inside. I am wondering if its just bushings in there or what. I think I am going to finish re-essembling my drill press and then re-pull the quill on put it on the bench. Mine is MT3.

Anyhow, please post some more stuff!

I'd love some! I can't imagine what they were using planetary gears for, but I love me a good planetary, so I certainly wouldn't turn one down. :D

I don't have any video or pictures of taking the quill apart, but I do of putting it back together. Check out the second video in the post with the pictures of the quill. There isn't much to it. There's the spindle, 4 bearing races (one pressed on, the others are loose), a bunch of loose balls and then a nut and a locknut. No bushings. The spindle is a close fit with the quill body, and it has oil ports to keep it lubed. I loosened the nuts with a pipe wrench and it all comes apart. To get the last bearing race off (should you choose do so, I would avoid it) my Dad knocked it off with a flat face chisel. Just be careful not to break it if yours is pressed on and you decide to remove it. There should be no need to do so.
 

tym

Well-known member
Joined
Mar 5, 2016
Messages
2,434
Location
MA
Enjoying this thread! Thanks for sharing this cool project!
 
To avoid these ads, REGISTER NOW!

tym

Well-known member
Joined
Mar 5, 2016
Messages
2,434
Location
MA
^ Thanks! Just got all caught up on the videos and look forward to the next installation in your resurrection! :)
 
OP
C

ClappedOutBport

Well-known member
Joined
Mar 30, 2016
Messages
998
^ Thanks! Just got all caught up on the videos and look forward to the next installation in your resurrection! :)

The next will definitely be the last. :) I ordered belts today, but I'm still on the hunt for clipper lacing. I don't want to pay for a whole box of the stuff, so I'm searching around.
 
OP
C

ClappedOutBport

Well-known member
Joined
Mar 30, 2016
Messages
998
I took Easter Sunday and got it finished up. What a beast! Doesn't even flinch at a 1 1/2" drill bit.

I ended up finding a good price on some clipper on ebay. I bought the mcmaster 5 ply belt and used polyurethane for the feed. I'm not sold on the polyurethane. It has very little friction, and if you stretch it like they say to do, then it's very hard to get on. I'd still probably use it again, just not stretch it much at all as the feed belt doesn't need to be very tight, it's double worm reduced.

It's a really nice addition to the shop. I used it that day for some 3/4" holes, and just popped them right through with no pilot even with a dull drill. I can't believe they phased these out. They're slow to change belts around, but in use it's really a Caddilac to operate.


Attachments

  • IMG_0005 (800 x 533)2.jpg
    IMG_0005 (800 x 533)2.jpg
    66.6 KB · Views: 75
  • IMG_0017 (800 x 533)2.jpg
    IMG_0017 (800 x 533)2.jpg
    101.2 KB · Views: 53
  • IMG_0024 (800 x 533).jpg
    IMG_0024 (800 x 533).jpg
    66.3 KB · Views: 52

zkling

Well-known member
Joined
Jan 23, 2007
Messages
16,939
Great job! now you can come over and do mine!

No love for the safety cage?
 
OP
C

ClappedOutBport

Well-known member
Joined
Mar 30, 2016
Messages
998
Excellent job on the restore! Love when old metal like this is brought back to use.

Nice job! I restore/refurb machines for a hobby in retirement, and I know how much work goes into one.

Great job! now you can come over and do mine!

No love for the safety cage?

Thanks all!

This one took me 11 months of off and on (damned college getting in the way of all the fun stuff :( ), so I'll pass. :bounce:

The shop is currently a bit too tight for good access with the cage on, and it generally gets in the way of changing belts and stuff. I tend to shift belts a lot for the appropriate SFM, so I like good open access. Until there are little kids running around or something it will probably stay outside.
 

tym

Well-known member
Joined
Mar 5, 2016
Messages
2,434
Location
MA
That turned out great! Thanks for taking us along on the journey.
 

Machinitect

Well-known member
Joined
Feb 28, 2021
Messages
87
Location
Louisburg, Kansas
Hey Bport- any chance you have a close up detail photo of the back gear pin assembly? I think Royersford made the Champion 20” version, and the pin should be similar. It would really help me figure out how the pin works as mine is missing. Thank you!
 
OP
C

ClappedOutBport

Well-known member
Joined
Mar 30, 2016
Messages
998
Hey Bport- any chance you have a close up detail photo of the back gear pin assembly? I think Royersford made the Champion 20” version, and the pin should be similar. It would really help me figure out how the pin works as mine is missing. Thank you!

attachment.php


Does that help any? If not I can get you what you need next time I'm up there.

Glad to hear you got it!
 

Attachments

  • IMG_0023.jpg
    IMG_0023.jpg
    59.7 KB · Views: 30
OP
C

ClappedOutBport

Well-known member
Joined
Mar 30, 2016
Messages
998
Oh wow. Yes, your photo is perfect. Is that pin spring loaded from the opposite side of the gear?

I'm not really sure. That is one of the few things I didn't take apart. I saw no need. It was pinned together and I got it freed up. It certainly pulls it into the gear, so I would have to assume that you are correct and that is on the other side, but I don't recall anything but the little nubbin of the pin sticking out.

I also wanted the long quill handle off, but to do that I would have had to remove a taper pin that appeared to be installed before final turning somehow. So I left well enough alone.
 
To avoid these ads, REGISTER NOW!
Top Bottom