FINISHING MY “DOCKING” WORKBENCH… (Part 1 of 25)
SOME HISTORY
I know there are always new members showing up here and this saga has been going on too long to not give a little history lesson before telling you how I’m finishing up the workbench.
The concept was born when a coworker offered me one of the old Mayline drafting tables from my employer that were retired years earlier. It’s quite possible that I sat at this very table before CAD became mainstream and the old drafting boards went the way of the dinosaur. Back when my company was disposing of the tables, I did not have room for one, so I passed on taking one home.
Back in 2009, that coworker (who was fortunate to have taken one) approached me and said he needed the room in his garage and offered it to me. The Asylum was now built and I knew I could fit it in SOMEWHERE, so I jumped at the chance to acquire one! He didn’t want anything for it and even let me use his little utility trailer… what a deal! I wanted to pay something for it, but he just wouldn’t take it. But in the end, he convinced him to accept $100 for trailer rental. LOL
This isn't a picture of my Mayline Desk-O-Matic II, but basically it is identical, except mine was complete with the Vemco drafting machine (more on that later).
Insert Picture 150
When I picked it up, the drawing board was already removed from the base so I never remounted it since I had other plans for it. Instead, I mounted my families old kitchen table top on it, which fit perfectly on the support arms. There’s a lot of history with that kitchen table too and I can’t imagine how many wonderful dinners Mom served the family on it when I was a kid.
These pictures show the versatility of the table support mechanism…. Height and angle adjustments. Also note that casters were added to it… because EVERYTHING in the Asylum has casters, or at least wheels, for mobility. LOL
Insert Picture 158
Insert Picture 159
Insert Picture 160
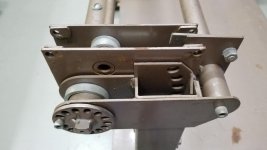
A track system was custom built for the original drawing board and it was mounted to the wall in the upstairs office. There’s the Vemco drafting machine I mentioned earlier, which is basically an X-Y track system for making your lines on the large drawing sheets.
Insert Picture 244
Insert Picture 245
Insert Picture 246
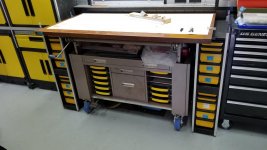
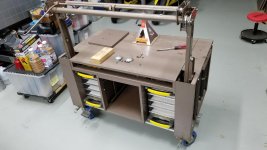
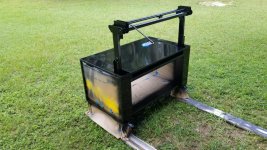
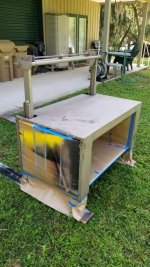
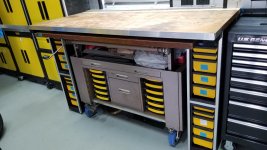
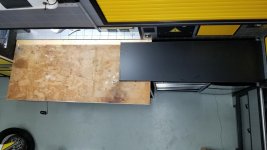
The new drafting table base was then combined with my primitive stationary workbench to “dock” underneath. When needed, it could roll out and become a stand-alone island bench. And when I need more floor space again (which tends to be 95% of the time), it stores nested underneath the wall bench
Insert Picture 252
Insert Picture 253
Insert Picture 254
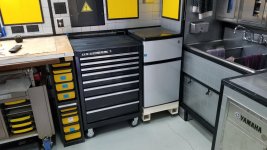
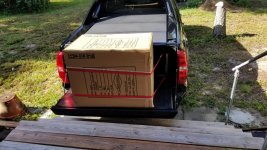
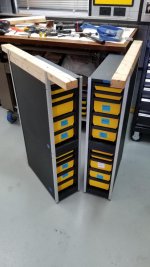
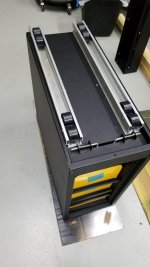
In 2014, I decided to replace the basic stamped steel legs on the top bench with pedestals offering some storage space (you know I don’t like to waste valuable space!!). Despite being a little pricy, four wheelwell truck bed tool boxes fit nicely into the design. The boxes are shown here, stacked two per side, before I removed the locking lids that expose the drawers behind. Northern Tool had an awesome sale on them at the time, so it took the sting out of the purchase. The middle drawer set in the drafting table base was also centered to offer more symmetry to the bench.
Insert Picture 3231
Insert Picture 3232
Insert Picture 3233
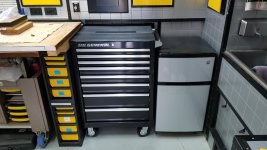
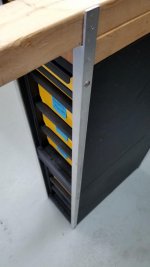
In 2015, another upgrade was done to remove the cheap white storage drawers and add shelving to house the 12 small Stanley parts organizers for the most commonly used items. In this picture, it also looks like I was exploring what the aluminum trim would look like on the black pedestals.
Insert Picture 3384
Okay… you are sufficiently up to speed on the docking bench, so I can now get started on the continuation of this story.