To avoid these ads, REGISTER NOW!

My new 28x38x10 with Full Dormered Loft

dave67fd

Well-known member
Joined
Apr 25, 2011
Messages
872
Location
Southern NH
My 2010 built 28x38x10 with Full Dormered Loft

Here's my new build i started last July (2010).

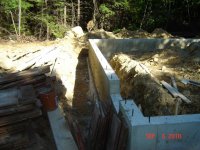
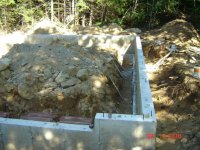
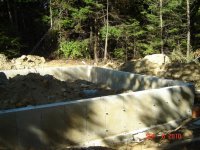
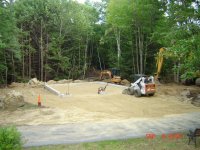
Area was wooded and hilly. Cleared and graded with a big piece of ledge that was a pain to remove. We kept the big piece of granite on the left in the third pic that was pulled out with many others. Kind of funny watching the big John Deere struggling to move it around.

Foundation has 4' frost walls, floor is 5" thick with controlled joints, vapor barrier and fiberglass added for strength.
 

Attachments

  • GARAGE1.jpg
    GARAGE1.jpg
    154.4 KB · Views: 108
  • GARAGE2.jpg
    GARAGE2.jpg
    147.9 KB · Views: 89
  • GARAGE3.jpg
    GARAGE3.jpg
    150.9 KB · Views: 84
  • GARAGE4.jpg
    GARAGE4.jpg
    151.2 KB · Views: 68
  • GARAGE5.jpg
    GARAGE5.jpg
    151.5 KB · Views: 71
  • GARAGE6.jpg
    GARAGE6.jpg
    153.7 KB · Views: 70
  • GARAGE7.jpg
    GARAGE7.jpg
    154.8 KB · Views: 86
Last edited:
To avoid these ads, REGISTER NOW!
OP
D

dave67fd

Well-known member
Joined
Apr 25, 2011
Messages
872
Location
Southern NH
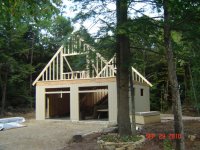
I didn't get too many shots inbetween construction as she went up pretty quick.
 

Attachments

  • GARAGE12.jpg
    GARAGE12.jpg
    150.2 KB · Views: 92
  • GARAGE11.jpg
    GARAGE11.jpg
    151.3 KB · Views: 76
  • GARAGE10.jpg
    GARAGE10.jpg
    148.1 KB · Views: 111
  • GARAGE9.jpg
    GARAGE9.jpg
    149.8 KB · Views: 70
  • GARAGE8.jpg
    GARAGE8.jpg
    150.7 KB · Views: 80
Last edited:
OP
D

dave67fd

Well-known member
Joined
Apr 25, 2011
Messages
872
Location
Southern NH
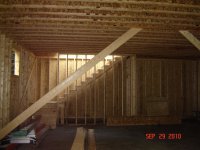
Access to the upper level is a two tier stairway.
 

Attachments

  • GARAGE13.jpg
    GARAGE13.jpg
    143.6 KB · Views: 128
Last edited:
OP
D

dave67fd

Well-known member
Joined
Apr 25, 2011
Messages
872
Location
Southern NH
jsandlin0803,

Thanks, unfortunately i don't. The original design was kind of changed a bit at the last minuite. The full dormers were added as well as the decision to go with I joists for the floor.

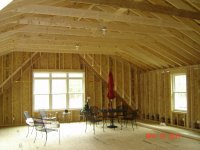
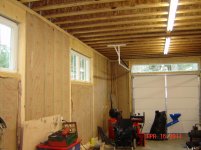
I also added and upgraded the additional windows. The transums above the garage doors as well as the doubles on one side and the 3 tier in the front. The lower windows are at 6' for added security/privacy.

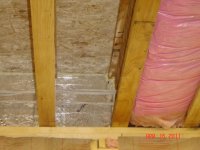
2X6 Construction, R19 Insulation for the walls and R30 in the floor. The rim I joists were filled with foil foam board and sealed with spay foam.
 

Attachments

  • DSC01070.jpg
    DSC01070.jpg
    135.8 KB · Views: 136
  • DSC01072.jpg
    DSC01072.jpg
    137.8 KB · Views: 126
  • DSC01073.jpg
    DSC01073.jpg
    142.9 KB · Views: 145
  • DSC01074.jpg
    DSC01074.jpg
    137.3 KB · Views: 138
  • DSC01076.jpg
    DSC01076.jpg
    133.8 KB · Views: 143
Last edited:
OP
D

dave67fd

Well-known member
Joined
Apr 25, 2011
Messages
872
Location
Southern NH
Thats very nice. What are the plans for the inside finish?

Thanks for the kind words all.
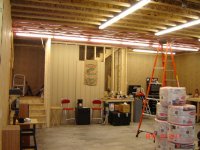
Half the garage area (left side) will be the "clean" side per say and will be plaster and not sheet rock (Here in New England it's cheaper) the right side, or dirty side will be OSB.

There will be no solid seperation between each side. The floor will be epoxied, heat will be 75K BTU Mr. Heater. Compressor will be in vented, waterproof shed mounted on slab outside. Inside on adjacent wall has switched 240V with indicator for power. Airline will be 3/4" black iron pipe plumbed around the shop. A lift may be an added item in the future.

The upper floor will be open concept with tounge and grove pineboard. Cathedral ceilings with a post and beam theme. Haven't fully decided on how i want to implement. The upper floors intent will have a small area partitioned for my Amateur Radio "shack". The remaining area will be the Man cave with hardwood floors. Primary heat will be wood with propane as likely secondary.

Nice. Surprised you insulated the floor. Will the upper level be outside the heating envelope?

In essence yes. The lower garage level will be the primary usage area especially during the winter so i wanted to keep the garage area tight. The insulation in the floors is the Owens corning comfort touch so there is no vapor barrier. Ceiling will also be plastered.

Mind sharing your rough cost on this build for materials only?

I would have to go back and do the math and deduct the labor. The windows were a big cost addition. The garage is a bit bigger than my house and also has more windows.
 

Attachments

  • DSC01071.jpg
    DSC01071.jpg
    143.4 KB · Views: 122
  • DSC01075.jpg
    DSC01075.jpg
    140.8 KB · Views: 115
Last edited:
Scoutman

Well-known member
Joined
Mar 3, 2010
Messages
161
Location
Huntsville, AL
Very nice build. I like the fully kicked out dormers that really make some good useable space upstairs.

I too was wondering what was going to happen under the stairs.
 

thrifty bill

Well-known member
Joined
Jan 12, 2011
Messages
490
Location
The Mountains of North Carolina
Lots of great ideas here! I plan to build a 30 by 40 workshop with attic. Doors will be in the long wall, due to my lot layout. Subscribing to keep track of your progress!

Met with my first builder yesterday, so it's starting...
 
OP
D

dave67fd

Well-known member
Joined
Apr 25, 2011
Messages
872
Location
Southern NH
My builder boxed in the stairs. I installed an outlet and above light fixture inside the boxed area which is switched on the outside wall. There will be a door installed for access. I had originaly contemplated having the compressor here but have thrown around a couple of ideas from a small parts paint spray booth with venting to various types of storage. I temporarily have some items stored under the first tier stairway.

What ideas can you guys come up with?
 
OP
D

dave67fd

Well-known member
Joined
Apr 25, 2011
Messages
872
Location
Southern NH
Very nice looking place you have there! I like it very much!

Thanks Call me the Breeze, Love the fairlane, Looks like a 66, my eyes are bad,lol. I will post a pic of my 67 conv. for you, ill send later as the pics are on my desktop.

Anyway,
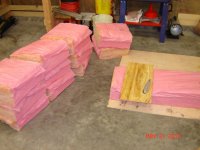
Here's cutting up the rest of the 16" batts for the rim joist and one of the finished ceiling.
 

Attachments

  • DSC01114.jpg
    DSC01114.jpg
    129.7 KB · Views: 97
  • DSC01123.jpg
    DSC01123.jpg
    130.3 KB · Views: 88
Last edited:
To avoid these ads, REGISTER NOW!
OP
D

dave67fd

Well-known member
Joined
Apr 25, 2011
Messages
872
Location
Southern NH
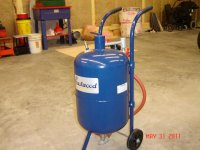
Picked up my new compressor (Just temporary hook-up shown) as well my sandblaster from Eastwood.
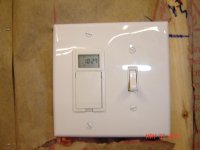
And added light timer for the outside lighting.
 

Attachments

  • DSC01115.jpg
    DSC01115.jpg
    132.4 KB · Views: 51
  • DSC01120.jpg
    DSC01120.jpg
    129.6 KB · Views: 41
  • DSC01124.jpg
    DSC01124.jpg
    129.1 KB · Views: 51
Last edited:
OP
D

dave67fd

Well-known member
Joined
Apr 25, 2011
Messages
872
Location
Southern NH
Call me the Breeze,
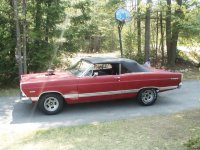
Here's my pic of my 67. The Garage is actually now in the background. Older pic of the car.
 

Attachments

  • DCP_1700.jpg
    DCP_1700.jpg
    151.1 KB · Views: 54
Last edited:
OP
D

dave67fd

Well-known member
Joined
Apr 25, 2011
Messages
872
Location
Southern NH
Been awhile since i posted last. Been pretty busy at work.

Had a local guy look at plastering the ceilings and half the shop. Waiting for his estimate. I will be hanging OSB on the other half. Should be picking the OSB up this weekend. Hopefully have more pics when i get started.
 

back2class

Well-known member
Joined
Jan 7, 2009
Messages
2,723
Amazing! First off I love it. Second is how uncanny it is that you built pretty much the same exact garage I plan to buid later this summer. Even the color is identical. Any things you would have done done differently? Also, do you have the size on the floor I-Beams? I am on a tight budget so, my plan calls for minimal and basic windows and doors, but it is nice to know how much nicer it could look should I choose to upgrade. Any plans lying around you can part with? :)
Thanks
 
OP
D

dave67fd

Well-known member
Joined
Apr 25, 2011
Messages
872
Location
Southern NH
back2class,
The color is just the pre-primered T-111. It will be painted the same gray color of my house. The I-joists are i believe 16" and mounted 16" on center. I believe it cost me about an additional $2500 opposed to a main joist and lally columns. At this point i don't think there is anything i would change in the overall structure.

There maybe things i will want to change after everything is done but it turned into more than what i had initialy had in mind or dreamed of to begin with so im happy.

Yeah, the detached of course has it's advantages and disadvantages. Would be nice to have running water.
 
OP
D

dave67fd

Well-known member
Joined
Apr 25, 2011
Messages
872
Location
Southern NH
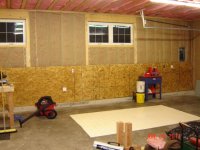
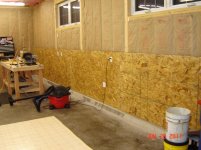
Picked up some OSB on Wednesday and got a few sheets hung today.

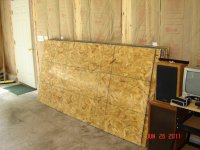
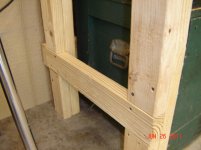
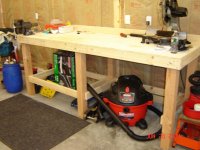
Took a few shots of my home made benches. This one will have a 1/8" sheet of aluminum on it. The smaller one will hold the grinder and whatever else. I guess just the **** thats on it for now.
 

Attachments

  • DSC01141.jpg
    DSC01141.jpg
    136.6 KB · Views: 70
  • DSC01140.jpg
    DSC01140.jpg
    135.7 KB · Views: 61
  • DSC01135.jpg
    DSC01135.jpg
    139.3 KB · Views: 63
  • DSC01133.jpg
    DSC01133.jpg
    132.5 KB · Views: 53
  • DSC01132.jpg
    DSC01132.jpg
    134.1 KB · Views: 56
  • DSC01130.jpg
    DSC01130.jpg
    133.5 KB · Views: 60
  • DSC01129.jpg
    DSC01129.jpg
    137 KB · Views: 68
Last edited:

mjbdesigns

Active member
Joined
Jun 23, 2011
Messages
28
Very Nice, I wondered why you chose 28 x 38 in stead of say 30 x 40 ?
Is there any such thing as a standard size or when you build an outbuilding does it really matter? Again very nice project...
 

Call me the Breeze

Well-known member
Joined
Jul 28, 2009
Messages
1,385
Location
Sebring Fl
Call me the Breeze,
Here's my pic of my 67. The Garage is actually now in the background. Older pic of the car.

NewImage.jpg

Nice convertable! I like the old mag wheels too! Looks like it is pretty solid

By the way, your place is really turning out awesome! Congratulations. It is definately something to be proud of!
 
Last edited:
OP
D

dave67fd

Well-known member
Joined
Apr 25, 2011
Messages
872
Location
Southern NH
mjbdesigns,
Well it's kind of funny in a way on the size it wound up.

I started of by measuring out the lot before clearing and came up with 26 X 36. I kind of choose this size based on my house size so i could more visually compare it. Once the land was cleared it came about i had enough width room to go with a 28 X 36. I had more depth as well but for some reason wanted to keep the building somewhat within my original plan. I had an idependent company clear the land and pour the foundation and another contractor to build the structure.
Once my builder started, he asked me if i was aware that the foundation was measured at 28 X 38. Of course i said no and immediately called the foundation guy asking him what was up with the "38" dimension. He said thats what you wanted, i said the number 38 was never mentioned. Anyway thats how i got the size and increased my build cost a bit. I think on width it gets a bit more complicated but not shure. I guess if you have the pocket book you can build whatever you want/need.

Pic showing the room behind the garage where i will be probably doing most of the sand blasting on larger items. There will be a pneumatic line exiting the rear of the garage.

Call me the Breeze,
Thanks. Your 66 is pretty sweet as well. The wheels are old aluminum ET's. Here is a newer pic inside the garage.

Brad, If i had to guess about 5:12 on the main dormers and probably about 12:12 on the pre and fore roof trusses.
 

Attachments

  • DSC01136.jpg
    DSC01136.jpg
    149.1 KB · Views: 41
  • DSC01125.jpg
    DSC01125.jpg
    139 KB · Views: 53
Last edited:

back2class

Well-known member
Joined
Jan 7, 2009
Messages
2,723
looking good. If you can take the measurment from floor of 2nd floor to the base of the ridge beam those of us dying to know the roof slope can figure it out from there.
 
OP
D

dave67fd

Well-known member
Joined
Apr 25, 2011
Messages
872
Location
Southern NH
back2class,
I'll take measurements and let you know.

Anyway,Got a couple of small items out of the way. Mounted brackets for my Mr. Heater. Used some 1/4" thick 6061 aluminum from junk stock i had lying around at work and lagged them to the I joists. Also started taking my lights down to get ready for the ceiling and left and rear walls to get plastered starting Monday.

Installed 1/2" PVC conduit from the rear of my compressors power/switch/indicator out the side wall which will enter the shed
 

Attachments

  • DSC01145.jpg
    DSC01145.jpg
    128 KB · Views: 68
  • DSC01146.jpg
    DSC01146.jpg
    128.2 KB · Views: 55
  • DSC01147.jpg
    DSC01147.jpg
    132.8 KB · Views: 48
  • DSC01148.jpg
    DSC01148.jpg
    138.5 KB · Views: 52
  • DSC01149.jpg
    DSC01149.jpg
    129.9 KB · Views: 51
Last edited:

back2class

Well-known member
Joined
Jan 7, 2009
Messages
2,723
Definately SCREW in some runners to the sides of those 2x I beams to strengthen up the area you notched. As another member noted that is a big "no-no" Only take a moment to do that, but best to get them back to full strength. But in all honesty, I think it will be fine as is becuause you di not go too far, but why take a chance.
 

hpw

Well-known member
Joined
Oct 7, 2007
Messages
989
Definately SCREW in some runners to the sides of those 2x I beams to strengthen up the area you notched. As another member noted that is a big "no-no" Only take a moment to do that, but best to get them back to full strength. But in all honesty, I think it will be fine as is becuause you di not go too far, but why take a chance.

agree, don't use drywall screws and use construction adhesive between the members.
 

rinker1

Well-known member
Joined
Aug 30, 2008
Messages
289
Location
Ohio
Dave, Great build, it kinda reminds me of my build! Keep new pics coming.
 
To avoid these ads, REGISTER NOW!
Top Bottom