To avoid these ads, REGISTER NOW!

Mud dobbers like sunflower seeds?

boing

Member
Joined
Sep 22, 2010
Messages
23
Location
Colo Spgs
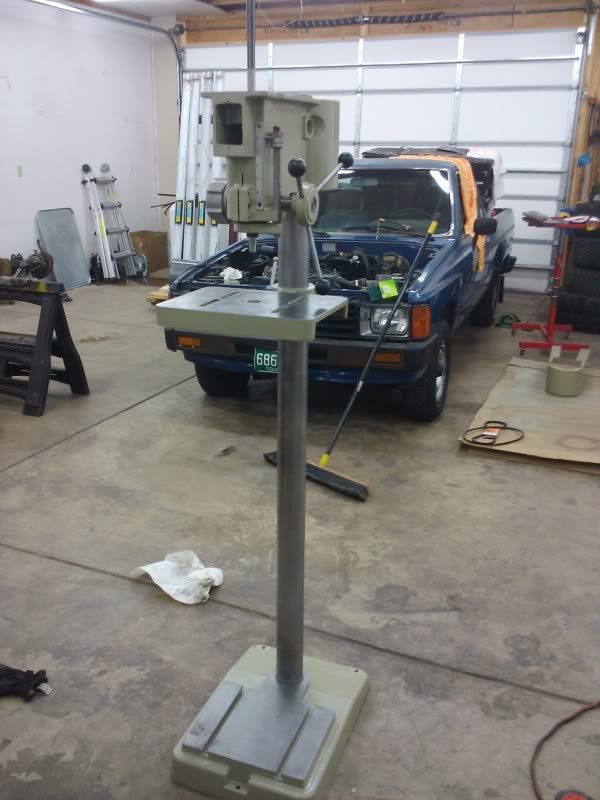
Picked up a drill press from a friend sight unseen for 50 bucks, buddy said he put a new cord on it and it worked. Also mentioned he picked it up from an estate auction where the shop/garage burned.
I show up to get it and find out its a floor model. I didn't think much of it, and honestly thought it was probably junk. Got it home plugged it in and it acutally worked however the bearings sounded terrible.
At that point I put all my tools in storage for about 2 years, except for the drill press loaned it to a buddy. Long story short bought a house with a shop and now I pulled it out to start tinkering with it (Two days ago).
I Didn't relize it was a Clausing because the amount of soot on the machine.

Started cleaning the table, which cleaned up nice, then spent the next two days after work with a wire wheel on the mast. Finished the mast up with a scotch bright pad... To my supprise its acutally decent looking. I may chuck up the mast in a lathe and sand it....

Last night after finishing the foot plate and mast I wheeled it back into the shop right in front of the work bench, stared at it for a second trying to decide weather I open the can of worms or not.

I decided to freshen up the thing since it appears to be a nice unit, just needs some love.

Plans are to replace the bearings throughout and bead blast and paint everything else.

I have never rebuilt a drill press before so this maybe a learning experience. I'll have fun with it either way.

After empting the guts I dug out probably a pound of mud dobber nests, sun flower seeds, and a bunch of old cooked grease.


Snapped one picture of the thing as I was tearing it down, although now its just the head.

2011-06-28205434.jpg
 
To avoid these ads, REGISTER NOW!

Kev442

Well-known member
Joined
Jan 15, 2009
Messages
5,386
Location
Wi
The mouse living in there liked sunflower seeds, but you already knew that! :D
 

throttlejunkie1

Well-known member
Joined
Mar 1, 2011
Messages
71
Nice find! I'm redoing an old craftsman that was in similar condition. Your idea about spinning the mast in the lathe is exactly what i'm gonna do with mine. That will make quick work of all that browness :beer:,,,Good luck!
 
OP
B

boing

Member
Joined
Sep 22, 2010
Messages
23
Location
Colo Spgs
Breakdown is complete, chucked the parts in the pictures into the lathe and scotch brighted them. The rest of the parts are in boxes to be bead blasted tomorrow. If all goes well maybe I can start laying some paint by Monday.

Replaced all 4 of the bearings, the ones in it were original...

Cleaned quill and spindle
2011-06-30203057.jpg


2011-06-30203048.jpg


16ST

Also sent an email to Joe @ plazamachinery, to see if he has a Morse Taper Spindle. If I can get one I'll change it out, if not I'll buy a Jacobs 34-33C (14451)...
 
OP
B

boing

Member
Joined
Sep 22, 2010
Messages
23
Location
Colo Spgs
Bead blasted all the parts that I could fit in the cabinet, took 7 hours on Saturday. Started puting down paint Saturday night, Sunday, and finishing on Monday.

Paint is Van Sickle Tractor paint (one of the best IMO) supposed to be Ford Tractor Grey Pre 1965. It seems to have a greenish hue, but I like it...

Going to drop off the mast & base plate, belt guard, and several handles to a bead blasting shop that can handle the size...


3rd Coat on head, ended with 5 Coats overall...

2011-07-02215212_WoodlandPark_Colorado_US.jpg


2011-07-03075556_WoodlandPark_Colorado_US.jpg


Bits and pieces 3 Coats...

2011-07-03075609_WoodlandPark_Colorado_US.jpg


Since I didn't tape off the head when I painted it, I'll be sanding the bores clean for the next two nights. Will also be running a tap down all the holes to clean them up. Picked a manual (online) so now I have a punch list of all the hardware that is needed...

Little trick I have learned along the way about aluminum, is that once you bead blast it you need to not touch it with your hands as it will leave an oily residue behind. Right after you pull it out of the cabinet blow it off, then lay down some clear. On most aluminum this will make it look brand new, however the aluminum that this handle is made of is pot aluminum so it isn't ever going to look awesome...

Quil return spring (preload)

2011-07-02215232_WoodlandPark_Colorado_US2.jpg
 
Last edited:
OP
B

boing

Member
Joined
Sep 22, 2010
Messages
23
Location
Colo Spgs
Started getting paint on the belt guard and base, just picked it up from having it bead blasted (it wouldn't fit in my cabinet).

Just sealing the bottom, it had alot of rust in there before bead blasting.

2011-07-08060336.jpg


Belt guard, still needs some more paint...

2011-07-08060410.jpg


2011-07-08060357.jpg


Switch trim plate; love the old look...

2011-07-08060346.jpg


Depth gauge after about 30 minutes of a scotch bright, it’s got a clear coat on it...

2011-07-08060516.jpg


The head is partially assembled, everything moves like butter (compared to how it was when I finally got it home). Got the quil return speed set (its return speed is slow, but it pulls back smooth), also spent about an hour at Ace gathering up new hardware for this drill press debacle. Its all stainless steel hardware...

2011-07-08060442.jpg
 
OP
B

boing

Member
Joined
Sep 22, 2010
Messages
23
Location
Colo Spgs
Made a little progress this weekend even though I was really busy...

Ordered a Jacobs Chuck and two keys, should be here some time this week, Enco had it cheaper than anybody...

Painted the top of the base, then got kinda nerdy with the lathe, figured out how to do something that has bothered me for years...
In the manual it shows the pinch for the deck is just the handle tighting against the cast iron, I made a washer with a big ID and almost the same OD as the handle. I have tried drilling out washers for years always hated doing it. Inside the 3 jaw on the lathe are small grooves well, washers fit in there like it is its job, used the tail stock with the correct size bit. Then turned the head of a bolt down to the same OD as the rest and used two nuts to pinch the washer so that I could turn down the OD.

Alot of work just for this, however every spot that it pinches once complete will have a stainless washer to draw against...

2011-07-09081053.jpg


Lower part is finished, next time I'll tape it off, its taken me hours of sanding this tractor enamel off the bores & surfaces that need to be bare...

2011-07-09083750.jpg


Put on the locking collar and pinch bolts, a trick an old timer taught me is to put in a peice of solder then a little blue locktight on the threads. Then run the pinch bolt into the solder very snug...

Put the head on it after greasing the mast and top of locking collar, will have to come back off though as I found two more bores that have to be cleaned out. Starting to look like something though...

2011-07-09110130.jpg


2011-07-09111133.jpg
 
To avoid these ads, REGISTER NOW!
OP
B

boing

Member
Joined
Sep 22, 2010
Messages
23
Location
Colo Spgs
Sorry for the crapy cell phone pics!

The chuck finally made it in, got the rest of the press put together except the motor which is being looked at and the idler pulley and assembly (which i am waiting on also).

2011-07-14062225.jpg


2011-07-14062331.jpg


2011-07-14062419.jpg


2011-07-14062428.jpg


2011-07-14062250.jpg


2011-07-14062314-1.jpg


Last night, got all the panels installed along with the chuck, put 90w on a rag and rubbed it into the mast and base plate for about an hour, then took a paper towel and removed the excess. I'll add 90w to this thing another 3-4 times, the metal soaked up quite a bit.

Still have alot of little things left to do on the punch list...
 
Last edited:
OP
B

boing

Member
Joined
Sep 22, 2010
Messages
23
Location
Colo Spgs
Getting there, motor finally showed up yesterday (1hp Baldor) got it installed and leveled it out, however I now have to move the motor to the left about 1 inch. Will be getting new wire for it tonight, hoefully I can get it wired and break it in tonight!

2011-07-21060757.jpg
 
OP
B

boing

Member
Joined
Sep 22, 2010
Messages
23
Location
Colo Spgs
Well the drill press is complete, performed the half of the motor break in last night (let the motor run with no belt for an hour). Will finish the break in tonight which is with belt on and no load. Also have 3 screws to replace, however after the break in is finished it is ready to make some holes...

2011-07-21221448.jpg


2011-07-21221435.jpg


2011-07-21221502.jpg


2011-07-21212152.jpg
 

Slip_Kid

Well-known member
Joined
Apr 20, 2010
Messages
615
Location
Rhode Island
Great job............It was documented very well with all the pictures. It should give you years of great service in your shop.
Well Done!!
 
To avoid these ads, REGISTER NOW!
Top Bottom