To avoid these ads, REGISTER NOW!

Building my garage / workshop (56K death)

ceo012384

Well-known member
Joined
Nov 29, 2007
Messages
112
Location
Boston
So I thought I would share what I've been spending around 1 day a week average working on since the summer: Building my own garage/workshop. I'll be adding to this thread as I make more progress.

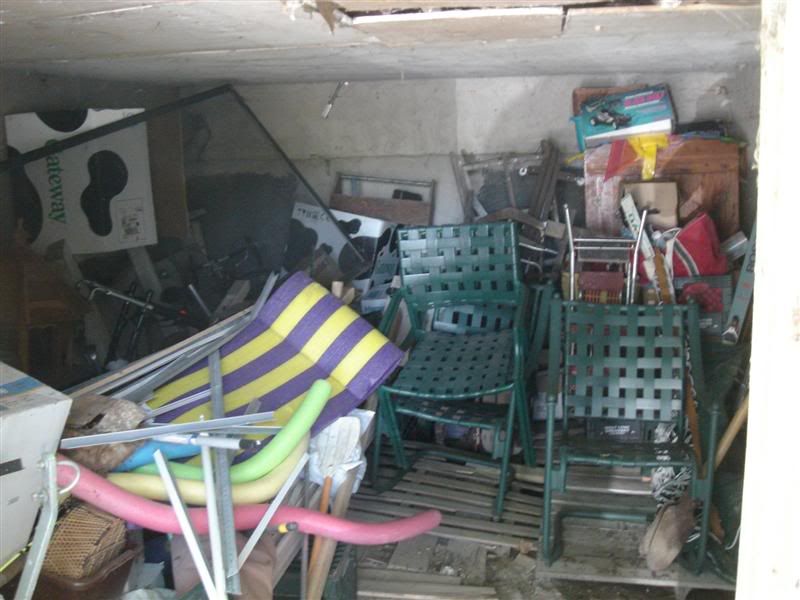
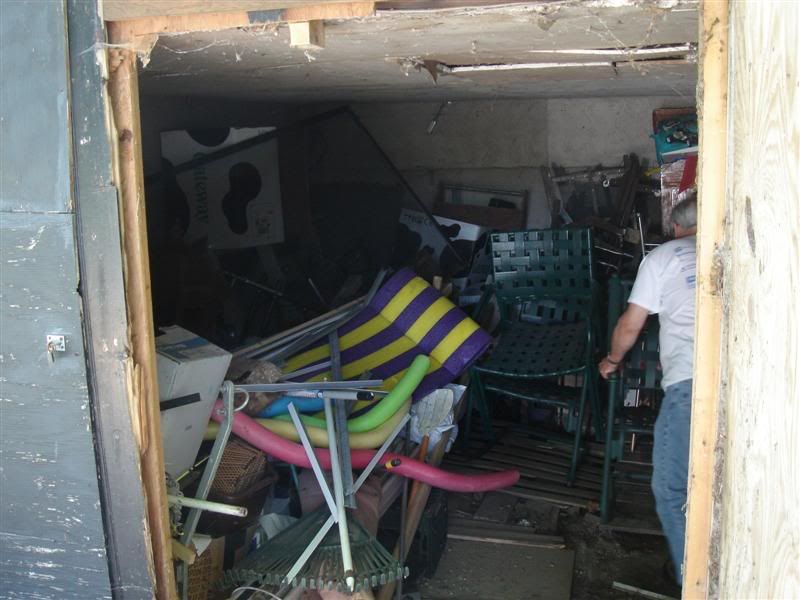
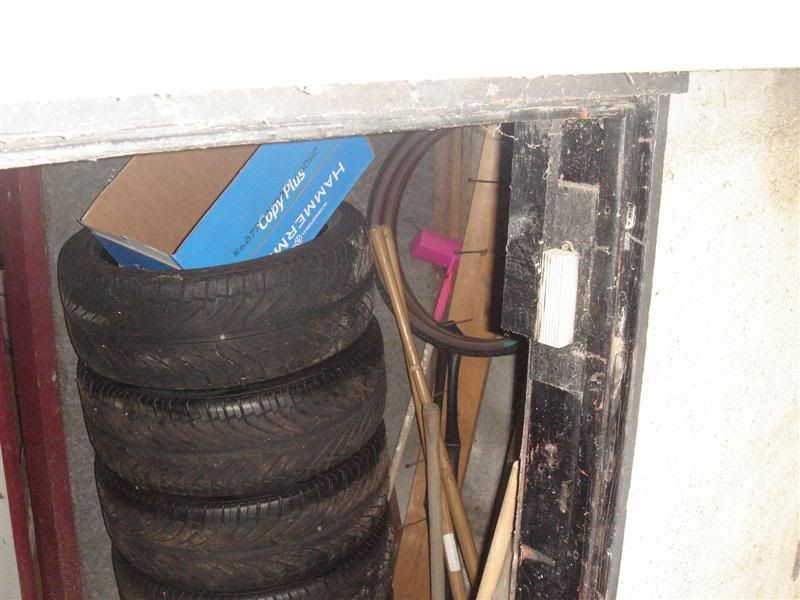
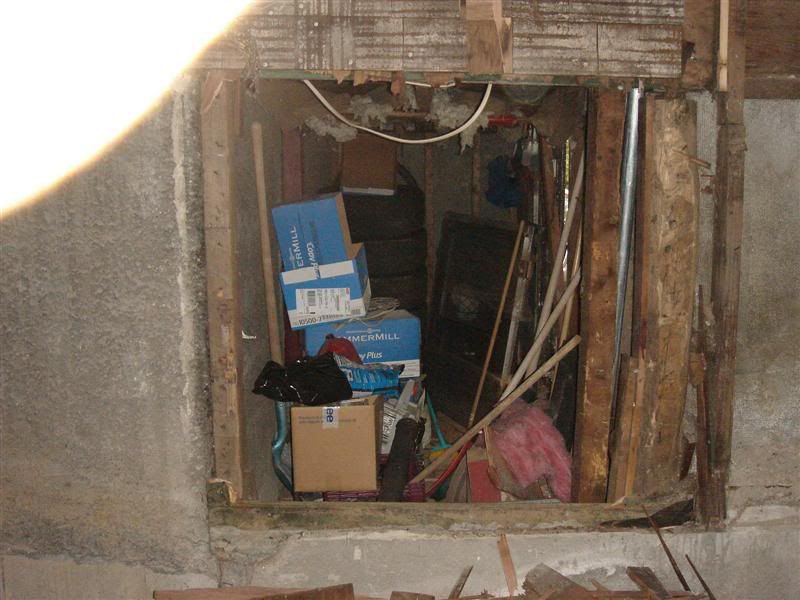
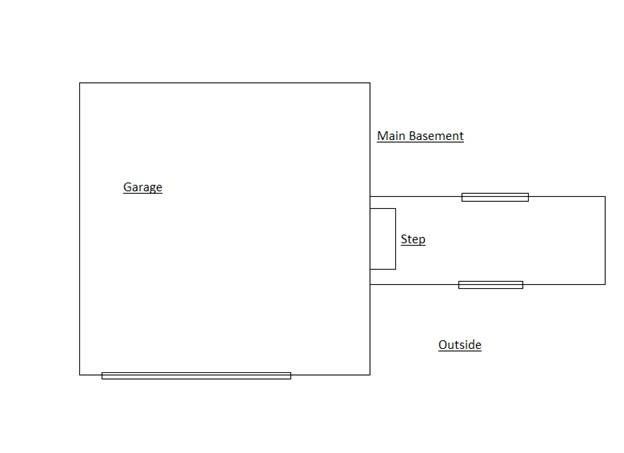
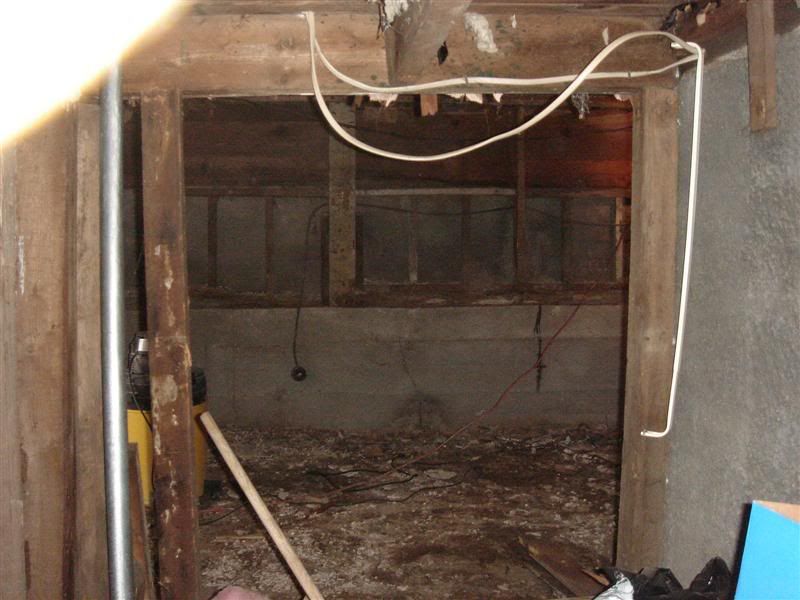
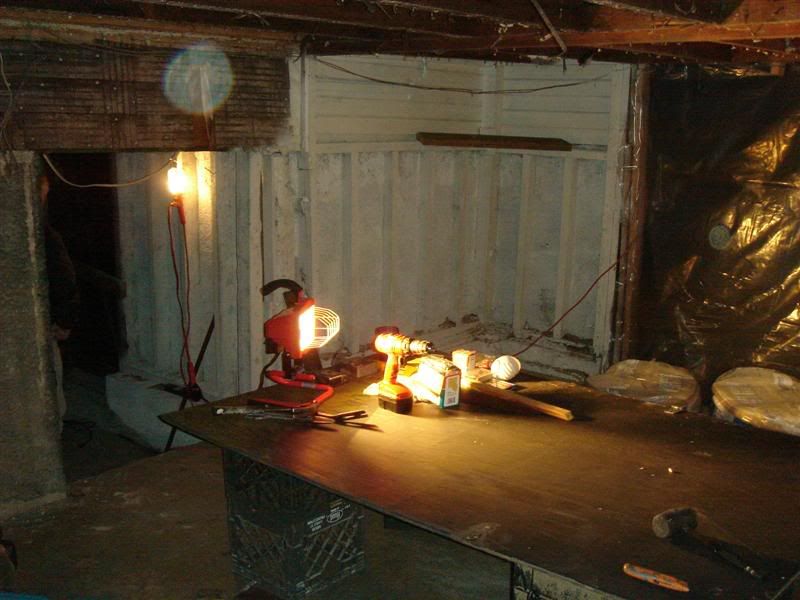
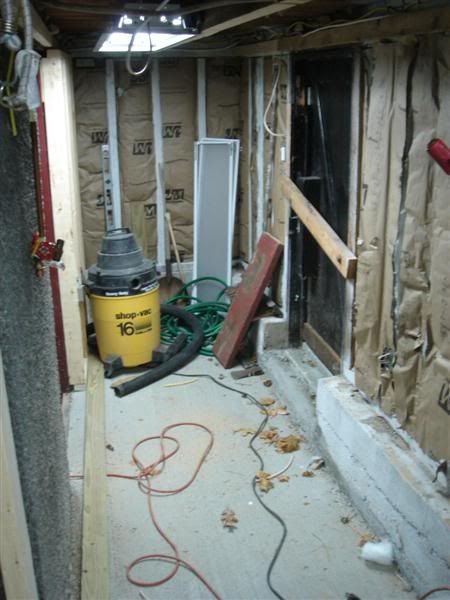
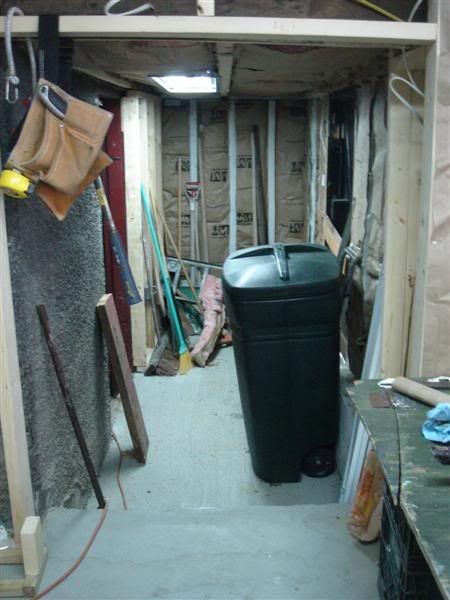
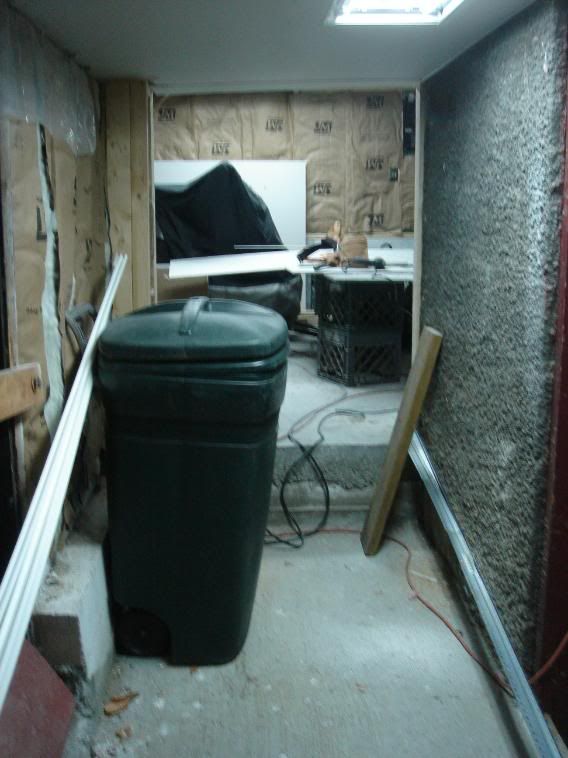
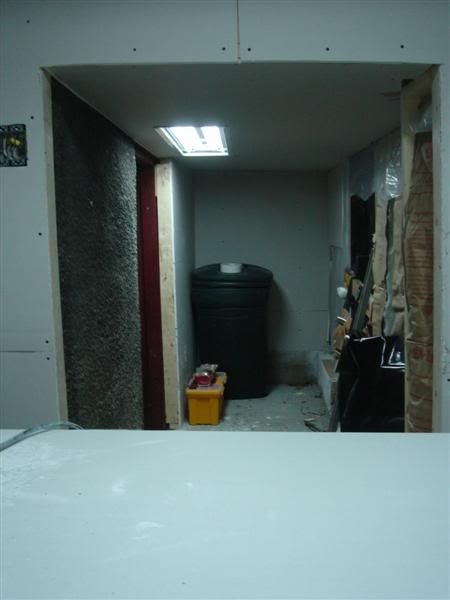
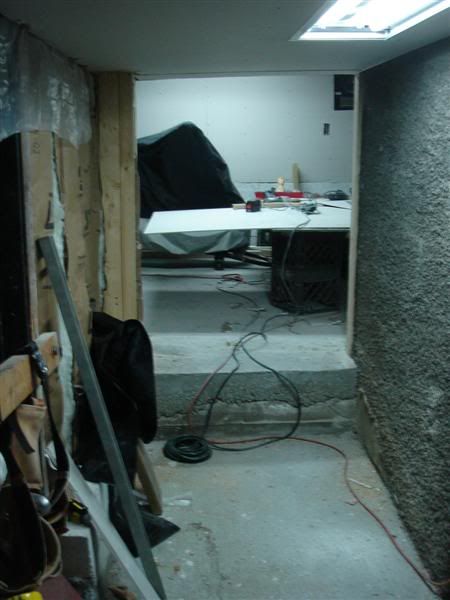
My folks' office building has some parts of the basement that are separate due to the building having had a couple additions over its lifetime. One portion is about 15x18, and consists of a dirt floor, and very old plaster covering the walls and ceiling (the type of plaster with a mesh screen nailed up and the plaster attached to the screen). It's been full of a bunch of useless **** we have to shove in there about 7-8 years ago in a hurry (long story) and haven't done anything with since. Also, through a small wall there is another small portion separated from the main basement that is about 5x15 which also has a dirt floor and had **** in it as well.

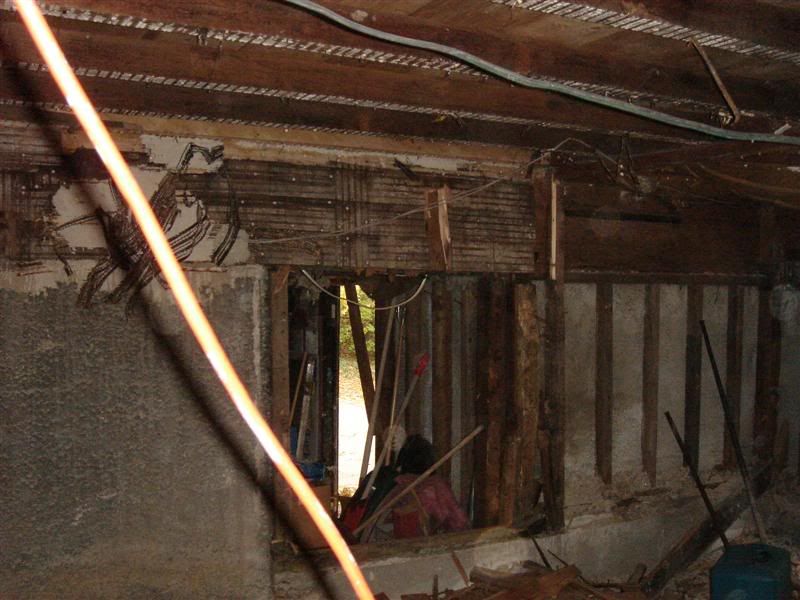
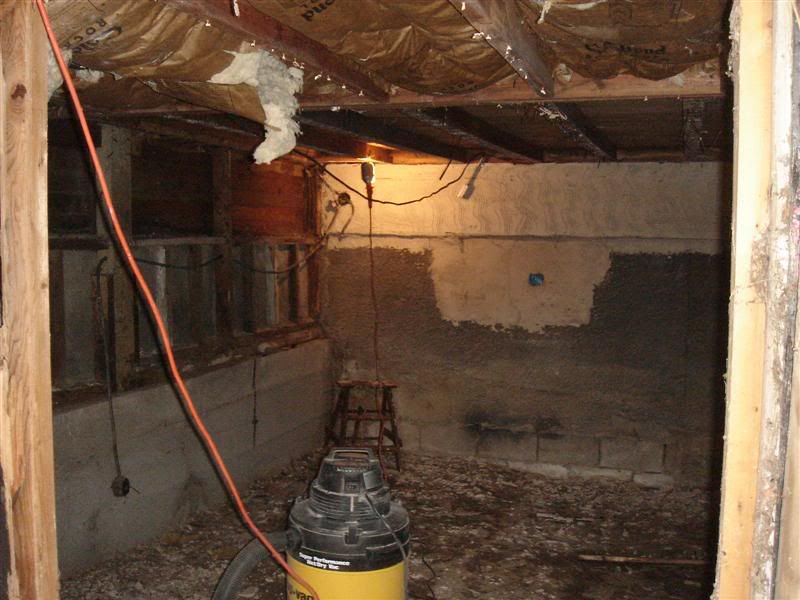
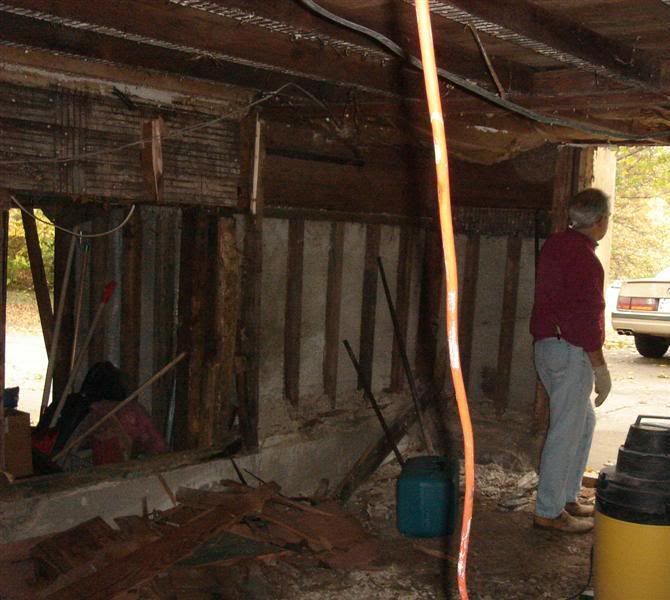
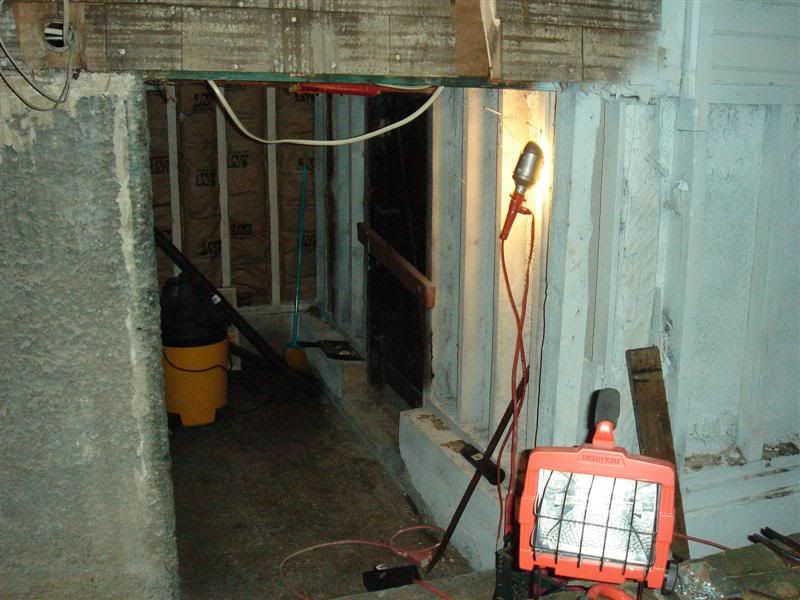
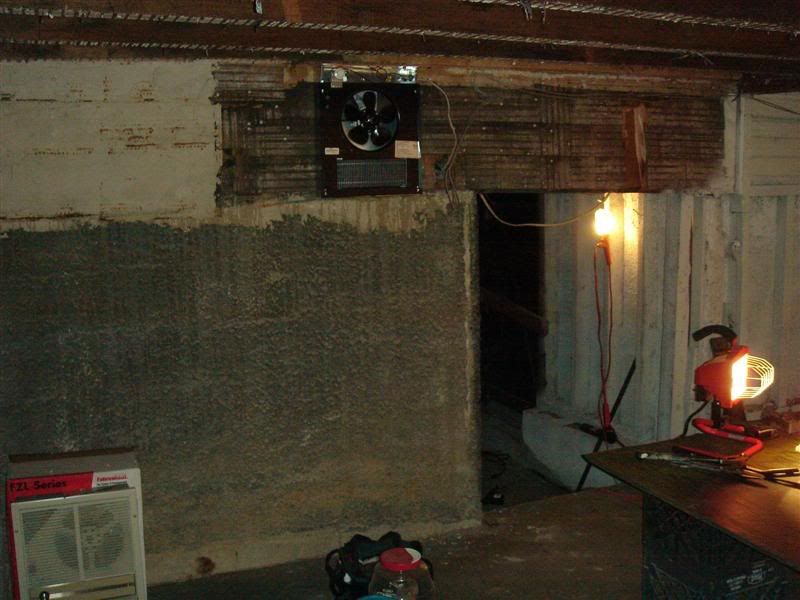
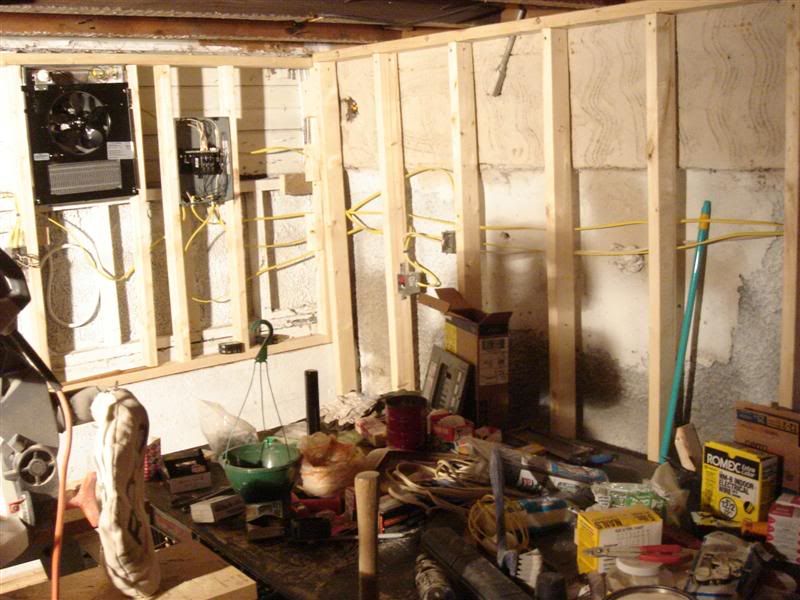
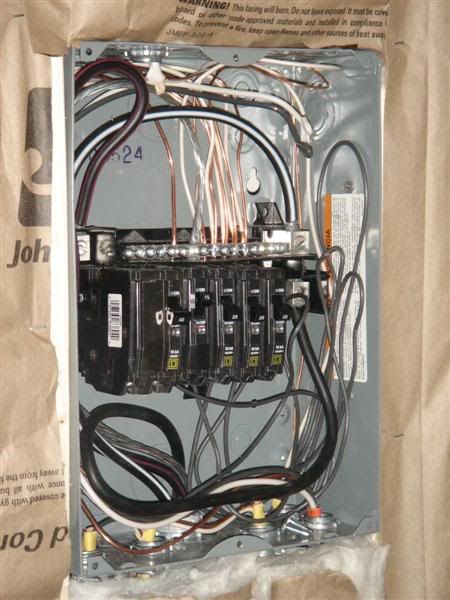
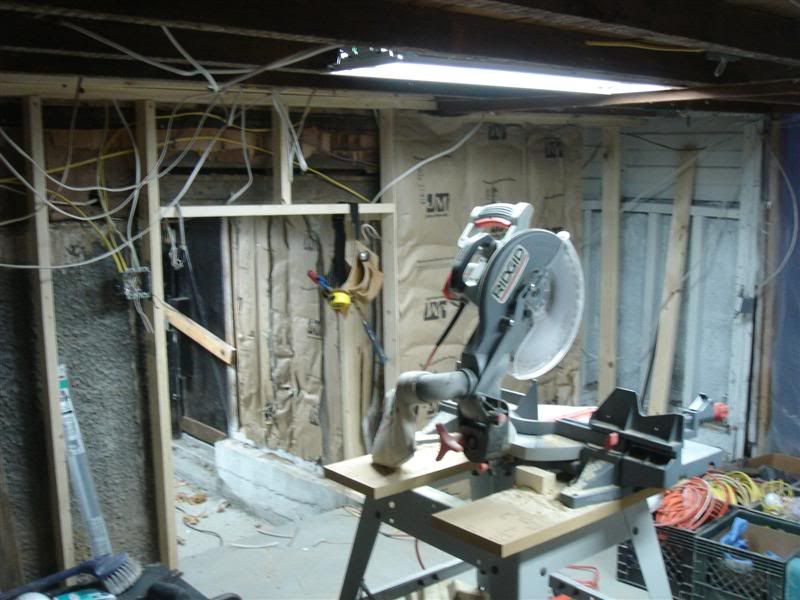
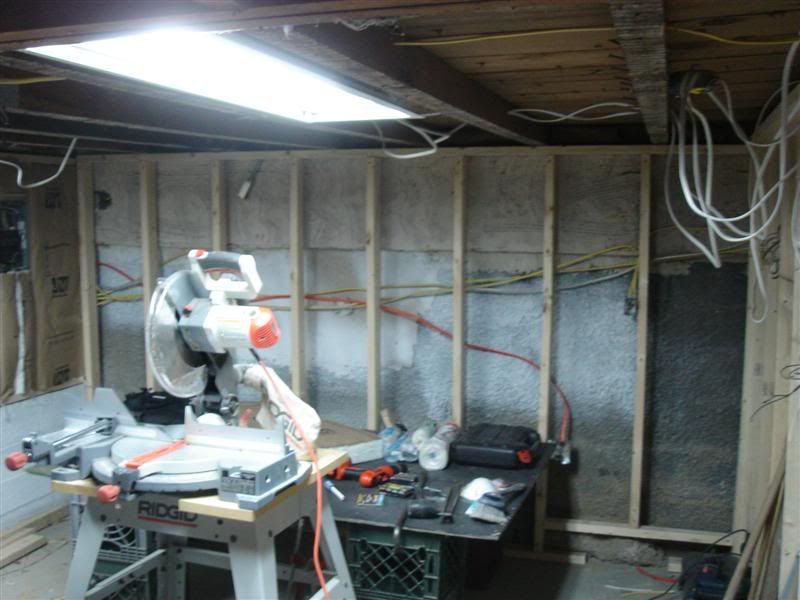
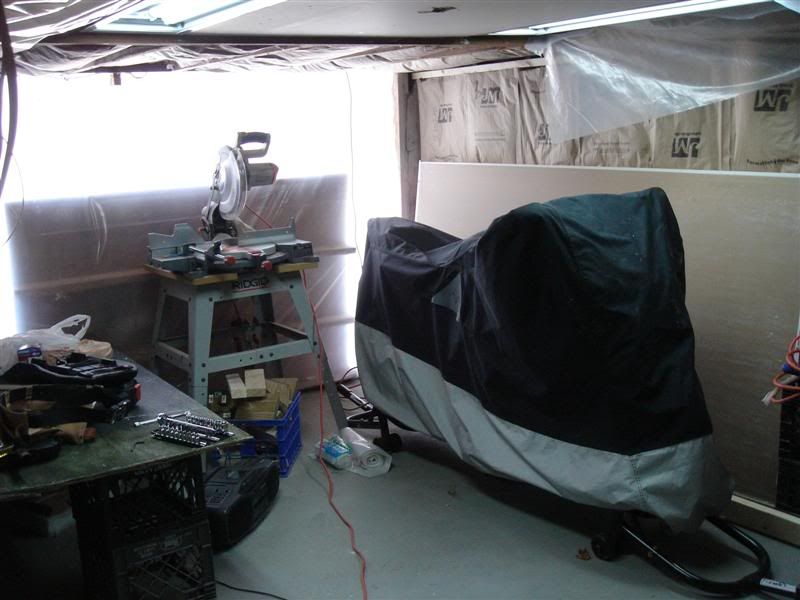
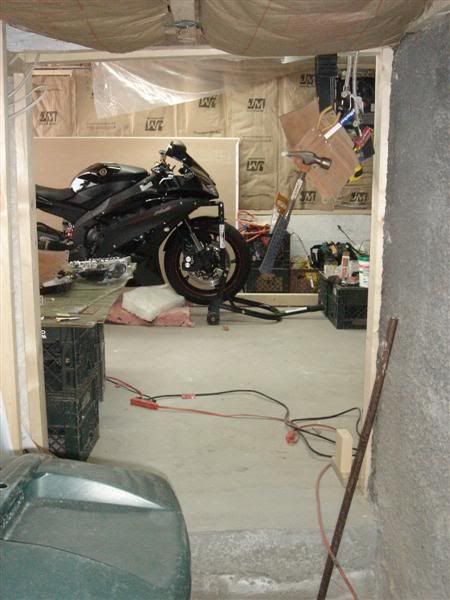
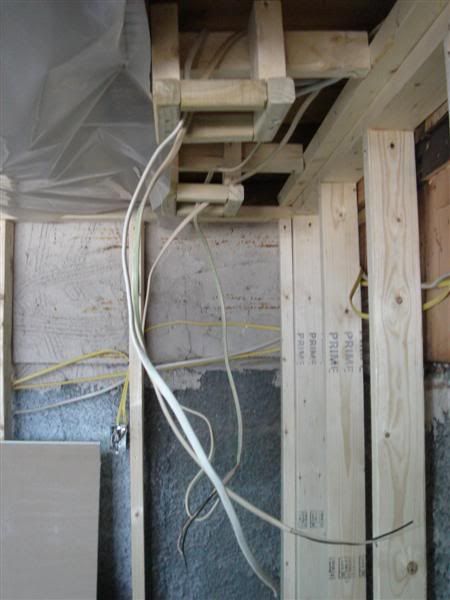
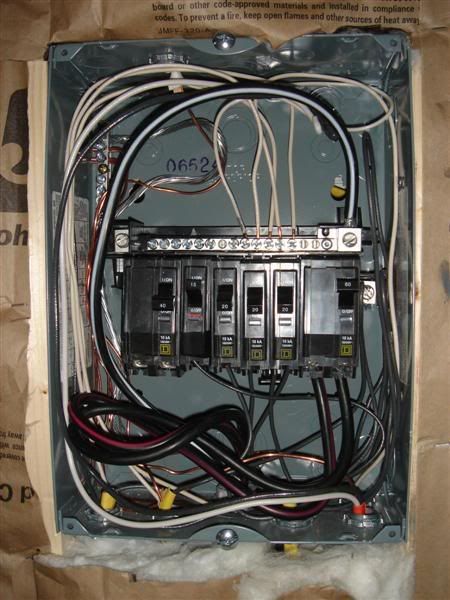
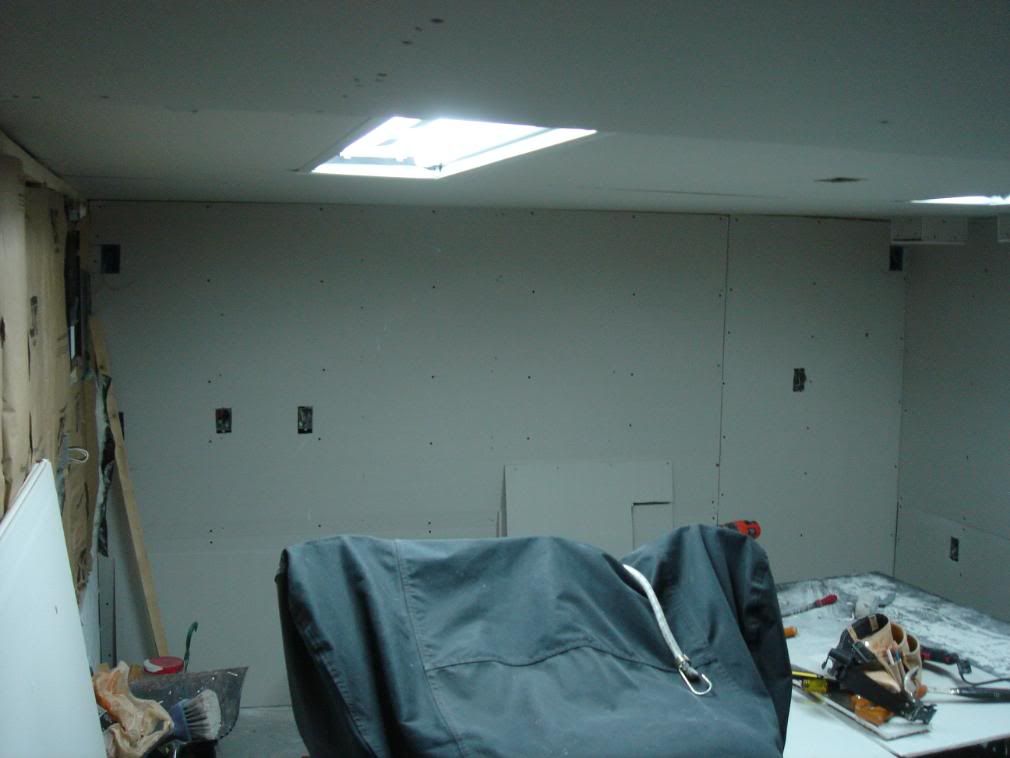
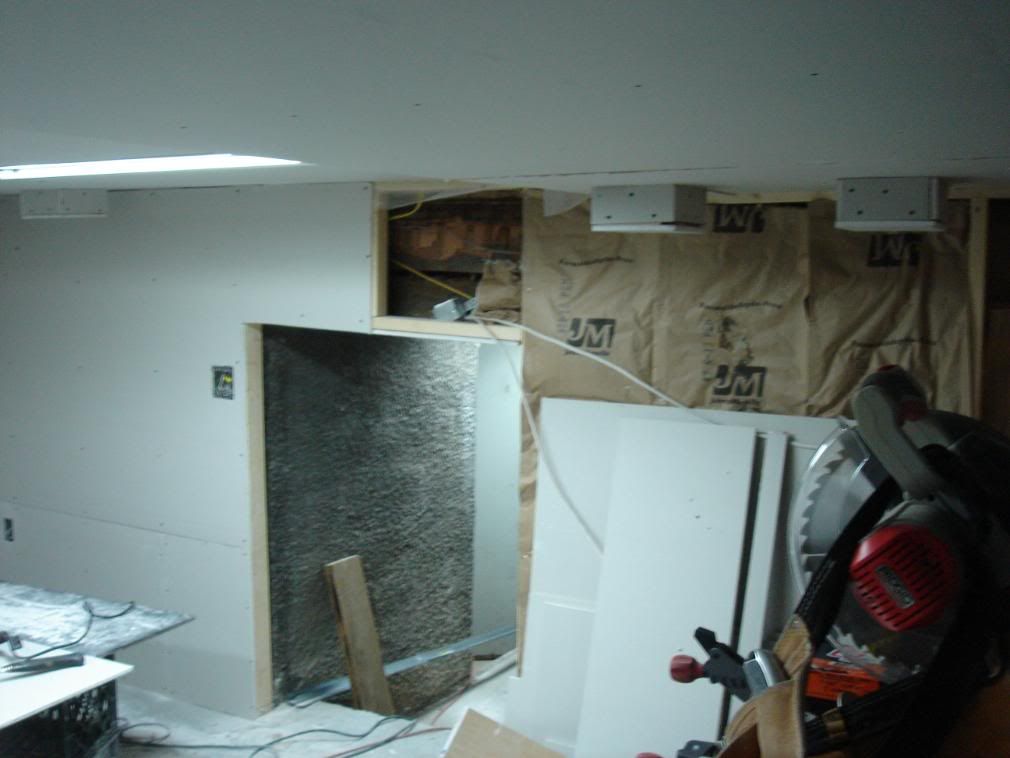
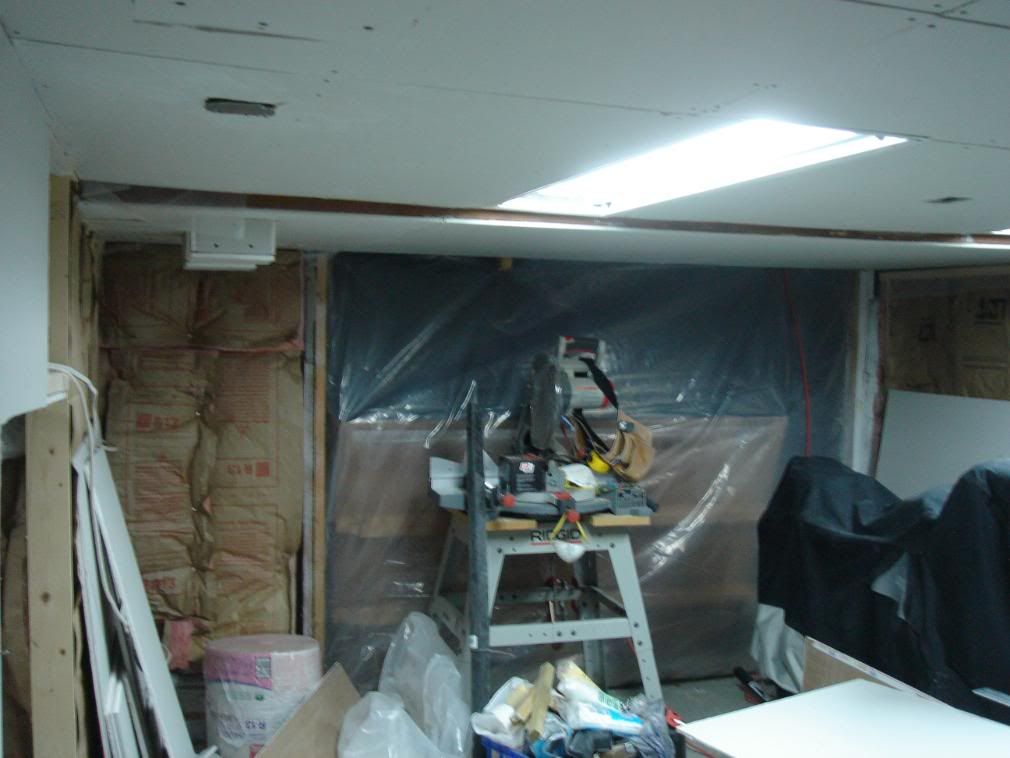
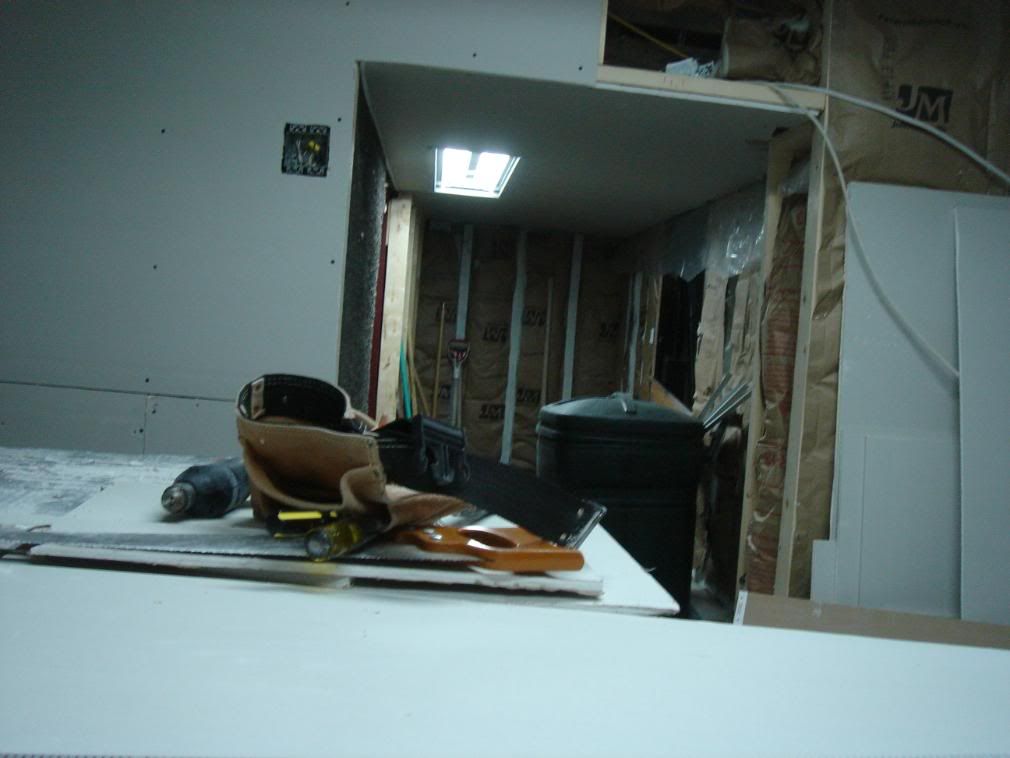
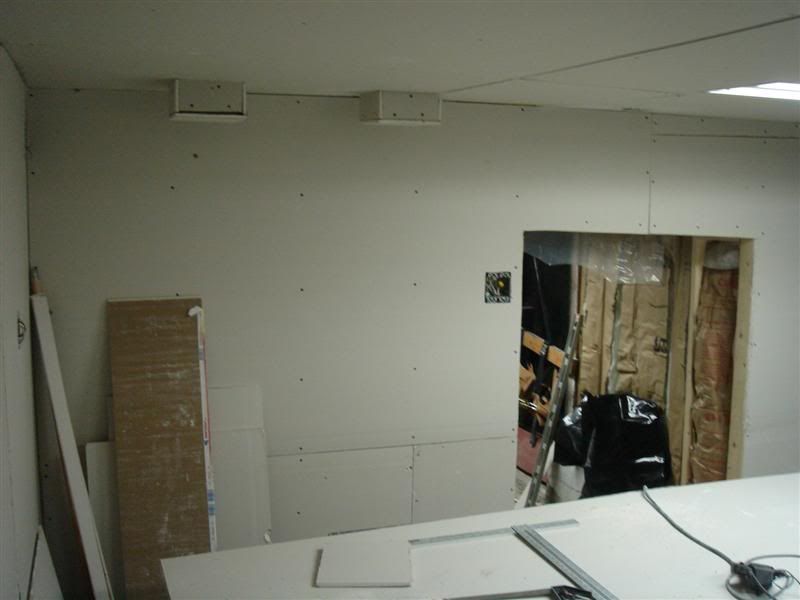
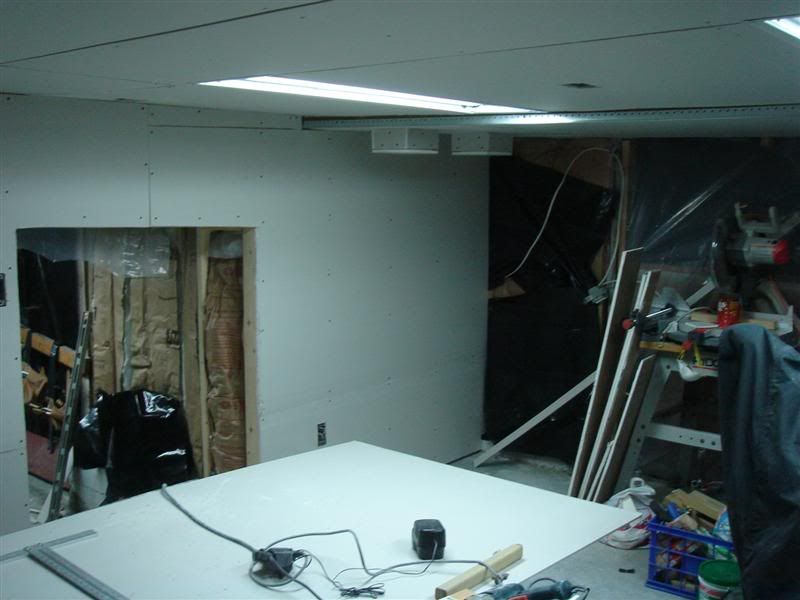
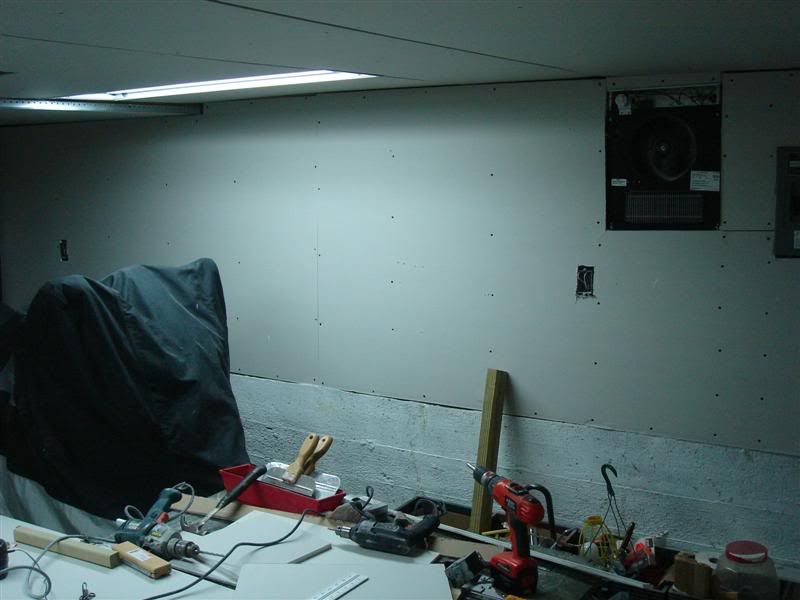
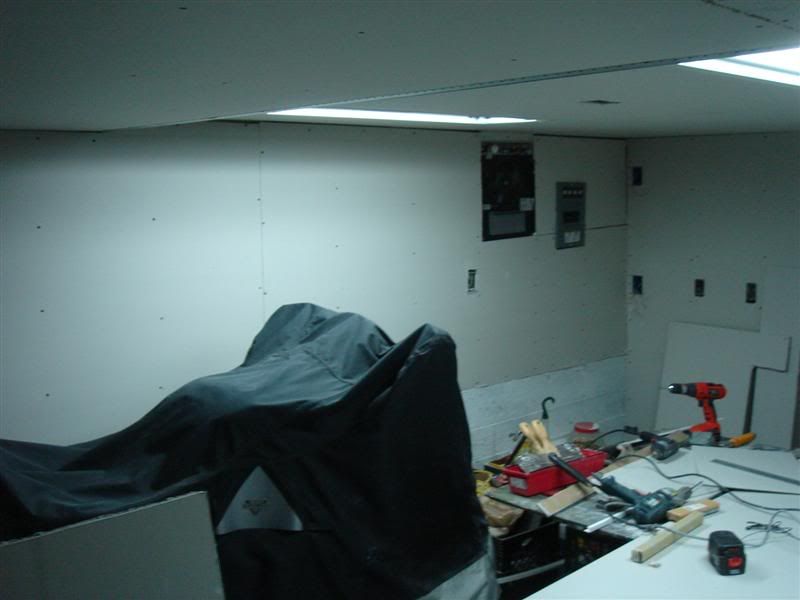
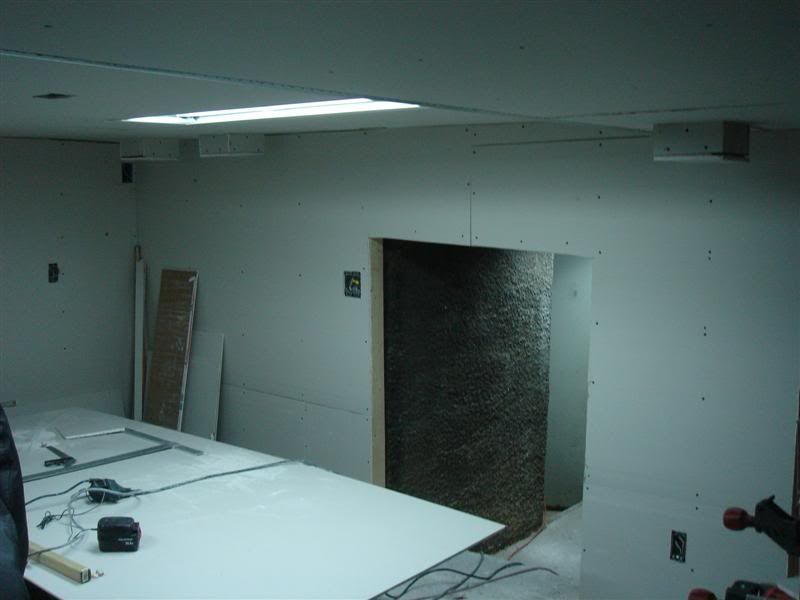
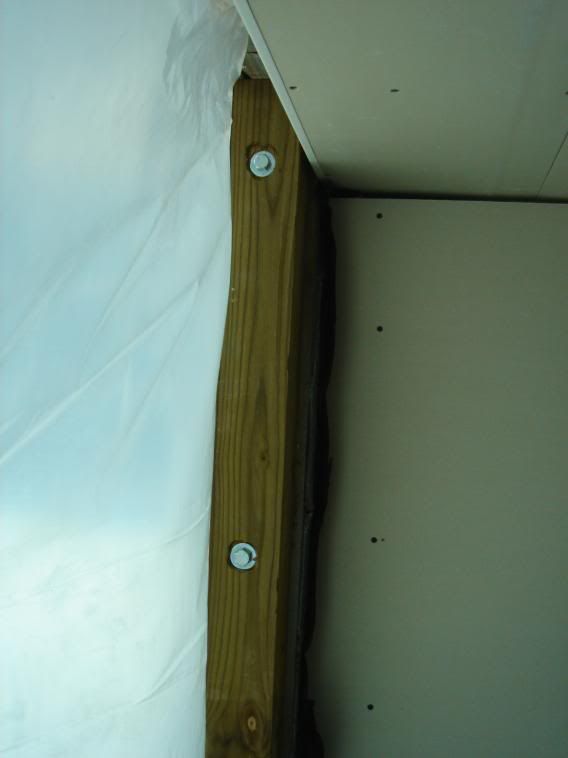
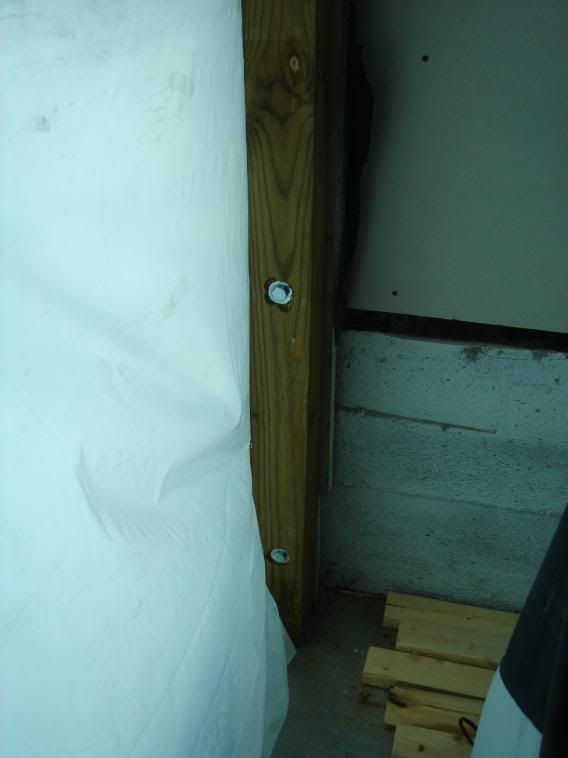
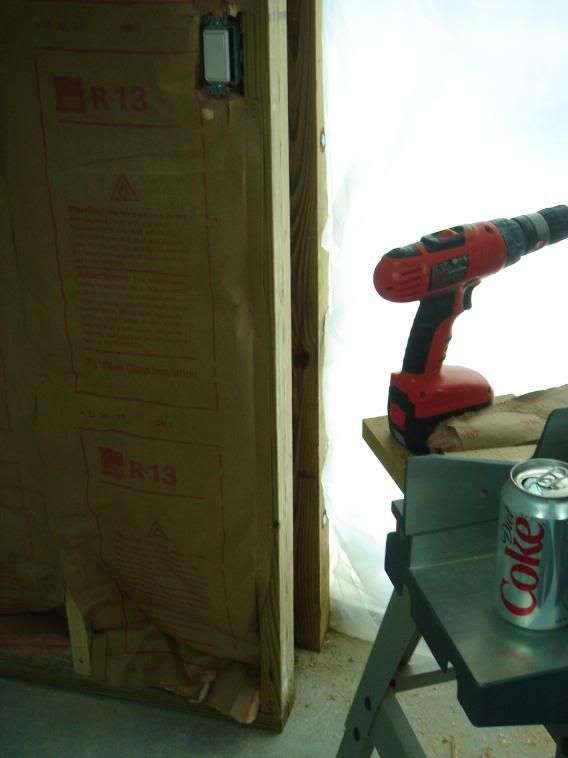
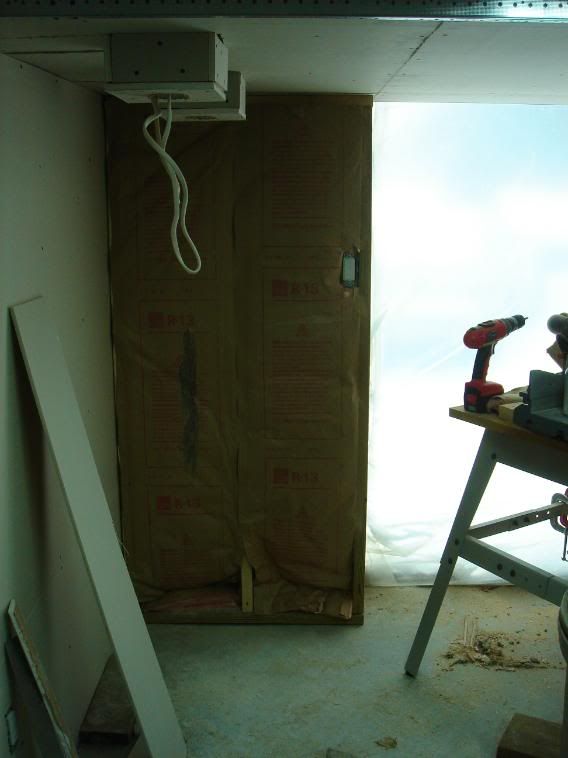
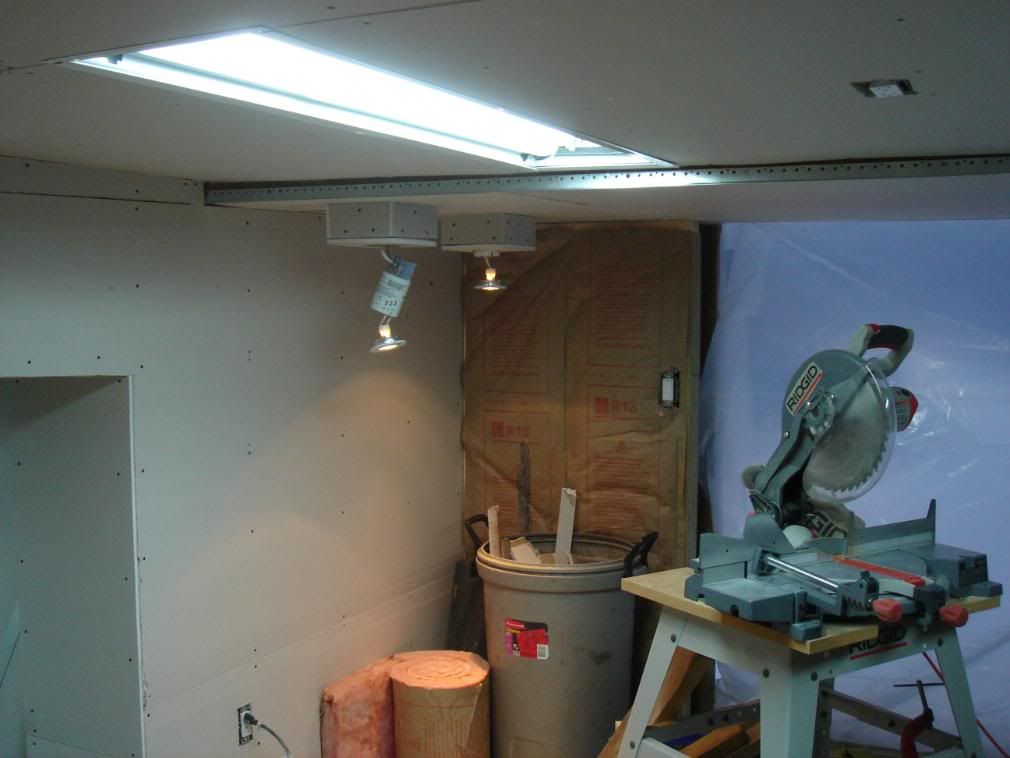
Upon starting the project I decided it would be well worth it to break down the wall and connect the two sections into one workshop... the smaller room will end up with lots of shelving mounted to the walls. Due to the age of it all, I decided to frame new walls inside the room in most places, in order to be able to insulate easily, hang drywall, and mount light fixtures, outlets, etc. There are some walls in the smaller room up which I will just mount insulation and sheetrock directly, though.

Just getting all the stuff out and making all the dump runs, as well as ripping out all of the old plaster and insulation took me the first few months (only one day a week, roughly).
 
To avoid these ads, REGISTER NOW!
OP
C

ceo012384

Well-known member
Joined
Nov 29, 2007
Messages
112
Location
Boston
So, here is what I started with:

Main room full of ****:
DSC01505Medium.jpg

DSC01506Medium.jpg

DSC01507Medium.jpg


Here is part of the smaller room:
DSC02034Medium.jpg


After I knocked down the wall between the two and cleared out the main room, here is a view looking from the main room into the smaller room:
DSC02037Medium.jpg
 
OP
C

ceo012384

Well-known member
Joined
Nov 29, 2007
Messages
112
Location
Boston
So, essentially, here is a schematic of the space I will be working with:
schematic.jpg


Here is the whole place stripped out,dirt floor, ready for concrete:
DSC02040Medium.jpg

DSC02036Medium.jpg

DSC02035Medium.jpg


In this one you can see the main garage door as well as the smaller door in the small room.
DSC02039Medium.jpg
 
OP
C

ceo012384

Well-known member
Joined
Nov 29, 2007
Messages
112
Location
Boston
The concrete needed not only to be laid inside the building in the two rooms, but there are severe drainage issues right outside the building, so there is now also a concrete 'apron' that runs around the whole back of the building and up the side a little bit. This makes sure all the rain goes away from the building. I don't have pics of the outside right now, I'll add some later. Also, all of the walls that border the outside world, I sprayed using a paint sprayer with a heavy duty sealing primer called 'Kilz'... seals in moisture, etc. Also, I caulked any cracks or holes both on the inside and outside.
Here's some shots with the floor in, walls sealed,(I've also insulated the walls in the small room that I won't be building another wall inside of) ready to start getting some real work done:
DSC02065Medium.jpg

DSC02064Medium.jpg

DSC02063Medium.jpg

DSC02062Medium.jpg

DSC02061Medium.jpg
 
OP
C

ceo012384

Well-known member
Joined
Nov 29, 2007
Messages
112
Location
Boston
I framed walls on most of the remaining walls. There are a couple where I will use the existing frame. To attach the bottom 2x4 to the floors, I used one of those powder-actuated nailers that use little bullets and you hit them with a hammer. I've used them before, they work great, made by Remington. After that it's just standard pain in the *** wall framing.

Then, I ran all of my wires. Due to anticipated high amperage, I used 4 gauge wire (for this particular wire I used aluminum because copper is so damn expensive right now) and ran a line from the takeoff lugs on the building's main panel back to my garage, and mounted a subpanel. I also used an existing wire to connect a fan-forced heater and mounted it in the framing... nice and toasty in there now. I ran all the wires for three big fluorescent light fixtures with a 3 way switch in two places, 4 small spotlights (for above where I plan to build a workbench and where I plan to have my big roller tool chests) controlled by a switch near where the workbench will be, 9 normal outlets, and 1 line for a 220V wire for when I get a compressor, hopefully not too far in the future. This is all managed by a 15 amp breaker for all the lights, three 20 amp breakers for all the outlets, and a 40 amp breaker for the 220V line.

Here is some pictures with most of the walls done being framed and most of the wiring done.
DSC02085Medium.jpg

DSC02084Medium.jpg

DSC02082Medium.jpg

DSC02090Medium.jpg
 
OP
C

ceo012384

Well-known member
Joined
Nov 29, 2007
Messages
112
Location
Boston
Today I got some bulbs and turned on the breaker for the fluorescent lights so I can stop working with those damn spot/work lights. I finished a couple other little wiring things and insulated the two walls that are up that border the outside. Here's some pics with the lights on.

DSC02091Medium.jpg

DSC02089Medium.jpg

DSC02088Medium.jpg


I plan to run a couple speaker wire outlets and the accompanying wires on the back wall because I plan to bring in my stereo and speakers on shelves there. After a couple more little wiring and insulation things, it will be time to start the drywall for all the walls and the ceiling. Really starting to come together.
 
OP
C

ceo012384

Well-known member
Joined
Nov 29, 2007
Messages
112
Location
Boston
^thanks. after wiring a couple speaker wire boxes and finishing up some more insulation, I think I'll be starting the drywall this saturday.

It's tough because I can only work on it ~1 day a week, maybe 2 at most.
 
OP
C

ceo012384

Well-known member
Joined
Nov 29, 2007
Messages
112
Location
Boston
A little update.

The bike is in there now on a tender, because of the snow. Fits in nicely, I will have PLENTY of space to work on it. Only problem is I noticed there was some oil on the ground underneath the bike, and it didn't look like it was coming from the breather tubes. I didn't have time to look into it, so now it's bugging me quite a bit, I'm worried.

DSC02148Medium.jpg


DSC02143Medium.jpg


All of the insulation is done. I've JUST started drywalling. Lots of work left to do there.

DSC02147Medium.jpg


Because the little spot lights I am putting above my workbench and tool chest are a little too long to fit in the rafters, I had to box them in. I built little boxes and hung two of them, I still have to hang the other two.

DSC02146Medium.jpg


Here's a random shot of the little side room.

DSC02145Medium.jpg


Left to do:
- Hang boxes and run wires for speakers (have parts already)
- Hang other two small light boxes
- Modify the subpanel (add a 60amp main breaker and ground bus bar... have the parts)
- Build and hang doors
- Finish putting up plastic sheeting
- Drywall hanging, mudding, sanding
- Paint
- Install all outlets, switches, and faceplates (after paint, obviously)
- Put down epoxy floor coating (medium gray with black, red, and white paint chips)
- Crack a beer and admire the work
 
OP
C

ceo012384

Well-known member
Joined
Nov 29, 2007
Messages
112
Location
Boston
Did a couple little things the other day.

I mounted up boxes and ran wires for all of the speaker outlets.

Also, I modified the subpanel a bit to follow convention... the neutral and ground wires needed to be on separate bus bars, and the hot lines coming in needed to run through a main breaker before going to the individual breakers.

Gettin **** done, son.
DSC02168Medium.jpg


Updated... new ground bus bar, new main breaker.
DSC02167Medium.jpg


After xmas 
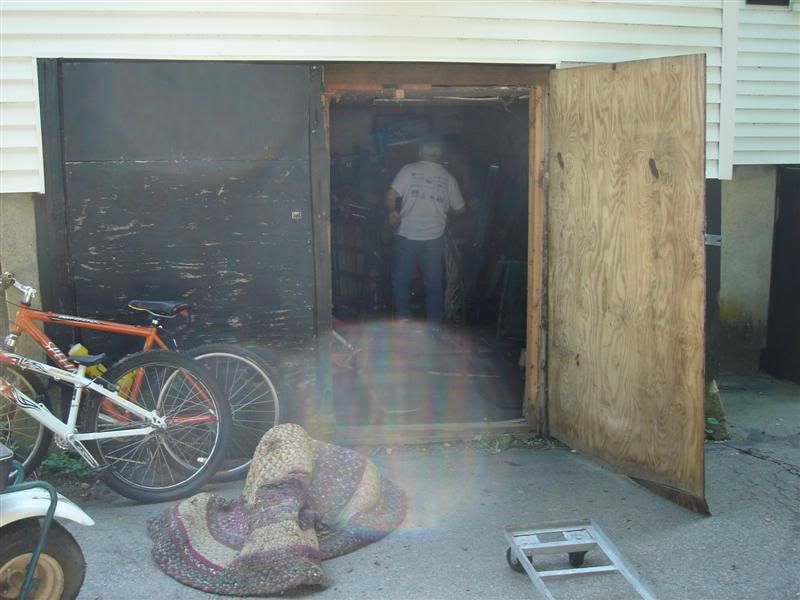
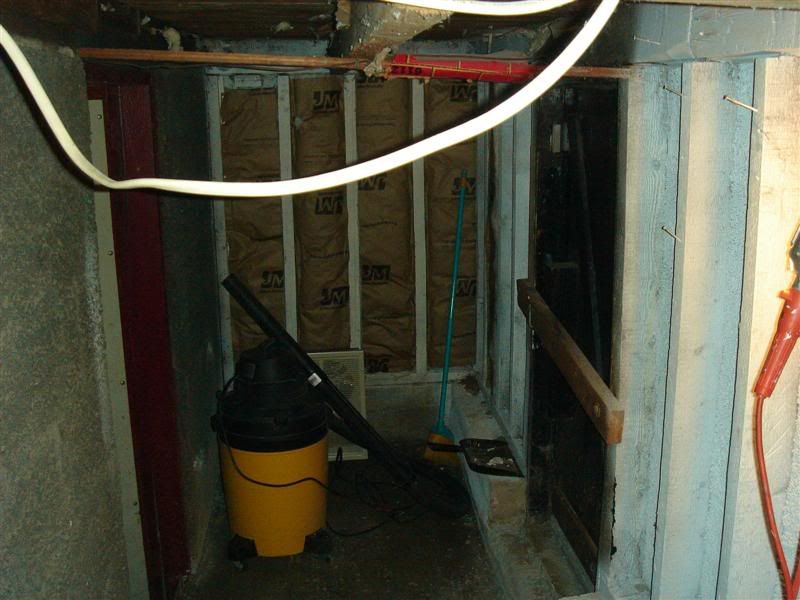
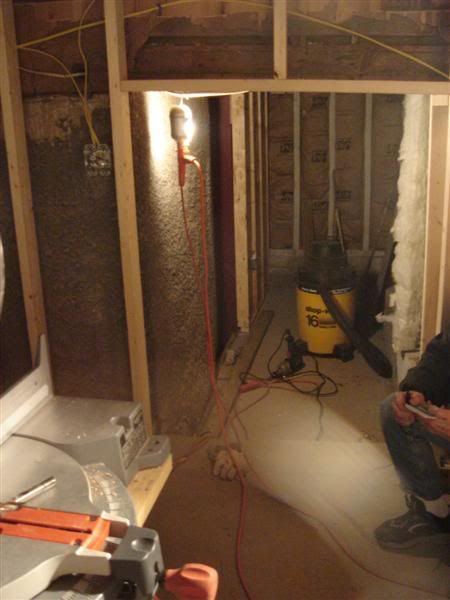
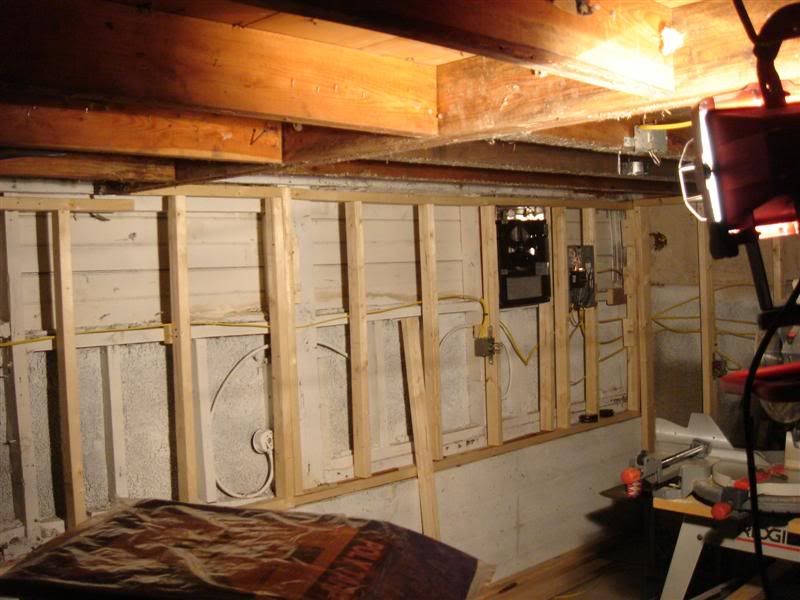
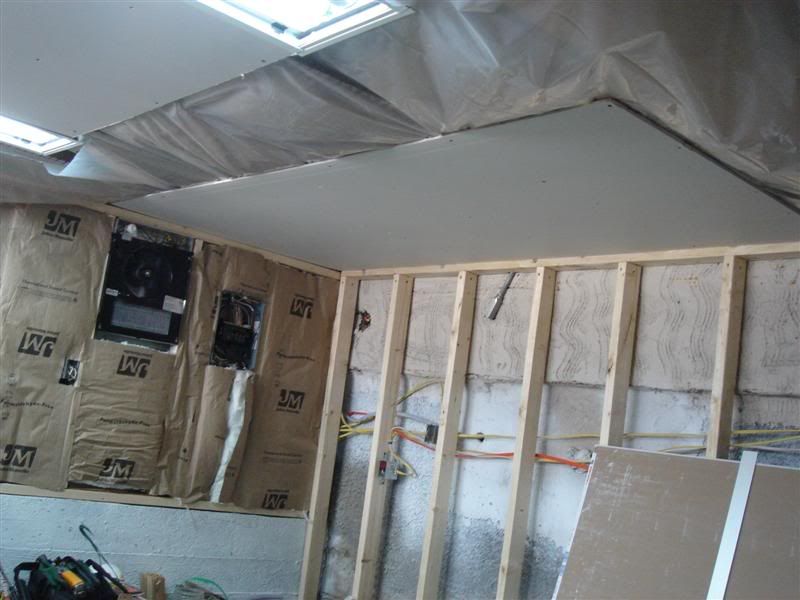
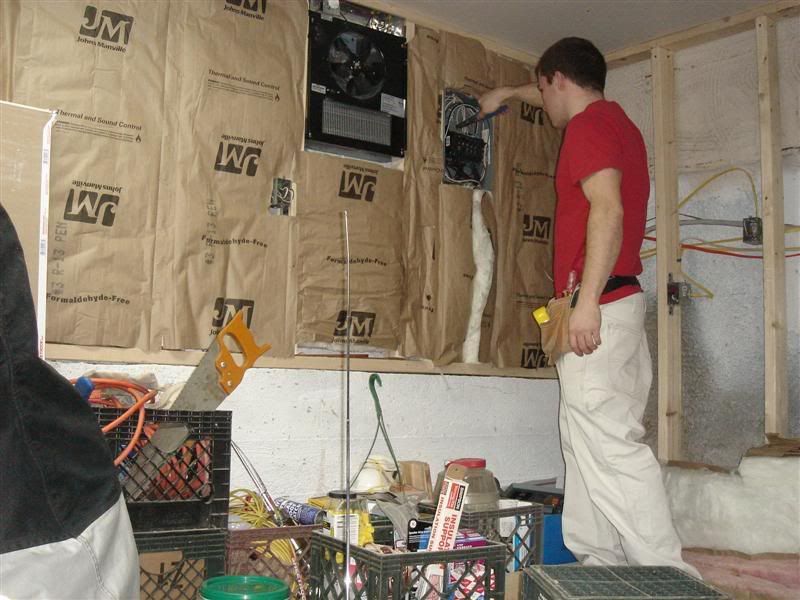
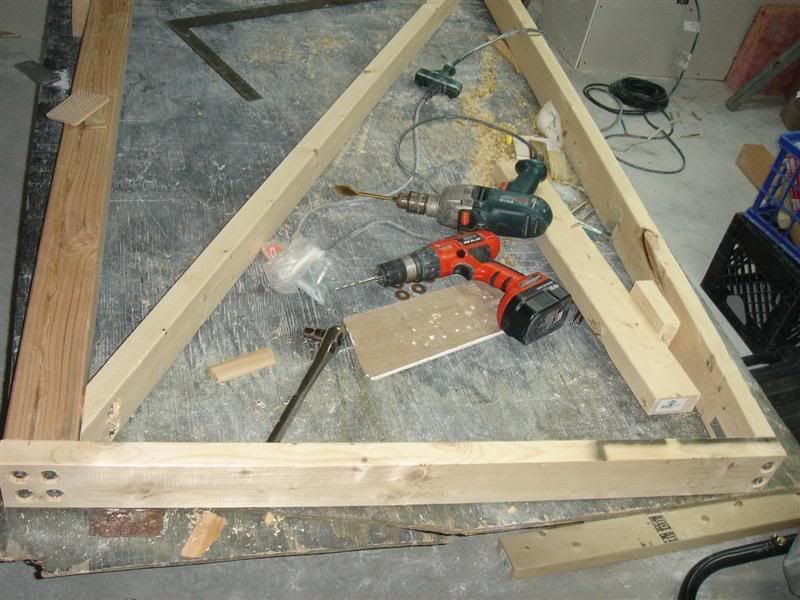
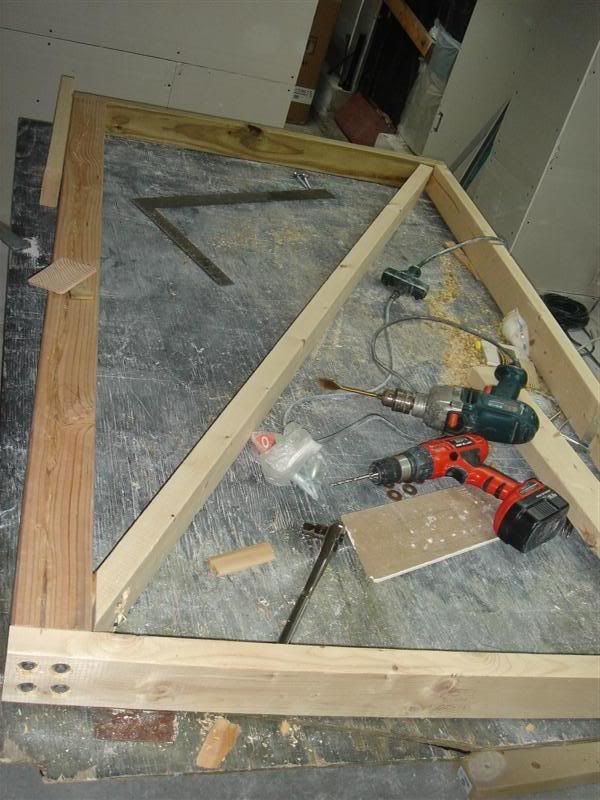
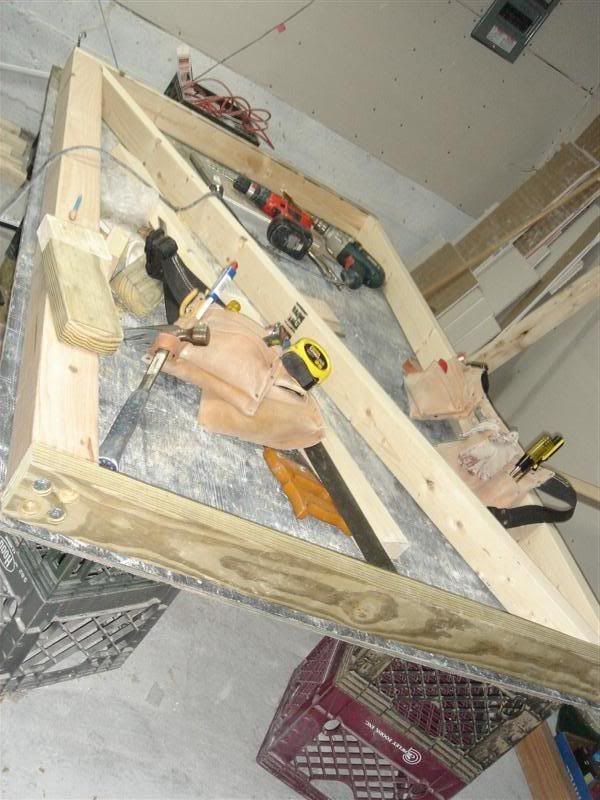
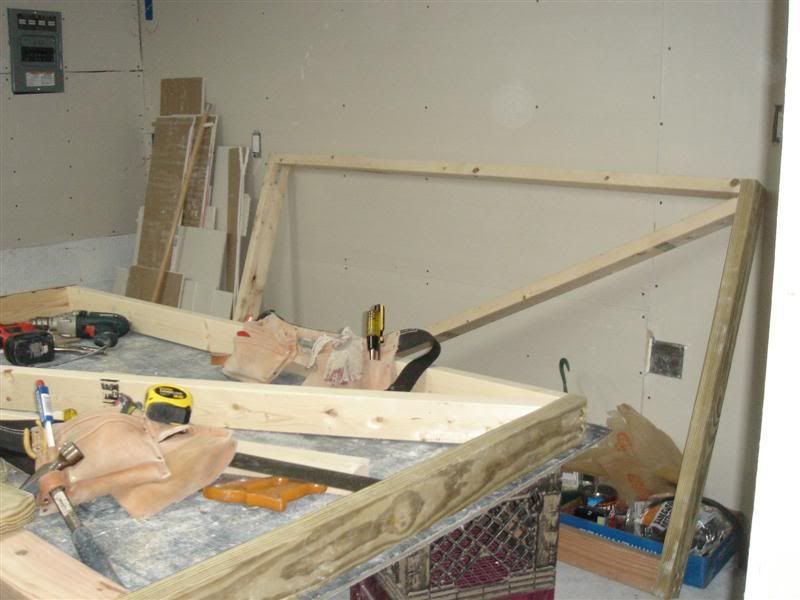
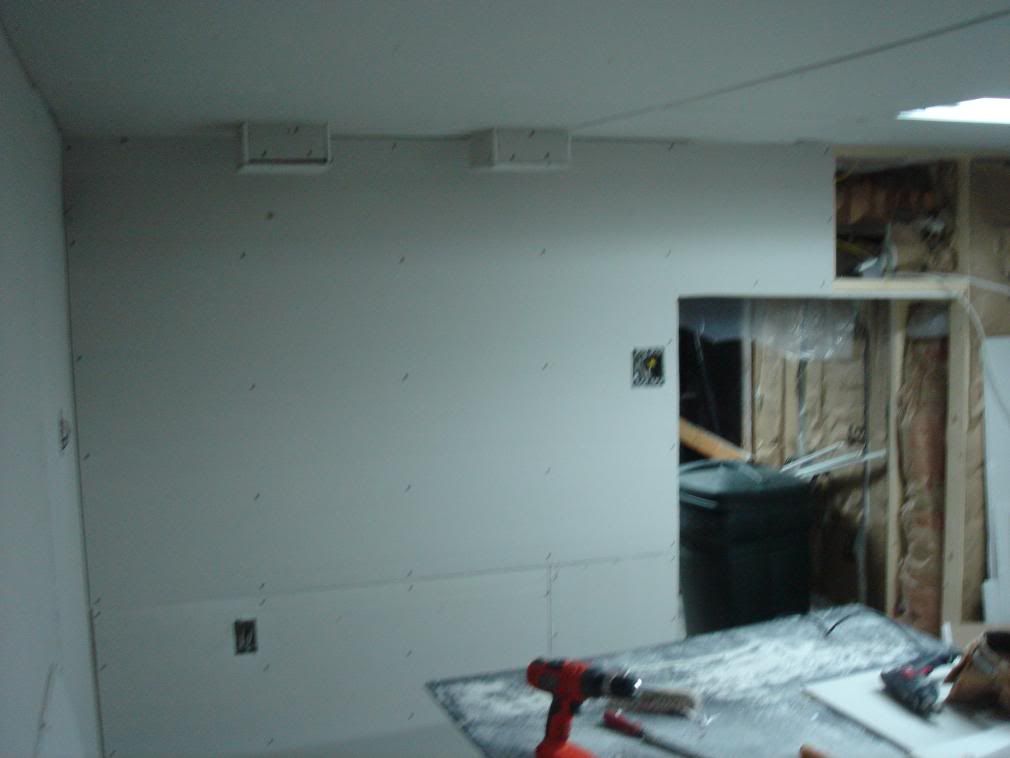
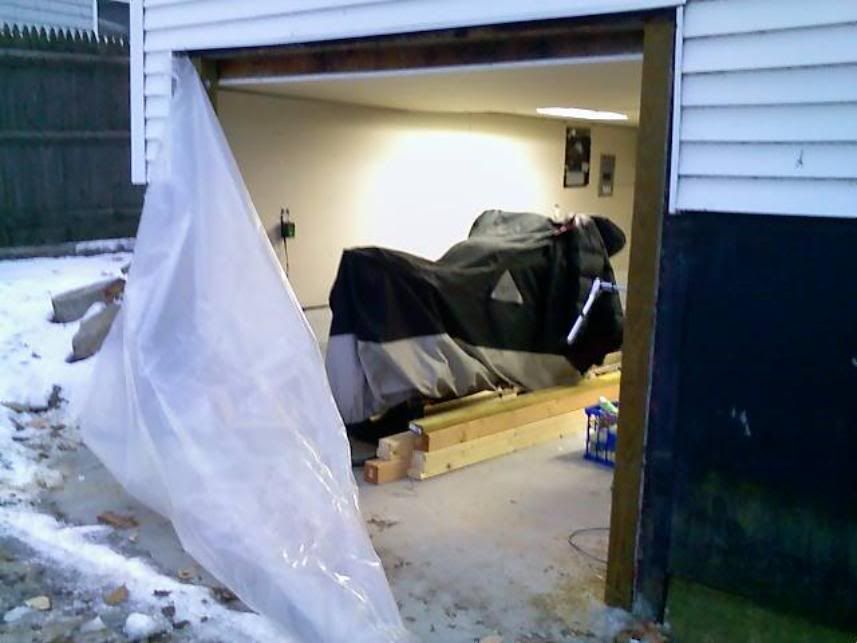
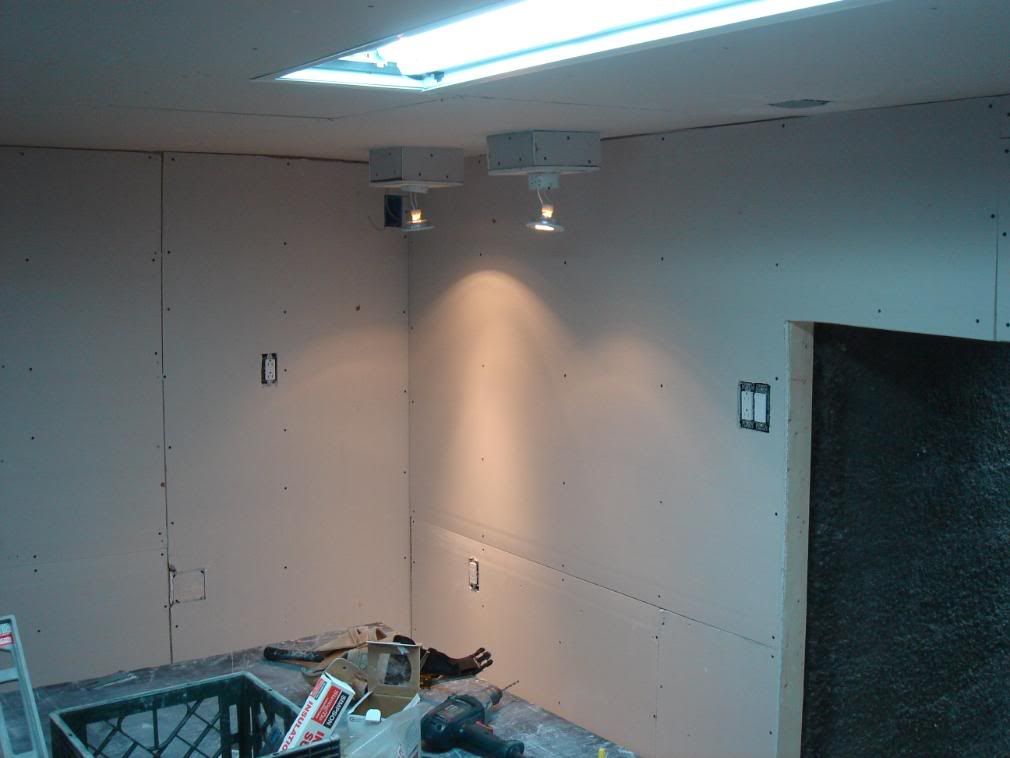
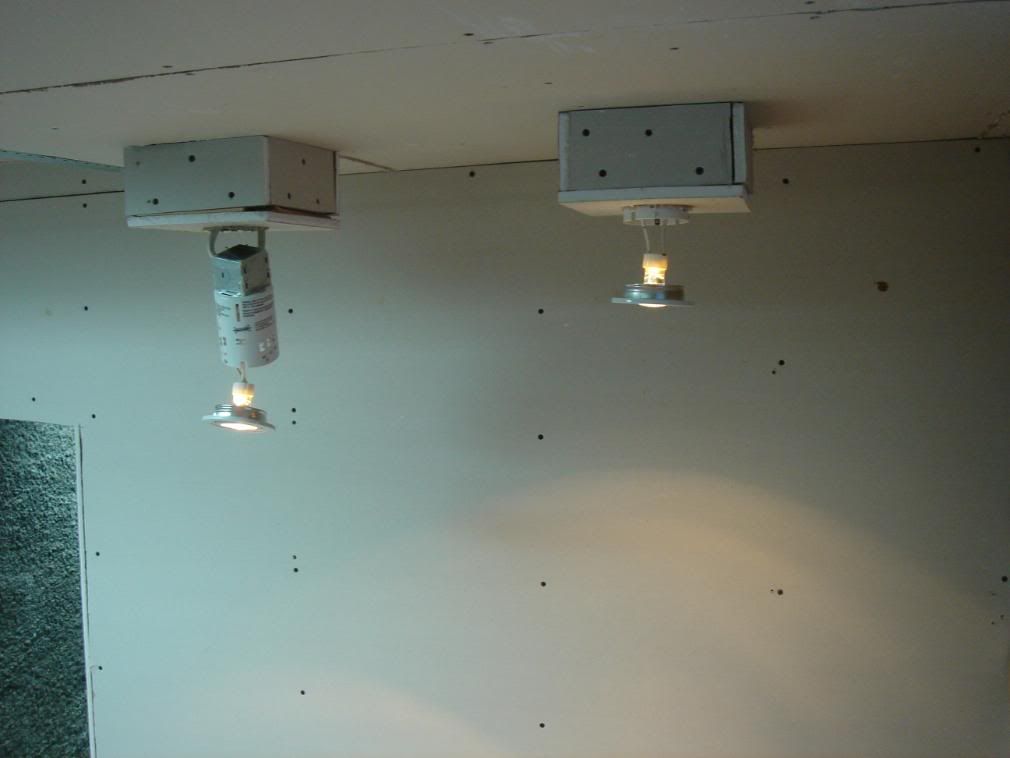
I'm planning to make a ton of progress, mainly on the drywall and the construction of the doors.
 
OP
C

ceo012384

Well-known member
Joined
Nov 29, 2007
Messages
112
Location
Boston
Today I finished all of the ceiling drywall. Man, old construction is really a ***** sometimes. Those guys that build houses from scratch have a cakewalk!

In the next couple days I think I can get most of the drywalling done and a chunk of the mudding.
 

1320stang

Well-known member
Joined
Dec 28, 2006
Messages
4,569
Location
Edmond, OK
First I've seen the thread.

I've had to look at the post several times to sort of follow at what I'm looking at, no fault of yours, just such a small space to photograph.

I can't believe you used aluminum wire, I'm guessing even though it's in a commercial building, you have no permit. I'm just saying aluminum wire is illegal to use here. If there ends up being a fire, there may not be a settlement. Not digging on anything other than wire choice.
 

SWA Guy

Well-known member
Joined
Dec 12, 2006
Messages
111
Location
Sacramento, CA
Chris,

The job is looking great. I love to see the before and after pictures.

Those ceiling mounted lights really brightened things up quite a bit. Your electrical plan sounds great. I wish that I had thought a little further ahead when I did my garage remodel this last summer.

Keep the pics coming! And... don't worry too much about the lack of comments. The holidays kind of screw up everyone's schedule. Keep it coming!

Regards,

Guy


www.737guy.com
 

Stuart in MN

Well-known member
Joined
Sep 8, 2005
Messages
23,052
Location
Minneapolis
I can't believe you used aluminum wire, I'm guessing even though it's in a commercial building, you have no permit. I'm just saying aluminum wire is illegal to use here. If there ends up being a fire, there may not be a settlement. Not digging on anything other than wire choice.


Aluminum wire is pretty common for this application, and is perfectly fine as long as it's installed correctly and local code allows it. The main lugs on the panel should be labeled 'Al/Cu' if the panel is rated for use with aluminum wire; there's a deoxidant goop that should be used on the terminals and you have to be careful to properly tighten the lugs (and they should be checked periodically over time to make sure they haven't loosened.)
 

jay50

Banned
Joined
Oct 28, 2007
Messages
3,894
Chris, nice job you got going making you a "man-cave"
One thing you might have forgotten about: The frig location for the beer....LOL
 
OP
C

ceo012384

Well-known member
Joined
Nov 29, 2007
Messages
112
Location
Boston
I've had to look at the post several times to sort of follow at what I'm looking at, no fault of yours, just such a small space to photograph.
Yeah, it's a little tough to comprehend it all without physically being in there. It's a small-ish space, but it will be perfect for my purposes. Also, I am ridiculously ****/OCD, so it will be extremely organized and the space will be used to its maximum efficiency. The smaller side room is going to be pretty much all shelves.

I posted it above, but for completeness, here is the general layout:
schematic.jpg

I can't believe you used aluminum wire, I'm guessing even though it's in a commercial building, you have no permit. I'm just saying aluminum wire is illegal to use here. If there ends up being a fire, there may not be a settlement. Not digging on anything other than wire choice.
Aluminum wire is perfectly fine and legal to use, meets all the codes, etc. You need to use one gauge larger than copper usually, just because the conductivity it slightly lower. With the prices of copper having gone through the roof, tons of people are using aluminum now. Almost every electrical component you can buy these days will say "Al/Cu" on it, and all of mine do, which means you can use aluminum. Then, you need to put a gel on the end of each wire before you tighten it into all of the connections, this takes care of aluminum's tendency to expand/contract under temperature fluctuations. Done deal, about 70% cheaper than copper these days. Also, note that I only used aluminum for the one very large wire that is powering the whole subpanel. The rest is all standard #10, #12, and #14 copper wire. The big wire was going to be about $2.60 a foot or something ridiculous like that... I got the Al for like 90 cents a foot.
Chris,

The job is looking great. I love to see the before and after pictures.

Those ceiling mounted lights really brightened things up quite a bit. Your electrical plan sounds great. I wish that I had thought a little further ahead when I did my garage remodel this last summer.
Thanks man! Yeah, I figured it would be nice to have some spotlights over my bench area.... it's been a bit of a pain to box them in since the rafter depth isn't enough to accommodate the lights, but I think it will be worth it.
Aluminum wire is pretty common for this application, and is perfectly fine as long as it's installed correctly and local code allows it. The main lugs on the panel should be labeled 'Al/Cu' if the panel is rated for use with aluminum wire; there's a deoxidant goop that should be used on the terminals and you have to be careful to properly tighten the lugs (and they should be checked periodically over time to make sure they haven't loosened.)
There we go! I shouldn't have typed all of that two quotes up :lol:
Chris, nice job you got going making you a "man-cave"
One thing you might have forgotten about: The frig location for the beer....LOL
Oh don't worry, I have a mini-fridge for beers, it's going to tuck under my workbench when I build it :thumbup:
 
Last edited:

markb1

Well-known member
Joined
Jan 24, 2007
Messages
241
Converting, remodeling is hard, and you're doing a great job, I've enjoyed your pics and and can certainly relate as I'm reclaiming space also (storage to working space).

Don't get discouraged by the lack of response, just go out and do more.

I know you aren't asking for advice but I would like to emphasize the importance of the "NO-Ox" gel for your AL. wire connections. Aluminum wire oxidizes and the oxide coating that forms on the wire does not conduct electricity, so as this coating slowly forms at the electrical connection the resistance builds and as a result it heats up with the electrical load and expands then cools and shrinks, this cycling loosens the connection and can produce enough heat to destroy your wire and panel, or worse yet start a fire.
The coating keeps the oxide from forming.

As a licensed electrician for 30+ yrs. I see this quite often.

Keep up the good work and I,m looking forward to more pics of your progress.
 

jay50

Banned
Joined
Oct 28, 2007
Messages
3,894
Converting, remodeling is hard, and you're doing a great job, I've enjoyed your pics and and can certainly relate as I'm reclaiming space also (storage to working space).

Don't get discouraged by the lack of response, just go out and do more.

I know you aren't asking for advice but I would like to emphasize the importance of the "NO-Ox" gel for your AL. wire connections. Aluminum wire oxidizes and the oxide coating that forms on the wire does not conduct electricity, so as this coating slowly forms at the electrical connection the resistance builds and as a result it heats up with the electrical load and expands then cools and shrinks, this cycling loosens the connection and can produce enough heat to destroy your wire and panel, or worse yet start a fire.
The coating keeps the oxide from forming.

As a licensed electrician for 30+ yrs. I see this quite often.

Keep up the good work and I,m looking forward to more pics of your progress.

When I took residental wiring course in community college several years ago, instructor commented on the change in code in most areas that took place in early 70s (IIRC) that prohibited the use of AL in small wiring circuits such as lights. As stated previously, the heating and contraction would cause the wire to work loose behind the holddown screws in the switch which could cause arching and fires. He also believed it was due to the fact that when you turn on the switch, you are subject to bumping against the cover and over time this also aids in making it work loose also with AL.

I never got my electrical liscense, did not need it to do my own work in my state. Learned quiet a bit from this guy.
I see you are using Copper for the light circuits; missed this when reading earlier.
 
Last edited:
To avoid these ads, REGISTER NOW!

WolverineCoatings

Well-known member
Joined
Oct 22, 2007
Messages
833
Location
Spartanburg, SC
This is the first time I've seen this one... It looks like things are progressing extremely quickly for the amount of time you have to work on it!

- Put down epoxy floor coating (medium gray with black, red, and white paint chips)

Let me or 'GrampaBill' know if we can help you. We do have a Red, White, and Black blend of chips... and... medium gray. We might even have something cooler...

Just curious... Why Red, White, and Black with Medium Gray? Team Colors? Just like it?
 

markb1

Well-known member
Joined
Jan 24, 2007
Messages
241
[QUOTE=jay50;

"He also believed it was due to the fact that when you turn on the switch, you are subject to bumping against the cover and over time this also aids in making it work loose also with AL."


If you nick AL wire when striping then wrap around terminal screw it would often break at the nick or sometime later through normal use,and if it was an often used outlet, like a hall plug used for a vacuum, over time the slight motion would eventually cause a failure.

The smaller gauges of AL wire once used in buildings (12,10ga.) solid wire haven't been used since the '70s, The larger sizes, 8ga and up of stranded AL wire have and still are commonly used with no problems as long as you use an oxide inhibitor and torque correctly.
 
OP
C

ceo012384

Well-known member
Joined
Nov 29, 2007
Messages
112
Location
Boston
Good use of space , you have come a long way there.:thumbup:
Thanks buddy! It's going to be real nice when I'm done. I'm very pleased so far.
Converting, remodeling is hard, and you're doing a great job, I've enjoyed your pics and and can certainly relate as I'm reclaiming space also (storage to working space).

Don't get discouraged by the lack of response, just go out and do more.

I know you aren't asking for advice but I would like to emphasize the importance of the "NO-Ox" gel for your AL. wire connections. Aluminum wire oxidizes and the oxide coating that forms on the wire does not conduct electricity, so as this coating slowly forms at the electrical connection the resistance builds and as a result it heats up with the electrical load and expands then cools and shrinks, this cycling loosens the connection and can produce enough heat to destroy your wire and panel, or worse yet start a fire.
The coating keeps the oxide from forming.

As a licensed electrician for 30+ yrs. I see this quite often.

Keep up the good work and I,m looking forward to more pics of your progress.
Mark,

Thanks very much for the kind words!!

Yes, I used that coating on all of the Al wire connections, and used it liberally. I'll be able to easily keep tabs on those connections over time.

Also, the temperature extremes won't be too bad at the main panel in the other portion of the basement or at my subpanel since we have heaters and everything.

But yes, as long as you do it right, there really isn't any disadvantage to the Al wire!

-Christopher
When I took residental wiring course in community college several years ago, instructor commented on the change in code in most areas that took place in early 70s (IIRC) that prohibited the use of AL in small wiring circuits such as lights. As stated previously, the heating and contraction would cause the wire to work loose behind the holddown screws in the switch which could cause arching and fires. He also believed it was due to the fact that when you turn on the switch, you are subject to bumping against the cover and over time this also aids in making it work loose also with AL.

I never got my electrical liscense, did not need it to do my own work in my state. Learned quiet a bit from this guy.
I see you are using Copper for the light circuits; missed this when reading earlier.
All good info... I wouldn't use Al wire for outlets and lights, or even my 240 compressor outlet, I'm not sure you can even get small gauge wire in Al around here.

Like I said, I only used it for the big 50 foot wire that's coming from the main panel in the other portion of the basement, in order to save money. :beer:
This is the first time I've seen this one... It looks like things are progressing extremely quickly for the amount of time you have to work on it!


Let me or 'GrampaBill' know if we can help you. We do have a Red, White, and Black blend of chips... and... medium gray. We might even have something cooler...

Just curious... Why Red, White, and Black with Medium Gray? Team Colors? Just like it?
Thanks a lot, man!

I'm intrigued by the 'something cooler...' :lol: what do you mean???

The colors are just mostly my preference. I'm pretty set on the medium gray base... looks nice, good contrast with the white walls, and not too bad with showing dirt. I would do black, but I don't feel like cleaning it every day. The white red and black, I just think would look really smart. Also, my motorcycle is all black with red accents... here it is:

_K5C4508Large.jpg

jay50 said:
"He also believed it was due to the fact that when you turn on the switch, you are subject to bumping against the cover and over time this also aids in making it work loose also with AL."
If you nick AL wire when striping then wrap around terminal screw it would often break at the nick or sometime later through normal use,and if it was an often used outlet, like a hall plug used for a vacuum, over time the slight motion would eventually cause a failure.

The smaller gauges of AL wire once used in buildings (12,10ga.) solid wire haven't been used since the '70s, The larger sizes, 8ga and up of stranded AL wire have and still are commonly used with no problems as long as you use an oxide inhibitor and torque correctly.

Good info right there!! I agree with all of it :beer:
 
OP
C

ceo012384

Well-known member
Joined
Nov 29, 2007
Messages
112
Location
Boston
So in the past few days I've made some pretty decent drywall progress. The ceiling in both rooms is completely done, including boxing in the little spotlights. I started the walls, I've done the whole back wall in the main room, and half of the wall that interfaces the two rooms. Did a couple wiring things, added a dedicated outlet under the workbench for the minifridge,other odds and ends. There are a couple portions of wall that cannot be drywalled until later, because I have to design and build the garage doors, and design and build a door to replace the small door in the small room that goes to the outside.

Here's some shots of the progress:

Back wall, ceiling (notice that my 'work table' looks like I had a huge coke party :lol: ... gotta love drywall):
DSC02179.jpg


Side wall, ceiling with boxed in spotlights:
DSC02180.jpg


Ceiling:
DSC02181.jpg


Side wall, ceiling with boxed in spotlights:
DSC02182.jpg


Looking from the main room into the small room:
DSC02183.jpg


Looking from the small room into the main room:
DSC02184.jpg


Comin' along decently not that I've been able to put in a couple consecutive full days :)
 

markb1

Well-known member
Joined
Jan 24, 2007
Messages
241
Great pic of you and the bike, and the sheet rock is looking good too.
 
OP
C

ceo012384

Well-known member
Joined
Nov 29, 2007
Messages
112
Location
Boston
Great pic of you and the bike, and the sheet rock is looking good too.
Thanks buddy!


A little update from today:

Did a couple more things today....

Finished almost all of the drywall that can be done before the main doors and the small side door are all sorted out. There is a small portion in the smaller room that can still be done, probably about an hour of work.

It's all a mental thing, but once you get those sheet up on the ceiling and wall, you really feel like you've actually done something.

DSC02185Medium.jpg


DSC02186Medium.jpg


DSC02187Medium.jpg


DSC02189Medium.jpg


DSC02190Medium.jpg


DSC02192Medium.jpg


DSC02194Medium.jpg


DSC02196Medium.jpg
 

JMURiz

Well-known member
Joined
Dec 6, 2005
Messages
1,483
Location
NoVA
Looks good, I can get a much better feel for the space from the after pics...the before looked like a disaster!

I like the storage space, nice place for parts/junk storage!

Question, how high is the door into the 5x15 storage room, looks mighty short, not that you could have done anything about that.
 

jay50

Banned
Joined
Oct 28, 2007
Messages
3,894
Looks good; you have been busting your *** to get this done....great motivation
 
OP
C

ceo012384

Well-known member
Joined
Nov 29, 2007
Messages
112
Location
Boston
Looks good, I can get a much better feel for the space from the after pics...the before looked like a disaster!

I like the storage space, nice place for parts/junk storage!

Question, how high is the door into the 5x15 storage room, looks mighty short, not that you could have done anything about that.
Thanks a lot man!

Yeah, about the doorway between the rooms...

The building has been added onto several times over its over-hundred-year lifetime. When you go from the garage to the smaller room, the bit you are ducking under is a 4x12 (I think, I forget now that I've boxed it all in with drywall) that supported the original edge of the house.

Since there is a step up there in the floor, you certainly need to duck. The clearance isn't that great.

However, the ceiling clearance in the whole place has been the main concern since I started, but several factors made it the way it is, and I'm confident the way I've done it was the best solution. I can comfortably stand everywhere except that little doorway, so I'm pleased.
Looks good; you have been busting your *** to get this done....great motivation
Thanks!!! :beer:
 

itb76

Active member
Joined
Dec 29, 2007
Messages
40
Location
Whitehall, MI
Looks like you're really making progress; can't wait to see how it all comes together. I'm glad you mentioned speaker wiring. I didn't think of this for my garage. I will want to take care of this before I 'rock the garage next summer.

Great looking bike!
 

tony p

Well-known member
Joined
Oct 15, 2007
Messages
131
Location
London UK
Gosh - you've been working damn hard, Christopher.
Nothing like seeing a job done well and 'thoroughly', even when on a rather more compact scale than some of the oglesome palaces we see around here!

Smart bike; R6?
 
OP
C

ceo012384

Well-known member
Joined
Nov 29, 2007
Messages
112
Location
Boston
Looks like you're really making progress; can't wait to see how it all comes together. I'm glad you mentioned speaker wiring. I didn't think of this for my garage. I will want to take care of this before I 'rock the garage next summer.

Great looking bike!
Thanks man, I can't wait to see it done either :lol:

I've positioned the speaker outlets so that I can put everything on shelves. As you're looking at that wall, the plan is to nestle the speakers right up into the top corners of the room on shelves, then on the left side underneath the speaker there will be another shelf holding the tuner, cd player, equalizer, etc.
Gosh - you've been working damn hard, Christopher.
Nothing like seeing a job done well and 'thoroughly', even when on a rather more compact scale than some of the oglesome palaces we see around here!

Smart bike; R6?
Thanks man!!! Yeah, the space is small, but it's what I have to use for free, and it should be fine for my purposes.

Yes, the bike is a 2006 Yamaha R6 Raven. It has a couple small mods that are mostly for ergonomics, aesthetics, and crash-worthiness: woodcraft clipons, pazzo shorty levers, frame and swingarm and barend sliders, seat cowl, fender eliminator with small LED signals, flushmount front signals, CF tank pad, etc.

I really don't plan to modify it power wise... the thing's a screamer. I will put all my money towards track days and tires, and eventually maybe suspension/braking mods as I get better.

Here she is:
DSC01654Medium.jpg
 
OP
C

ceo012384

Well-known member
Joined
Nov 29, 2007
Messages
112
Location
Boston
Unfortunately, I have a couple hellish weeks coming up with work, so I don't think I'll be getting too much work done on the garage... which *****.
 
OP
C

ceo012384

Well-known member
Joined
Nov 29, 2007
Messages
112
Location
Boston
^Thanks, buddy. With the weather we're getting in Boston right now I'm hoping I can sneak away from work long enough to take the r6 out for a good ride.

Also hoping I can get some odds and ends done in the garage, but we'll see what work has to say about that...
 

ScSilverDak

Active member
Joined
Nov 10, 2007
Messages
27
it looks like your have made Great use of some space that can be overlooked by a Lot of Home owners....

it's amazing what a little work can do to transform a Space like that... :thumbup:

I look forward to the finished Pics!
 
OP
C

ceo012384

Well-known member
Joined
Nov 29, 2007
Messages
112
Location
Boston
^thanks man!

A little update:

So, after some pretty hectic times at work, I was finally able to get some more work done on the garage in the weekend right after my birthday.

The main thing hanging over my head at this point is building the garage doors, as well as the door in the small room needing to be ripped out and a new one built. Like I said before, some companies will charge anywhere between 5 and 20 grand for a set of 'carriage house' doors.... which is ludicrous. I'll just build them myself.

So, all of the drywall being done save for three small strips around the small door and large doors, I decided to tackle the big project. It took almost an entire day just to measure, come up with a plan, verify structural integrity, buy the materials, and be ready to get started. Swinging doors are much more difficult than traditional garage doors due to their tendency to sag over time if not built properly.

The key here is to keep weight down while still making them nice and strong, make them able to be very well insulated, resistant to weather, decent looking, etc.
Here is the general shape I came up with. This is the left door, the right would be a mirror image of this.
doorshape.jpg


The main beam for the hinging is a 4x4, the rest of the boards are 2x4's. I'll use 5/16" lag bolts for all of the fasteners (four on the top and bottom of the 4x4, 2 on all the 2x4 joints. Also, the cross beam going from near top to far bottom should alleviate some load from the door wanting to sag. When I find a decent set of hinges, I will use lag bolts to attach each side of the hinge into the 4x4's (the static post the doors hang on is also a 4x4). The outside of the doors will be clad with Texture 1-11 with the more narrow grooves... looks decent, treated for weather, paints well, lightweight. The doors inside will be filled with some foam insulation. The inside of the doors will be clad with some very thin wood sheeting and painted. The bottom of the doors will have rubber 'wiper'-type weatherstrips, the center seal will be similar. The top and sides will have rubber stripping tacked into the door fram so that as the doors are closed they will seal up. The center will use on of those vertical rod locks that will go down into a hole drilled in the concrete.

It took all of another day to frame the doors in and get everything all squared and solid. It was worth it. You could hang a flucking car on these support posts. They are pressure treated 4x4's that are secured to the structure of the building with 1/2" lag bolts that are 10" long. They are perfectly square and level. Also, the last piece of wall had not yet been built because I hadn't decided how the door framing was going to do, so I built that... powder-actuated nail cannon to put the base PT 2x4 into the ground, framed the rest, insulated it, mounted the lightswitch. Here is a view from outside, followed by a few closeups:
DSC02296.jpg


Left side (if looking in from outside)
DSC02298.jpg


DSC02299.jpg


DSC02300.jpg


Right side (if looking from outside):
DSC02301.jpg


Last bit of wall framed:
DSC02297.jpg


One thing you can't see in any of the pictures but that I did do, and was fairly time consuming, was that I installed all of the outlets into the outlet boxes. There are 10 of them... but now I turned all the breakers on so I don't have to run extension cords anymore. Wired up the switch for the spotlights too.

Lastly, I wired up the little spotlights for over the workbench and over the tool chests. These things were a little *****... cramming all the wires and wire nuts into the junction boxes and then getting them up and into the holes I cut in the drywall and up into the little boxes I framed in. Big pain. It's not readily apparent in these photos, but these little lights are going to provide some great worklight in those two areas.

Workbench lights:
DSC02303.jpg


Toolbox lights:
DSC02305.jpg


DSC02306.jpg


Turned the main lights off, workbench lights:
DSC02307.jpg


Now work ***** again, which is why I haven't been on here recently, but hopefully I'll be able to get out there and get some more work done soon.
 
Last edited:

Herb

Well-known member
Joined
Apr 15, 2006
Messages
739
Location
CT
Looks good! Definately a lot of work and time. One recomendation I would make regarding the door construction, use LOTS of construction adhesive, not just dots, but a continous bead when framing and skinning- it will add a tremendous amount of strength to the finished product.
 

Lu47Dan

Well-known member
Joined
Apr 3, 2006
Messages
51
Location
N/W Pa.
Keep up the good work . Small spaces require extreme organization skills , something that I have been lacking in my small shop . :willy_nil Dan
 
OP
C

ceo012384

Well-known member
Joined
Nov 29, 2007
Messages
112
Location
Boston
Looks good! Definately a lot of work and time. One recomendation I would make regarding the door construction, use LOTS of construction adhesive, not just dots, but a continous bead when framing and skinning- it will add a tremendous amount of strength to the finished product.
Thanks! I am definitely planning to use a lot of that stuff.
Keep up the good work . Small spaces require extreme organization skills , something that I have been lacking in my small shop . :willy_nil Dan
Well, I am ****/OCD, so I shouldn't have a problem haha


Finally, after a really chitty week at work, spending until 11pm there thursday, friday, and saturday... I was able to take the day off on sunday and get some work done on the garage.

I built the structure/frame for both of the swinging doors. They are REALLY sturdy. So far, I'm definitely happy with my decision to build these myself. The 4x4's on each door will be closest to the hinges, the 2x4's in the center.

The 2x4's on the top and bottom are connected to the vertical boards via 5/16"x3" lag bolts with washers, countersunk. There are 4 going into the top and bottom of the 4x4, 2 going into the top and bottom of the 2x4, and then 2 going into the top and bottom of the 2x4 cross-support board.

Built the first one:
DSC02343Medium.jpg

DSC02344Medium.jpg


Built the other one:
DSC02345Medium.jpg


Looking pretty good:
DSC02346Medium.jpg


I have a plan for the cladding front and back, adhesive, insulation, hinges, weather stripping, ground wipers and center flap, as well as the locking/closing mechanism, and an idea for center casters for support to prevent sag. I think this will all take one more full day of work. Then, I will just need to paint them and hang them up!

Really coming together now :D


Also, I got some new toys today :D

Been keeping my eye out for the right sale on these for six months, it finally happened and I had some gift cards from christmas to help me afford it, so I got them!
DSC02338Medium.jpg


Inside those boxes are two of these:
00959615000.jpg


And one of these:
96908_tool-storage-chest.jpg


For some reason the larger photo on the sears site isn't working, so here it is in stainless (didn't want stainless, too annoying to keep clean):
00959632000.jpg
 
To avoid these ads, REGISTER NOW!
Top Bottom