To avoid these ads, REGISTER NOW!

The Droobarn, my (small) slice of garage heaven

drooartz

Well-known member
Joined
Jan 26, 2010
Messages
228
Location
Utah, USA
The time has finally arrived for me to start the build thread for my little slice of garage heaven, hearby named the Droobarn. I've been planning this pretty much since I bought the house in 2005 as we're on enough ground (.3 acre) that I had some space to expand out. A bit. More on the "a bit" later…

First, a bit of background story.

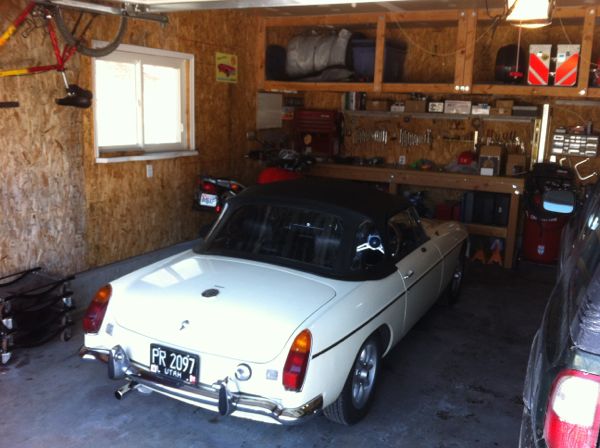
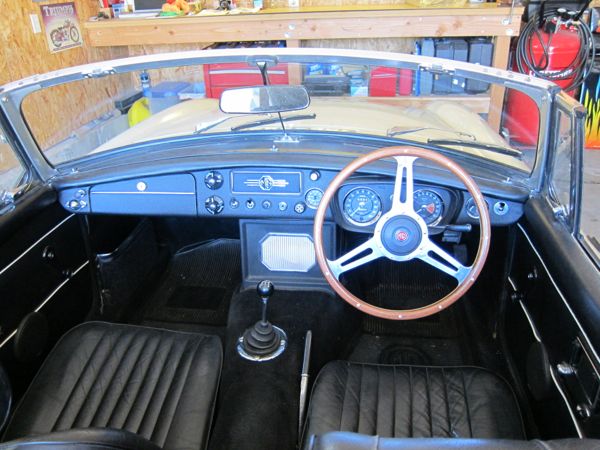
Here's what I've got now, your standard 20'x20' suburban garage. Plenty of space for a decent sized bench, my MGB and BMW F650, and the wife's Rodeo Sport. It's a real help that I like small cars, let me tell you. I just have to park outside. Did a pretty major amount of work on a Bugeye Sprite in this very space, worked well -- but I had to park outside.

Did I mention that I hate scraping the ice off my windows. At 6 am. When it's -10f outside. And dark. And cold.

mg_garage.jpg


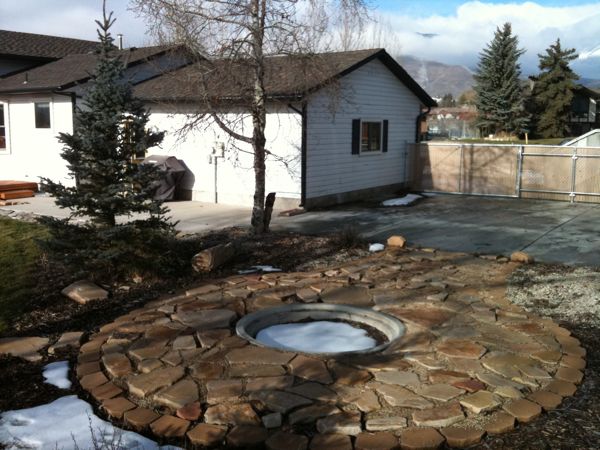
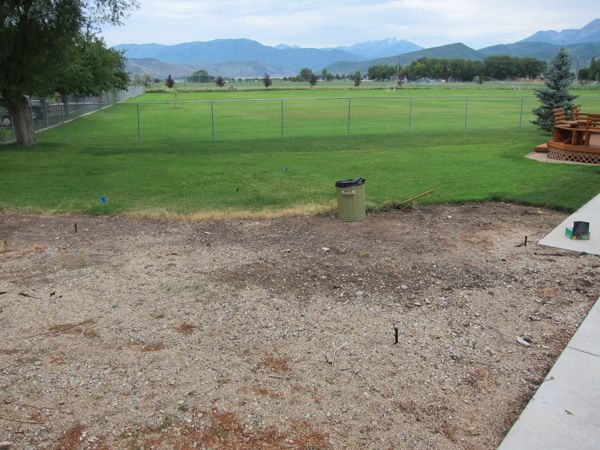
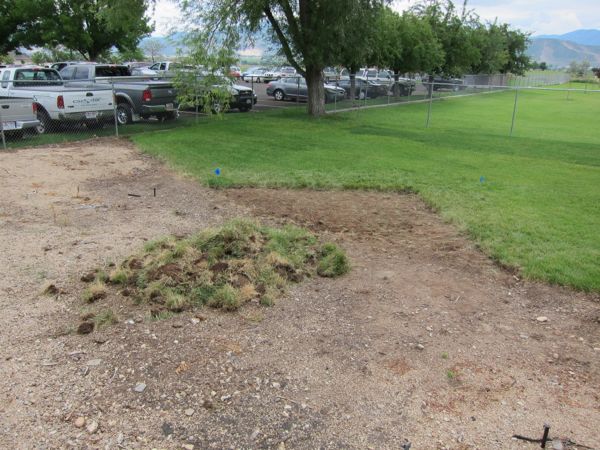
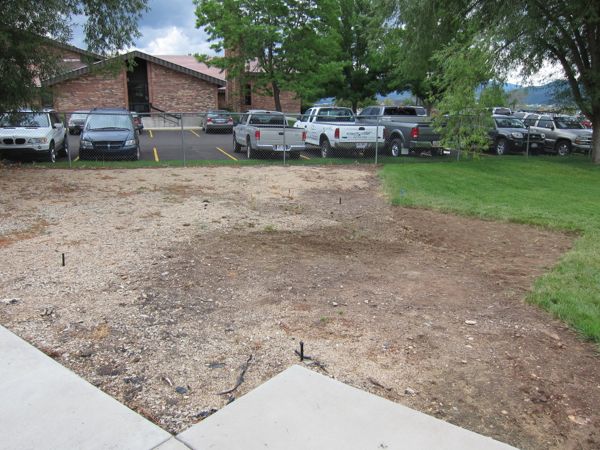
And here (thanks to Google) is a rough picture of the lot and what I had planned. Picture is a bit out of date, so I added in the deck that we built in 2010. Big gray rectangle on the back properly line is a large gravel area that we've since put back to lawn. Yellow square is roughly where the Droobarn is going in.

gm_planning.png


I've done a bunch of thinking and planning over the last few years, and finally this year was my year to build. Deck is done, landscaping is done, time for the shop/barn/garage. Calls were made, a contractor chosen, and a plan was put together for a 20'x24' garage. Bid came in within my budget. I was ready to sign, just gave a couple days to sleep on it and think it all over one last time.

A funny thing happened as I thought it over. The more I contemplated what I was about to do, the less I wanted to do it the way I had it planned out. The less I wanted to spend what this project was going to cost. I had the resources available, just didn't want to put them to this purpose.

It really came down to how I was going to use the space. The more I thought about what I *needed* versus what I thought I *wanted*, the more I realized that the space really didn't fit my use case. It needed to be smaller to really be what I needed.

Smaller you say?

Yup, smaller. After much thought, I've really come to the conclusion that I won't do any more automotive restorations. I just didn't enjoy the last one I did as it took too much time away from the other things I have passions for. By way of explanation, let me say that I'm an actively gigging musician in addition to holding down a steady full time job. Those two things alone could easily take up every available minute. Add to that a wife (she's understanding, but I should see her occasionally) and a passion for hiking and I've just about used up all my daily allowance of minutes. I love my MG and bike, but they're a bit down the list of passions.

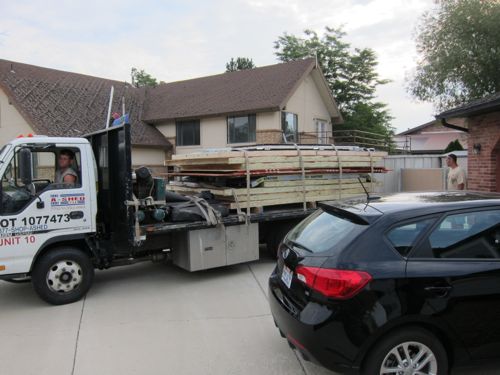
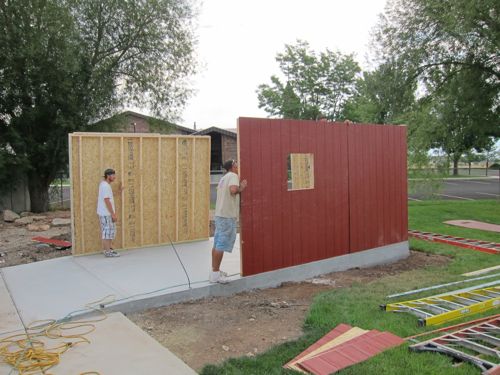
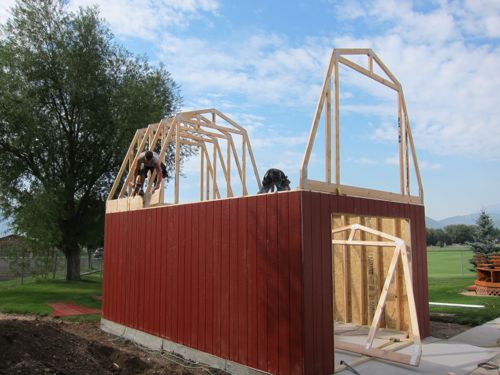
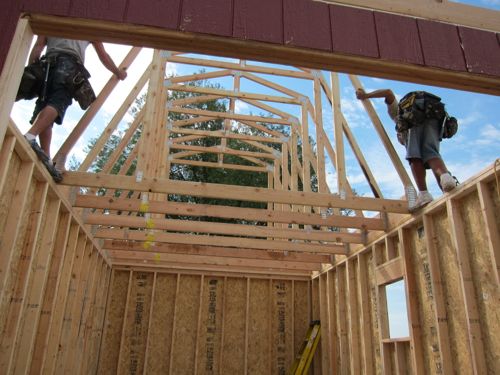
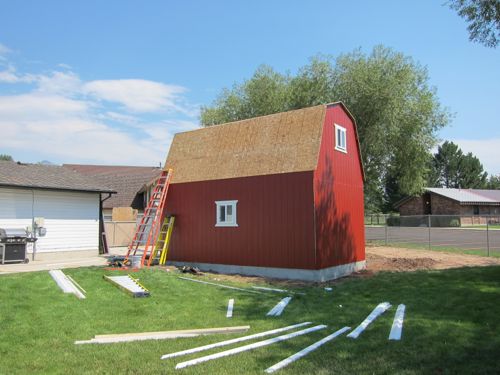
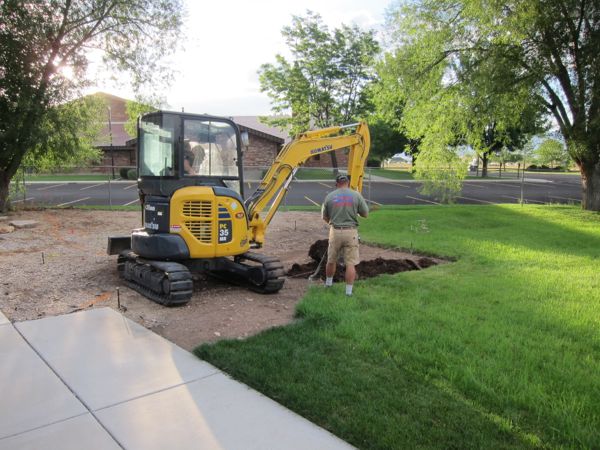
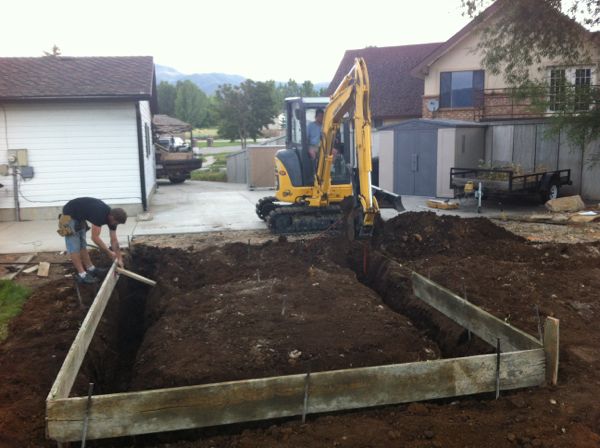
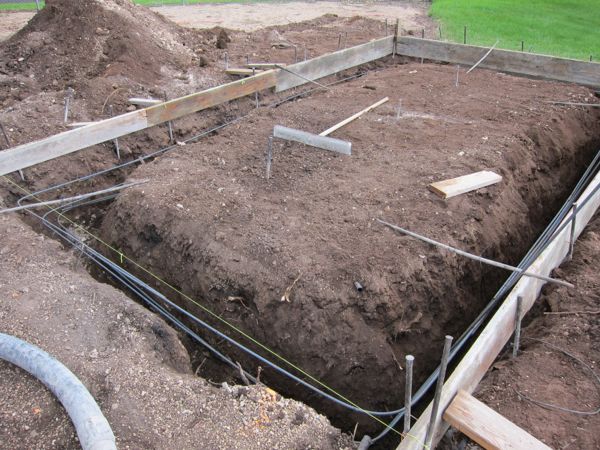
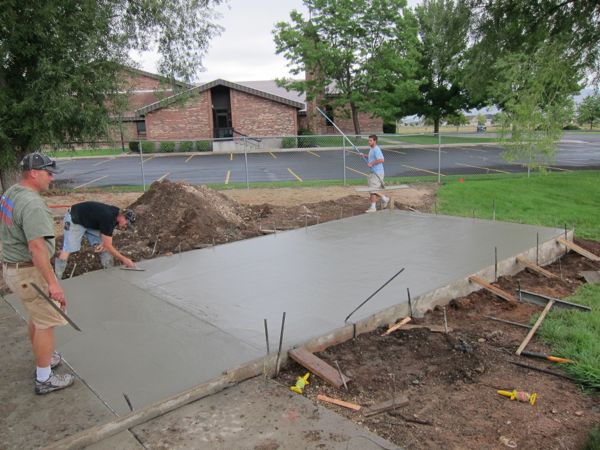
So what I really needed was storage and parking, not shop space. Back to the drawing board I went, and out came the new design that is a better fit for what I need. The Droobarn is now a 12'x20' barn-style shed on a full concrete pad with footers. The barn roof gives lots of room to eventually build a loft for more storage space.

Now for most folks here this would be way too small. What solid upstanding Garage Journalist would ever recommend going *smaller* on a build? For me it wasn't so much an issue of going smaller as going with the proper size. This is the amount of space I need, so that's what I'm building. I'd estimate it's probably 1/3 the cost once you figure in the extras (like heat, lots of power, other tools) that I now won't be pursuing. A more modest project, but one that's properly suited to what my needs are.

Another benefit to the smaller size is that it makes a hard limit on the number of cars/bikes I can have. After some experimentation over the last couple years I've decided that I'm happiest with one car and one bike, no more. No exceptions. For me this is a hard limit, and accepting that and the fact that I don't do restorations means that my needs for space are much smaller. Besides, I've always got the existing 2-car garage if I needed to do a larger chunk of work on the MG.

So there you have it, a Garage Journal project that is intentionally smaller than it could be. Who knew? :D
 
To avoid these ads, REGISTER NOW!
OP
D

drooartz

Well-known member
Joined
Jan 26, 2010
Messages
228
Location
Utah, USA
First work, clearing some sod

Doing the first work, clearing some sod

So my first project was to clear off the sod from where the Droobarn will be going. While I'm having it built, I did take on the small project of clearing off the old sod -- saved a few bucks that way and it was something I could do.

When we redid the landscaping last year we removed an old fire pit and some bushes that were in the way, but left the grass until I was ready to build. With a concrete pour date coming up, it was time to grab my shovel and get to it.

A couple years ago the area looked like this:

shoploc_2.jpg


After doing the landscaping last summer, I was left with this area -- with just a small corner of the grass left to be removed.

db_sod2.jpg


After a couple hours with a shovel, I was left with this nice pile of dead sod to haul away.

db_sod3.jpg


Once cleaned up, this is the area ready for Droobarn construction. A good reminder that I'm not in as good a shape as I used to be. That much shovel work did wear me out, but at least I wasn't sore. Just tired and in need of a beer. :)

db_sod4.jpg


The concrete pad is scheduled to be poured later this week (July 26 or 27), with the build set for August 9. I'm getting excited!
 

Omphaloskeptic

Well-known member
Joined
Oct 11, 2008
Messages
2,346
Location
Ultima Ratio, Wa.
drooartz, they say that 'Form follows function', and I think you've planned accordingly. In reading of your interests, I idly wondered if the loft area might become a music studio/lounge/hangout/getaway/guest bedroom/etc. in the future? Can you share with us your revised plan? With the reduced footprint, and the barn style roof, I'm wondering about the general look in regards to proportions, and how it might complement/detract from the style of your home; any thoughts?
 

softailgarage

Well-known member
Joined
Apr 20, 2011
Messages
5,153
Location
Bullhead City, Az.
Goin smaller? smaller? why, I aint never heard of such a thing! Smaller?, really? I do believe the fellers a little light headed from all that thinkin'
 
OP
D

drooartz

Well-known member
Joined
Jan 26, 2010
Messages
228
Location
Utah, USA
drooartz, they say that 'Form follows function', and I think you've planned accordingly. In reading of your interests, I idly wondered if the loft area might become a music studio/lounge/hangout/getaway/guest bedroom/etc. in the future? Can you share with us your revised plan? With the reduced footprint, and the barn style roof, I'm wondering about the general look in regards to proportions, and how it might complement/detract from the style of your home; any thoughts?

Don't know if that loft area would be tall enough for a hangout, but it will make a nice storage area -- and maybe I'll be able to sneak a little cave up there for an escape now and then. :)

Here's a photoshopped version of roughly what I'll be putting in. Size is 12'x20' with doors and window as shown. Doors are two 4' wide by 7' tall doors for an opening on the end of 8' wide by 7' tall. There will be no floor system, just the concrete pad. Walls are 7'9" on the inside from the floor to the start of the roof.

example.png


The town where I live is still pretty rural (there's a large herd of cattle visible from our back yard) and plenty of property here has red barns -- all much bigger than mine will be, though. I think it should fit in nicely, and will provide some more privacy along that side property line. There's a church there, and though they've been great neighbors it will be nice to block the view of their parking lot a bit.

Here's a revised plan, a bit more to scale (sorta). Barn roof line should still be lower than than the house, or close to it. It's back enough that it's mostly blocked from the view of the front of the house, and from the church lot on the side it will block our deck from view (a plus).
newplan.png
 

SnoDave

New member
Joined
Jul 10, 2012
Messages
1
Tell us a little more about the MGB.

It looks to be RHD, plus it has no marker lights on what appears to be a Mk III, so that's definitely not a US market car. Where did it come from and how did you end up with it?

Did you restore it yourself? Any other neat features that those of us with US-spec B's might find interesting? Finally, is it white or pale primrose - looks white in the garage but PP in your avatar?
 
OP
D

drooartz

Well-known member
Joined
Jan 26, 2010
Messages
228
Location
Utah, USA
Tell us a little more about the MGB.

The MGB is a UK home market car, built in November of 1970. It was in the UK until 1995 when it was imported to Canada. I bought it out of Canada in early 2011 in the condition you see it. It was restored at some point, probably when it was brought into Canada but I don't know for certain -- it's really solid other than a crack-of-doom on the driver's door and and a bit of bubbling on the bottom of the doors. I do have a full history of all the owners.

mgbhome2.jpg


It was originally white but has been repainted in more of an Old English white (cream color that does look almost yellow in some pictures). I like the color, so it will stay. Should have the "fishmouth" grill, but some PO replaced it with the earlier style. Seats should be vinyl but were recovered in leather at some point. It has the overdrive (is a factory OD car).

As a home market car, it has a number of differences from a USA market car. Still has the metal dash with the key in the dash, single circuit brakes, non-collapsable steering column, no reflectors, no smog equipment (still has its original 18GG engine and twin HS4 carbs), different mount points for the seatbelts. Two windshield wipers, no sun visors. Heater controls work opposite the way LHD cars work. It's very similar in spec to a 1967 car other than the tail lights and a few minor trim details. My car has an aluminum bonnet though it would have been steel from the factory.

mgbrhd.jpg


Last year I decided that I really did want a RHD car -- always been a fascination of mine (used to make all my LEGO cars RHD for some bizarre reason). Posted a note on a Friday on the British Car Forum that I was looking for one, figuring it would take quite a while to find what I wanted. In a couple hours I had the lead on this car and a note from a friend who lived close that he could check it out. He looked at it on Saturday and I had a deal with the seller on Sunday. Took a couple weeks for it to get delivered from Ontario to Utah, and off I went!

I love this car, drive it every day it's at least somewhat decent. Got used to the RHD in a day or so and still find it fun. Guess I'm just odd that way. :G
 
OP
D

drooartz

Well-known member
Joined
Jan 26, 2010
Messages
228
Location
Utah, USA
Building permit is ready

Back on the Droobarn front, got a call from the city that the permit is ready to go. Off we go! :thumbup:
 
OP
D

drooartz

Well-known member
Joined
Jan 26, 2010
Messages
228
Location
Utah, USA
Minor setback

Slight setback -- just caught it

I picked up the building permit after work today, and when I got home I was leafing through the engineering drawings and noticed something that stopped me cold. I looked at the truss design and it seemed quite clear that the trusses were not what I expected. Instead of all that clear space inside the gambrel roof, there were trusses with lower pieces that would basically fill the space.

So I called the builders, and sure enough those are the trusses in the plans. Seems somewhere along the line there was some mis-communication between myself and the company. I knew they had to do some extra engineering for the snow load here, but somehow we never were clear on the fact that I was planning a loft up there for storage. (I thought I was clear, but you know how that goes. I never saw the final engineering drawings.)

Luckily the builders have been very good to work with, and they're getting back to me with changes to the truss design that should allow a good sized loft -- or I'll go with a different design all together so I can reclaim the storage space that way. It'll be tougher to afford if I have to go that route, but saving money is pointless if the end product doesn't meet the need.

Just glad I caught it now, before any work has been done. Now it's just a change order. In a few days it would have become a major problem. :eyecrazy:
 
OP
D

drooartz

Well-known member
Joined
Jan 26, 2010
Messages
228
Location
Utah, USA
Issues sorted, pouring on Friday

Issues sorted, pouring on Friday!

Got the issues with the loft space sorted out today, so we pour concrete on Friday. Debated between having them do different trusses and build in the loft ($) versus doing a different, wider building design altogether ($$$) and decided to go with the loft. It's what I was planning anyways, and still reasonably within what I was hoping to spend. It'll work.
 
OP
D

drooartz

Well-known member
Joined
Jan 26, 2010
Messages
228
Location
Utah, USA
A boy and his concrete

We have a pad!

Friday was a momentous day, as I finally went past the point of no return on this project and we broke ground for real. Concrete guys showed up right on time and other than a little bit of a rain delay in the middle they were right on time and done by about 1:30 pm. This sucker isn't going anywhere -- had to do 36" footer depth due to our frost line, serious overkill for what is essentially a big shed. Still, at least it'll be solid.

So without further ado, some pictures. (Of course I took the day off work to be home to watch it all happen.)

Making the first holes after all was measured up
db_pad1.jpg


Just about there
db_pad2.jpg


Ready for the concrete. Passed footer and location inspection with no problems. Helps that this is a small town with a one-woman building department -- and that she's knowledgeable, helpful, and seems happy to see the property improvements we've done over the years.
db_pad3.jpg


Pouring in the concrete. Had to do a pump truck due to the curb/gutters and the distance to the spot.
db_pad4.jpg


Just about finished up
db_pad5.jpg


And the finished product, a few days later. Still have to deal with the huge pile of dirt, but otherwise ready for my new mini-barn. That build date is scheduled for August 9. Woohoo! :bounce:
db_pad6.jpg
 
OP
D

drooartz

Well-known member
Joined
Jan 26, 2010
Messages
228
Location
Utah, USA
I have to ask. Why no re-inforcement mesh in the concrete ?

I'll confess that I don't have a solid answer (I'm no concrete expert) but given the fact that this is just for parking (and is fairly small) I'm assuming that it wasn't necessary for the loads it will be seeing. I guess we'll see how it holds up over the years without it, but I expect it will be fine.
 

HOTFR8

Banned
Joined
Mar 2, 2007
Messages
24,498
Location
Castlemaine, Victoria. The Hot Rod Centre of Austr
I'll confess that I don't have a solid answer (I'm no concrete expert) but given the fact that this is just for parking (and is fairly small) I'm assuming that it wasn't necessary for the loads it will be seeing. I guess we'll see how it holds up over the years without it, but I expect it will be fine.

I would have believed it should have had some mesh to strengthen it :dunno:.
 
OP
D

drooartz

Well-known member
Joined
Jan 26, 2010
Messages
228
Location
Utah, USA
I would have believed it should have had some mesh to strengthen it :dunno:.

Don't know, too late now though. Just have to see and hope for the best. :confused:

Looks good. Kind of curious about the lack of electrical in the slab. Will you be installing lighting?

No electrical (though they did run what's needed for a ground in the future). For the next year or so the electrical will be via long extension cord from the house. Didn't have the budget for power right now. Once I've lived with the space for a while (and rebuild my financial resources) I'll get power run out there.
 

JasonW

Well-known member
Joined
Aug 25, 2011
Messages
309
Location
Orange County, California
I would have believed it should have had some mesh to strengthen it :dunno:.

They could have spec'd fiber in the cement, but basically with a 36" deep footing and rebar tied around the perimeter, I can't see it being much of an issue. The wire mesh is so cheap, I really think it is over used.
 

blownhemi

Well-known member
Joined
Jun 20, 2011
Messages
191
Location
NSW, Australia
I have to ask. Why no re-inforcement mesh in the concrete ?

Same question I asked myself out loud when I saw the picture, "Where's the reo?"

Hope it works out for you, because too late now, but I would have wanted it there 100%.

I honestly think that's the first time I've ever seen a slab laid down without it. :scared:
 
To avoid these ads, REGISTER NOW!

blownhemi

Well-known member
Joined
Jun 20, 2011
Messages
191
Location
NSW, Australia
They could have spec'd fiber in the cement, but basically with a 36" deep footing and rebar tied around the perimeter, I can't see it being much of an issue. The wire mesh is so cheap, I really think it is over used.


See, I'd go the other way. Wire mesh is so cheap, why wouldn't you use it?
 

Thedoc14

Well-known member
Joined
Mar 4, 2012
Messages
259
Location
Melb, Australia
After looking at quite a few build up there in the northern hemisphere, those guys use such deep footers wrapped in rebar, I guess they expect the deep sides to hold the center section in tack. Quite a few now have laid larger slabs with zero bar?
I guess down under we are used to a ton of steel going in, but then again our edge-beams are not as deep.

So now you have to wait for the build, is it a kit or stick built?
 

HOTFR8

Banned
Joined
Mar 2, 2007
Messages
24,498
Location
Castlemaine, Victoria. The Hot Rod Centre of Austr
See, I'd go the other way. Wire mesh is so cheap, why wouldn't you use it?

I agree.

After looking at quite a few build up there in the northern hemisphere, those guys use such deep footers wrapped in rebar, I guess they expect the deep sides to hold the center section in tack. Quite a few now have laid larger slabs with zero bar?
I guess down under we are used to a ton of steel going in, but then again our edge-beams are not as deep.

So now you have to wait for the build, is it a kit or stick built?

Then that is also a good point.
 

JasonW

Well-known member
Joined
Aug 25, 2011
Messages
309
Location
Orange County, California
See, I'd go the other way. Wire mesh is so cheap, why wouldn't you use it?

I don't necessarily disagree in this case, was only saying that it wasn't necessarily a problem. That said I am not a fan when it come to exterior walks and other 3" thick outdoor pours. I would rather use properly tooled joints and smart planning. Wire mesh is not a substitute for a properly compacted base or properly mixed and cured concrete.
 
Last edited:
Joined
Jun 13, 2012
Messages
11
Location
Northern Europe
Great project, thanks for posting :bowdown:

I´m all with you what comes to decent sized (ie. small) storage/garage build. Times change; no need for a big garage/space anymore. Not that a big garage wouldn`t be fun, though. But I mean: "just wanting" and "actually needing" may be the magic words here, I think.

By the way, that -10F scrape of car windows at 6 AM sounds all too familiar to me, too :)
 
Last edited:

JasonW

Well-known member
Joined
Aug 25, 2011
Messages
309
Location
Orange County, California
Just been told of some similar concrete poors done the same way here without mesh and instead they add fibre t the concrete mix. All new to me.

That fiber is strong and in my experience very easy to use. It comes prepackaged and you can just throw it (bag included) into the truck, onsite, just before the final mix. After the pour, smoothing the surface may take a moment or two longer but didn't seem much worse than a slightly dry mix. The finish was smooth. Obviously it is not appropriate for all installations but where it works, it works very well.
 

HOTFR8

Banned
Joined
Mar 2, 2007
Messages
24,498
Location
Castlemaine, Victoria. The Hot Rod Centre of Austr
That fiber is strong and in my experience very easy to use. It comes prepackaged and you can just throw it (bag included) into the truck, onsite, just before the final mix. After the pour, smoothing the surface may take a moment or two longer but didn't seem much worse than a slightly dry mix. The finish was smooth. Obviously it is not appropriate for all installations but where it works, it works very well.

I can see in small jobs like this it would work ok. Still very new to many I have asked about it here.
 
OP
D

drooartz

Well-known member
Joined
Jan 26, 2010
Messages
228
Location
Utah, USA
After looking at quite a few build up there in the northern hemisphere, those guys use such deep footers wrapped in rebar, I guess they expect the deep sides to hold the center section in tack. Quite a few now have laid larger slabs with zero bar?
I guess down under we are used to a ton of steel going in, but then again our edge-beams are not as deep.

So now you have to wait for the build, is it a kit or stick built?

The pad is what the company who's building the shed recommended, so that's the way I went. As stated, we'll see how it goes. I'm no engineer (that's for sure!) so I have to go with their experience here. Certainly those footers aren't going to shift at all.

Building is semi-prefabbed (built by a local shed company). They'll put it up in a day. I'm pretty sure that the walls and trusses and such will be built at their factory to ease the process, then everything gets built/assembled on site. Should go up in just a day.
 
OP
D

drooartz

Well-known member
Joined
Jan 26, 2010
Messages
228
Location
Utah, USA
Great project, thanks for posting :bowdown:

I´m all with you what comes to decent sized (ie. small) storage/garage build. Times change; no need for a big garage/space anymore. Not that a big garage wouldn`t be fun, though. But I mean: "just wanting" and "actually needing" may be the magic words here, I think.

By the way, that -10F scrape of car windows at 6 AM sounds all too familiar to me, too :)

I'll admit that I struggled with the sizing right to the end (made the final decision was the day before they poured the pad). You nailed it, I went with "actually needing" -- especially since I'm the one actually paying the bill. :)

I thought about what I was going to be using the space for, and this was what I needed, and what I could see needing for the foreseeable future. I love the big, elaborate builds you see here, and am hugely happy for the folks who are both able and willing to do them. Fantastic stuff, just not what I needed.

And yes, I really won't miss those cold morning window scrapes. *Really* won't miss those. Nope.
 
OP
D

drooartz

Well-known member
Joined
Jan 26, 2010
Messages
228
Location
Utah, USA
Up in a day will be fantastic as at the end of the day you will be moving your things in.
:thumbup:

I'm looking forward to that day, but first I have to figure out a good solution to keep the MG from leaking on that brand new concrete...
 
OP
D

drooartz

Well-known member
Joined
Jan 26, 2010
Messages
228
Location
Utah, USA
:lol_hitti Never happen!

Or, you can use a large drip pan.

Jim :cool:

That's the plan. For an MG, mine doesn't leak badly at all, but that's for an MG... :lol:

To quote Peter Egan: "the British should never have been allowed to handle any fluid less viscous than chilled window putty"
 

Omphaloskeptic

Well-known member
Joined
Oct 11, 2008
Messages
2,346
Location
Ultima Ratio, Wa.
That's why they say "KEEP'EM ON THE ROAD!"; when they're parked, they pee. lol

As an owner of a couple of British cars, I strongly suspect that all gaskets supplied to the factory are made by Lucas! It makes sense to me, Lucas electrics are famous the world over for 'leaking electrons'; why shouldn't Lucas gaskets be responsible for 'leaking fluids'? :monkey_pi
 

HOTFR8

Banned
Joined
Mar 2, 2007
Messages
24,498
Location
Castlemaine, Victoria. The Hot Rod Centre of Austr
I'm looking forward to that day, but first I have to figure out a good solution to keep the MG from leaking on that brand new concrete...

:lol_hitti Never happen!

Or, you can use a large drip pan.

Jim :cool:

That's the plan. For an MG, mine doesn't leak badly at all, but that's for an MG... :lol:

To quote Peter Egan: "the British should never have been allowed to handle any fluid less viscous than chilled window putty"

I use a piece of cement sheet on the floor and then sit a drip tray on top. You can clean a drip tray and the cement sheet will prevent some spills on the concrete and staining if you are lucky.

That's why they say "KEEP'EM ON THE ROAD!"; when they're parked, they pee. lol

As an owner of a couple of British cars, I strongly suspect that all gaskets supplied to the factory are made by Lucas! It makes sense to me, Lucas electrics are famous the world over for 'leaking electrons'; why shouldn't Lucas gaskets be responsible for 'leaking fluids'? :monkey_pi

:evil: Lucas the Devil himself :lol:.
 
OP
D

drooartz

Well-known member
Joined
Jan 26, 2010
Messages
228
Location
Utah, USA
A (Droo)barn raising

A (Droo)barn raising

Today was a big day, a very big day. Today I got my very own (small) barn! :D

(Yes, I fully realize that it's awfully small to be called a barn -- too bad, it's my barn and I'll call it a barn if I want to :thumbup: )

The crew (4 guys) showed up at about 9 am and were done by 4 pm or so. It was fascinating to watch. The walls and trusses were pre-built offsite, so they went up very quickly. Roofing, trim, and all the little bits took much longer. I'd estimate that having those pre-built bits saved at least a day of working.

So by dinner time I had a finished little barn, just waiting on the final inspection (should happen in the next few days) and it will be truly complete and done. My initial thoughts -- I like it a lot. The loft area is quite spacious, plenty of room for what I need to store. The building proportions are a bit odd; from a visual standpoint it's a bit too narrow for the height. That said, going taller rather than wider saved me quite a but of money so it's a fair trade. Resources are limited around here, and I put a lot of thought into the compromises that I knew I had to make. It'll work, and I'm quite happy about the finished product. There is some room between the barn and the property line so I could build an addition some day if necessary.

So without further ado, here's the day's work...

Trucks arriving with all the parts and the crew.
barnraising_01.jpg


Wall sections going up. Pre-built and pre-painted at the factory with another paint coat (or 2 in some cases) added as they were working.
barnraising_02.jpg


Trusses going up -- you can see the space for the loft.
barnraising_03.jpg


Inside view of the crew placing the trusses. They worked quickly.
barnraising_04.jpg


All trusses in place, ready for roof sheathing.
barnraising_05.jpg


Roof sheathed, ready for shingles
barnraising_06.jpg


My (roughly) 12' x 20' workspace/parking/shed/storage, just waiting for its MGB.
barnraising_07.jpg


The loft -- 6'2" tall and the same wide, full length of the barn, accessed by pull-down stairs.
barnraising_08.jpg


All done. Tall and narrow, but it fits my odd-shaped lot and my stuff will fit in it.
barnraising_09.jpg


A good friend commented that it's a very North-East style (I'm from Rhode Island originally). Yes, it's a small New England barn. Hey, my dad grew up on a dairy farm, so I suppose it's in my blood.
barnraising_10.jpg
 
To avoid these ads, REGISTER NOW!
Top Bottom