To avoid these ads, REGISTER NOW!

Restoring the triplets of Belleville

NASTYZEN

Well-known member
Joined
Jun 11, 2010
Messages
2,823
Location
St-Colomban,Que. Canada
Wow! They finally left my shop on Monday. This was one of those long drawn out projects.
A customer friend of mine from Belleville ont. Asked me to restore his 3 Lola T-360 seventies formula Atlantic tubs back in 2009. To which I agreed blindly.:lol:
I made it clear that I have one main customer, to whom it is imperative that I deliver stuff to on time, no matter what, and that his project would be a side job.
He agreed as he has a complete T-360 to play with and runs other cars in different series.
With that I drove down to pick them up at his warehouse.

This is one of the tubs next to his working car.

imgp0598pl.jpg


The triplets when they landed in my shop in 09.
Boy were they rough!

imgp3850j.jpg


imgp3851s.jpg


Before I get into the restore, here is some of the previous work I did on his working T-360. Over the years.

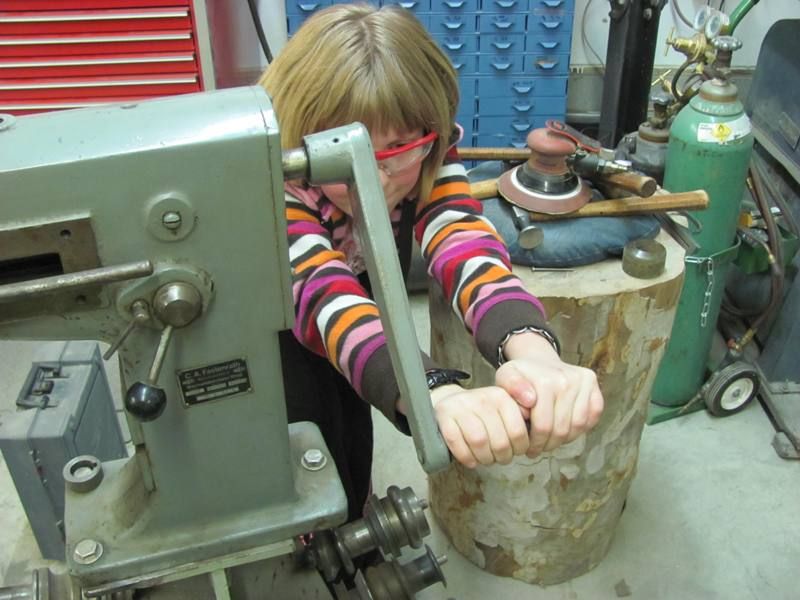
Ignition box reproduction. It gets bolted to the valve cover.

photo1689s.jpg


Re worked the rear and re brazed the whole thing.

miscprojects526.jpg


On critical stuff like roll bar braces, I tig weld under the brazing first. Just to be sure.

miscprojects5060617.jpg


Catch tank, oil tank and wing/header mount.

miscprojects153.jpg


Nose frame/rad mount. Made a jig for it as it is a crush able replacement part.

miscprojects297.jpg


miscprojects224.jpg


miscprojects151.jpg


At play. At watkins Glen

miscprojects97.jpg


Much more to come as I get the time to up load.

:beer:
 
To avoid these ads, REGISTER NOW!

Piper

Well-known member
Joined
Nov 17, 2006
Messages
590
Location
Muskoka, Canada
umm wow!! Belleville Ontario?! My mom lives in Belleville!! (well Big Island which is really close). I live in Huntsville Ont... how do I get to work with you?? this is awesome work, and frankly, the world seems a bit smaller hearing about your work, and our proximity.

Without doubt, very nice job!
 

upndown

Well-known member
Joined
Dec 5, 2010
Messages
3,107
Location
Desert Hills/Peeples Valley AZ.
Nasty, As always..Interesting project! Looks like an expensive hobby. Have always enjoyed older formula cars..growing up a couple buddys Dads raced formula vee and formula ford, our playground was Road America. Looking forward to more...:beer:
 
OP
N

NASTYZEN

Well-known member
Joined
Jun 11, 2010
Messages
2,823
Location
St-Colomban,Que. Canada
Thanks for the kind words guys.
Glad you enjoy this type of stuff. I certainly do.
I merely work on these. I can't afford to race myself, besides ,she would have a fit if I were to have one for myself.:sad:
These Lola's are capable of about 180 mph! On any track with one of these on slicks must be ridiculously fun indeed!
Maybe when I retire I can go vintage racing with the old boys. I have a fetish with open wheel cars but probably would end up in a Mini or Sprite.
We are all living on spaceship Earth.That makes us all neighbors.:D
 

JC23

Well-known member
Joined
Dec 31, 2009
Messages
11,718
Location
Northcoast
Have always dug yer posts and high level of craftsmanship. Never heard of brazing over TIG. Can you elaborate some?
 

MoonRise

Well-known member
Joined
Nov 5, 2010
Messages
4,025
Location
NJ
Have always dug yer posts and high level of craftsmanship. Never heard of brazing over TIG. Can you elaborate some?

I suspect that he is TIG welding (for strength) and then 'cosmetically' flowing some brazing rod over the joint(s) to make it all look 'period correct'.

Although a good brazing job can be plenty strong (given proper joint prep and layout and the appropriate filler), welding steel together may give you a tiny bit more leeway for fit-up and will usually give you better fatigue-strength properties than a typical copper-based brazing filler.

YMMV. :beer:
 
OP
N

NASTYZEN

Well-known member
Joined
Jun 11, 2010
Messages
2,823
Location
St-Colomban,Que. Canada
Have always dug yer posts and high level of craftsmanship. Never heard of brazing over TIG. Can you elaborate some?

Thanks JC, I enjoy your high level of art craftsmanship. I can barely draw a strait line myself.
As for the brazing over t.i.g. Moonrize verbalized it well.
Bronze is ductile and will bend along as a tubular joint is deformed.
I've seen brazed joints all stretched out of shape after a crash but still holding on, with no cracks. But
I've come across some bronze welds that completely detached themselves from one tube. In one particular case it was on a 1600 FF that had slammed sideways into the tires. The weld detached and the tube came into the cockpit and injured the driver a little. His name was Greg Moore 16 years old and a great person. R.I.P.

Incredible work.

Thanks

I found some old pics of the rear wing and mount.

miscprojects132.jpg


miscprojects138.jpg


This wing is not conventional on the insides and was pita to put together.

miscprojects139.jpg


miscprojects133.jpg


miscprojects137.jpg


So back to the triplets.
First thing was to asses and to do that, I had to take the things apart.
The red one.

imgp4151a.jpg


imgp4149k.jpg


imgp4145.jpg


Oh my!:scared:

74338528.jpg


66766658.jpg


:beer:
 
OP
N

NASTYZEN

Well-known member
Joined
Jun 11, 2010
Messages
2,823
Location
St-Colomban,Que. Canada
After I took off the left hand pod and looked inside,I had a chuckle.
I will often leave a memento somewhere inside the projects I work on. My way of finding immortality sort of.
Turns out I had worked on this tub before.Funny coincidence. I guess these cars change hands often.

imgp4738g.jpg


After much drilling out rivets. I was left with all the metal bits to be restored.
All the Alu. panels are scrap and need to be refabed.

imgp4160p.jpg


88407496.jpg


97488412.jpg


Man, these cars have been to war!

47587388.jpg


56065815.jpg


After taking them apart, I found that the orange one had some discrepancies with the other 2 Tubs and also had different A-arm pickup points.
All three have to be the same so all the parts can be interchangeable as per request from the customer.

93026592.jpg


The white Tub had just been restored.......very poorly.
Check out the fine craftsmanship here.

imgp4306e.jpg


Just a small gap.

66387318.jpg


25422034.jpg


Next. We start rebuilding.

:beer:
 

TeckniX

Member
Joined
Jan 23, 2012
Messages
22
Sub'd this is pretty epic - There's actually quite a few builders/fabricators that do leave their signature hidden inside a project, it's probably more fun to find your own though. haha
 
OP
N

NASTYZEN

Well-known member
Joined
Jun 11, 2010
Messages
2,823
Location
St-Colomban,Que. Canada
Been a while. Hard to stay on top of things these days.
So here are some shots of the steel inards after many hours.

imgp4297w.jpg


imgp4300.jpg


Made the first of many dies to form that end plate.
Moded the Orange cars pick up points to match the Quakerstate car.

imgp4299u.jpg


imgp4301x.jpg


Some of the outside bits.
Top trailing link pickup.

imgp4302j.jpg


Shock pickups.

imgp4298.jpg


Next to do.
Get some tubs bent up so as to be able to match the roll bar structures as closely as possible.

:beer:
 
OP
N

NASTYZEN

Well-known member
Joined
Jun 11, 2010
Messages
2,823
Location
St-Colomban,Que. Canada
I love your threads. I hope to see the rest of this when you have time!

I'm glad someone is enjoying this. Here is a little more.

My brake is a little under capacity so I had the tubs and side pods bent up by a friend.
First I patched up the old rollbars a little. then re fit them to the new tubs.

imgp5088.jpg


I had to make some new anchor plates to have a proper fit. First placing them on the tub and then tacking them to the main bar.

imgp5085.jpg


Replaced tubes here and there along the way.

imgp5089z.jpg


imgp5090.jpg


imgp5072u.jpg


Started fitting some other bits as well. Here , the steering rack brkt's.

imgp5093t.jpg


Once I was satisfied with the fit, it was time to make the holes and dimples in the tubs.
For the dimples, I had to make a custom die.

imgp5077.jpg


Applying the dimple in my press.


imgp5074.jpg


The result.

imgp5075.jpg


imgp5076.jpg


imgp5087d.jpg


Lots of bits to yet reproduce and repair.

imgp5073m.jpg


:beer:
 

CNGsaves

Well-known member
Joined
Sep 26, 2012
Messages
13,233
Location
KS and OK
Nice work you're doing on those Lola's!!

Curious where all they race now??

Here in KS used to have SCCA races around small lake called Lake Afton and classes went all the way up to Formula Atlantic and Formula Continental . . . man were they fast. Saw one bad wreck at 135 mph where guy got tire off the track and went airborn!! Back in 70's and 80's, even had one of pizza franchise owners (Dan Carney) racing a closed body Lola and had stiff competition from 65 yr old bank owner named Jack Hinkle, which was highlight race of the year. Now all races are at Heartland in Topeka, KS.

Love seeing work "under the hood" so keep pics a coming!
 
To avoid these ads, REGISTER NOW!

Jose G

Well-known member
Joined
Aug 1, 2012
Messages
46
Location
Canada, Quebec
i really enjoy reading your threads too, make me understand what is involved in your work and how you make things.

Wish i had 10% of your skill lol
 
OP
N

NASTYZEN

Well-known member
Joined
Jun 11, 2010
Messages
2,823
Location
St-Colomban,Que. Canada
Thx's guys.
These cars still race at vintage events all over the place. Check with your local clubs.

Ok, so at this point, after having gotten the bars to fit in all three tubs. It was time to get the front bulkhead panel worked out. It holds the front of the tub together straight. the other panels depend on this to be placed correctly.

imgp5095.jpg


I made a drawing of the part and cut it out with my cnc mill. This is great when you need an extra parts because you screwed up one.

imgp5154.jpg


From the same drawing I made some tooling to dimple the bulkhead panel.

imgp5951.jpg


Part loaded.

imgp5952.jpg


A little pressure.

imgp5953.jpg


Now for the round dimples.

imgp5948zl.jpg


imgp5949x.jpg


imgp5950.jpg


I even had to make some custom v dies.

imgp5156.jpg


The part done.

imgp5954.jpg


:beer:
 
OP
N

NASTYZEN

Well-known member
Joined
Jun 11, 2010
Messages
2,823
Location
St-Colomban,Que. Canada
How large of a press/jack do you need for that, and what gauge material is it?

10 Ton should be adequate. The important thing is to distribute the load evenly.
The bulkhead is .045'' thick 6061 T-4 material.
I made 5 or so parts with the mdf dies. I could still get a few more parts out of it.
 
OP
N

NASTYZEN

Well-known member
Joined
Jun 11, 2010
Messages
2,823
Location
St-Colomban,Que. Canada
Now that the front panel is made up, the steel inserts can be fitted. As well as the inner rib bulkhead.

imgp5531dst.jpg


imgp5211l.jpg


I also had the side skins bent out of shop by a friend.

imgp5533.jpg


After some fitting and layout. Time to make some holes.

imgp5534h.jpg


One slip with this thing and it's game over!!

imgp5540.jpg


The trick is to take your time and go little by little.

imgp5549.jpg


I use a Blue point auto center punch to first make a punch mark for all the rivet holes. Drill tracks are unacceptable here.

imgp5548n.jpg


A bit closer.

imgp5541m.jpg


imgp5542k.jpg


Sides done!

imgp5551u.jpg


The rear all fits ok. Time for brazing.

imgp5544n.jpg


imgp5545.jpg


imgp5547e.jpg


imgp5546u.jpg


:beer:
 

ZeroDrift

Member
Joined
Sep 13, 2012
Messages
14
Looks amazing! Very much impressed with the skill level to restore a chassis like that!
 
OP
N

NASTYZEN

Well-known member
Joined
Jun 11, 2010
Messages
2,823
Location
St-Colomban,Que. Canada
So now it was time to make some battery boxes alias mid tub panels.
After figuring out the pattern I cut out some panels.

imgp5633r.jpg


After much fiddling and fancy bending, we have something that fits!

imgp5939j.jpg


Some drivers step on these while getting in. So I added some re enforcing angles on the underside to add a bit of stiffness to the panel.

imgp5940.jpg


imgp5645p.jpg


imgp5646.jpg


I even got some help with the second car.

imgp5643.jpg


With both of the mid panels fit. Time for the back panel with access hole for the gas lines and accumulator.

imgp5653.jpg


She tells me I spend to much time in the shop.:dunno:
I wonder what she's talking about.:)

imgp5656.jpg


All fit up.

imgp5669.jpg


:beer:
 

Graham08

Well-known member
Joined
Dec 10, 2007
Messages
713
Location
Iron Station, NC
Very cool! I've only seen a handful of pictures of aluminum monocoques under construction, so the detailed photos of the process are very much appreciated.

One question on the rear wings: are the riveted with solid rivets or pop rivets?
 
OP
N

NASTYZEN

Well-known member
Joined
Jun 11, 2010
Messages
2,823
Location
St-Colomban,Que. Canada
Nice work Claude! Who is the apprentice?

Thank's Robert,
The apprentice is my 16 year old. He's finishing up high school and going on to college for 7 years to become an engineer. That means I have a part time employee for at least that long.:thumbup:
He is a real pleasure to work with and eager to learn. I have been blessed with at least one who likes to tinker with Dad.
 

MP&C

Well-known member
Joined
Oct 21, 2009
Messages
4,396
Location
Leonardtown, MD
It will be good for him to have that practical application under his belt before cramming all the books.. My apprentice is 11........ I figure I have only a couple years left before dirty fingernails will bother her.. :lol_hitti


Picture042.jpg
 

ClickClickBoom

Well-known member
Joined
Jan 1, 2010
Messages
117
Location
Indianapolis
When you make custom tooling like that for a project, does it go to the car owner, or do you keep it for a future job?

Just curious. Awesome work.
 
OP
N

NASTYZEN

Well-known member
Joined
Jun 11, 2010
Messages
2,823
Location
St-Colomban,Que. Canada
It will be good for him to have that practical application under his belt before cramming all the books.. My apprentice is 11........ I figure I have only a couple years left before dirty fingernails will bother her.. :lol_hitti

I can only hope that he can translate and apply his experiences with real hands on work to his engineering in the future.
I work with so many engineers that have no f#%?&*! clue!! I bet half of them have never even turned a wrench.....
Your 11 year old may surprise you later on. If she's interested now she just may take over your shop in the future. Great to see some women in this industry!!

btw Robert. I ran across your picture of a close encounter with an oil drum the other day... Holy crispy ****** bat man!! Of all the people on this web site for something like that to happen to??? WTF??Robert?? You should of known better. Sorry you had to go through that ordeal, Glad it didn't take your head off! Almost looks like you had a rocket launch from your chest.
Seems there's at least one poor guy who meets his end with drums year after year. If your experience can save someone from putting a torch to a drum and avoiding death or injury, at least your pain will of been of some use.
Boy, that looks like it was painful!! Hope your recovering well.

Claude
 
OP
N

NASTYZEN

Well-known member
Joined
Jun 11, 2010
Messages
2,823
Location
St-Colomban,Que. Canada
When you make custom tooling like that for a project, does it go to the car owner, or do you keep it for a future job?

Just curious. Awesome work.

Thanks for the kind words.
I always keep the tooling and fixturing I make for this kind of project. If I do end up using the tooling again, I will ask the customer for permission first.
 

MP&C

Well-known member
Joined
Oct 21, 2009
Messages
4,396
Location
Leonardtown, MD
btw Robert. I ran across your picture of a close encounter with an oil drum the other day... Holy crispy ****** bat man!! Of all the people on this web site for something like that to happen to??? WTF??Robert?? You should of known better. Claude


You're right, and I am normally a stickler for safety issues. I had someone mention he used a cutting torch all the time to remove the lids.... and I was in the middle of a car project with the owner breathing down my neck almost daily. That combined for just enough of a lapse in judgement and the next thing you know I was going for a helicopter ride. Yeah, the first thing I did when I got home was to snap some pictures in hopes to save someone a similar or worse fate. I think the worst thing was the liquid Dial scrub bath.
 
OP
N

NASTYZEN

Well-known member
Joined
Jun 11, 2010
Messages
2,823
Location
St-Colomban,Que. Canada
Now, there was still the front toe box cover to cut out and form. I had to make yet another Dimple Die.
Bottom.

imgp5659x.jpg


Top. With guide pins to keep both dies centered.

imgp5660m.jpg


Part is held in position with tape.

imgp5661.jpg


A little squeeze.

imgp5662o.jpg


It's nice when you can pull the part out easily without damaging it.

imgp5663u.jpg


And now the dash board cover.

imgp5665r.jpg


Creative bending and fitting (sweat!!)Phuew!

imgp5666g.jpg


imgp5668o.jpg


imgp5670.jpg


The customer wanted tight joints all over.

imgp5851.jpg


imgp5849v.jpg


The dash board.

imgp5914.jpg


In place.

imgp5852x.jpg


This ones for JC :lol:

imgp5916m.jpg


:beer:
 

neonnblack

Well-known member
Joined
Jun 7, 2010
Messages
4,913
Location
Reno, NV
Always like watching your builds, zen.

Man the drum thing, we are building some things out of some drums and i came home one day and saw that my dad had cut one open. (race fuel drum) asked how he did it, just the grinder he says. All that came out of my mouth was" fuuuuuck".
 

racingtadpole

Well-known member
Joined
Dec 3, 2011
Messages
2,029
Location
The far side of crazy.. but sometimes Australia
One slip with this thing and it's game over!!

imgp5540.jpg

I use a router plate and 1/8" router bit in a Dremel for that sort of stuff. The thick craft cardboard makes a nice easily cut template material for the dremel to guide on (although beer boxes work too if thats all you happen to have :p)
Leaves a really nice edge and is easy to control.
 
To avoid these ads, REGISTER NOW!
Top Bottom