To avoid these ads, REGISTER NOW!

30x40 Garage/Shop

porschedude996TT

Well-known member
Joined
Oct 28, 2007
Messages
2,384
Location
Santa Maria, California
Hello everyone, I've been watching this forum for a while and I finally made some physical progress in my new build. It seemed to take forever to get to this point. I would call this my second milestone. The first was the Design and permitting, what a PITA.

I had to demo the existing broken concrete pad that was damaged by tree roots. The concrete was 6-8 inches thick an 9-10 inches in some spots.

Next Phase is Root removal and grading and then digging for the footing and form boards.
 

Attachments

  • IMG_0834.jpg
    IMG_0834.jpg
    74.2 KB · Views: 1,415
  • IMG_0835.jpg
    IMG_0835.jpg
    36.1 KB · Views: 1,022
  • IMG_0836.jpg
    IMG_0836.jpg
    51.1 KB · Views: 985
  • IMG_0837.jpg
    IMG_0837.jpg
    77.4 KB · Views: 977
  • IMG_0840.jpg
    IMG_0840.jpg
    76 KB · Views: 909
  • IMG_0838.jpg
    IMG_0838.jpg
    62.9 KB · Views: 809
  • IMG_0839.jpg
    IMG_0839.jpg
    67.5 KB · Views: 1,009
Last edited:
To avoid these ads, REGISTER NOW!

Minitucking

Well-known member
Joined
Jan 28, 2008
Messages
79
Location
Lake Charles,la
Looks like a project!! Also looks like the concrete didnt have any reinforcement in it. Pretty thick though in places. Keep us updated!!
 
OP
P

porschedude996TT

Well-known member
Joined
Oct 28, 2007
Messages
2,384
Location
Santa Maria, California
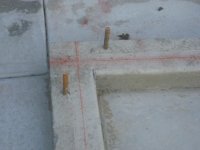
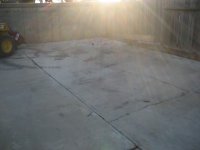
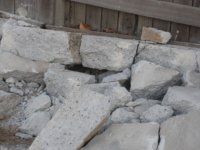
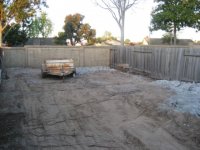
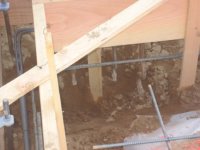
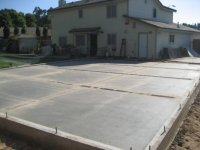
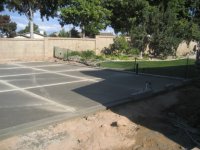
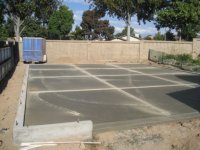
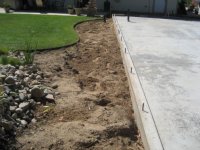
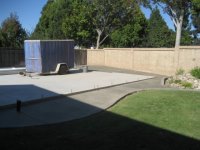
Thanks MiniT, you are so right about not having re-bar in the old concrete. I couldn't believe that someone would trade concrete for dirt and proper grading. I guess the previous owner of the property had a good line on cheap concrete...

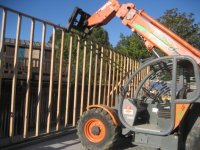
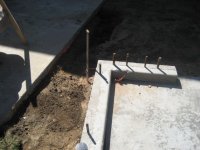
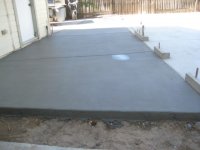
Currently on my plans I have a 4" floor and 1/2" re-bar every 18", but after seeing the broken concrete, I am going to pour a 6" floor in the shop and re-bar every 12".

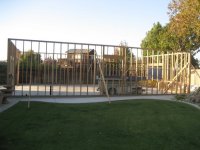
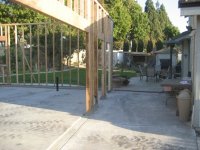
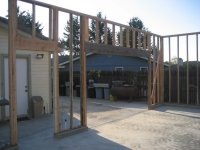
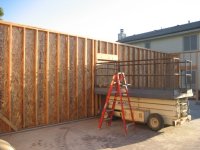
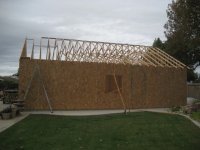
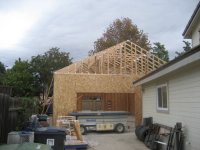
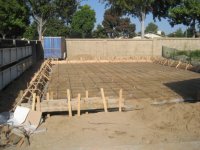
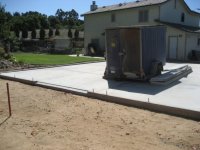
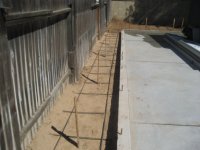
More details about the shop. It is going to be 30'x40' with 10' 10" walls, restroom with separate entrance from the outside as well as from within the shop. That way people can use the restroom during backyard BBQ's and whatever... It will have a 12’ sectional rollup door on the end pointing to the street and an 8’ Sectional pointing to the block wall and a personnel door on the same end as the 12’ door. The ceiling will be flat on the first 10’ and last 10’ of the 40’ run with a vaulted ceiling to 14’ and change in the center 20’ with 8 2x4 skylights.

There will have a bank of 4’ deep cabinets 24’ long from floor to ceiling and then permanent work bench around the entire inside perimeter. The 4’ deep cabinets will allow me to keep all my tools on wheels and dollies (welders, table saw, pressure washer put away when not in use. I will also have some tools mounted to the floor inside the cabinet like my drill press, 6” Belt/12” Disk Sander, etc. The workbench will be made of 2x4 and 4x4 lumber with face frames for the door and drawers. I plan to run shop air and a vacuum system inside the bench with the outlets sticking up out of the workbench. I’m not sure what kind of workbench top to put on at this point. Maybe a mix of metal and maple butcher block. At this point I don’t know if I am going to need overhead cabinets.

The air compressor and vacuum system will be outside in a separate structure outside the 8’ rollup door.

The interior will be smooth texture over gypsum and painted semi-gloss white. The floor will be light gray epoxy without the color flecks. I drop too many small parts on the floor… LOL The white walls will reflect the light well.

I found some 4’ (6 tube) T-8 fluorescent fixtures and there will be 10 of those over the workbenches. The 8 2’x4’ skylights will illuminate the center area of the shop by day. I plan to build the skylight vaults so that the vault opens up at an angle to spread the light out and also enable me to place some Highbay Lighting fixtures at proper height up inside the skylight vault. So at night I can turn on the 8 Highbay Lights as necessary. I have the Highbay Lights now. They are 400 watt Metal Halide with a 22” acrylic bell. I think the lighting plan will keep me in light and I hope that I don’t need to turn on the 400 watt fixtures much. You younger guys will appreciate what I am talking about when you reach 40-45 years old…

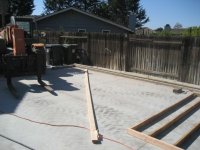
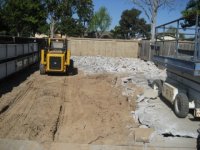
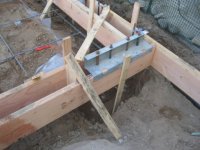
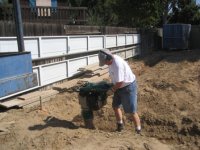
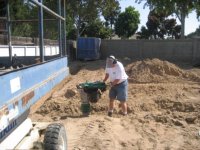
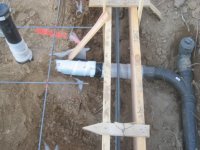
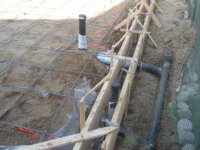
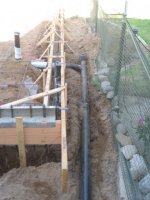
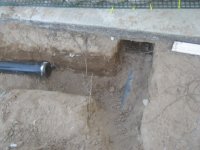
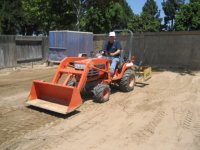
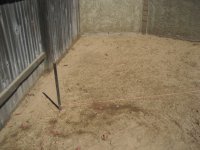
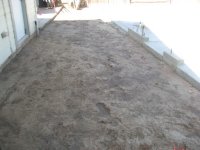
Anyway, more to follow. I should start digging for the footing after I get rid of the tree roots this weekend, and pour the footing in early May.
 
Last edited:

AGBill

Well-known member
Joined
Dec 11, 2006
Messages
62
Hey P-Dude:

That skid steer with a hammer really did a nice job breaking up your old concrete. That was a lot of grunt work to load the chunks into the dump trailer...

Are you planning on having some fun running the back hoe or a small excavator for the footings?

Bill
 
OP
P

porschedude996TT

Well-known member
Joined
Oct 28, 2007
Messages
2,384
Location
Santa Maria, California
Hi Bill, I think you are right. I don't really want to hand dig the footing...

I got a price on my concrete from a buddy of mine, $103.50 a yard (50/50) mix 2,500psi, but he said it would pass 3,500psi, plus a $10 Environ Fee and $20 Fuel Surcharge per load. He also said that he would wave the extra fee for Saturday delivery.

I calc'ed the total amount to be about 47 Cu Yards. 8.5 for the footing, 19.7 for the shop floor, and 18.6 for the apron and driveway. I plan to hire a pumper and two concrete finishers. My Brother-N-Law is a General Contractor and has enough form boards for the task.

I wondering about putting in some Polyester Fiber in the Mix…any comments?

I plan to paint the floor when everything is done in the inside and have heard that the fibers can stick-up from the surface, but can be removed easily. Propane Torch or hand grinder.

Also, any idea on how many expansion seams I should put into the floor?

Keith
 

AGBill

Well-known member
Joined
Dec 11, 2006
Messages
62
I did not put in any expansion joints, just saw cuts on 10 ft centers. One less thing to run over with the floor jack...
Remember NOT to have your concrete guy use a sealer to retain moisture during curing because you will have to remove it before applying epoxy..
Bill
 
OP
P

porschedude996TT

Well-known member
Joined
Oct 28, 2007
Messages
2,384
Location
Santa Maria, California
That will work. I planned to fill with crack filler that will expand/contract and can be painted. I think the filled saw cuts would be much less noticeable than if I made a conventional seam. Everyone that I have seen has kind of a profile to it where the seaming trowel touches on the top surface…

You are right on the sealer. The paint mfg's say to remove all sealers. I guess it would behave like a mold release and prevent a good tooth to the paint.
 
Last edited:

Bib Overalls

Well-known member
Joined
Dec 4, 2006
Messages
3,318
Location
Jonesboro, Arkansas
I like "commercial/industrial" fiber in concrete slabs. But it does leave a fuzz on the surface that will wear away in time. For a slick, epoxy ready surface I would pass on the fiber. Your rebar schedule is aggressive and fiber would really be overkill. I also agree with your decision to place a 6" thick slab. IMHO 4" is borderline in a garage or shop. And if you ever want to add a two post lift you will be set.
 
OP
P

porschedude996TT

Well-known member
Joined
Oct 28, 2007
Messages
2,384
Location
Santa Maria, California
Thanks Bib, I do plan a two post in the future. I was thinking of adding rabbit wire or 4" x 6" wire. If I did that I would hate to bust this slab when it nolonger serves the next owner in a 100 years...LOL It would take an atomic bomb to bust it up...
 
OP
P

porschedude996TT

Well-known member
Joined
Oct 28, 2007
Messages
2,384
Location
Santa Maria, California
Ok, I have an update. Been hard getting back into the groove with a hospitalization and recovery and work. After the demo on the concrete and some grading work, I dug for the footing and then had concrete company come in and get me back on schedule. I cost me about 10K for the footing and a 6 inch floor.
 

Attachments

  • 07.jpg
    07.jpg
    68.6 KB · Views: 1,044
  • 06.jpg
    06.jpg
    77.5 KB · Views: 928
  • 05_renamed_13532.jpg
    05_renamed_13532.jpg
    72.7 KB · Views: 769
  • 04_renamed_14564.jpg
    04_renamed_14564.jpg
    68.4 KB · Views: 789
  • 03.jpg
    03.jpg
    71.3 KB · Views: 685
  • 01.jpg
    01.jpg
    73.5 KB · Views: 847
Last edited:
OP
P

porschedude996TT

Well-known member
Joined
Oct 28, 2007
Messages
2,384
Location
Santa Maria, California
Here are some more...
 

Attachments

  • 14.jpg
    14.jpg
    71.2 KB · Views: 711
  • 13.jpg
    13.jpg
    50.4 KB · Views: 650
  • 12.jpg
    12.jpg
    71 KB · Views: 756
  • 11.jpg
    11.jpg
    73.1 KB · Views: 696
  • 10.jpg
    10.jpg
    70.5 KB · Views: 770
  • 09.jpg
    09.jpg
    61.3 KB · Views: 714
  • 08.jpg
    08.jpg
    54.2 KB · Views: 679
OP
P

porschedude996TT

Well-known member
Joined
Oct 28, 2007
Messages
2,384
Location
Santa Maria, California
Saw cut on a 10 ft x 10 ft grid, finish is smooth. I plan to fill the saw cuts with a silastic material and then paint, but that is a long way off.
 

Attachments

  • 17.jpg
    17.jpg
    49.8 KB · Views: 1,185
  • 16.jpg
    16.jpg
    74.1 KB · Views: 864
  • 15.jpg
    15.jpg
    70.1 KB · Views: 1,238
Last edited:

bmwpower

Super Moderator
Staff member
Joined
Apr 24, 2005
Messages
12,578
Location
NJ
Did you saw cut the stepdown inline with the sawcut in the floor? My guess it will crack there if not.

Looks good!

I went with no sawcuts just expansion around the edges. So far so good. But better to have the joints for sure if you're concerned about cracks.
 

Denominator

Well-known member
Joined
Oct 25, 2006
Messages
204
Location
Hamar, Norway
What make and model is this mini tractor?
Any good for removing snow? We get loads of snow up here in Norway, and I am sick and tired of my snowblower breaking down when i need it the most!
 

Attachments

  • 01.jpg
    01.jpg
    73.5 KB · Views: 427
OP
P

porschedude996TT

Well-known member
Joined
Oct 28, 2007
Messages
2,384
Location
Santa Maria, California
The slab was a two step process, footing / stem wall and then floor. The drop in front of the floor in the door opening is one pour. How is that going to effect cracking?

The tractor is a Kubota and it has two models. One on the engine cover and the other on the front implment. ???

RX223 and LA221 respectively.
 
Last edited:
OP
P

porschedude996TT

Well-known member
Joined
Oct 28, 2007
Messages
2,384
Location
Santa Maria, California
The flatwork around the building starts tomorrow, grading and drainage lines have been established. More tomorrow.
 

Attachments

  • 004.jpg
    004.jpg
    66.2 KB · Views: 476
  • 003.jpg
    003.jpg
    59.3 KB · Views: 501
  • 002.jpg
    002.jpg
    61.4 KB · Views: 583
  • 001.jpg
    001.jpg
    50.8 KB · Views: 501
  • 006.jpg
    006.jpg
    66.1 KB · Views: 733
  • 005.jpg
    005.jpg
    69.4 KB · Views: 497
  • 007.jpg
    007.jpg
    63.5 KB · Views: 564
To avoid these ads, REGISTER NOW!
OP
P

porschedude996TT

Well-known member
Joined
Oct 28, 2007
Messages
2,384
Location
Santa Maria, California
Steel in today, concrete tomorrow.
 

Attachments

  • 007.jpg
    007.jpg
    61 KB · Views: 291
  • 006.jpg
    006.jpg
    62.9 KB · Views: 299
  • 005.jpg
    005.jpg
    48.1 KB · Views: 321
  • 004.jpg
    004.jpg
    74 KB · Views: 346
  • 003.jpg
    003.jpg
    65.3 KB · Views: 343
  • 002.jpg
    002.jpg
    60.8 KB · Views: 426
  • 001.jpg
    001.jpg
    44.8 KB · Views: 363
OP
P

porschedude996TT

Well-known member
Joined
Oct 28, 2007
Messages
2,384
Location
Santa Maria, California
Concrete flatwork got finished today. The small area between the existing patio and the new work is my access to the sewer connection until I have the vent up through the roof. After that inspection I will dowel into either side with rebar and pour it.
 

Attachments

  • 007.jpg
    007.jpg
    57.9 KB · Views: 415
  • 006.jpg
    006.jpg
    54.2 KB · Views: 433
  • 005.jpg
    005.jpg
    68.9 KB · Views: 457
  • 004.jpg
    004.jpg
    77.3 KB · Views: 494
  • 003.jpg
    003.jpg
    56.2 KB · Views: 464
  • 002.jpg
    002.jpg
    73.9 KB · Views: 490
  • 001.jpg
    001.jpg
    50.2 KB · Views: 415
OP
P

porschedude996TT

Well-known member
Joined
Oct 28, 2007
Messages
2,384
Location
Santa Maria, California
Ordered lumber and trusses today. Lumber will be delivered Friday and the Trusses are 2 weeks out.

This past weekend I modified a set of sectional garage doors from 16' to 12'. I was given these doors (8' and 16') by a friend who was going to two 12' doors in his house. It went very well since the doors are in four foot width sections, so I could make them 4', 8', 12' in width. You may have seen them hangin on my wooden fence in previous photos.

Anyone know how to easily insulate a plan sectional door?
 
Last edited:
OP
P

porschedude996TT

Well-known member
Joined
Oct 28, 2007
Messages
2,384
Location
Santa Maria, California
It is movin' forward. I started building and standing walls yesterday. I rented a reaching forklift to get the material back where I wanted it staged. The pathway back to the shop build is only 10 foot of so and the skid of material was over 20. so I lifted it over the house. Not wanting to kill the house in the process, I rented a big forklift so that the load was stable while above the house during the climb up the driveway. So the load was delivered at noon and it took a few minutes to get the load where I wanted it. An hour or so to rearrange the lumber in the order that I planned to use it. And then I started the layout and build by myself and my trusty friend the forklift. I'm going to be sad when it leaves on Monday. Oh well, I still have my friend the Scissor Lift that I own and bought for the duration of the build. I starting to look bigger, the shop that is... It is funny how ones eye and brain work. When I first did a four corner layout, it looked big, then the forms and it looked pretty big, and after all the concrete work was done, it started shrinking, now it looks bigger because of the vertical aspects of the project. I assume that it will start to look small once I start sheeting the walls. That's all for now, more to follow.
 

Attachments

  • 007.jpg
    007.jpg
    74 KB · Views: 507
  • 006.jpg
    006.jpg
    67.2 KB · Views: 608
  • 005.jpg
    005.jpg
    64.1 KB · Views: 496
  • 004.jpg
    004.jpg
    74.9 KB · Views: 480
  • 003.jpg
    003.jpg
    72 KB · Views: 594
  • 002.jpg
    002.jpg
    60.5 KB · Views: 548
  • 001.jpg
    001.jpg
    68.2 KB · Views: 881
Last edited:
OP
P

porschedude996TT

Well-known member
Joined
Oct 28, 2007
Messages
2,384
Location
Santa Maria, California
At the end of the day, the other 40' wall and one of the 30' walls is coming together. I'm glad the temperature was down from yesterdays 84F degrees. I had a whole day and a 1/2 day from my brother-in-law and my wife.

I screwed up when I ordered my lumber. I ordered 10' lenghts for the studs instead of 10' wall studs which are 116 and change. I tasked my wife with the job and she did 50 plus chops and layed them out for me. Good job Honey! I made a jig setup to keep them at the proper length.
 

Attachments

  • 014.jpg
    014.jpg
    65.2 KB · Views: 389
  • 013.jpg
    013.jpg
    77.1 KB · Views: 359
  • 012.jpg
    012.jpg
    66.9 KB · Views: 367
  • 011.jpg
    011.jpg
    75.8 KB · Views: 353
  • 010.jpg
    010.jpg
    64.3 KB · Views: 367
Last edited:
OP
P

porschedude996TT

Well-known member
Joined
Oct 28, 2007
Messages
2,384
Location
Santa Maria, California
Today was a good day, almost finished the wall framing. I started in the morning on the back wall with a single 8 foot door, that spans 30 feet and had it all ready to lift when my brother-in-law showed up at 1:00pm. Just a couple of studs and shims on the strong wall to go. Trusses are are due next week, maybe...
 

Attachments

  • 019.jpg
    019.jpg
    70 KB · Views: 449
  • 016.jpg
    016.jpg
    62.7 KB · Views: 565
  • 013.jpg
    013.jpg
    76 KB · Views: 382
  • 012.jpg
    012.jpg
    76.1 KB · Views: 381
  • 010.jpg
    010.jpg
    77.9 KB · Views: 439
  • 009.jpg
    009.jpg
    57.4 KB · Views: 419
  • 008.jpg
    008.jpg
    61.6 KB · Views: 419
Last edited:
OP
P

porschedude996TT

Well-known member
Joined
Oct 28, 2007
Messages
2,384
Location
Santa Maria, California
I finshed putting up the shear panel this weekend. I still need to finish of nailing the field of each panel. I think it is about 85% at this point.

I have gone thru 2/3's of a box of 8d Ring-Shank Nails and I am not done yet. I think this building is starting to qualify as a steel structure... Haah!
 

Attachments

  • 006.jpg
    006.jpg
    46.9 KB · Views: 406
  • 002.jpg
    002.jpg
    64.6 KB · Views: 310
  • 005.jpg
    005.jpg
    63.4 KB · Views: 283
  • 007.jpg
    007.jpg
    63.4 KB · Views: 338
  • 009.jpg
    009.jpg
    53.2 KB · Views: 349
  • 004.jpg
    004.jpg
    66.4 KB · Views: 323
  • 001.jpg
    001.jpg
    76.7 KB · Views: 368
Last edited:
OP
P

porschedude996TT

Well-known member
Joined
Oct 28, 2007
Messages
2,384
Location
Santa Maria, California
Trusses are on site and installed today with the help of a a bunch of extra friends and relatives. It took about 3-1/2 hrs to get them prep'ed and installed.
 

Attachments

  • 008.jpg
    008.jpg
    56 KB · Views: 669
  • 007.jpg
    007.jpg
    62 KB · Views: 819
  • 006.jpg
    006.jpg
    75 KB · Views: 578
  • 001.jpg
    001.jpg
    59.7 KB · Views: 492
OP
P

porschedude996TT

Well-known member
Joined
Oct 28, 2007
Messages
2,384
Location
Santa Maria, California
I got most of the structual blocking and bracing done. The storage platforms done. Started sheeting the roof...
 

Attachments

  • IMG_1130.jpg
    IMG_1130.jpg
    50.8 KB · Views: 635
  • IMG_1131.jpg
    IMG_1131.jpg
    57.8 KB · Views: 709
  • IMG_1132.jpg
    IMG_1132.jpg
    64.9 KB · Views: 895
  • IMG_1133.jpg
    IMG_1133.jpg
    75.1 KB · Views: 684
Last edited:
OP
P

porschedude996TT

Well-known member
Joined
Oct 28, 2007
Messages
2,384
Location
Santa Maria, California
Almost half way with the roof sheeting. Sure is slow going by myself. I'm getting the sheets up using two ladders leaned againist the facia and a good rope and two "C" Clamps. After setting it up I get up in the trusses and pull them up the face of the ladders and up onto the roof. It is a good work-out too. I also got one of the attic ladders installed.
 

Attachments

  • 001.jpg
    001.jpg
    55.5 KB · Views: 414
  • 002.jpg
    002.jpg
    46.7 KB · Views: 360
  • 003.jpg
    003.jpg
    75.6 KB · Views: 501
  • 004.jpg
    004.jpg
    69.7 KB · Views: 401

therealjakeg

Well-known member
Joined
Dec 27, 2008
Messages
202
Location
AZ
Or you could post tension that slab, leave the tree roots and never have a crack, or need any expansion joints at all. Out here in the desert we use that due to our sandy dirt and unstable foundations. By this time I think its already poured because I saw the same guy asking about lighting and there were pictures so I would imagine that he is past this enjoy!
 
OP
P

porschedude996TT

Well-known member
Joined
Oct 28, 2007
Messages
2,384
Location
Santa Maria, California
Or you could post tension that slab, leave the tree roots and never have a crack, or need any expansion joints at all. Out here in the desert we use that due to our sandy dirt and unstable foundations. By this time I think its already poured because I saw the same guy asking about lighting and there were pictures so I would imagine that he is past this enjoy!

Please explain "Post Tension".
 
To avoid these ads, REGISTER NOW!
Top Bottom