The XPR-10ACX is BendPak’s updated designed 10,000 pound capacity wide version asymmetrical two-post lift. By the serial number I have the second one off the production line. I assume the first one is in their testing facility. From what I understand it’s basically the same as its’ predecessor; but has revised “Tru-Metric” arms and locking mechanisms. That will provide more versatile arm positioning
Over the years I’ve installed a dozen lifts for myself and friends, a professional approach made this one a breeze. A mere investment of $400.00 will save you a lot of time and effort,, particularly for the first timer. I've taken the time to outline the steps to show how simple the task may be. But if you choose to DIY, please carefully read and follow BendPak’s well written instructions.
The lift comes bolted together at the ends with an angle iron frame. The arms are wrapped and shipped in the columns with several corrugated cartons filled with the misc parts and the pump assembly That are all neatly wrapped with cardboard then plastic shrink-wrapped. I had the lift unloaded from the common carrier’s truck and placed on my trailer with a forklift.

Once backed into my garage, I removed side cartons and lifted the columns with my Bridge crane off my flatbed trailer. Without a crane, it would be best to dismantle the package on the trailer and remove item by item. A cherry picker would be a good asset to have. .

Removed all packaging material and laid out all the components and checked that nothing was missing or damaged. The columns, cross bar, and arms have a terrific paint job and looks as if they were powered-coated. The blue is very pleasant, with contracting safely yellow arms. A can of touch up paint was supplied; but was not needed. I only wished that my new flatbed trailer looked half as nice! The folks at LoadTrail could learn a lot from BenPak on how to paint


With the columns on their sides, the carriages are manually raised about 24“. Making room to remove the bottom pulley, lay in cables, add hoses and fitting.
Thread the equalization cables per instructions. Note the asymmetric model has two different length cables and need to be placed on the correct pulleys. The instructions clearly point out proper locations.

A hydraulic fitting is placed at the bottom of the main hydraulic cylinder. An access hole is provided on the outside of each column. The proper length hoses are connected and routed up the columns. The hoses are secured in clips in the columns and top trough.

The passenger side column receives a “T” bulkhead hydraulic fitting and the shorter hose connects to the cylinder fitting from below.

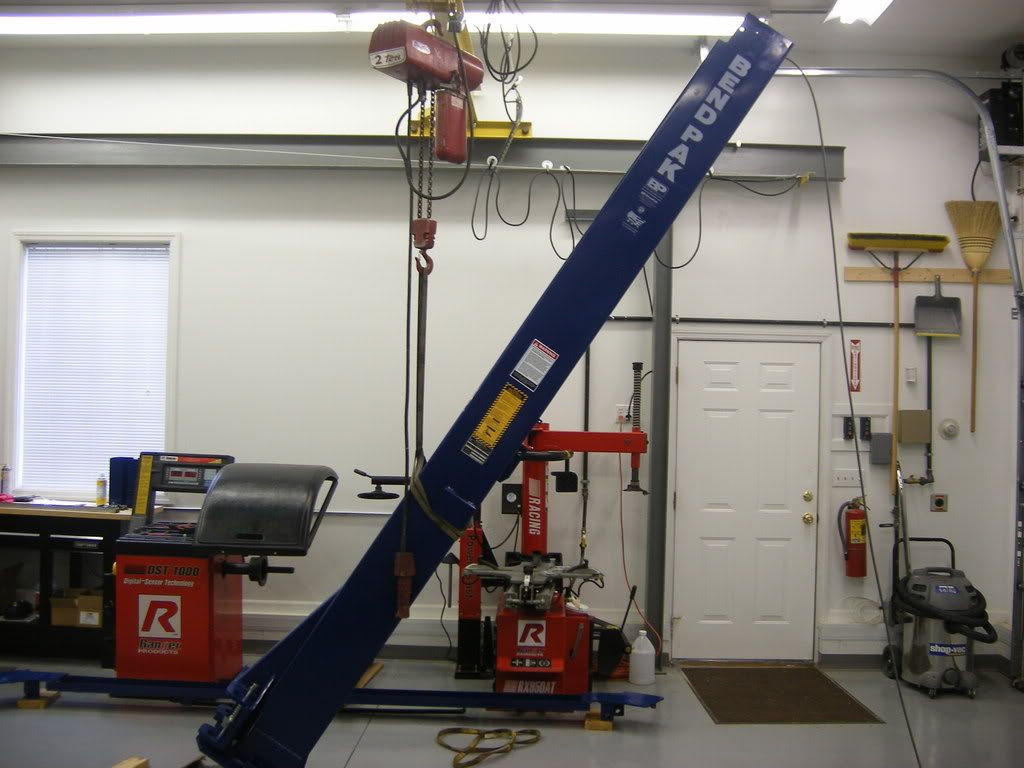
Once hoses and equalization cables are pre-assembled lower the carriages to their bottom position. A second person needs to keep the slack pout of the cables so that they don’t come off the pulleys. The columns can now be up-righted. Two men can do this. But I used a nylon sling and my crane.
A chalk line is struck on the floor to line up the columns. A piece of carpet under the columns made it easier to move them and keep from marring the epoxy floor coating. Once they were in the approximate location, the carpet was removed. Two clever
“notch cutouts” are provided on the column flange to line the bottom flange to the chalk line.

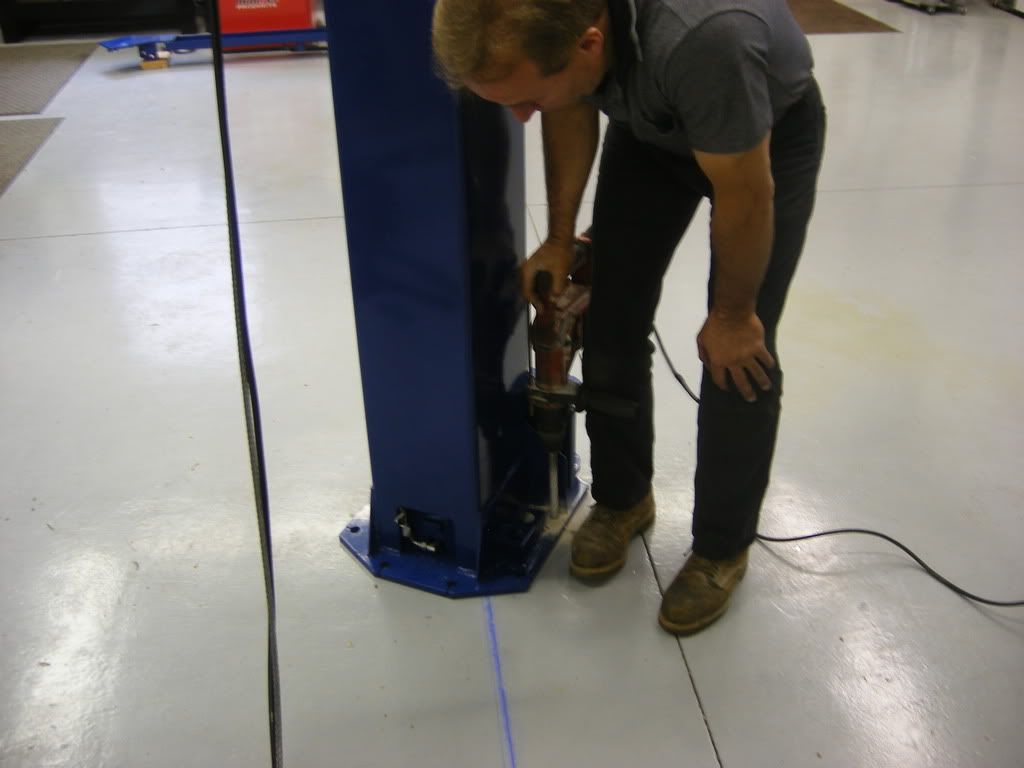
Now it’s time to anchor the columns to the floor. We chose to anchor the driver's side first, because of the clearance issues of my bridge crane runway beam. Using a rotary hammer drill one hole is drilled through the mounting plate. The hole is drilled completely through the concrete floor. In case it needs to be replaced, it can be driven down through the floor. After vacuuming out the dust, one anchor is put into place. A washer and nut are loosely installed. A second hole is drilled and another anchor placed. Then the remainder can all be drilled. All he nuts are left loose by 1/4".
The column is plumbed using a carpenter’s level. The provided steel horseshoe shims are placed between the baseplate and concrete floor and around the bolts. The nuts are tightened by hand. After triple checking that the columns are plumbed, the bolts can be tightened down.
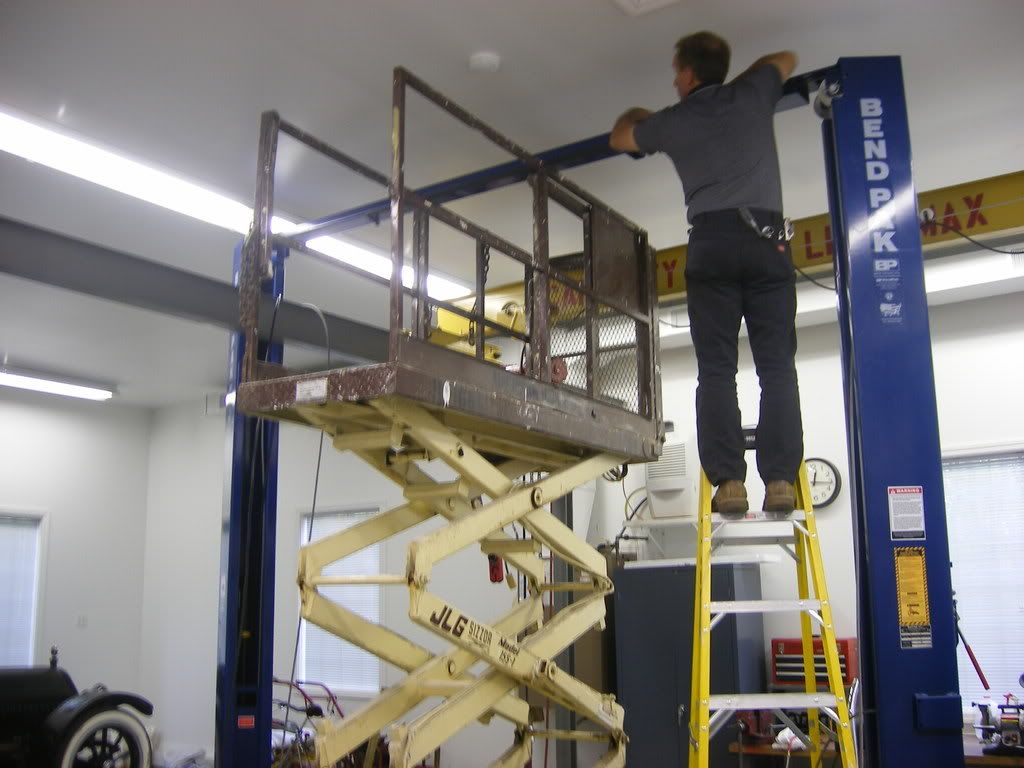
Next the passenger's side column is set into place on the chalk line and approximately 145" from the outside of the base plates. And the top trough is set on top the two columns. I used my scissors lift; but two men on ladders can do the trick. Then secure in place with bolts and nuts provided.
Once the top bridge is secured into place. The second column is plumbed, shimmed and anchored to the floor. The hydraulic pump is now attached to the passenger's side column. The hydraulic lines are routed across the top and down to the bulkhead fitting. The two equalizer cables are feed through the top pulleys down the far columns and fastened in the carriages with a washer and nylon lock nut.

The mechanical safety stops are mounted to the respective columns. The handled safety stop mounted on the passenger's side column. Then the safety release cable is feed between the two mechanical stops per instructions. Adjusted and secured with proper fasteners. Then the safety covers are bolted in place.
The four Tru-Metric” arms are installed onto the lift’s carriages. Using the four pins and snap rings. The snap rings cannot be installed until the carriages are raised.


The top safety micro switch in mounted on the top trough and the wire is routed to the pump motor. Where it is wired in series with the incoming power. This should be done by a qualified electrician.
Fill the pump’s reservoir with the recommended hydraulic oil. Takes about 12 quarts. Tie a rag around the top of each lifting cylinder. Then loosen the top pipe plug with a hex wrench. Push the lift button on the pump’s motor. Stop when the carriages move 2 feet off the floor. Tighten the plugs and lower the lift carriages until they hit bottom. It’ll take a few minutes to lower the carriage to the ground level. This bleeding process was repeated approximately five times. Or until only oil, not air, comes out of the bleeder plugs.
The total install was done by one professional installer along with my help. and took less than five hours time.
No problems handling my 7,100 pound 3/4 ton Avalanche!

Clearance front side doors on Avalanche.


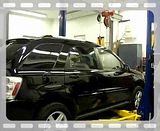
Movie time! Click on picture... Lifting a 2005 Chevrolet Equinox for oil change.

 .
.
Over the years I’ve installed a dozen lifts for myself and friends, a professional approach made this one a breeze. A mere investment of $400.00 will save you a lot of time and effort,, particularly for the first timer. I've taken the time to outline the steps to show how simple the task may be. But if you choose to DIY, please carefully read and follow BendPak’s well written instructions.
The lift comes bolted together at the ends with an angle iron frame. The arms are wrapped and shipped in the columns with several corrugated cartons filled with the misc parts and the pump assembly That are all neatly wrapped with cardboard then plastic shrink-wrapped. I had the lift unloaded from the common carrier’s truck and placed on my trailer with a forklift.
Once backed into my garage, I removed side cartons and lifted the columns with my Bridge crane off my flatbed trailer. Without a crane, it would be best to dismantle the package on the trailer and remove item by item. A cherry picker would be a good asset to have. .
Removed all packaging material and laid out all the components and checked that nothing was missing or damaged. The columns, cross bar, and arms have a terrific paint job and looks as if they were powered-coated. The blue is very pleasant, with contracting safely yellow arms. A can of touch up paint was supplied; but was not needed. I only wished that my new flatbed trailer looked half as nice! The folks at LoadTrail could learn a lot from BenPak on how to paint
With the columns on their sides, the carriages are manually raised about 24“. Making room to remove the bottom pulley, lay in cables, add hoses and fitting.
Thread the equalization cables per instructions. Note the asymmetric model has two different length cables and need to be placed on the correct pulleys. The instructions clearly point out proper locations.
A hydraulic fitting is placed at the bottom of the main hydraulic cylinder. An access hole is provided on the outside of each column. The proper length hoses are connected and routed up the columns. The hoses are secured in clips in the columns and top trough.
The passenger side column receives a “T” bulkhead hydraulic fitting and the shorter hose connects to the cylinder fitting from below.
Once hoses and equalization cables are pre-assembled lower the carriages to their bottom position. A second person needs to keep the slack pout of the cables so that they don’t come off the pulleys. The columns can now be up-righted. Two men can do this. But I used a nylon sling and my crane.
A chalk line is struck on the floor to line up the columns. A piece of carpet under the columns made it easier to move them and keep from marring the epoxy floor coating. Once they were in the approximate location, the carpet was removed. Two clever
“notch cutouts” are provided on the column flange to line the bottom flange to the chalk line.
Now it’s time to anchor the columns to the floor. We chose to anchor the driver's side first, because of the clearance issues of my bridge crane runway beam. Using a rotary hammer drill one hole is drilled through the mounting plate. The hole is drilled completely through the concrete floor. In case it needs to be replaced, it can be driven down through the floor. After vacuuming out the dust, one anchor is put into place. A washer and nut are loosely installed. A second hole is drilled and another anchor placed. Then the remainder can all be drilled. All he nuts are left loose by 1/4".
The column is plumbed using a carpenter’s level. The provided steel horseshoe shims are placed between the baseplate and concrete floor and around the bolts. The nuts are tightened by hand. After triple checking that the columns are plumbed, the bolts can be tightened down.
Next the passenger's side column is set into place on the chalk line and approximately 145" from the outside of the base plates. And the top trough is set on top the two columns. I used my scissors lift; but two men on ladders can do the trick. Then secure in place with bolts and nuts provided.
Once the top bridge is secured into place. The second column is plumbed, shimmed and anchored to the floor. The hydraulic pump is now attached to the passenger's side column. The hydraulic lines are routed across the top and down to the bulkhead fitting. The two equalizer cables are feed through the top pulleys down the far columns and fastened in the carriages with a washer and nylon lock nut.
The mechanical safety stops are mounted to the respective columns. The handled safety stop mounted on the passenger's side column. Then the safety release cable is feed between the two mechanical stops per instructions. Adjusted and secured with proper fasteners. Then the safety covers are bolted in place.
The four Tru-Metric” arms are installed onto the lift’s carriages. Using the four pins and snap rings. The snap rings cannot be installed until the carriages are raised.
The top safety micro switch in mounted on the top trough and the wire is routed to the pump motor. Where it is wired in series with the incoming power. This should be done by a qualified electrician.
Fill the pump’s reservoir with the recommended hydraulic oil. Takes about 12 quarts. Tie a rag around the top of each lifting cylinder. Then loosen the top pipe plug with a hex wrench. Push the lift button on the pump’s motor. Stop when the carriages move 2 feet off the floor. Tighten the plugs and lower the lift carriages until they hit bottom. It’ll take a few minutes to lower the carriage to the ground level. This bleeding process was repeated approximately five times. Or until only oil, not air, comes out of the bleeder plugs.
The total install was done by one professional installer along with my help. and took less than five hours time.
No problems handling my 7,100 pound 3/4 ton Avalanche!
Clearance front side doors on Avalanche.
Movie time! Click on picture... Lifting a 2005 Chevrolet Equinox for oil change.
Last edited:


")