To avoid these ads, REGISTER NOW!

Making my car's home a little cozier

kmcphee

Well-known member
Joined
Dec 20, 2012
Messages
66
Location
Hammonds Plains, Nova Scotia, Canada
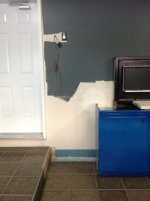
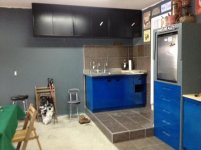
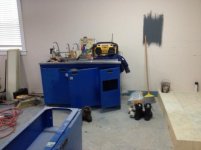
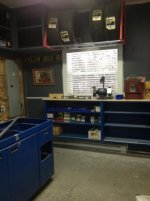
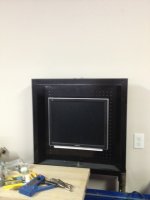
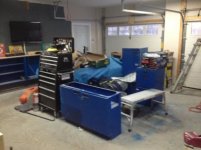
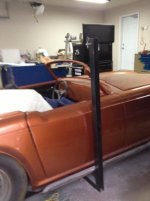
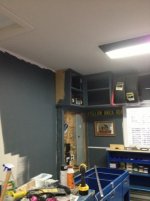
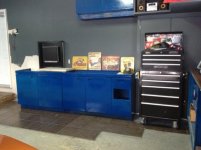
I've been checking out this site for some time and decided it was time to join. My garage is 22' x 24' attached to the house. I picked up a bunch of steel cabinets from a university for $150. Just have to touch up the scratches and make the butcher block top. I have my old house PC that will be in the lower cabinet with a pop up screen. After lots of thread reading on floors I am going with tile. I just bought enough for the entire garage. It is porcelain with a PEI rating of 5 so should stand up quite well. The house is a year old and I had the builder frame in spots (pockets) on each side of the garage for a 10" steel beam to sit (I will have to poke a small hole in the side of the house to get it in; the wife will love this!) I have an electric hoist with trolley for lifting heavy stuff. Talked with the engineer on the house and as long as the loads are not over 1,000 lbs I am more than ok with the weight on the footing walls. Realistically the heaviest will be around 500 lb - 600 lb max. (Engine / ****** etc.)

Would love to hear some thoughts / comments / improvement suggestions?

Cheers,
Kevin
 

Attachments

  • back wall.jpg
    back wall.jpg
    38.2 KB · Views: 459
  • stainless sink.jpg
    stainless sink.jpg
    28.1 KB · Views: 335
  • shelf and tire rack.jpg
    shelf and tire rack.jpg
    33.7 KB · Views: 429
  • pad for sink.jpg
    pad for sink.jpg
    32.6 KB · Views: 354
  • monitor up.JPG
    monitor up.JPG
    132.3 KB · Views: 423
  • door view.jpg
    door view.jpg
    37 KB · Views: 458
  • coat rack installed.jpg
    coat rack installed.jpg
    32.9 KB · Views: 434
To avoid these ads, REGISTER NOW!
OP
K

kmcphee

Well-known member
Joined
Dec 20, 2012
Messages
66
Location
Hammonds Plains, Nova Scotia, Canada
over the weekend I got some more cabinets up.......more paint......even started tiling where the sink will go.
 

Attachments

  • TR6 custom dash.jpg
    TR6 custom dash.jpg
    33.5 KB · Views: 242
  • TR6.jpg
    TR6.jpg
    31.2 KB · Views: 254
  • workbench.jpg
    workbench.jpg
    26.5 KB · Views: 194
  • toolbox.jpg
    toolbox.jpg
    37.4 KB · Views: 177
  • stereo and shelf for manuals.jpg
    stereo and shelf for manuals.jpg
    32.7 KB · Views: 193
  • side.jpg
    side.jpg
    31.8 KB · Views: 156
  • corner cabinet installed.jpg
    corner cabinet installed.jpg
    31.7 KB · Views: 171

Sludge Puppy

Well-known member
Joined
Jan 16, 2012
Messages
92
Those Audio Engines should be plenty for the garage :) Good start, looking forward to progress.
 

Omphaloskeptic

Well-known member
Joined
Oct 11, 2008
Messages
2,346
Location
Ultima Ratio, Wa.
Looking good! Great score on those cabinets (you ****!). Those lateral files look like they'll be useful also; how is the paint matching up? What's the story on the TR; especially that smoothed dash?
 
OP
K

kmcphee

Well-known member
Joined
Dec 20, 2012
Messages
66
Location
Hammonds Plains, Nova Scotia, Canada
Looking good! Great score on those cabinets (you ****!). Those lateral files look like they'll be useful also; how is the paint matching up? What's the story on the TR; especially that smoothed dash?

Paint is a ford blue; I'm painting the whole fronts so they match. Its a close match though. Those shelves on the wall were white when I started so the match is almost bang on.

The Tr6 is another story; I have spent a lot of money on the body ($7,000 +++), custom fab work all over the car. That dash was hand made from scratch. The window frame was also lowered 3" and stretched out to fit the original windshield cut down. Unfortunately the guy that did the custom work passed away before the car was painted. The shop did not prep for the paint properly and every panel has paint & clear bubbling right down to the steel. I am very frustrated as the local shop (Overall Auto Services in Dartmouth, NS) will not make this right. After several attempts over the past couple of years I have given up. I've chosen to now remove the body and have it repainted in a different color. I just can't recommend this shop to anyone; they do not stand behind their work!!!

I do have big plans for the TR now that I have a bigger shop to work in. Once the body is removed I'll get to work on the power plant that is going in there. Hint, Hint: not the original straight 6 or a V8 :headscrat....think more cylinders. LOL
I’m just lining up the drive train now then on to fitment. :D
 

Omphaloskeptic

Well-known member
Joined
Oct 11, 2008
Messages
2,346
Location
Ultima Ratio, Wa.
Wow, $7k in the body work alone and yet the paint shop screwed the finish? Very sad, I'll bet the craftsman that did the custom work is still spinning in his grave. Did O.A.S. even attempt to placate you or did they just offer excuses? I've heard of people who were screwed over by various shops (not just auto paint), who have taken the time to park the item(s) on a public street near or in front of the offending service with a big sign inviting passersby to see the shoddy work done. The power of advertizing works both ways, and when craftspeople won't stand behind their work and make it right, then they deserve to be stood up in front of the court of public opinion and judged accordingly. :rant::soapbox:


"Would love to hear some thoughts / comments / improvement suggestions?"

In regard to the above request....

- Be prepared to add more light fixtures as the dark (blue-gray ?) and the brown (?) porcelain tile will tend to **** up the light.

- Keep plenty of rinse buckets of clean water at hand as you do the grout cleanup to prevent a haze from forming, and use a proper grout sponge.

- Strike numerous guidelines (blue chalk) over the entire main floor (after carefully measuring the layout multiple times) and hit the lines with some clear spray (lacquer ?) to keep them visible through the entire process.

- Investigate the use of a bonding agent/sealer latex coat prior to laying down the mortar. In a garage situation, the latex would mitigate moisture accumulation beneath the tiles via capillary action. With your house being just a year old, you may already have a vapor barrier beneath your slab, but the latex sealer helps the mortar bond.

CAVEAT - I am not a professional tile setter, but these are things I've done/learned on my own tiling projects. I used this book as a learning guide to help me; I thought it was very complete and well-written -

http://www.amazon.com/dp/1561580805/?tag=atomicindus08-20


By the way, I really like the color combination of the wall color and the cabinet color. Could you provide specific info on color codes and brands used?
 
OP
K

kmcphee

Well-known member
Joined
Dec 20, 2012
Messages
66
Location
Hammonds Plains, Nova Scotia, Canada
Wow, $7k in the body work alone and yet the paint shop screwed the finish? Very sad, I'll bet the craftsman that did the custom work is still spinning in his grave. Did O.A.S. even attempt to placate you or did they just offer excuses? I've heard of people who were screwed over by various shops (not just auto paint), who have taken the time to park the item(s) on a public street near or in front of the offending service with a big sign inviting passersby to see the shoddy work done. The power of advertizing works both ways, and when craftspeople won't stand behind their work and make it right, then they deserve to be stood up in front of the court of public opinion and judged accordingly. :rant::soapbox:


"Would love to hear some thoughts / comments / improvement suggestions?"

In regard to the above request....

- Be prepared to add more light fixtures as the dark (blue-gray ?) and the brown (?) porcelain tile will tend to **** up the light.

- Keep plenty of rinse buckets of clean water at hand as you do the grout cleanup to prevent a haze from forming, and use a proper grout sponge.

- Strike numerous guidelines (blue chalk) over the entire main floor (after carefully measuring the layout multiple times) and hit the lines with some clear spray (lacquer ?) to keep them visible through the entire process.

- Investigate the use of a bonding agent/sealer latex coat prior to laying down the mortar. In a garage situation, the latex would mitigate moisture accumulation beneath the tiles via capillary action. With your house being just a year old, you may already have a vapor barrier beneath your slab, but the latex sealer helps the mortar bond.

CAVEAT - I am not a professional tile setter, but these are things I've done/learned on my own tiling projects. I used this book as a learning guide to help me; I thought it was very complete and well-written -

http://www.amazon.com/dp/1561580805/?tag=atomicindus08-20


By the way, I really like the color combination of the wall color and the cabinet color. Could you provide specific info on color codes and brands used?


Thanks for the info on the tile setting, especially the lacquer tip. The cabinet paint is a Rustoleum "Ford Blue"; I have been doing one cabinet at a time with spray cans. If I had it to do over I would wait for warmer weather and do them all at once outside with a spray gun. The wall paint is Glidden from Home Depot, its a steel blue color (satin finish); I can get you the code if you like? I do plan on putting corrigated metal on the bottom half of the wall (34"? up) all the way around; that might help brighten it up a little. It is quite bright in there now with the three double flourecents installed, however I could easily add a 4th light in there no problem at all.

I have plans for that body shop. They frequent all the local car shows to promote themselves. Once mine is done I might just have to set up right next door to them with a nice little sign!!! Maybe some before & after pictures of my build to show the quality of their work.


Omphaloskeptic

Well-known member
Joined
Oct 11, 2008
Messages
2,346
Location
Ultima Ratio, Wa.
Thanks for the paint info; no code necessary.

A fourth light fixture might be a useful addition in the garage. I've appreciated having a separate double halogen troffer fixture suspended above my main work bench on its own circuit; allows me some flexibility in my lighting options.

The corrugated metal wainscoting is an idea I'd like to employ in certain areas of my shop also; maybe not the entire periphery but something like 8' foot sections interspersed with 8' foot sections of bead board (or similar) for visual interest. The height of wainscoting is problematic for me too! I'm wondering if in your case it makes sense to top out at the window sill, or perhaps extend it upwards to the bottom of plug plates, or even plan to incorporate it as a backsplash above work surfaces? Thomas (BB767) delt with corrugated material as a backsplash nicely for his Barn Bench project. Good luck with your garage and please keep us posted.
 

KPSquared

Well-known member
Joined
Aug 18, 2010
Messages
2,750
Location
Wetaskiwin, Alberta, Canada
Beauty garage! Love where this is going. I saw the "pop up monitor" and immediately realised you must be a fellow Canuck. Did you take apart the Mastercraft cabinet or have a wrecked on or what? That was an idea of mine the first time I saw those tool boxes.

Keep up the great work.
 
OP
K

kmcphee

Well-known member
Joined
Dec 20, 2012
Messages
66
Location
Hammonds Plains, Nova Scotia, Canada
Beauty garage! Love where this is going. I saw the "pop up monitor" and immediately realised you must be a fellow Canuck. Did you take apart the Mastercraft cabinet or have a wrecked on or what? That was an idea of mine the first time I saw those tool boxes.

Keep up the great work.

I never used that part of the box. I was cutting off the welds for the pop up section to remove it so the box would sit a little closer to the wall. Once removed I had no idea what to do with it until one lazy Saturday on old Mission Impossible movie came on tv and bingo the idea was born!
 
OP
K

kmcphee

Well-known member
Joined
Dec 20, 2012
Messages
66
Location
Hammonds Plains, Nova Scotia, Canada
Well I have a bit more done in the garage. I laid down some tile so I could get the back cabinets (and beer fridge) in place. I built a cabinet around a steel drawer unit I picked up cheap (painted it blue to match everything else) Just have to sand and paint the MDF to match the wall color.

I can now get my sink hooked up!!!! :rocker: ***** not having access to water in the garage when tiling, cleaning etc.

I can also now order the 9' butcher block needed to complete my bench. :willy_nil

I would have loved to clear out the garage completely and just get the tiling done but being smack in the middle of winter made this a problem. Anyway now that the cabinets are in place I just have to roll out the car and cover it.
 

Attachments

  • sink with tile.jpg
    sink with tile.jpg
    30.7 KB · Views: 141
  • fridge cabinet 2.jpg
    fridge cabinet 2.jpg
    30.7 KB · Views: 151
  • fridge cabinet.jpg
    fridge cabinet.jpg
    29.9 KB · Views: 157
  • bench with tile 3.jpg
    bench with tile 3.jpg
    35 KB · Views: 167
  • bench with tile 2.jpg
    bench with tile 2.jpg
    31.5 KB · Views: 160
  • bench with tile.jpg
    bench with tile.jpg
    29.1 KB · Views: 171
OP
K

kmcphee

Well-known member
Joined
Dec 20, 2012
Messages
66
Location
Hammonds Plains, Nova Scotia, Canada
I am finished the shelving top and backsplash. Did it in Hemlock with a dark stain. I was going to order in a butcher block for this but it was expensive for a little shelf !! .....and it really isn't a workspace; just wanted to clean it up a little. Found some hooks at Princess Auto to neatly store my drill collection, LOL (never thought I would ever have 5-6 drills)

I am undecided on the bench grinder location; leave it where its at and make up an aluminum shroud around it to collect the sparks, dust, etc) ....or I do have future plans on building a welding table on heavy duty casters so I can move around or bring outside. Probably best to put it on the table.

Thought I would throw in a shot of the TR6.......I have big plans for this car; I just picked up a donor car (BMW 750 - V12) :evil: Should be fun shoe-horning that 12 into the 6'er.
 

Attachments

  • TR6 side view.jpg
    TR6 side view.jpg
    36.6 KB · Views: 170
  • shelves with top and back splash.jpg
    shelves with top and back splash.jpg
    39.9 KB · Views: 183
  • grinder.jpg
    grinder.jpg
    40.4 KB · Views: 152
  • drill storage 2.jpg
    drill storage 2.jpg
    41.9 KB · Views: 197
  • drill storage.jpg
    drill storage.jpg
    46.8 KB · Views: 171

Kevin54

MEMBER EMERITUS
Joined
Jan 12, 2005
Messages
29,341
Location
Urbana, Ohio
Looking good!! I think the gray walls really warmed it up vs. the white walls. Are you going to throw a stripe around the perimeter?
 
To avoid these ads, REGISTER NOW!
OP
K

kmcphee

Well-known member
Joined
Dec 20, 2012
Messages
66
Location
Hammonds Plains, Nova Scotia, Canada
Looking good!! I think the gray walls really warmed it up vs. the white walls. Are you going to throw a stripe around the perimeter?


I know its been done a million times but I'm doing the corrugated metal as a wainscoting around the whole garage. Only difference is that I'm going to use old rusted up roofing; cut it to height and spray with a clear coat). Not that I don't like it new and shinny I just want more of a vintage look.
 

Sunbimmer

Well-known member
Joined
Dec 6, 2011
Messages
2,022
Location
The province of Limburg, The Netherlands
I know its been done a million times but I'm doing the corrugated metal as a wainscoting around the whole garage. Only difference is that I'm going to use old rusted up roofing; cut it to height and spray with a clear coat). Not that I don't like it new and shinny I just want more of a vintage look.

Wow like the idea :thumbup:, please post pictures if you're done with that.
 

Omphaloskeptic

Well-known member
Joined
Oct 11, 2008
Messages
2,346
Location
Ultima Ratio, Wa.
It's certainly coming along nicely. Are you learning to LOVE/HATE tiling yet? lol

You've just got to start a separate thread for the TR6/BMW750! Let's see pics of the donor car as it gets its enginectomy. Will the TR6 ultimately be called the TR6+6, the TRBMW, or what?
 
OP
K

kmcphee

Well-known member
Joined
Dec 20, 2012
Messages
66
Location
Hammonds Plains, Nova Scotia, Canada
It's certainly coming along nicely. Are you learning to LOVE/HATE tiling yet? lol

You've just got to start a separate thread for the TR6/BMW750! Let's see pics of the donor car as it gets its enginectomy. Will the TR6 ultimately be called the TR6+6, the TRBMW, or what?


Tiling is probably the worst home improvement job I have ever done. My back & knees are not built for it.

Thats what I was thinking TR6+6. I'm not bringing the BMW home for a couple of weeks. I want the garage to be done first so I can focus and go 100% into the car build. I might have a pic on my phone.
 

akdiesel

Well-known member
Joined
Aug 8, 2008
Messages
2,617
Location
Wasilla, AK
kmcphee
Nice work on the garage. The walls and tile are a dark choice but look good, and as Omphaloskeptic said soak up the lighting but correctly placed lights (bench lighting and above the car lighting) should correct that.
 
OP
K

kmcphee

Well-known member
Joined
Dec 20, 2012
Messages
66
Location
Hammonds Plains, Nova Scotia, Canada
More cabinets bought and installed. I got these black upper cabinets for $20 bucks again from the university. They are steel with sliding doors; 9' in total / 3 cabinets. I was going to paint them blue but decided the black works well with the other colors and it saved me alot of time; just had to put them up.

The 3 ton Arbor Press was free from work; just cleaning it up and getting it ready for paint. I'm also going to mod it so it will ratchet instead of adjusting the bar.
 

Attachments

  • bench with tile 4.jpg
    bench with tile 4.jpg
    32.8 KB · Views: 69
  • 3 ton arbor press - before pic 2.jpg
    3 ton arbor press - before pic 2.jpg
    36.5 KB · Views: 64
  • black upper cabinets installed 3.jpg
    black upper cabinets installed 3.jpg
    36.4 KB · Views: 75
  • black upper cabinets installed 2.jpg
    black upper cabinets installed 2.jpg
    33.9 KB · Views: 79
  • black upper cabinets installed.jpg
    black upper cabinets installed.jpg
    30.8 KB · Views: 73
OP
K

kmcphee

Well-known member
Joined
Dec 20, 2012
Messages
66
Location
Hammonds Plains, Nova Scotia, Canada
Just picked up this 1990 BMW 750il (V12). the engine from this will be fitted in the TR6. Anyone looking for parts from the 750; everything is up for grabs except for the drivetrain. :rocker:
 

Attachments

  • bmw front.jpg
    bmw front.jpg
    56.1 KB · Views: 39
  • bmw side.jpg
    bmw side.jpg
    52 KB · Views: 39
  • bmw interior front.jpg
    bmw interior front.jpg
    32.3 KB · Views: 43
  • bmw interior front 2.jpg
    bmw interior front 2.jpg
    31.6 KB · Views: 39
  • bmw engine.jpg
    bmw engine.jpg
    49.8 KB · Views: 47
  • TR6 side view.jpg
    TR6 side view.jpg
    36.6 KB · Views: 45
  • TR6 custom dash.jpg
    TR6 custom dash.jpg
    33.5 KB · Views: 33
Last edited:

dubber

Well-known member
Joined
Dec 31, 2012
Messages
5,326
Location
Canada's Capital
Oh man your space is getting sweet. Can't believe your gonna put that V12 into the Tr6. You should also put in the "car phone" :)
 

CNGsaves

Well-known member
Joined
Sep 26, 2012
Messages
13,233
Location
KS and OK
Just picked up this 1990 BMW 750il (V12). the engine from this will be fitted in the TR6. Anyone looking for parts from the 750; everything is up for grabs except for the drivetrain. :rocker:

Nice work on the garage!!

That'll be a Serious Shoehorn to slip that v12 into the TR6 . . . . looking forward to seeing that happen!!

Good luck and keep the pics a coming.
 
OP
K

kmcphee

Well-known member
Joined
Dec 20, 2012
Messages
66
Location
Hammonds Plains, Nova Scotia, Canada
Nice work on the garage!!

That'll be a Serious Shoehorn to slip that v12 into the TR6 . . . . looking forward to seeing that happen!!

Good luck and keep the pics a coming.


Thank you. At first I thought it was going to be impossible but when I looked at the dimensions of the V12 its actually smaller than a big block and guys have been putting those in TR's for years. It has a 60 degree V vs the traditional 90 degrees; that makes a huge difference and i might not even have to mess with the steering. Its 1.5" shorter than the big block. Its also an all aluminum block so the weight is around 500 lbs. The current cast iron straight 6 weighs in at 450 lbs or so.

I am going with 12 individual throttle bodies with stacks coming out the hood. Stock the engine has about 300 hp and really is a torque monster. It had to be to haul that big *** car around. Should be fun in my car weighing in at 2,000 lbs.
 

Twomato

Well-known member
Joined
May 26, 2010
Messages
126
Location
CHICAGO
Great space. I really like the blue cabinet paint and the tile floor. Had an '96 e38 750 iL V12 myself, you're going to love the smooth, constant grunt of torque.
 
OP
K

kmcphee

Well-known member
Joined
Dec 20, 2012
Messages
66
Location
Hammonds Plains, Nova Scotia, Canada
Great space. I really like the blue cabinet paint and the tile floor. Had an '96 e38 750 iL V12 myself, you're going to love the smooth, constant grunt of torque.

Thank you!! I do love the V12 already.....picked it up last night and drove it home. First time behind a V12 and trust me my wife was laughing at me the whole time cause of the huge grin from ear to ear. Even with all the weight of that car, when I stomped it, it had plenty of get up and go!!!:D
 

Omphaloskeptic

Well-known member
Joined
Oct 11, 2008
Messages
2,346
Location
Ultima Ratio, Wa.
The the TR6+6/TRBMW will be a fun project to watch; keep up posted!

Will you transplant the third member also, or is the TR6 stock rear end stout enough to handle all that extra torque? Are all the front end chassis parts fairly fresh or are you planning to upgrade to better accommodate the V12's bit of extra weight and power? I'm thinking of a braking improvement here to compensate for all that extra speed you'll have; you'll still have to stop that beast and a drag chute is probably not an option. :3gears:

Your shop is coming along nicely, especially with all those deals you are scoring. I like the black uppers; do you plan to paint the cabinet above the bench black also to keep the same look?
 
OP
K

kmcphee

Well-known member
Joined
Dec 20, 2012
Messages
66
Location
Hammonds Plains, Nova Scotia, Canada
The the TR6+6/TRBMW will be a fun project to watch; keep up posted!

Will you transplant the third member also, or is the TR6 stock rear end stout enough to handle all that extra torque? Are all the front end chassis parts fairly fresh or are you planning to upgrade to better accommodate the V12's bit of extra weight and power? I'm thinking of a braking improvement here to compensate for all that extra speed you'll have; you'll still have to stop that beast and a drag chute is probably not an option. :3gears:

Your shop is coming along nicely, especially with all those deals you are scoring. I like the black uppers; do you plan to paint the cabinet above the bench black also to keep the same look?


I have a pre-made kit (Good Parts) to bolt in an LSD diff from a 300 ZX, it can handle up to 400 hp. Once I have the engine / transmission in place my plan is to lift the body and go at the frame; lots of strengthing and new parts for everything. I will probably order front and rear disc brake kits from Good Parts; Richard has developed the front and rear kits with Wilwood calipers. He also has beefier front aluminum hubs and rear CV axles. I already have his stiffer springs and nyltron suspension pieces. Front and rear sway bar kits I bought from another source.

I'm thinking I should start a new thread on the TR6 build. I will be tearing into the BMW in a couple of weeks. There will be tons of pics along the way and its always good to have other comments / help in areas I get stuck, especially when it comes to the wiring. That will be my week point but I have lots of time to study and plan the wiring. Already looking at the Megasquirt Pro3 for a stand alone fuel management. There's also an updated wire harness for the TR6.

I was thinking the same thing on the upper blue cabinet so I may just pull it down and quickly spray it black to match the other ones
 
Last edited:
To avoid these ads, REGISTER NOW!
Top Bottom