To avoid these ads, REGISTER NOW!

Upgrading air compressor plumbing, any advice?

Strouty

Well-known member
Joined
Mar 21, 2010
Messages
38,210
Location
Southern Maine
Today I finally got so fed up with the moisture in my airlines I decided to fix it, hopefully for good. I am basing this on how TP tools recommends it. I am using 1" black iron for the main supply then 3/4" for the risers and drops. I need to make another trip to the plumbing supply store tomorrow and was hoping to get some advice on where to put my unions. Here are my pictures so far. I also bought a new 1/2" rubber hose reel, it has 50' and I was wondering if I should shorten it some? I am also adding a true disconnect so I won't have to worry about the compressor going crazy if I get a leak in the system. Here is the TP Tools link:

http://www.tptools.com/tech-metal-piping.dlp
 

Attachments

  • 20130830_185552.jpg
    20130830_185552.jpg
    97.2 KB · Views: 794
  • 20130830_185545.jpg
    20130830_185545.jpg
    90.8 KB · Views: 888
  • 20130830_185530.jpg
    20130830_185530.jpg
    107.1 KB · Views: 757
  • 20130830_185522.jpg
    20130830_185522.jpg
    83.7 KB · Views: 636
  • 20130830_185558.jpg
    20130830_185558.jpg
    113.4 KB · Views: 718
To avoid these ads, REGISTER NOW!

MTW

Well-known member
Joined
Aug 6, 2013
Messages
294
Location
SE Michigan
Here are some ideas that you may use if so inclined, I've been doing it this way for years at my own shop and customers I service. This go's against the common school of thought, such as provided by the sample link you provided.
Compressor%20Piping%20Sample.jpg


And here is the reasoning...

1)Temperature of the air. First thing to recognize in moisture removal and rust control is the temperature of the air. Compressing air makes it hot, hot air holds more moisture, heat raises the dew point. The dew point is the temperature where condensation occurs. You need to cool the air before condensation can occur to effectively remove water from the system. The most condensation collection inside the piping trunk is usually within the first 20-30' of piping where the air gets a chance to cool after leaving the hot compressor tank. If you look at most heavy duty industrial units, they have an after-cooler radiator right on the side of the compressor to help dissipate the heat as soon as possible.

You can build your own radiator out of piping to dissipate the heat as soon as it leaves the compressor tank, such as done in this post.
http://www.garagejournal.com/forum/showpost.php?p=960267&postcount=38 I have seen this method used in bump shops in the past, and I suspect it works pretty good, when done properly.

2) Slope Pipe. My method is a little different. I just use the main trunk piping to cool the air. Then install it like a plumbing drain system would be, sloped 1/4" per foot or more to a drip leg drain.

Your sample drawing shows this slope to drain, however I think the slope is backwards from the way it should be. The way the sample shows it, any condensation in the trunk pipe is forced all of the way to the end of the run before it can drain off to the drip leg at the end of the run. Therefore any air passing over the water accumulating in the bottom of the trunk pipe can pickup more moisture.

Sloped back towards the compressor is more ideal, this is where the moisture is coming form, and usually much closer to where the actual dew point occurs inside the piping, especially on systems that are not run very hard (hot). To reference the sample drawing again, this is where you really want/ need a drip leg drain point, and it is lacking one there. Most of the condensation occurs early in the piping and should be removed as soon as practicable to prevent buildup and rusting of the system. Normally about 70-80% of the system moisture can be removed at this point.

I have serviced Industrial systems with a 3" trunk piped just like the sample is and the trunk became so full of water that no air could flow to the drops, from the water buildup almost entirely blocking the flow of air. Any air that did escape through the water blockage was at 100% humidity, and didn't bode well for their tools or paint jobs. The drain at the end had been neglected so long that the rust sediment completely blocked off the drain valve even when it was opened under pressure.

Another advantage that can be had by draining the trunk at the compressor end is the combination of drains. Where the sample drawing shows the flex hose connected to the trunk riser, install a tee here with the supply hose coming in the side inlet, and a drip leg out the bottom. Keep the drip leg pipe the full size of the trunk run, as long as possible and put on a drain valve. From the bottom of the drain valve reduce down to 3/8" polyethylene tubing. Install a polyethylene tubing fitting in the tank drain after the drain valve. Combine these two 3/8" tube drains into one manifold and install an automatic drain valve with timer. In this way the tank and trunk pipe can both be drained automatically with the same automatic valve, adding convenience and saving money, with only one automatic drain valve. Usually this type setup will remove about 80-90% of the condensation from the system, and help prevent rusting of the trunk piping and bottom of the tank. All while saving you the hassle of trying to remember to manually drain the system as you should.

A word of advise about automatic drain valves. Most commercial units come with 1/8 or 1/4" pipe size fittings, and the actual orifice hole inside the solenoid valve is usually an 1/8" or less. This does not work very well when you have scale and rust coming out of the tank bottom and trunk piping. It will clog the small orifice, cause erratic operation of the valve, the valve no longer drains and usually sticks open when debris gets in the seat area. This can be remedied by installing a larger solenoid on the existing timer control box.

I try to keep all drain lines no less than 3/8" ID to pass scale and crud particles. For the solenoid valve I use 1/2" NPT port units which normally have a 3/8" orifice in the valve body. While piping this drain/manifold setup if you add some extra ports you can install drain tubing from your other trunk drip legs, coalescers, aftercoolers, and refrigerated dryer if you have them. Run all polyethylene tubing drains downward, in a loop fashion, for it to collect water in the tubing, then back upwards to follow the trunk piping back to the drain manifold. Once the valve opens all collected water slugs in all the drain's tubing's will be forced back to the drain manifold. One last thing is to install a globe valve at the output of the drain solenoid, to throttle the output as required. When you have several drains connected to a single manifold you get a lot of output all at once, and is unnecessary to get rid of the condensate.

Here is an example of one unit I constructed for a problem job at a customer site.
Drain%20manifold%20construction.jpg

The left upper rail is for system components that had their own automatic drain valve, it dumps downward to the outlet to the oil/water separator tank. The right rail is for all of the constantly pressurized system drains that I spoke of above.

Continued...
 

MTW

Well-known member
Joined
Aug 6, 2013
Messages
294
Location
SE Michigan
The above drain manifold and described system was installed three years ago on an ancient 60 year old trunk piping system with scaly 3" pipes and 200Gal receiver tank. The system had 1) 100HP & 1) 50HP screw compressors, aftercooler, refrigerated dryer, several trunk drip legs, and coalesceser's. Before this fix three compressed air companies/contractors tried to solve the water problem the customer was having in the system. Oil, debris and moisture was causing damage to their robot controls and pneumatic tooling. They installed more than 5 standard automatic drain valves, the conventional way, to try and combat the problem, but they never reliably worked due to the reasons listed above. Since the install as described, no one has had to touch the system other than to clean out the oil/water separator tank. Not a drop of moisture or oil comes out of the system all the way across the plant at their production area, even on the most humid soaked days.

3) Turn the trunk take-off drop tees down. Pointing the tees up as in the sample drawing is a bad idea. The thing you are trying to accomplish is get the condensation out of the piping trunk as quickly as possible, not force it completely across the entire system as suggested it the sample drawing. Again this go's against conventional wisdom. Conventional reasoning is that taking air off the top of the trunk, will prevent condensation from entering the drop pipe. That may be true to a certain extent, but it traps the water/oil in the trunk and causes it to be forced across the system. Dry air flowing across this trapped moisture will absorb it and transmit it to all downstream devices.

Picture in your mind's eye, a tee facing up will always collect water/sediment in the internal recess formed by the male pipe screwed into the female fitting. It will never drain out completely, even if the pipe has the proper slope to it.

Now picture the reverse scenario. With the tee pointing down, no water, scale or sludge will ever be allowed to accumulate in the internal recess of the fitting. Anything liquid or solid coming down that horizontal trunk will naturally fall out in the first tee that it crosses. The remainder of the trunk piping after the first or second drop tee should remain clean and dry, as long as the dew point temperature has been achieved by that point.

On the drop pipes, install a tee, and always take air off of the side, never on the bottom. The bottom should always have a decent length 6" or more drip leg, and a drain valve. This is the part that is shown correctly in the sample drawing. If you connect a drain tube as suggested above to the first or maybe second drop pipe, and run back to a drain manifold, you should have a perfectly clean system beyond that point. Any downstream drip legs installed will most likely never need manual draining or connection to the drain manifold. Therefore you could eliminate the cost of the drain valves downstream and just use pipe caps, to easily remove when de-pressurized to check that your system is working correctly.

Lastly on the piping portion. Every layout and instillation situation is unique. I tried to present my concepts in a simple fashion and justify my reasoning. You may not be able or willing to do the things exactly as suggested with your particular layout. And yet as I stated earlier, this flies in the face of conventional wisdom, as can be seen by the numerous systems installed exactly like the sample drawing. The moral of the story is to treat it all like a natural gas line and a drain line at the same time. These notions have been a requirement in those particular trades for as long as I've been sucking air here. I just learned to apply them in a different situation, after much field experience, working on systems installed by others using different methodologies, that didn't quite work so well.

A system installed like this is normally clean enough for me to blow off computer motherboards and cases without any line filtration at the final point of use without a single issue in at least 10 years. The only time I really use a filter/regulator assembly is when I connect a paint gun, mainly to reduce the line pressure.

Fastening of the pipe to the structure is also another issue. Most folks like to use two hole pipe straps, or pluming standoffs. Those can work, especially on a tight budget, but they make installing, servicing and modifying the system a pain in the ****. My preference is to use strut channel and clamps (Unistrut). This stands the pipe securely off of the structure, while for providing getting wrenches on any fitting without having to resort to removing the supports as with two hole straps. It comes in may depths 13/16 and 1 5/8 are most common, I normally use the shallow version to keep it close to the wall, but yet provide just enough room for a wrench jaw behind it.

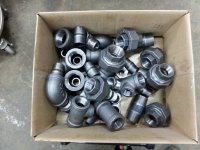
As to the placement of unions. Unions can be expensive compared to other fittings. I put them at every drop and point in the system that is likely to require service or modification later. Such as at any filter regulator assembly, compressor output, or major changes of direction. If you ever need to tap in an additional drop, extension, or hose reel, it's a lot better if you don't have to get out the saw and cut it out, then re-thread the piping again, just to take it apart. And if you have any leaks when pressure testing the system it makes it a hell of a lot easier on you to repair them.

4) Filters, coalescers, and regulators. Filters and coalescers don't do much good if anything, when placed in the run before it attains the due point temperature. If you need proof of this concept, take a portable compressor that is spewing condensation from the output as they normally due when run hard. Then attach a filter/coalescer right at the output where the air is still hot. The moisture will pass through pretty much unimpeded by the filter assembly. It will only condense and come out further down the hose, after it cools a bit. Usually right where your tool is attached, normally the only place it can go.

Installing filter/coalescer assembly's is normally done at the bottom of the drops, right at the point of use, to be most effective. Properly placed drip legs, normally will do the heavy work for you. Sometimes on larger systems as mentioned above, you may need a coalescer in the main line to catch the remaining condensation in the main trunk, that was missed by the other traps upstream. In this case, locate it as far downstream as possible, to be the most effective. If need be, drop the pipe down in a loop to put the filter where you can easily service it, then take the trunk back up. In this way it becomes just another trap to force the water down by gravity where it can be expelled from the system. Any main line filter or trap should be tied back to the main drain manifold as suggested earlier.

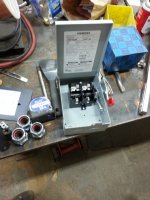
Regulators. Put them where you need them to reduce pressure, preferably after the dew point to reduce contamination of the pneumatic control circuitry ports inside them. If it's a two stage pump running at 175 PSI, I like to put a unit on the main line to reduce the overall system pressure. This relieves excessive pressure on the downstream equipment, hoses, couplers and make it last longer. If I do put a main line unit in, I normally install one or two take-off ports before it. For high pressure to bust loose a stubborn nut or bolt that wont come loose with standard pressure. If you have a single stage unit or a screw type unit, normally no regulation is required, since they output much lower pressure already.

5) Another of my post's with useful information on compressor selection, placement, and troubleshooting.
http://www.garagejournal.com/forum/showthread.php?t=212927

;)
 
OP
S

Strouty

Well-known member
Joined
Mar 21, 2010
Messages
38,210
Location
Southern Maine
That is a bunch of great advice. I am glad you posted. I looked at the diagram and thought it seemed weird to go up and then back down. It also makes a mess of the pipe too. I am not too worried about the cost of unions, they will make life a lot easier in the long run. I am only doing one wall at this time, I am pretty sure I will be moving the compressor, but it will be there for close to a year and I would like to have some dry air. I am installing a few hose reels, but I like them on the ceiling, would you just put the tee up high or would you put it at a lower level and then plumb up to the reel? I have a pressure regulator and filter that will be going before the reel. Also my main unit is set to 150 PSI even though it is capable of 175 PSI.
 

MTW

Well-known member
Joined
Aug 6, 2013
Messages
294
Location
SE Michigan
Placement of the tees for the hose reels. If you have some drip legs installed in the main trunk before the reels, then just point the reel tees up. If not, then point down, tap off the side of the drop, and install the drip leg on the bottom. Another option is to use a cross tee, one up and one down leg.
 
OP
S

Strouty

Well-known member
Joined
Mar 21, 2010
Messages
38,210
Location
Southern Maine
I was going to put the tee on the vertical line, not horizontal. My wall is only thirty feet, so I was going to put three legs spaced about 10' apart. Should I not put anything on the first leg and let that be my drain for now? I will try and draw a picture of what I am doing. My ceiling is 12'6" so I can get a good amount of pipe in a short span. Of course I have no idea how far the air needs to go in the pipe before it will condense.
 

MTW

Well-known member
Joined
Aug 6, 2013
Messages
294
Location
SE Michigan
I would try to get at least 20' of pipe and at least one drain point in the horizontal run, before your first actual takeoff point. If you plan on relocating later can you add that additional pipe now, to get more footage before your first takeoff point?
 
Last edited:
OP
S

Strouty

Well-known member
Joined
Mar 21, 2010
Messages
38,210
Location
Southern Maine
Does the 20' include vertical as well as horizontal? If so I will have 10' vertical, then ten more horizontal before the first drop. I can leave that drop as my maine drain line. That would give me another ten feet before the second drop, I can also plumb the reel after the second drop. Once I move the compressor everything will change, I will also be adding another compressor (25 hp rotary screw) just for my blast cabinet and big jobs.
 
OP
S

Strouty

Well-known member
Joined
Mar 21, 2010
Messages
38,210
Location
Southern Maine
Another question is can you go both directions with the plumbing or is it not advised? Kind of like a tee off the compressor.
 
Last edited:

MTW

Well-known member
Joined
Aug 6, 2013
Messages
294
Location
SE Michigan
20' in any plane should get enough cooling to at least start the condensation forming, the more pipe distance the more effective it will be for you. Make sure you drain the horizontal run at least once before a point of use tap. Second tap for the reels should work OK.

If you want to go two directions, that's fine just try to run uphill both ways, to make the riser pipe the first drain, put a drain in each horizontal run before the first point of use.

The main factor on the distance is how hot you run your system. If it's really hot you need more distance, if it's occasional light use you may get by with less distance. To play it really safe, you could run across the shop and then back again for additional footage first. Similar to the other post I referenced with the fabricated radiator, did you look at that, is that an option for you?
 
Last edited:

MTW

Well-known member
Joined
Aug 6, 2013
Messages
294
Location
SE Michigan
Take some time to thoroughly think about your layout, using the principals provided. Try to incorporate your future location change and additional compressor, so that you don't have a recurring problem, and force a redo when you get around to you changes later.
 

sberry

Banned
Joined
Jun 18, 2005
Messages
35,747
Location
Brethren, Michigan
Take some time to thoroughly think about your layout
Air is not wuite the same as electric in the sense there is not the same amount of fixed equipment. I snap air tools on and off dealing with one hose on most job, 3 drops in 30 ft is a waste of effort and way too complicated and adding removing hot hose connections is dangerous. I cover 4K sq ft work space with 3 fixed hose drops (2 would really do) and 2 hose reels and can have 2 reach any p[lace if needed.

1/2 is great but overkill for that comp unless trying to run 3/4 and 1 inch impacts.
 

sberry

Banned
Joined
Jun 18, 2005
Messages
35,747
Location
Brethren, Michigan
Air is not quite the same as electric in the sense there is not the same amount of fixed equipment. I snap air tools on and off dealing with one hose on most job, 3 drops in 30 ft is a waste of effort and way too complicated and adding removing hot hose connections is dangerous. I cover 4K sq ft work space with 3 fixed hose drops (2 would really do) and 2 hose reels and can have 2 reach any place if needed.

1/2 is great but overkill for that comp unless trying to run 3/4 and 1 inch impacts
One filter regulator covers a whole small garage.
 

MTW

Well-known member
Joined
Aug 6, 2013
Messages
294
Location
SE Michigan
I'm pretty certain that this discussion started for the purpose of getting rid of condensation. I don't think that ties in much with an electrical comparison or how many hose reels are installed or not, or if hose whips can be dangerous. Is there something constructive you have to contribute, to the issue of effectively removing condensation. That is the information that the poster was asking for, and that is what I tried to provide.
 

Nor'Easter

Well-known member
Joined
Nov 30, 2012
Messages
718
Location
Maine
The purpose of running extended lines is to cool the air so the moisture will become liquid. Black iron is not ideal as it does not dissipate heat well. It might work if you bury the lines to keep them cool, but once it is warm they will not dissipate much. I have 60ft of 3/4 copper, and a 20scfm coalescing filter at the end, not a drop ever.
 

MTW

Well-known member
Joined
Aug 6, 2013
Messages
294
Location
SE Michigan
Yep, copper is a better conductor of heat than steel, and corrodes less too. But not everyone is adept at sweating connections, not to mention the cost difference. 60' of pipe will make a dam good radiator, whether made of steel or copper.
 
OP
S

Strouty

Well-known member
Joined
Mar 21, 2010
Messages
38,210
Location
Southern Maine
Air is not quite the same as electric in the sense there is not the same amount of fixed equipment. I snap air tools on and off dealing with one hose on most job, 3 drops in 30 ft is a waste of effort and way too complicated and adding removing hot hose connections is dangerous. I cover 4K sq ft work space with 3 fixed hose drops (2 would really do) and 2 hose reels and can have 2 reach any place if needed.

1/2 is great but overkill for that comp unless trying to run 3/4 and 1 inch impacts
One filter regulator covers a whole small garage.

I am using the drops to support a drain, then one for each reel, essentially what you have, I need the extra pipe to help cool the air.

I'm pretty certain that this discussion started for the purpose of getting rid of condensation. I don't think that ties in much with an electrical comparison or how many hose reels are installed or not, or if hose whips can be dangerous. Is there something constructive you have to contribute, to the issue of effectively removing condensation. That is the information that the poster was asking for, and that is what I tried to provide.

:thumbup:

The purpose of running extended lines is to cool the air so the moisture will become liquid. Black iron is not ideal as it does not dissipate heat well. It might work if you bury the lines to keep them cool, but once it is warm they will not dissipate much. I have 60ft of 3/4 copper, and a 20scfm coalescing filter at the end, not a drop ever.

Black iron may not be able to cool as efficiently as copper, but it does cool the air a lot better than rubber hose. It is within my budget and being in my shop it makes more sense to have black iron than copper. I have movable pallet racks and I think the iron would handle an accidental bump better than the copper.
 
OP
S

Strouty

Well-known member
Joined
Mar 21, 2010
Messages
38,210
Location
Southern Maine
Yep, copper is a better conductor of heat than steel, and corrodes less too. But not everyone is adept at sweating connections, not to mention the cost difference. 60' of pipe will make a dam good radiator, whether made of steel or copper.

Exactly and worded better than my post.
 

sberry

Banned
Joined
Jun 18, 2005
Messages
35,747
Location
Brethren, Michigan
I want taking a shot at anyone here and your plan for condensate is fine but yes there is something constructive here. No point in worrying about a little water and blow a hand off unhooking a hose or putting 10X as many fittings as he will ever use. This isn't only for the OP but for anyone else that figures they need a couple dozen drops and 6 reels in the 30x40 to drain a pint sized comp in 30 seconds.

When you have several drains connected to a single manifold you get a lot of output all at once, and is unnecessary to get rid of the condensate.
Where died the OP get several drains?
 
To avoid these ads, REGISTER NOW!

sberry

Banned
Joined
Jun 18, 2005
Messages
35,747
Location
Brethren, Michigan
Only reason I mention this, again not so much for the OP who did mention budget but with screwed pipe it is easy to change, it can be a good idea to start simple, add if and where needed, doesn't do any good to put in a lot of fittings that find themselves un used for years. I can recall when I did design,, things didn't turn out exactly as planned, plugged some, added some.
 

MTW

Well-known member
Joined
Aug 6, 2013
Messages
294
Location
SE Michigan
In the post, and follow up questions I recommended 3 as a bare minimum.
1) tank drain 2) riser drain 3) at least one drain in the horizontal run
4) would be the coalescer that he mentioned
5) would be the additional screw compressor that he is adding.
and before he is finished he may add some additional would be my guess.
 

sberry

Banned
Joined
Jun 18, 2005
Messages
35,747
Location
Brethren, Michigan
I agree with MTW about all the drains and have seen several versions of that same TP drawing. I agree not directly related to condensate we may be able to put a T after filter C, run a hose to a reel or other fixed equipment and one to the cabinet.

I see a couple types of shops, one with no plumbing and some with too much or dead end with unused stagnant piping. Its great to plan and often unused equipment is stripped up and re placed or reused. One of the things I find hard to swallow on occasion is go slow, I want it all done, my last storage I added wire and pipe will likely sit for decades. Some of it I would have put in basic and made do till I really found the level and the hot spots.
 
Last edited:

CNGsaves

Well-known member
Joined
Sep 26, 2012
Messages
13,233
Location
KS and OK
Notice the TPTools diagram how the airline drops first go UP, then back down. This gives best chance of "dry air" being forced down the drop, while the moisture gets blown down the airline system towards the last drop while it cools off. Also don't forget to have the entire airline system to slightly slope downwards towards the last drop where you'll want ballcock valve to periodically dump any water.

OP you'll never regret building it right out of black pipe steel. It will last you a LIFETIME and next guy who buys that garage some day will be thanking you as well !! :beer:
 

pepi

Well-known member
Joined
Mar 27, 2013
Messages
2,883
Location
Woodstock, GA
MTW

Very good read learned a lot, wealth of knowledge in those words. Regarding the rubber air hose holding moisture. I have a run that goes over to another garage and used a 50 ft hose to reach it. I did notice more moisture and now understand why, so pipe will be an upgrade planed for the future . Thanks
 

sberry

Banned
Joined
Jun 18, 2005
Messages
35,747
Location
Brethren, Michigan
But, there is a lot of difference in piping buildings that may be huge and need long runs of hi pressure or a home garage.

Those 2 open couplers are basically unused, there is a source for the operator on the end of the reel, makes the only routinely used connection at the tool.

This type of thing allows for connection to hi pressure before reg and after filter IF needed. Could put a coupler on the reel feed and be able to move but I don't need it and hose barbs don't leak. I might have a hundred tools but really only need a couple couplings. I got half a dozen now I over engineered, have taken several out and plugged or hose barbed, the design is done.

Saves throwing a lot of money at things, saves a lot of maintenance.
 

Attachments

  • air reg combo.jpg
    air reg combo.jpg
    142 KB · Views: 397
Last edited:

devoncoolman

Well-known member
Joined
Mar 17, 2013
Messages
2,096
Location
quakertown pa
Lots of hose there. I just have hose run on my compressor for now. Building a new building in the next 2 years not gonna waste my time in my current garage. Only gonna turn into storage once the big building is done. I dont have much condensation issues currently but my garage stays cool. MTW knows what hes talking about. Theres no reason to build a crazy complicated air system for your home or even repair shop. As long as u use ur first drop as a drain and feed your lines 30' or do after the compressor with a drier you will be ok. Most of the water will be gone. An after cooler will really take care of that issue but not always cost effective.
 

sberry

Banned
Joined
Jun 18, 2005
Messages
35,747
Location
Brethren, Michigan
So back to condensate,,, is it a relatively minor design flaw that clogged the 3 inch steel manifold or is it a neglected drain?

I often try to come up with something that fits the user, not always the best and yes, no debate, the man knows what he is talking about.
 
Last edited:

CNGsaves

Well-known member
Joined
Sep 26, 2012
Messages
13,233
Location
KS and OK
You're also forgetting SBerry that you're in Michigan . . . . doubt you have the humidity and moisture in general as other locations. Also, everyone doesn't buy into notion of dragging around a long rubber air hose everywhere. Using your logic, only need a couple electrical outlets in garage as it would be no problem to drag around a 50 ft extension cord !!

Also, if OP wants to build a LIFETIME black pipe steel out of 30 or 40 ft of black pipe steel up and around perimeter, that's HIS money, he can spend it how he wants. Many a small body shop has setup airline system like OP is doing, and just need a simple dryer at the last drop for spray painting with dry air. Thus, couple hundred dollar investment in black pipe steel gives a LIFETIME of dry air.

I'd love for MTW to continue sharing proven strategies to capture and eliminate moisture in airline systems. He's the guru . . . we're the blind puppies. ;)
 

sberry

Banned
Joined
Jun 18, 2005
Messages
35,747
Location
Brethren, Michigan
Using your logic, only need a couple electrical outlets in garage as it would be no problem to drag around a 50 ft extension cord !!
That's why I made the original electric comparision, there is so much connected equipment involved you cant drag cord to every piece, its often along walls, easy to connect. My shop is large, cords we got to have but other than a light use one at a time on the floor, my Bud has a common garage and his most used outlet for remote work is a single cord reel.

I am not telling anyone to drag a long rubber hose, quite the opposite. Put a T in and fix a whip, put the reel where its convenient, move it if it aint right, 1 well placed reel is worth 3 that are not tuned to the environment.
 

sberry

Banned
Joined
Jun 18, 2005
Messages
35,747
Location
Brethren, Michigan
I'd love for MTW to continue sharing proven strategies to capture and eliminate moisture in airline systems. He's the guru . . . we're the blind puppies.
Me too, but could we clear something up between a couple of opinions. Which is right, CNG wants to slope it away and MT wants to slope it back.
 

AndyA

Well-known member
Joined
May 23, 2011
Messages
514
Location
Texas Near Dallas
My compressor has the built in aftercooler (between the compressor and tank). This works wonders for helping to remove moisture. Most of the water drops out in my tank and gets removed via the auto drain. The separator-regulator that follows the tank rarely sees any water.

The aftercooler is surprisingly small. It's 4 passes of 3/4 copper pipe maybe 8 or 9 inches tall and 2ft long. You might be able to build your own aftercooler using oil coolers. www.summitracing.com has oil coolers in the $35 and up range. These are smaller sized so you may need an electric fan, or more than one in series to do the job. I didn't see a pressure spec so you'd have to do a little more research. Some of these are copper pipe and some are aluminum. The down side is most of these are 1/2" tube and may cause more restriction than you want.

Automotive air conditioner condensers may also work. These will be rated for pressure above any typical compressed air system. They will also have lots of surface area and provide good cooling. The downside is the cost ($80+) and most will have smaller tube size.

Intercoolers for turbo setups are another option. Benefits are huge flow rates, so effectively zero pressure loss on your compressed air system. The downside is cost ($150+)
 

MTW

Well-known member
Joined
Aug 6, 2013
Messages
294
Location
SE Michigan
Strouty, in answer to your PM question.
"The thing about sloping back towards the compressor that confuses me is how does the condensate roll backwards against the air pressure?"

Air pressure doesn't push water down the pipe, only the actual air flow rate does.

If you think about a fresh bottle of pop, it is pressurized in the vessel, but the liquid contents are free to move with gravity. Normally, in the pipe, the main force acting on any liquid is gravity. So this means when there is no or little flow in the pipe, only gravity acts on liquid contents, whatever the pressure is, negative or positive.

This principle dramatically changes if there is a slug of liquid in the pipe however. A slug is when the pipe is completely full of liquid, this almost never happens in a air line, except when it never gets drained. This principle of letting a slug accumulate, is what I suggested earlier with the 3/8 polyethylene drain tubing. If the tube is not full with a slug, no water will be pushed out when the drain timer valves opens, the air go's right over the top of the water, when not completely full.

This would be a good way for you to to demonstrate to yourself the principals discussed here. Find a piece of tubing that is translucent or clear so that you can see a slug of water in, the bigger the better, to simulate your intended pipe size, but 3/8" will do. Connect one end to a source of air pressure with a supply shutoff valve. Run the tubing in an upward slope as suggested with your trunk line. Install a shutoff valve on the end of the line. Put a small amount of water in it so that you do not create a slug. Turn the air on slowly to simulate one of your tools in use, or connect a tool for real world test. You should witness a small/medium amount of turbulence of the water in the tube, while the air is flowing over it. When you turn the air flow off and leave the line pressurized, the water will flow back to the low end.

Similarly, you can demonstrate the drain principal mentioned earlier. With the same setup, put in enough water to make a decent size slug. Put the downward loop in the tube, to form a trap, then back up. Then open the exit valve. The entire slug will move toward the exit end. You should witness a rapid movement of the entire slug. At the point that enough water goes away that the slug is no longer filling the tube, the remaining water will again drain back to the low point(trap) in the tube.

I encourage you to do this test so that you can see the results for yourself. Keep in mind that the size of the tube or your trunk pipe matters greatly. The more circular area the pipe has inside, the less effect the air flow will have on the water collected in the bottom of the pipe. And conversely the smaller the drain tube is the more complete the slug will be evacuated from the trap. as stated earlier I don't use drain lines smaller than 3/8", unless the device will not accept it, say like a fitting on the bottom of a coalescer bowl which is usually no more that 1/8" NPT, then I use 1/4" tube.

This type system probably would not work very well on a system with 1/2" trunk pipe, where the end user's device's are using most of the flow capacity of the of the pipe. This would lead to a condition where, the flow rate inside the pipe, would be pushing the liquid down the trunk. I use 1" pipe for trunk runs, and 1/2" or 3/4" for drops. This is normally sufficient for a bump shop with at least a few bodymen. If I remember correctly you said you were using 1" trunk with 3/4" drops so you would be fine.

In this post I'm not trying to convince others that their methods are wrong or that I am correct. Just trying to share what I have learned over the years, and that was what you asked in the original post, upgrading air piping.

For the record, I didn't just sit down and dream up these methods. As a industrial electrical contractor my customers often ask me to come up with solutions to their existing problems, that have nothing to do with electrical or controls. Air compressors and their accessories are often one of them. Usually the system is already installed and not very functional, that's why their asking for help. They can't figure it out on their own, or others they have hired to solve their problems did something that didn't work and took their money.

The design methods that I suggest came about by trying to devise a method for removing moisture/contaminates from old plant and shop systems that are large, expensive, and poorly installed. There can be many points in a existing system that trap water and debris. During periods of high flow these contaminates then move downstream and cause problems. My strategy is to eliminate the contaminates at the beginning of the system, and try not to fix poorly installed piping downstream, which can be hugely expensive. Clean dry air flowing through dry rusty pipes, usually causes no issues, other than needing a filter element to catch stray dry particles at sensitive equipment.

I have used these methods to correct problems at many facilities, and have never had a complaint. What I try to achieve is a drain system that is automatic, works reliably, drains to one central location, and requires little or no attention from the employees or owner. One thing I learned from plant work is employees really don't give a poop about some equipment that they don't have to pay for. Eliminating tens or hundreds of manual drain points throughout the system is the main goal because nobody has time to remember to do this regularly, including myself, and when you don't it cost's lots of money and problems.

Take it for what it's worth. It's your system, your going to pay the freight one way or another, the choice is yours. If you use the advise please post back to let other know if it worked for you.

Thanks for all of the appreciative comments.
 

MTW

Well-known member
Joined
Aug 6, 2013
Messages
294
Location
SE Michigan
One last thing. My posts were focused on systems that are permanently installed and connected with pipe.

For the other extreme, small portable systems with rubber hose connections.

Small systems usually heat up a lot more because they have to work so much harder. Once the receiver tank becomes hot from use, it's difficult to get all the moisture to coalesce inside the tank. You can use the same principals and get decent results.

Make up a vertical pipe manifold of 3/4 or 1" pipe of about 4-6' length, the more mass (surface area) the better. Put a tee in it about 6"-8" from the bottom, connect the side of the tee to your air source, this could be a hose connection. On the bottom of the manifold put a drip leg ****** and drain valve. Install tee's near the top of the manifold, to attach your quick couplers to. Mount the manifold on the wall near where you park your compressor.

You will be surprised on how much water you can trap over time with this simple setup. Make sure you remember to drain it as well as your tank. When you forget to drain it and the drip leg fills up to the inlet tees. It will let you know, because your blow gun or tool will begin spraying water to remind you.
 

sberry

Banned
Joined
Jun 18, 2005
Messages
35,747
Location
Brethren, Michigan
Good explanation on pressure and flow driving water, when basic principle is not understood the poor results are not usually far behind.
 
OP
S

Strouty

Well-known member
Joined
Mar 21, 2010
Messages
38,210
Location
Southern Maine
I have had lots of people give advice on this and I am willing to try MTW's idea. I hope no one else takes offense to me not using their advice. I know that anything would be better than what I have now, but I think MTW has a great idea that does make sense. I bought enough material to do more than I probably need to do, but I will have it incase I need it. One more question would be how do you get the drops straight with the trunk angled? Do you bend the pipe? I may go crazy looking at the drops being skewed, the trunk I can live with.
 
OP
S

Strouty

Well-known member
Joined
Mar 21, 2010
Messages
38,210
Location
Southern Maine
So I got some done yesterday and a little more today, it is taking more time than I thought. I keep changing things. I figure this will allow for expansion later and it is set up so I can easily change configurations as well. Hopefully tomorrow I will have it all secured and be able to setup at least one hose reel. Here is some of the progress.

Main Connection from compressor:


First part of trunk line:


Drop 1 closeup of connection:


Drop 1 overall what I have so far:


Drop 2 closeup:


Drop 3 closeup:


Frozen pipe when I bled air this morning:


Flex hose:


Air filter???


Details:

 
OP
S

Strouty

Well-known member
Joined
Mar 21, 2010
Messages
38,210
Location
Southern Maine
So I have been away for almost a week, before I left I unplugged the compressor and it is holding almost 150 psi still. I would say that what I have installed so far does not leak. I was really happy about that! I still need more filters and regulators, but I will post what I have when I finish putting it together.
 
To avoid these ads, REGISTER NOW!
Top Bottom