To avoid these ads, REGISTER NOW!

Modifying roof trusses for lift.

Dakota00

Well-known member
Joined
Mar 9, 2008
Messages
1,078
Location
Woodbridge, Ontario
Hey Guys,

I just finish installing a 4 post lift in my 2 car garage. I'm able to get both vehicles on top and under the lift, but it's a tight fit leaving only 2" of space from the bottom of the trusses. I would like to add an extra 3"-4" of space for extra clearance so the vehicles roof top "by chance" doesn't come into contact with the trusses. This would mean cutting about 6 feet of the bottom chords of 3 trusses. The roof is a low pitch at 4/12 and the trusses span 20ft in length, trusses are 24" O.C.

Here's the trusses in question.

View media item 41164
Here's the section I want to remove (in red) and raise about 4", basically to ride on top of existing bottom chord.

View media item 41165
Any advice and input from the experts here would be great!!

Thanks!!
 
To avoid these ads, REGISTER NOW!

Letsgobowhunting

Well-known member
Joined
Jun 23, 2013
Messages
210
Location
Village of Clinton, N.E. Ohio
I reinforced a truss that was under load in my last garage to go around my garage door opener. When i cut the original i heard the ugliest sound...a loud pop. I couldn't tell a difference in the alignment though.
I personally would not do it again.
 

Slime1

New member
Joined
Jan 25, 2012
Messages
1
Location
Indiana
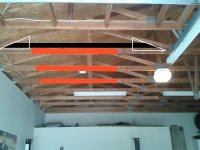
Ok first post here. I usually just lurk because everyone has already answer questions so well! Hopefully the picture works. I would simply place a 2x6 on top of the current bottom cord (the black box) and put some plywood gussets on (the white triangles) I would glue and nail the gussets on with ring shank nails. That's my personal opinion at least :beer:
 

Attachments

  • truss.jpg
    truss.jpg
    116.5 KB · Views: 624

gungatim

Well-known member
Joined
Jan 8, 2013
Messages
8,101
Location
west mich
do a search, I posted how I cut my trusses and gained an extra 4 ft. It CAN be done if you know what you are doing and understand the engineering behind how a truss works.
 
OP
D

Dakota00

Well-known member
Joined
Mar 9, 2008
Messages
1,078
Location
Woodbridge, Ontario
Thanks guys, I've been doing a lot of searching and reading up on modifying trusses. What Slime drew up, is pretty much what I envision. But with extra bracing with a boxed up opening.
 

Kevin54

MEMBER EMERITUS
Joined
Jan 12, 2005
Messages
29,341
Location
Urbana, Ohio
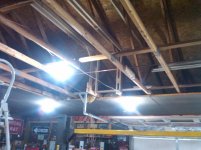
If it were me, and you only are spanning 20' with the trusses, I would take the truss on either side of the three that you are wanting to modify. I would them sister a 2x6 triangle to those 2 outer trusses. Then I would add a 2x6 at the bottom tying in the bottom chords of the 2x4 trusses. I drew only one side to show you a basic idea. It's been done before aND IF i CAN FIND THE PIC, A GUY ON ANOTHER SITE DID THE EXACT SAME THING YEARS BACK AND HAS HAD NO PROBLEM. Damn cap locks.

ANyways, just because they are called engineered trusses, don't let the phrase scare you. For one, you are only cutting out 8 feet across, and only a short section on one side. A simple 4/12 truss is not rocket science Just make sure that you brace up the existing trusses with a dead man, then tie the top rafter into the bottom chord before cutting anything. If you want a better detail, I can give you one, but like I said, this was quick and dirty, and I'm only showing the basic triangle you need to sister to a full truss, then the 2x6's running across to where you would have another triangle.

In looking at it, I would probably make the 2x6 triangle go back to the right and sister it to the vertical 2x running down from the top rafter to the bottom chord, and sister the 2x6 to that 2x4.
 

Attachments

  • truss mod.jpg
    truss mod.jpg
    66.4 KB · Views: 521
Last edited:

volleyball

Well-known member
Joined
Aug 29, 2011
Messages
4,127
Location
NY, not NYC
There must be a truss place near you. Those trusses were engineered. Find the engineer and pay him to design you a proper redesign.
An amateur thought would be to add a 2x4 above the cutout and run metal strapping from end to end on all the cut trusses.
 

JohnX14

Well-known member
Joined
Jun 2, 2014
Messages
595
Location
Boston 'burbs
Why don't you just remove the 3 trusses completely and replace with conventional rafters and a ridge with rafter ties?
 

Falcon67

Well-known member
Joined
Jun 11, 2009
Messages
18,371
Location
Merkel, TX
Kevin 54 and JohnX14 - probably a combination of both most likely. IIRC, the bottom cord on a truss is in tension, not compression. So cutting the bottons will allow them to tend to pull apart. Also, the rafter size on a truss is not what you'd spec for a regular rafter, maybe as much as 1/2 the size based on the span. So once you break the truss lower cord, forces go in all kinds of unintended directions. The three cut trusses could be replaced by three properly sized rafters sistered to the top cords (likely 2x6 for that span). I would not use "rafter ties" because they add no structure to the roof or help the rafters support load in any way. They are good to hang drywall is about all. I'd use plywood panels at the ridge on the replacements with nailing and construction glue. That takes care of the roof loading. I doubt you'd see much outward push on the walls from losing three joists (bottom cords) but you could shore up the end trusses with joists sized for the span (probably 2x10s or so).
 
Last edited:
OP
D

Dakota00

Well-known member
Joined
Mar 9, 2008
Messages
1,078
Location
Woodbridge, Ontario
I would not use "rafter ties" because they add no structure to the roof or help the rafters support load in any way. They are good to hang drywall is about all. I'd use plywood panels at the ridge on the replacements with nailing and construction glue. That takes care of the roof loading. I doubt you'd see much outward push on the walls from losing three joists (bottom cords) but you could shore up the end trusses with joists sized for the span (probably 2x10s or so).

Even if the rafter ties are joined with other uncut trusses, they wont help support the load?
 

typerr

Member
Joined
Feb 13, 2009
Messages
5
If you look closely at the trusses there is most likely a stamp somewhere with the manufacturers name and phone number. Contact them and tell them what you want to do and they can probably engineer a modification and send their truss repair guys out to modify your trusses for a reasonable cost.
 

Falcon67

Well-known member
Joined
Jun 11, 2009
Messages
18,371
Location
Merkel, TX
Even if the rafter ties are joined with other uncut trusses, they wont help support the load?

Nomenclature alert - I was thinking "collar tie". Oops. A "rafter tie" is a board in the lower 1/3 of the rafter space. That actually increases the loading on the rafter and may mandate the rafter(s) be upsized yet again. If you meant "collar tie" as up near the peak - no, they don't do much of anything. Many building codes don't even require them anymore. They can help with rafter uplift, so might be required in a coastal zone.
 
Last edited:

rsanter

Well-known member
Joined
Dec 22, 2007
Messages
18,521
Location
visalia ca
Ok first post here. I usually just lurk because everyone has already answer questions so well! Hopefully the picture works. I would simply place a 2x6 on top of the current bottom cord (the black box) and put some plywood gussets on (the white triangles) I would glue and nail the gussets on with ring shank nails. That's my personal opinion at least :beer:

You can do this but I would make the replacement 2x6 go the complete width of the garage and bolt to the exsisting cross bracing of the truss

Bob
 

Kevin54

MEMBER EMERITUS
Joined
Jan 12, 2005
Messages
29,341
Location
Urbana, Ohio
I'm trying to find the pic where the guy did it to his garage.

As far as steel beams, getting new engineering drawings, getting engineers to come up with something, and all of that, it's overkill. It's 10' from the center of Dakota's garage to the wall. You could sister a rafter all the way down from the top to the bottom. The bad thing......how are you going to slide the bottom of a 2x8 or 2x10 with a bird mouth cut onto the top plate. It sounds easy, but to lay it sideways, then try to stand it up and have a tight fit, always sounds easier than what it actually is.

Now you could put a joist hanger at the top plate, and sister a rafter on, but you still have the other side of the 20' rafter to deal with. If one uses common sense, and has a little bit of construction or remodeling under their belt, it's not a big job.

Dakota....I sent the guy a PM, and as soon as he tells me where the pics are at, I'll post them up.
 
To avoid these ads, REGISTER NOW!

MN4x4

Well-known member
Joined
Sep 5, 2010
Messages
1,443
Location
Minnesnowta
If you want to be sure your insurance will cover you should that roof collapse, you need to have stamped (engineered) drawings.
 

ovilla

Well-known member
Joined
Dec 18, 2005
Messages
2,342
Location
Plainfield, IL
A quicker but a little more costly method would be to go buy an engineered half scissor trust and just bolt (sister) it to your existing truss. Then you could just cut out any remaining wood below your new sistered scissor truss.

ImageUploadedByTapatalk1402758978.129831.jpg
 

holdover

Well-known member
Joined
Feb 15, 2011
Messages
750
Location
VA
Don't know your storm load, but with just a short span I do not believe you would have a problem creating sissor trusses out of your existing trusses. I would use 2 X 6 with bolts and plates as well as a liberal application of screws, as a safety net I would also sister 2 X 6s to your top cord. And also reinforce the trusses on either side of your work. Have done this a number of times over the years with never an issue , or sag in the roofline with up to 30" of snow. Think about years ago when roofs were built with rafters and collar beams, as long as you can get a good bearing on your top plate, you should be good to go..
 

Kevin54

MEMBER EMERITUS
Joined
Jan 12, 2005
Messages
29,341
Location
Urbana, Ohio
Don't know your storm load, but with just a short span I do not believe you would have a problem creating sissor trusses out of your existing trusses. I would use 2 X 6 with bolts and plates as well as a liberal application of screws, as a safety net I would also sister 2 X 6s to your top cord. And also reinforce the trusses on either side of your work. Have done this a number of times over the years with never an issue , or sag in the roofline with up to 30" of snow. Think about years ago when roofs were built with rafters and collar beams, as long as you can get a good bearing on your top plate, you should be good to go..


Holy overkill. :scared: He's only talking about three truss mods in an area of less than 10'.
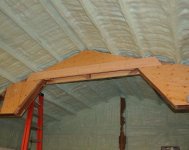
 
OP
D

Dakota00

Well-known member
Joined
Mar 9, 2008
Messages
1,078
Location
Woodbridge, Ontario
Ovilla,
Half Scissor will not work even though it's ideal. It'll cut into the clearance space I need at the end of the truss.

Don't know your storm load, but with just a short span I do not believe you would have a problem creating sissor trusses out of your existing trusses. I would use 2 X 6 with bolts and plates as well as a liberal application of screws, as a safety net I would also sister 2 X 6s to your top cord. And also reinforce the trusses on either side of your work. Have done this a number of times over the years with never an issue , or sag in the roofline with up to 30" of snow. Think about years ago when roofs were built with rafters and collar beams, as long as you can get a good bearing on your top plate, you should be good to go..

Being a simple 2x4, 2x3 Queen Post (fan) setup, there isn't a high storm load needed. We might at best see 12" of snow on the roof.

Looking at things over again, looks like I might only need to modify 2 bottom chords instead of 3 for the headroom clearance.
 

Jeep Garage

Member
Joined
Feb 11, 2013
Messages
9
Is the same vehicle always on the lift? And is it driven alot? Air down the tires and don't create any probems. If you always have the same car or truck on top and you have 2 inches of clearance, why would you worry about a change in height?

Just my thoughts.
 

Kevin54

MEMBER EMERITUS
Joined
Jan 12, 2005
Messages
29,341
Location
Urbana, Ohio
Is the same vehicle always on the lift? And is it driven alot? Air down the tires and don't create any probems. If you always have the same car or truck on top and you have 2 inches of clearance, why would you worry about a change in height?

Just my thoughts.

Yea....that'll work for a two post :lol:
 
OP
D

Dakota00

Well-known member
Joined
Mar 9, 2008
Messages
1,078
Location
Woodbridge, Ontario
Is the same vehicle always on the lift? And is it driven alot? Air down the tires and don't create any probems. If you always have the same car or truck on top and you have 2 inches of clearance, why would you worry about a change in height?

Just my thoughts.

Yes the same vehicle will spend 99% of the time on the lift. Airing down the tires is not the answer. I might want to switch the odd time and leave my DD on top which is 2" taller than my other car.

LOL!! at Kevin
 

volleyball

Well-known member
Joined
Aug 29, 2011
Messages
4,127
Location
NY, not NYC
Add some blocking to the lift so that the cutoff is 2" lower than it is now and you don't have to modify the building. If the other car is lower, it will still fit.
 
OP
D

Dakota00

Well-known member
Joined
Mar 9, 2008
Messages
1,078
Location
Woodbridge, Ontario
Can't do that. Front columns already sit on 2" blocks plus adjusted another 2" higher than the back columns which sits at the lowest setting due to the 4" slope on the garage floor for drainage.
 
OP
D

Dakota00

Well-known member
Joined
Mar 9, 2008
Messages
1,078
Location
Woodbridge, Ontario
^^^ If that was the case, I wouldn't have put up this thread. Again, the rear columns are sitting on the garage floor (not blocks) and it's at the lowest settings on the ladders. So the car underneath can still fit, can't go any lower.
 

gungatim

Well-known member
Joined
Jan 8, 2013
Messages
8,101
Location
west mich
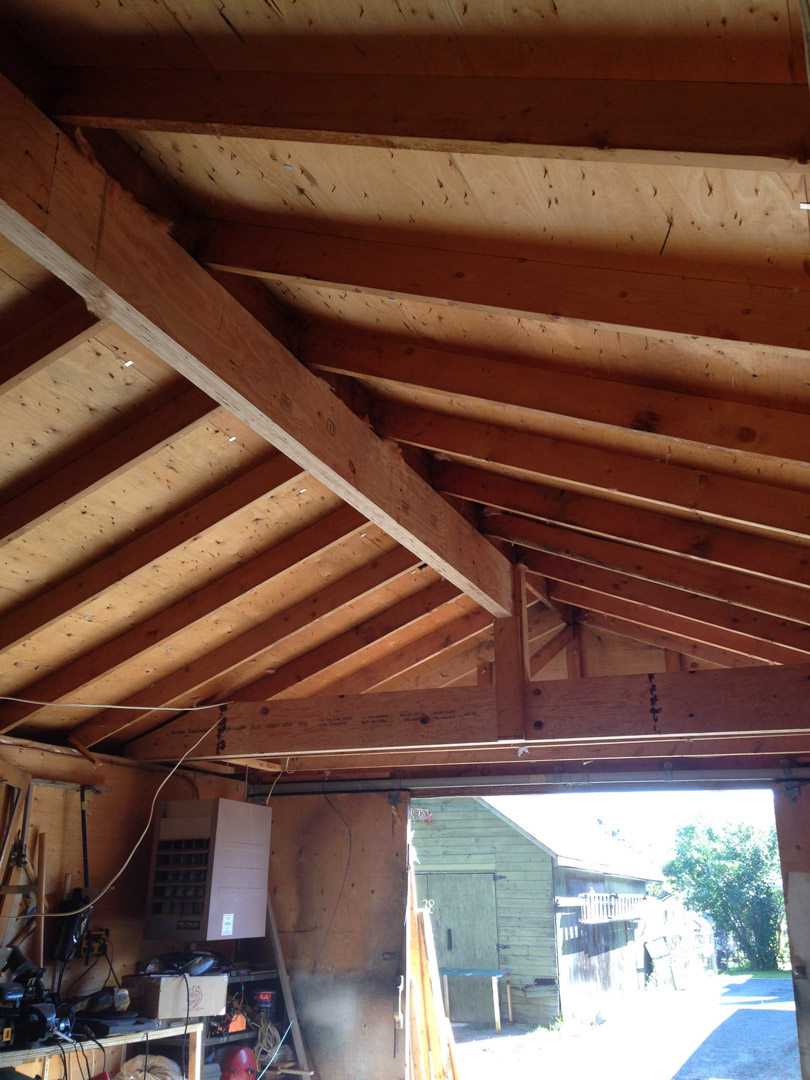
Here is a pic of how I did it. Raised the roof 4ft.
 

Attachments

  • truss mod (1).jpg
    truss mod (1).jpg
    140 KB · Views: 285
  • truss mod (2).jpg
    truss mod (2).jpg
    140.4 KB · Views: 250
  • truss mod (3).jpg
    truss mod (3).jpg
    139.1 KB · Views: 248
  • truss mod (4).jpg
    truss mod (4).jpg
    139.2 KB · Views: 245
  • truss mod (5).jpg
    truss mod (5).jpg
    139.1 KB · Views: 241
Last edited:

gungatim

Well-known member
Joined
Jan 8, 2013
Messages
8,101
Location
west mich
referencing above, basically what I did was build a "box" frame around the bottom outside of the trusses to hold it all together and keep the walls from bowing. then added double supports vertically on either side of the truss, then double horizontal, and some angle pieces. The top corners are the weak spot. then I cut the excess truss out. My building is a pole barn, with 6x6 supports in the ground. a 2x4 wall on a foundation may be less stable. I am in Michigan, and we had record snow fall this winter. I experienced zero issues with this configuration. This is what I did, and I am not saying this is what you or anyone else should do, only an idea of what worked for my situation.
 

69gp

Well-known member
Joined
Jan 1, 2013
Messages
255
Location
MA
referencing above, basically what I did was build a "box" frame around the bottom outside of the trusses to hold it all together and keep the walls from bowing. then added double supports vertically on either side of the truss, then double horizontal, and some angle pieces. The top corners are the weak spot. then I cut the excess truss out. My building is a pole barn, with 6x6 supports in the ground. a 2x4 wall on a foundation may be less stable. I am in Michigan, and we had record snow fall this winter. I experienced zero issues with this configuration. This is what I did, and I am not saying this is what you or anyone else should do, only an idea of what worked for my situation.


honestly just because it held one winter does not mean it will last the next unless an engineer did the calc's on your modifications. The bottom cord is critical to carrying the full load of the roof in tension.

If anything you might want to make up something to temporary connect the trusses ends of the bottom cord together to carry the load. Steel plates over the ends of the trusses with a cable that could be installed and tightened quickly may help.

just my 2 cents
 

Denwood

Well-known member
Joined
Sep 22, 2014
Messages
4,192
Location
Thunder Bay, Ontario, Canada
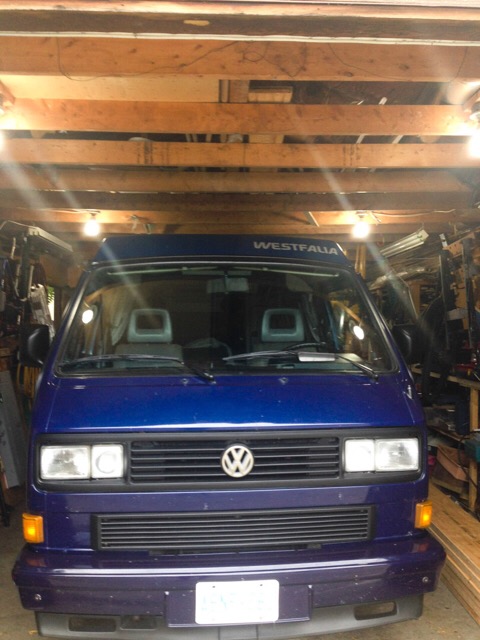
We did restructure (with an architect, engineer and permits!) 50 foot trusses to go from 8ft, to 11ft in our studio. The elevated ceiling section of the mod'd trusses were re-framed in the new profile, and then plywood bonded on both sides. It's a pretty cool space.

Gung, I'd agree that structurally, you've more or less just transferred a lot of load to the adjacent trusses, and the four trusses cut essentially created four roof rafters with truss ties...which is similar to a stick framed roof, albeit with truss ties elevated above the walls. The four trusses you cut are no longer supporting anywhere close to their design load...and the two adjacent are carrying much more than their design spec. If not adding in scissor trusses, you might have considered an LVL beam like this: http://www.garagejournal.com/forum/showthread.php?t=263351#post4267885

Before:
8ftceiling.jpg


After:
ridge3.jpg


This insures zero outward loading at the walls. Your mods wouldn't pass code here..but as I said, it looks like you've approximated a stick frame/elevated truss ties with the cut trusses. I would have a good look at your ridge from outside the garage to make sure last winter didn't introduce any deflection..
 
To avoid these ads, REGISTER NOW!
Top Bottom