
x1buellist
Member
- Joined
- Mar 25, 2012
- Messages
- 20
Here's my take on how to take a pretty poor (IMO) HF floor standing blast cabinet (Item#68893)and make it more usable (and less messy). Lots of pictures and the details that I thought would be useful. Some of these tips were provided with the upgraded parts, others I found on my own or read as good mods in different forums.

Build the box using sealant in excess on all seams , bolt holes, etc..

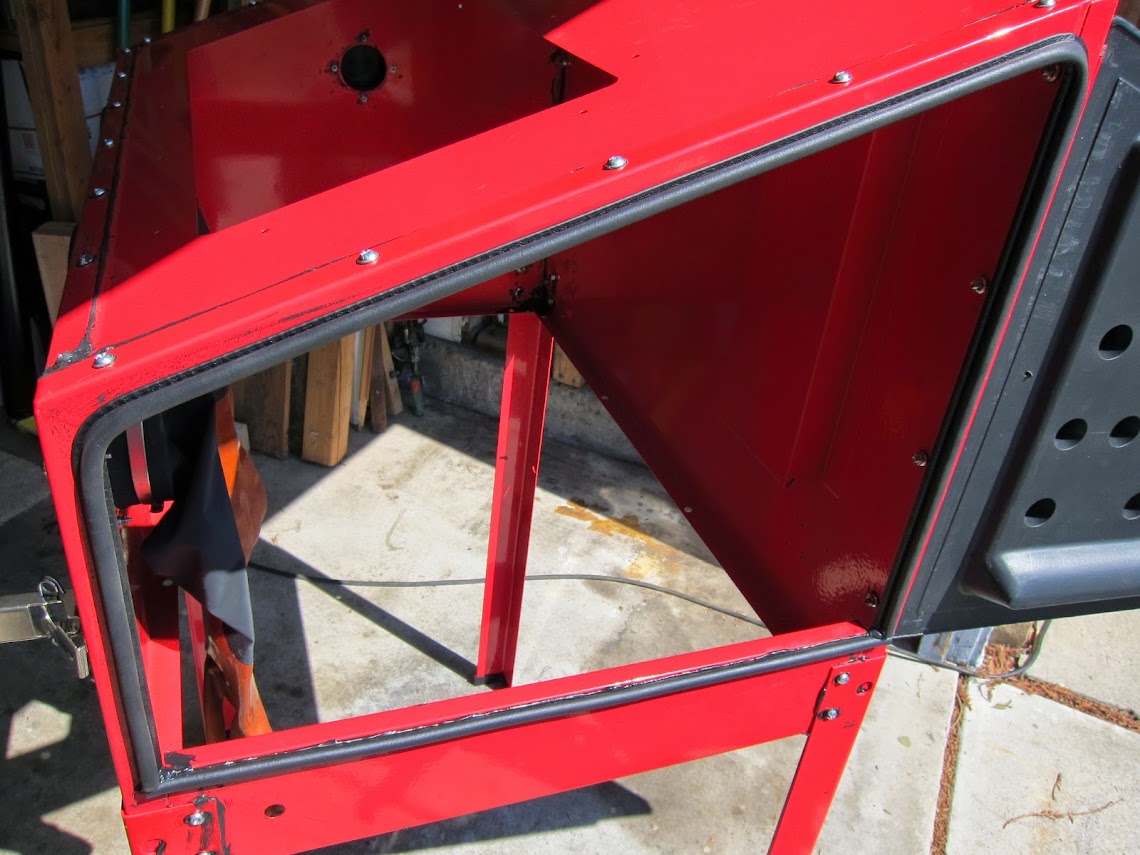
Use a rubber seal for the door (TPtools 6217-780). The seal slips right onto the edge of the sheetmetal on three sides but you will need to use sealant on the bottom section.

A piece of the foam door seal that comes on the cabinet from HF. Remove it with a putty knife and scrape all the glue off the door.
I had to trim the rubber seal off the clip for the bottom strip since there isn't an edge to mount it on. Use sealant to put it on and seal the gaps at the ends.

Seal everything. No point in holding back, use excessive sealant!

Cut the screen and frame down several inches. This drops the cabinet floor down several more inches giving you more clearance.
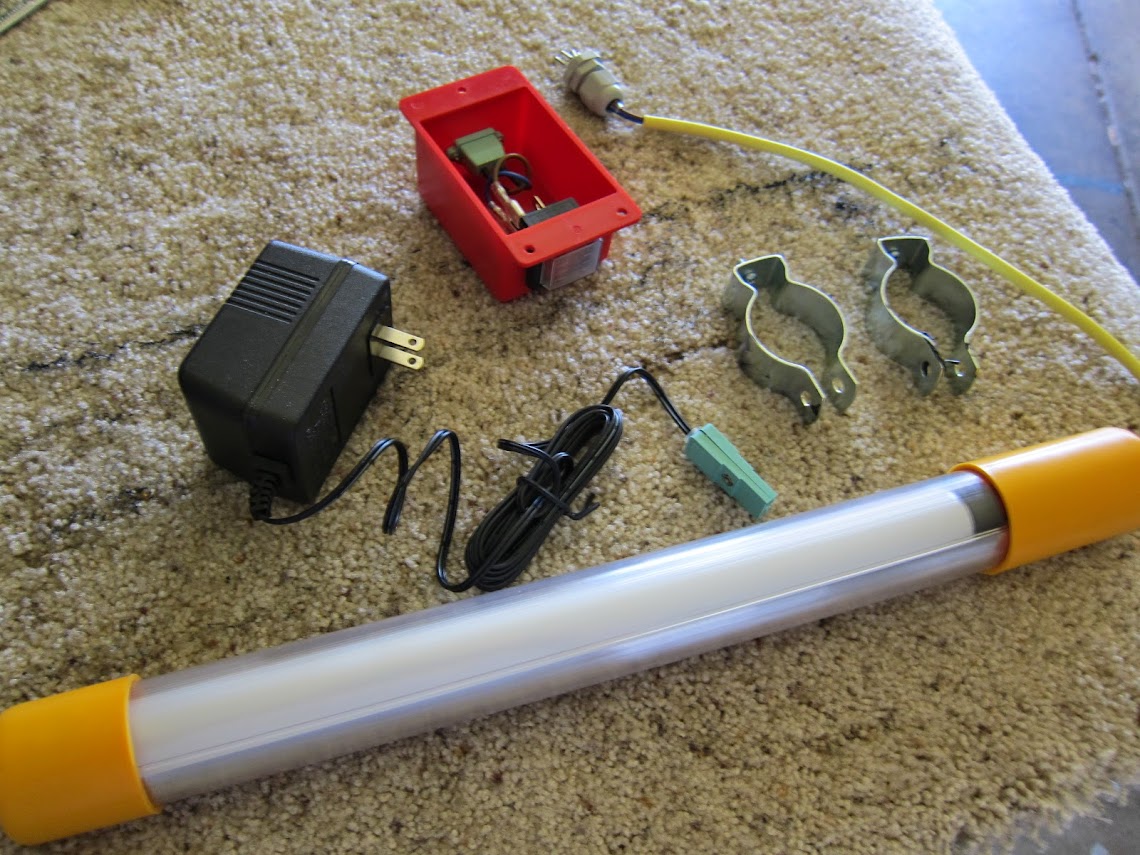
Light,switch power supply and brackets. Throw it all away.

New flood light with power switch and a couple outlets. Easy place to plug the reclaimer\Vac into.
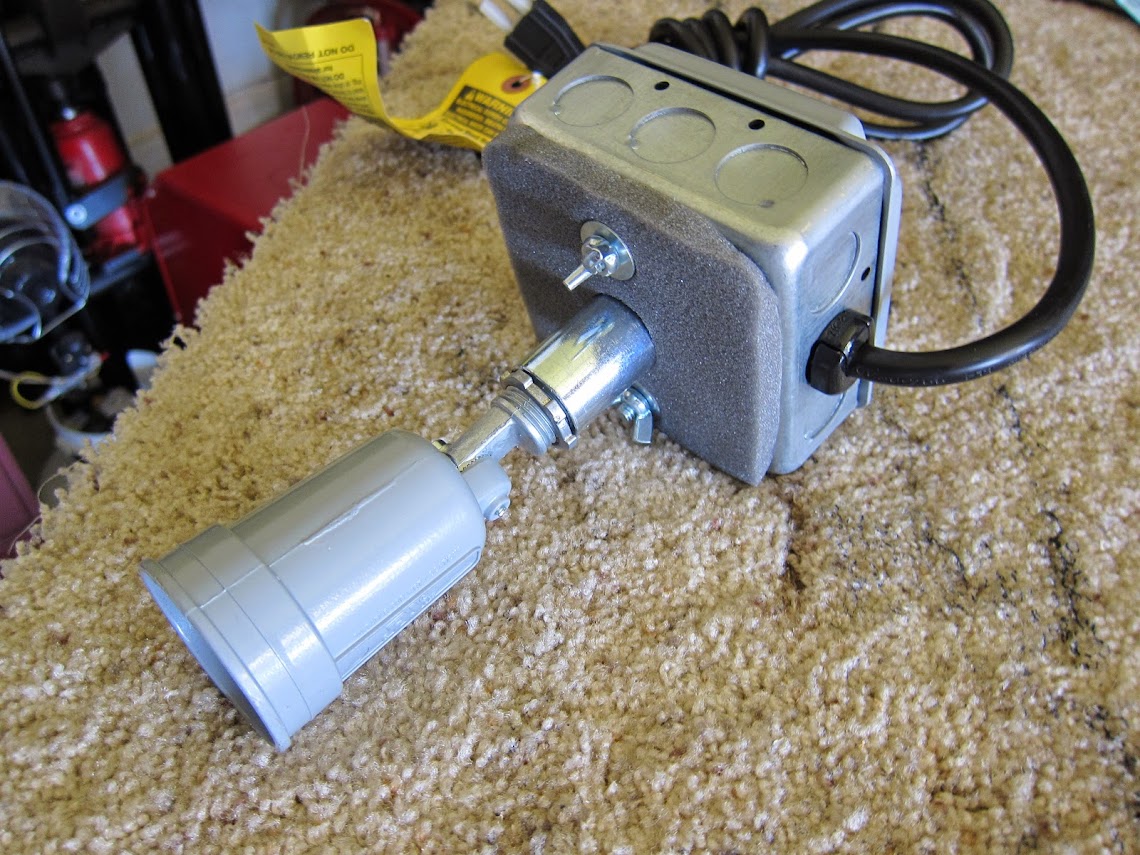
Front side of flood light and power box. (tptools 6258-03HD)

Hole where original light switch entered the box.

Drill a hole large enough for the flood light socket to go through and notch it for the mounting bolts.

Flood light/ switch interior cabinet mount.

Flood light/Switch exterior mount.

The foam tape that HF uses to seal the box. Scrape it all off and throw it away. Don't use any of the foam tape that comes pre-taped to the box flanges or any of the tape that comes in roles with the box. Use silicone sealant to seal everything.

A few of the sheet metal flanges were bent. Straightened them all out.

Another bent flange, straighten the bends.

Drill a hole through the Hopper chute door for the media regulator to mount to.

Chute door inside. Drilled through the seal by cutting a 2x4 the same size to back it while I drilled the hole.
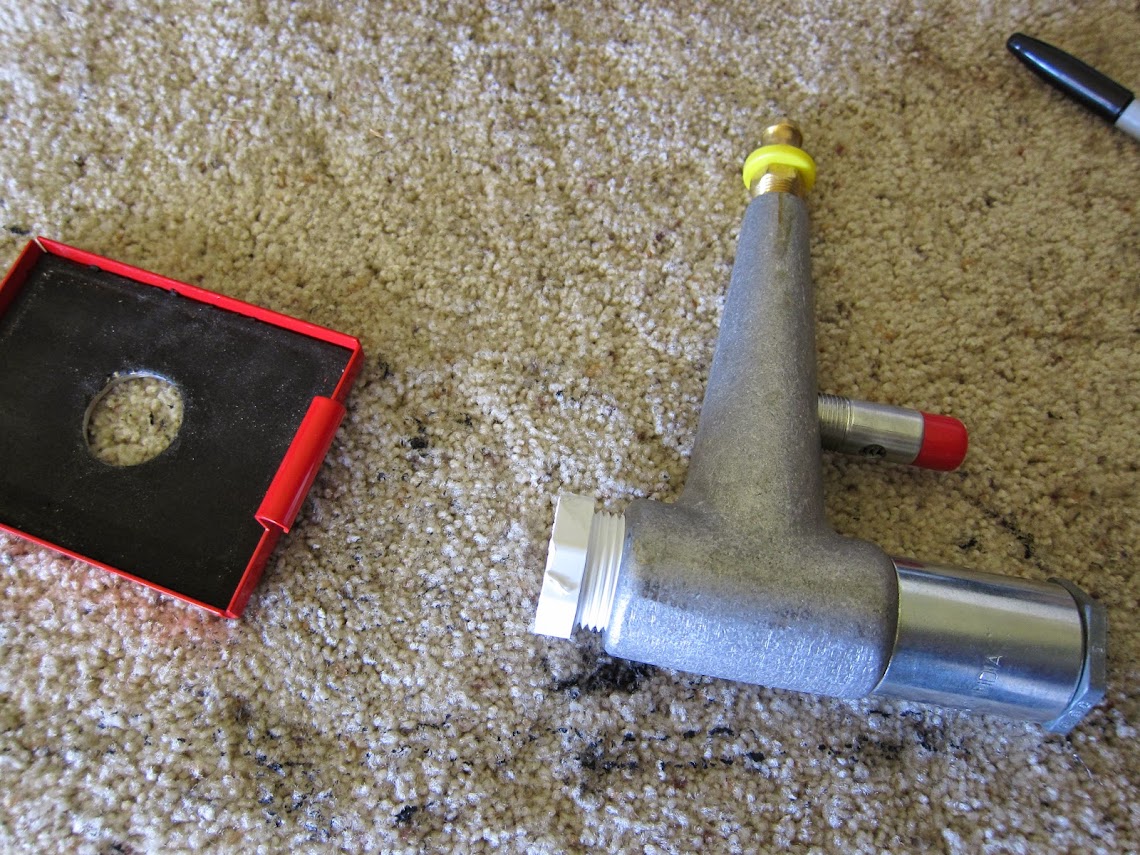
Chute door and media regulator. (Tacoma Company)

Media regulator mounted to Chute door.

Replaced door latch with a bolt and nut to seal the door tighter.

Replaced the hopper chute door hinge bolt with a 1/4" bolt to seal the door better.

bend the chute door hinge channel to wrap around the 1/4" bolt tighter.

Picture of hinge channel bent.

Drill out the chute door mounting holes to accept a 1/4" bolt.
Build the box using sealant in excess on all seams , bolt holes, etc..
Use a rubber seal for the door (TPtools 6217-780). The seal slips right onto the edge of the sheetmetal on three sides but you will need to use sealant on the bottom section.
A piece of the foam door seal that comes on the cabinet from HF. Remove it with a putty knife and scrape all the glue off the door.
I had to trim the rubber seal off the clip for the bottom strip since there isn't an edge to mount it on. Use sealant to put it on and seal the gaps at the ends.
Seal everything. No point in holding back, use excessive sealant!
Cut the screen and frame down several inches. This drops the cabinet floor down several more inches giving you more clearance.
Light,switch power supply and brackets. Throw it all away.
New flood light with power switch and a couple outlets. Easy place to plug the reclaimer\Vac into.
Front side of flood light and power box. (tptools 6258-03HD)
Hole where original light switch entered the box.
Drill a hole large enough for the flood light socket to go through and notch it for the mounting bolts.
Flood light/ switch interior cabinet mount.
Flood light/Switch exterior mount.
The foam tape that HF uses to seal the box. Scrape it all off and throw it away. Don't use any of the foam tape that comes pre-taped to the box flanges or any of the tape that comes in roles with the box. Use silicone sealant to seal everything.
A few of the sheet metal flanges were bent. Straightened them all out.
Another bent flange, straighten the bends.
Drill a hole through the Hopper chute door for the media regulator to mount to.
Chute door inside. Drilled through the seal by cutting a 2x4 the same size to back it while I drilled the hole.
Chute door and media regulator. (Tacoma Company)
Media regulator mounted to Chute door.
Replaced door latch with a bolt and nut to seal the door tighter.
Replaced the hopper chute door hinge bolt with a 1/4" bolt to seal the door better.
bend the chute door hinge channel to wrap around the 1/4" bolt tighter.
Picture of hinge channel bent.
Drill out the chute door mounting holes to accept a 1/4" bolt.
Last edited:


")


