To avoid these ads, REGISTER NOW!

Garage adventures of a Rallye fan

Cris B

Well-known member
Joined
Mar 21, 2011
Messages
416
Location
Lancashire, UK
This is the thread of an English guy with a love for cars, rallying, making stuff and tinkering with things. So seeing as this is the Garage Journal here are the garage adventures of a Rallye fan. Currently our family housing situation is in limbo, but I have plenty that I can write about on here.

The Norfolk Double Garage

17002556551_d07bc5c618_c.jpg


We own a beautiful house, dating from the Jacobean period (1603-1625) in rural Norfolk. We bought it in 2002 and since then have completely renovated it. It needed a lot of work because some genius in the recent past had rendered the house in concrete rather than the traditional lime mix. Once encased and unable to breath the timbers had started to rot.

In the end we replaced nearly all of the vertical timbers from ground to first floor level and the entire sole plate. On the day we exchanged there was a hole in the roof and we later discovered the house also had no foundations...It was, some might say, a bit of a project.

It's now a five bedroom property sensitively restored using modern materials and insulation. We enlarged the plot, purchasing land from the local farmer so it sits in an acre of land with a newly constructed attached double garage (18'8" x 15'7"). In many ways it's our ideal home.

A few ex-USAF may know East Anglia from being based there, so to put the location in context the house is about 35 miles east from the Lakenheath base. The property market has not worked in our favour these last 18 months and as we try and sell it someone else is enjoying living there now.
 
Last edited:
To avoid these ads, REGISTER NOW!
OP
C

Cris B

Well-known member
Joined
Mar 21, 2011
Messages
416
Location
Lancashire, UK
The Manchester Double Garage

Work means my wife and our two boys live five hours away from the Norfolk property in the North West of England. In my last job in Manchester accommodation was provided, but I changed employers and we had to move on in December 2013.

For the nine years before the move I'd had the luck of having a double garage and in typical GJer fashion had over time grown my collection of tools and useful stuff to fill the space. However being a rental, I'd been reluctant to commit too much to improving it. Yet whilst working on the cars in that time, I'd turned it into a useful space for getting stuff done.

So I thought that I'd start with writing about that double garage. This was the space:

12543352045_d1ab55573c_c.jpg


It was a double garage (18'2" by 17') - the small garage behind the roller shutter door in the left of the photo wasn't part of the space I had access to. When I moved in, it was open into that space with a divider made out of old cupboards. This was fine until the tenant in that unit changed and some of my stuff went missing. After that I built a dividing wall out of OSB.

I never felt that there was not a lot of room to work with in this garage with two cars in. These designs give some idea of the layout:

12543415953_cb9ae1559f_o.jpg


I had two cars in there quite a lot of the time. In that time I've had either Audis (S3 or A4 Avant) or my real passion Peugeot 106s (GTIs and Rallyes). I should digress to explain about these homologation specials. Peugeot built the 106 Rallyes over two phases visually distinguished by a revision of the body design although the chassis was fundamentally the same. I've owned both.

This is the phase 1 model I had. There were build from 1994 and offered a high-revving 1.3i 8v with 100bhp @ 7200rpm, 80lbs/ft @ 5400rpm which equates to 121bhp per tonne). These are very popular hillclimbing and sprinting cars.

2790905322_82e6e29933_z.jpg


Most of the 106s I have had have been phase 2s. These came out in 1997 and had a bigger 1.6i engine, but in the UK were all 8v models (16v models were available in Europe, but all were left hand drive). These were 103bhp @ 6200rpm, but pulled 97lbs/ft @ 3500rpm giving 119bhp per tonne.

I've had two of these, but this one was a restoration and near original:

9344171047_b1928b2cba_c.jpg


These are light and very agile front wheel drive cars with a chassis that is easily provoked into lift off over steer. On gravel if you know what you are doing you only need the handbrake for switchbacks.

7718726698_1d3126ef5b_c.jpg


Anyway back to the garage, as stated most of the time it was occupied thus (with some variation in cars over the years):

11623445385_7e9a188e1b_c.jpg


However for comfortable working on the cars for restoration projects, I built a wheeled chassis jig so I could orientate cars like this:

12543278665_6958f0c723_z.jpg
 
Last edited:
OP
C

Cris B

Well-known member
Joined
Mar 21, 2011
Messages
416
Location
Lancashire, UK
Construction wise it was soft red brick with a steel I-beam and corrugated steel roof. It was not insulated and I was plagued with condensation.

11623678573_1f24301d67_c.jpg


This coupled with metal roof joists that needed painting left rusty water drips on bodywork. As a consequence I put tarps up to at least stop that issue. The other limitation was the lighting - two 3' single tube strip lights mounted on the back wall. I bought two halogen work lights to light things up.

11623678423_98b8725917_c.jpg


I put up some basic shelving in the little alcove by the doors. I used this to store kevlar mountain bike tyres (my other hobby).

11623816694_a1e0778c1d_c.jpg
 
OP
C

Cris B

Well-known member
Joined
Mar 21, 2011
Messages
416
Location
Lancashire, UK
The rest of the photos are from the preparations before the move last fall. The partition wall was only ever partially painted. I'm not sure I can remember why it was never finished.

11624223456_bdaeffb14a_c.jpg


11623677843_1f1205d7de_c.jpg


11623677683_2c940a710e_c.jpg


I can't put my finger on quite why but I have a soft spot for this old wooden chest. It's great for storing stuff in. The original wooden legs were shot, so it's riding on castors right now. The lock clasp isn't elegant, but is functional and maybe I'll swap it out for something more fitting in future.

11623815604_dc74a26812_c.jpg


I fabbed up this little trolley to speed up moving gear. It's probably going to get the chop very soon, but served the purpose at the time:

11624221016_7e59dc6818_c.jpg


We all have our vices - these are mine ;)

11623677373_64c10b9c31_c.jpg


The stuff under the sheets here are the body panel moulds for my rally car:

11624221186_cf26eb98c1_c.jpg


So that sums up that period of garage life. Next phase coming up in the New Year. Have a good one all!
 
Last edited:

vegar

Well-known member
Joined
Jun 22, 2010
Messages
279
Location
Fredrikstad, Norway
106 er good little cars. I used to own a couple of 205 GTIs, and miss the smal french hatchbacks. Maybe a 106 should be next on my shopping list :) More pics of the kit-car please ;)
 
OP
C

Cris B

Well-known member
Joined
Mar 21, 2011
Messages
416
Location
Lancashire, UK
106 er good little cars. I used to own a couple of 205 GTIs, and miss the smal french hatchbacks. Maybe a 106 should be next on my shopping list :) More pics of the kit-car please ;)

My first car was a Peugeot 205 and it was great, but this car is currently dominating its class in the UK hillclimb scene and has broken many records in the 2014 season. It's driven by two drivers (one of whom is the very talented fabricator) from Cornwall.

My kit car has some nice features. This was it in the original GRP bodywork:

picturesagain1881.jpg


After trading a few cars, I finally reached an aspirational goal and landed a wide-track kit car with a full carbon fibre body. It's a 640kg rolling shell and was previously fitted with an ex-British Touring Car Championship 2.0 litre race engine putting out around 280bhp and mated to a Sadev Sequential gearbox. I also ended up with all the body panel moulds. It needs some work to get it back to it's former glory, but it is a hell of a car (well in my eyes at least).

11409492596_75609dd52a_c.jpg


Some of the new pre-preg carbon body work constructed by a former Williams F1 engineer.
9646619321_471f41be41_c.jpg


Some of the electrics...
9583971846_f2032d28c8_c.jpg


It should be sweet once I get it finished (right now I have no garage to work in). Once we moved from Manchester everything had to go into storage. I had a lot of stuff, but getting all the moulds for the kit car hadn't helped in the moving process. We filled to the brim a 150 sq foot storage unit and overflowed into garages belonging to friends.

15934333428_5b90ea51e0_c.jpg


The kit car went on holiday and is still in hiding. Some say it has become quite the talking point with the chaps who run a local garage and are into their McLaren's. The upside from this is that I did get a go in a MP4-12C.

11433584994_78a13381cb_c.jpg


With all my stuff in storage and no access to it nothing has happened on the kit car since December 2013.
 
Last edited:
OP
C

Cris B

Well-known member
Joined
Mar 21, 2011
Messages
416
Location
Lancashire, UK
The French Mountain House

In the summer after much deliberation we decided to cut our losses with our place in France, sold the house there and had to move everything back to the UK. It sold quite quickly and meant having to go over in early November and get our stuff back. This filled one whole half of the double garage at the house in Norfolk. Cue roadtrip...

15537738943_0975fe76df_c.jpg


This was our house. Like many French farmhouses, massive roof under which all the people, animals and straw is kept. When we moved in we had bushels of straw in there that had been composting since the 1940s.
15971425739_4a4aac284d_b.jpg


It had some great potential. Main garage (15'5" x 14'5"):
4293918362_86f921a93c_b.jpg


Wine cellar (11'5" x 13'5") at the back of the garage (the big stone box is for meat salting):
4293176259_dfab3ea8ff_b.jpg


Former dairy (26'6" x 11'4"):
4293221423_c298c3ccdc_b.jpg


Main barn (19'11" x 11'3"):
5653300491_edbb3af03c_b.jpg


Roof space (former hay loft above all the spaces listed above):
4293174533_0e21083854_b.jpg


Apartment garage (12'2" x 12'):
16156743402_2fc91cece4_b.jpg


Getting everything out of the property required some careful van packing. What came back from France was mostly household stuff, DIY equipment and tools. We had to leave some timber and a sofa suite but everything else fitted in a long-wheel base panel van (just).

15971724097_c717c4e817_b.jpg
 
Last edited:

ryolse

Well-known member
Joined
Jan 30, 2014
Messages
166
Location
Colorado
Sadly none of these circle track guys here in Merica have a clue what Rallye is and will just think you can't spell.

However... I own a '97 Subaru Rally car that I built 2 years ago and I'm thinking this might end up being one of my favorite threads here. Keep it coming!
 
OP
C

Cris B

Well-known member
Joined
Mar 21, 2011
Messages
416
Location
Lancashire, UK
The Lancashire Semi-Detached One Car Garage
After that we had a big think and decided to try and put down some roots in the North West. With this in mind we organised a rental property. The downside was it only had a single attached garage. It's 16'7" x 8'6"

There were four trips to different parts of the county clocking up about 1,500 miles total to get all of our stuff out of storage from different places. With some jiggery we managed to get everything in the house (two-bed semi). That said the box room and the garage were packed to the limits. There was no space for anything else.

15754526649_bc4e2b9451_c.jpg


So with the garage full and a space that needs to be organised to keep me sane there was some serious thinking about what we could do. Most normal people in the UK would just have just bought a wooden shed for the garden, but the plot is on a slope and we'd just paid extra to have the rear garden re-turfed for the kids to play on. There was no good spot to place a normal shed anywhere on the property. Having weighed up the options of buying pre-built metal, vinyl and wood units I decided that custom made to measure was the only way forward to get all of the garden tools and some other stuff out of the garage.

The plot:
15754552969_3497066497_c.jpg


Getting an idea of the scale and if stuff will fit. Size is 10'2" long by 3'5" high by 3'3" deep.
15754795317_7e348e0276_c.jpg


Building some bespoke storage may seem a little extreme but there was a good economical reason for this. As part of starting to renovate the house in France I purchased an old stage with plenty of 8' x 4' 3/4" ply and lots of 3m long 3.5" x 1.5" timbers that had been supported by A-frames.

Having taken this 1,200 miles to our place in France for four years, what we had left was brought back when we sold up this autumn. This gave me some ply to work with, 3m timber lengths and some treated 3.5m 4" x 4" that will form the structure of the new bench in the garage.

15753263940_41f818f986_c.jpg


All of the main structure is reclaimed from the staging. It's 40mm x 95mm softwood timber. In the end I had six 8' x 4' sheets of plywood. I'll let the pictures do the talking.

15914869716_42c2e463fd_c.jpg


Ventilation being built in

15947294715_c8f7a9ab3c_c.jpg


I had to purchase some feather-edge weatherboard and mineral coated roofing felt. Aside from some of the ironmongery I had everything else needed in the garage.

15945343981_b25d04b13e_c.jpg


15480236354_310e85dc2c_c.jpg


15926348768_e91221e9fc_c.jpg


Finished just before Christmas. Rushed getting some of the weatherboard on due to having to grab an hour when I could to get it finished around family commitments, weather and short daylight days. I may pull some of it off to get it evened up at some point this year

15935526447_9399379a07_c.jpg


Filled it up now and created space in the garage to get some racking up and start organising things. Update to follow.
 
Last edited:
OP
C

Cris B

Well-known member
Joined
Mar 21, 2011
Messages
416
Location
Lancashire, UK
Sadly none of these circle track guys here in Merica have a clue what Rallye is and will just think you can't spell.

However... I own a '97 Subaru Rally car that I built 2 years ago and I'm thinking this might end up being one of my favorite threads here. Keep it coming!

Ha ha! May have to rename the thread at some point then. The Subaru's are very popular here in the UK. I saw a 3rd Gen Prodrive Impreza rallycar being trailered to a stage event tonight on the way home. I also really enjoyed Ryan Symancek's series on his Subaru Rally car build on the Drive Channel last year. Seemed to show a different dimension to the grassroots US scene.
 

ryolse

Well-known member
Joined
Jan 30, 2014
Messages
166
Location
Colorado
Again, you guys get all sorts of good stuff. Most of the rally cars here are Subaru if you want AWD and Honda or BMW if you want 2WD.

The only time I see a car being trailered is if it's a friend I've caught up to on the way to the same event. We don't get the Drive Channel, I'll have to see if someone has it... "shared" on the Internet somewhere. Is this what you were talking about?
 
Last edited:

Lippyp

Well-known member
Joined
Jun 26, 2006
Messages
6,720
Location
Shropshire, UK
Whereabouts in Lancs are you? We lived up near Burnley until three years ago, we also have a place in The Lot in France. We also now live in a house built around 1630 down here in Shropshire!
 
OP
C

Cris B

Well-known member
Joined
Mar 21, 2011
Messages
416
Location
Lancashire, UK
Whereabouts in Lancs are you? We lived up near Burnley until three years ago, we also have a place in The Lot in France. We also now live in a house built around 1630 down here in Shropshire!

The place in France was in the Jura Mountains in Ain. Our place in the North West is near Ormskirk and the garage is now looking a bit more respectable. Even brought my sons project car out of storage.
16245392321_96b5c6ab78_c.jpg


Racking is the up, it's basic stuff from IKEA that I've had for about 15 years.

16221338716_d4affed1f3_c.jpg


Some more tidying and sorting to do and then I can crack on with building the bench. Today was spent cutting and laying concrete 4' x 2' paving slabs in the front garden.
 
OP
C

Cris B

Well-known member
Joined
Mar 21, 2011
Messages
416
Location
Lancashire, UK
After a bit of a hiatus on the garage front, decided to get back on the case the weekend. I had already earmarked some of the timber that had come back from France for the work bench. My father in law works in the woodworking department in the local high school and after he cleared it with his boss, I took in a couple of big bits that my circular Skil saw didn't have enough capacity to cut in one pass. Good clean cut on these and I was ready to start.

16472593481_551bd2864b_c.jpg


Size wise I am going for 3m (L) x 0.6m (W) x 0.9m (H) which equates to roughly 9'10" x 2' x 3'. This is the size of my last bench which I had built-in to the Manchester double garage and fitted a laminated kitchen work surface to. As a consequence, the only thing that I took away from that were a few of the original supporting frames. It's also a project for my two sons to help on (I spent most of my time keeping an eye on them).

16473376212_62d0945cf5_c.jpg


After a bit more work this afternoon this is where we are up to. Next up is to notch the timbers to accept a 2"x1" reinforcing ring halfway up the legs on the sides and back, partly to give a bit more stability and also so that in future a shelf could be fitted.

16286897420_378733b6a5_c.jpg


The usable space underneath will be enough for my two smaller Snap On roll cabs to sit side by side under one half and the wooden chest on the other side. In terms of the top, I'm planning a solid Beech Butcher Block top. I want a kickback return for the back of the worktop to stop stuff rolling off the back and am just waiting for our local timber merchants to get back to me with some prices.
 
Last edited:

minimowog

Well-known member
Joined
Dec 28, 2012
Messages
76
Location
Gloucester UK
i painted my metal roof with grafto therm bought from http://www.grafoproducts.co.uk/
and that sorted my condensation problem out this winter, i was running a dehumidifier previously but i could still see water clinging to the underside of the roof.

this winter haven't seen any condensation and it wasn't that expensive either.

btw nice looking garage you have there :D
 
To avoid these ads, REGISTER NOW!
OP
C

Cris B

Well-known member
Joined
Mar 21, 2011
Messages
416
Location
Lancashire, UK
It's been a while since the last update so here is some progress as I am on leave this week and making some headway on various projects.

To give me some more space I have been trying to sell this stainless steel shelving unit. I picked this from a previous employer as one of the castor wheels was bent and they were throwing it out because it couldn't be wheeled around anymore. The wheels were fine, the bolts that had been used to fit them were very poor quality and all of them had bent, one so badly that it had to be cut off.

The (non-locking) castors used to bolt into expanding wedges inside the legs. As I had some mild steel box in the workshop I made up a simple chassis for the shelving unit to ride around on instead. Currently sporting a gloss black finish which is far from perfect.

I've used it as a portable tool station and worktop when doing some jobs on the cars, but in most recent years it's been used to store wheels. I can get two full sets of 15" wheels on the unit, two wheels on each lower shelf and a full set stacked on top (2x2). The chassis and shelves are easily separated. Given the amount of stainless involved it's pretty heavy and is not easily moved on your own without the wheeled chassis.

16062767334_7fbf084910_c.jpg


16684077882_d1a3be6072_c.jpg


16497698170_975f27bebd_c.jpg


16683750531_cf3188a6e3_c.jpg


16498956369_f329cffcc2_c.jpg


I have picked up some paint and primer for the bench project:

16644406067_0ec0a47847_c.jpg


The main job in the first half of this week has been to restore the drive. When we moved in this was a real problem because it was mid winter and wet. The gap between the two concrete pads on the drive had been filled with soil and was just mud. This was then walked all over the garage and house...

A couple of months ago, having got hold of some 2x3' concrete pavers free through my father in law, I chopped one to fit directly in front of the garage door which has made a big difference as this is a heavy footfall area. The problem remained that the rest of the drive was a muddy mess and it was depressing to look at.

When I fitted the paving by the garage door the infill I dug out suggested to me that the gap had originally been filled with gravel and then over time had been reclaimed by nature. So on that basis, I thought that for no cost other than my time I could restore it. So that's been the mission for the last few days.

Starting off
16851668665_f5c8a1f665_c.jpg


Giving some idea of the mess
16229301084_7e5587fb00_c.jpg


Halfway point and view from the road
16664290270_32e8f17191_c.jpg
 
OP
C

Cris B

Well-known member
Joined
Mar 21, 2011
Messages
416
Location
Lancashire, UK
Finished the gravel for the drive yesterday and jet washed the paving and did some tidying up. Looks much better in my opinion - on a practical note it is now an extension to the garage for carrying out car maintenance and other jobs. This morning after the mist had burned off and the sun emerged I snapped a shot:

16679847498_ff264f4012_c.jpg


Late last year whilst parking up in a bay at a service station the A4 (B7) front bumper managed to get hooked over a curb stone. It was only when I put it into reverse to back out that I realised what had happened, but the damage was done - the bumper no longer fitted properly. It turns out the three bolts that attach the underside of the bumper to the body were all missing so it was hanging lower than it should, which might explain why it snagged.

15837379233_a389e368fc_c.jpg


I finally got round to taking the bumper off today and discovered some bent metal and snapped plastic mounting points on the passenger side (the drivers side was okay). The metal was pressed back into shape, but the plastic needed some help. I made up an aluminium backing plate and then glued and riveted it all back together. Bumper back on and it now all fits together nicely. Swapped the winter wheels for the summer set and the car is in first thing tomorrow for servicing. Once back I'll give it a good clean.

16866458171_777e482fd3_c.jpg
 
OP
C

Cris B

Well-known member
Joined
Mar 21, 2011
Messages
416
Location
Lancashire, UK
Managed to make some headway on the workbench over the last couple of days. All the knots in the timber treated with knotting solution to stop them affecting the paint finish. Cut in leg braces which instantly gave the workbench more stability. Mocked up in this photo.

16884835495_6a426fdd96_c.jpg


Went out to the local hardware suppliers this afternoon and picked up a 2m length of 15mm wood dowel. Then drilled and plugged all four legs (two 10" plugs in each). These will all be removed and glued in place prior to final paint.

16858934826_a5fc976b27_c.jpg


Over the last couple of days I discovered a crack in this knot that I had not noticed before so plated it. The orientation means it's under compression when the bench is loaded but I thought it best to be safe. If the wood does break I will swap in a new timber in future.

16697218258_f02983863c_c.jpg


Just came in from applying the undercoat. I am probably not going to have time to top coat it until next weekend.
 
OP
C

Cris B

Well-known member
Joined
Mar 21, 2011
Messages
416
Location
Lancashire, UK
I decided I could not bring myself to weigh in the stainless steel shelving on wheels posted above for scrap metal value. In the end I eBayed it and it was collected on Sunday. I didn't get a lot of money for it but it's getting re-used by someone else. I got some money in my pocket and crucially space in the garage.

This has accumulated some kid and family related mess but on the whole now has less stuff than before and I have been thinking of storage options to tidy it further. There are a few cardboard boxes that need emptying and replacing. Getting there slowly with them.

I glued the bench together, then cut and planed the plugs and undercoated it in white. The undercoat dried with a very rough texture so it needed quite a bit of sanding. Yesterday I put on the first coat of colour. It's a good colour I think, second coat to come.

16791685329_bb39893dbb_c.jpg


I've not ordered the beech butchers block top yet, but will do soon. With another colour coat and only having weekends to work I am two weeks off needing it at least. Two of my roll cabs and the white wooden chest on wheels will go under the bench on the left hand side of the garage.
 
Last edited:
OP
C

Cris B

Well-known member
Joined
Mar 21, 2011
Messages
416
Location
Lancashire, UK
Maybe I should get this thread renamed to "A Rallye small UK garage" because no matter how I cut it, I have too much stuff in this space :thumbup:

I kind of forgot about Easter - my mind has been on work recently. It was only going shopping on Tuesday night that it really twigged. This meant I remembered to get Easter treats for the family and that I had a few extra days to work on stuff this weekend.

So after getting home Thursday I keyed the first top coat on the bench and had just enough left in the tin to give all the visible surfaces a second coat. The colour over the wood is richer now. I am going to get another can of the paint to refurb the big Record vice so I'll give the bench a third coat at some point. The important thing to me is that it's a bit of colour and will be easy to wipe clean.

Yesterday I managed to get to the shops and picked up some 35 litre storage boxes. When I came home I realised two had broken (cracked near the handles) lids, so I took those back and exchanged them. Of course I could do with another five of them, but I need to rationalise my gear so I am going to hold out on pulling the trigger to buy anymore until I have sorted through more stuff. There is quite a bit of de-duplicating to do.

I also managed to get the Beech worktop. Both Wickes and B&Q (two big DIY outlets here in the UK) do the same 3m long surface for just under £90 ($135) in a 1" thickness. They also do a 1 5/8" thickness, but that is £307 ($460) which is nuts! I went with B&Q for convenience although there was mild panic having checked stock online prior to going then arriving and not being able to find any. Turns out they come boxed in cardboard and I hadn't spotted them on the warehouse racking.

Managed to crack the windscreen in the Audi in the process of getting that home when the car hit a pothole in the road :shocking: 
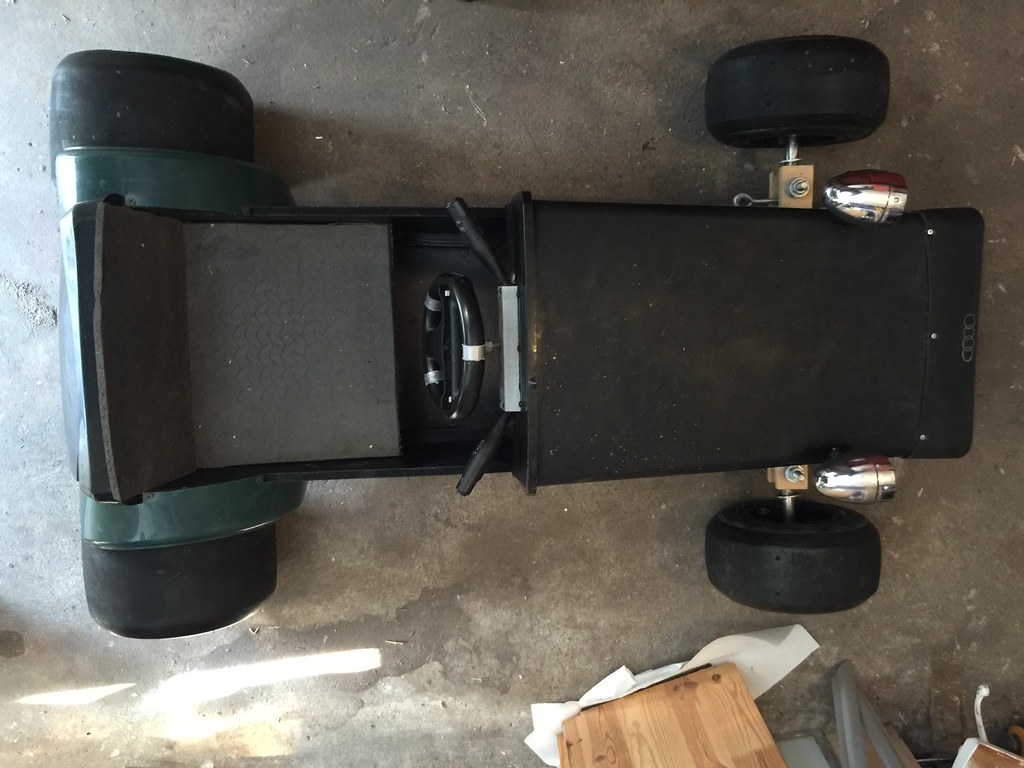
I am annoyed as I had put a big thick sheet on the dash. Guess it was just bad luck. Mishaps aside put it in the garage out of the way:

17019308436_e7d84a857e_c.jpg
 
Last edited:
OP
C

Cris B

Well-known member
Joined
Mar 21, 2011
Messages
416
Location
Lancashire, UK
Today my wife looked after the kids (well one was supposed to be helping but that didn't last long) and I cracked on with getting the bench installed. This meant creating chaos to make enough space to work in. Some point in the thick of it:

17045319475_a7a194a751_c.jpg


Fitted plenty of right angle brackets to hold down the worktop. Word is that they can warp if not fitted with enough fasteners. I will use a poly varnish over the worktop in future, but until I can get the rest of the garage i shape I am going to keep it covered with cardboard. I spent about another two hours tidying the space and felt like I made some headway, emptying about three cardboard boxes and two big plastic crates that were a loan from my father. Here are a couple of shots of the current status:

16857532548_b2b76f7f56_c.jpg


At some point I mounted the end cab cupboard I have on the wall. I needed the space back to fit the bench in. It's a KRA273A which came from an aerospace mech who was retiring.

16857781330_518cc68168_c.jpg


Next up is to do some more tidying on the opposite side. Then I may make another work surface for storage at the back of the garage as I have a 4'2" x 3'2" piece of laminated Oak worktop that is currently sitting idle.
 
OP
C

Cris B

Well-known member
Joined
Mar 21, 2011
Messages
416
Location
Lancashire, UK
To clear space on the right hand side of the garage I need to put up some shelving above the bench on the left. I have some 8' lengths of 3/4" ply left over from building the shed storage outside so that will form the shelves. Last night I made the pilgrimage to that mecca of Scandinavian goodness, IKEA, and picked up ten of these shelving brackets.

16867685767_689311b0c0_c.jpg


16888863879_df3e0f8220_c.jpg


On the web these do look a much darker colour (almost black) but it is more of an anthracite/gunmetal grey powder coat in reality.
 

Hostyle

Well-known member
Joined
May 8, 2014
Messages
272
Location
Geldrop (NL)
Holy **** Cris, you certainly don't mess around property and car wise! And thanks for sharing the pics of the shelf hangers. I've got to make the trip to IKEA sometime next week, I might pick some of these up as well (and a closet for the biking gear and a trolley for all the bike cleaning stuff).
 
OP
C

Cris B

Well-known member
Joined
Mar 21, 2011
Messages
416
Location
Lancashire, UK
I mentioned previously that I wanted to tidy up this corner at the back of the garage and make use of the oak surface that I have. We don't use the man door into the house.

16477965504_f97f3fafda_c.jpg


First thing this morning as soon as they opened I went to the local timber yard and had some 2x4" joists cut to measure:

17100403515_f89a8b3775_c.jpg


At lunch time I made up some simple frames and assembled the bench. This is a practical rather than aesthetic piece:

16893013377_2af676f16f_c.jpg


17099726461_144619a4d3_c.jpg


The perspective in this is a bit off, but there is a 1" overhang of the top to the base.

17100404545_350cf2fc51_c.jpg


This evening I cleared the corner of stuff and moved in the bench.

17098880652_21584564b0_c.jpg


The important thing was tyre storage and they fit (with room for other stuff too).

16912845160_5001493986_c.jpg


I picked up some more red paint too, so once the shelves are up and the vise refurbished, I'll psych myself to paint this to match.
 
OP
C

Cris B

Well-known member
Joined
Mar 21, 2011
Messages
416
Location
Lancashire, UK
looking good. damn shame on the Norfolk house. have it rented out now?

jim

It's complicated. The property was a renovation project I embarked on with my mother and she's the current occupant. This was February 2002 not long after we had moved in. Rallye being driven as a daily at that point.

16904052337_7e7fa47f46_c.jpg


In this photo you can see the clay lump blocks which is the traditional construction material locally. Dig a pit in the right spot, extract the clay, mix it with sand (extracted from another hole), horse hair, straw and lime and form into blocks. Our property is in an area dominated by sands and gravel substrate.

We bought the property from a guy who was the last heir in generations of ownership. He sold off some of the land (which had been a cider apple orchard) to a local developer and we bought the house. When they built the two properties next door, they extracted a lot of the sand for the construction straight out of the ground on site.

You might also see that the corner of the house is missing. A massive chunk of concrete render had fallen off revealing very little of the timber frame remaining behind it. The pile in the middle of the photo is the wattle and daub which had formed some of the internal walls.

The pile behind that nearest the house is broken up concrete that had been poured around a good portion of the perimeter of the house. That hadn't aided drainage and probably accelerated damp and deterioration of the timber frame. The double garage on the house is now in this area attached to north facing gable end.
 
Last edited:
OP
C

Cris B

Well-known member
Joined
Mar 21, 2011
Messages
416
Location
Lancashire, UK
Back to the current garage, I cut the 3/4" ply for the shelves today. Due to using up off cuts to make the shelf depth I want I am using two 'planks' side by side. To give a smooth single piece top surface I have cut some of 1/4" ply and have glued that to the two pieces below. Once that's cured I can press on.
 
OP
C

Cris B

Well-known member
Joined
Mar 21, 2011
Messages
416
Location
Lancashire, UK
Shelves glued and planed. Top surface.

17132355045_c7546f6ce3_c.jpg


Underside was a mess due to past life of the recycled boards. Due to the high position of the shelf the underside is what you'll see if you look up. I've added an edge that will be painted too. This will give me an option to conceal some lighting.

17132355085_17f47d81ab_c.jpg


Keyed the existing surface and used some satin black. It'll need a second coat and I will tidy the edges at that point later this week.

16512187813_26fb727745_c.jpg
 
Last edited:
OP
C

Cris B

Well-known member
Joined
Mar 21, 2011
Messages
416
Location
Lancashire, UK
Only managed to grab about an hour this weekend in the garage. Nonetheless managed to get the shelves up having managed to get the painting finished. I have one bracket still to fit and it turns out that the Snap On cabinet wasn't level and is lifting the right hand shelf slightly so I will drop and level that when I next get some time.

17215640611_6d57bf13b0_c.jpg
 
OP
C

Cris B

Well-known member
Joined
Mar 21, 2011
Messages
416
Location
Lancashire, UK
This week has been a crazy week. I had maybe half an hour in the garage on Tuesday morning. It was enough to get the final bracket up and rehang the cupboard. Irritatingly the front edging piece is slightly bigger on the righthand shelf in comparison to the left which has only become apparent now they are level. I'm not sure how I missed that, but will make plans to plane that down at some point.

17155037808_fd8e88a257_c.jpg


I have been looking for a few things for the space over the last few weeks. One has been a workshop clock. I get quite a bit of grief when I lose track of time when working on projects... Although I see no real problem with this to keep the peace I thought a wall clock was the way forwards. I really like the style of the European train station clocks, particularly those you find in Switzerland and Germany.

I did have one a few years ago but left it in an office when moving jobs and was never able to reclaim it. Since then I have been looking for a Mondaine or Hermle clock, but haven't managed to score one for what I feel is a fair price. In looking however I did find this which I think will do the job just fine. It has a thermometer and hygrometer built in which will be handy for any painting projects.

17342446081_00e4be4754_c.jpg


Next job is to sort out the storage on the right-hand side wall.
 
OP
C

Cris B

Well-known member
Joined
Mar 21, 2011
Messages
416
Location
Lancashire, UK
Bit of a drag trying to get stuff done in the garage at the moment because I opened a can of worms on tidying up walls. When the garage was painted they didn't do a good job, forgetting some of the basics like moving furniture and infilling the cement between the bricks. This has meant lots of this, which in isolation would be no bad think but overall was dragging down the quality of the space.

17405426182_51e6545051_c.jpg


17407016451_2ff65a4f0c_c.jpg


17780315735_4e5e59fbb8_c.jpg


So I started painting and filling. Yeah, about the filling. Seems like the whole garage was assembled with an overly dry mix of cement. As the cement was painted it was crumbling away between the bricks. A lot of filling was needed before painting could happen. I'm having to move stuff around to be able to tackle a section and as I only have weekends to work it's taking an age.

17555119668_c46daf5e6f_c.jpg


Still I have managed to get a few side projects done which has used up some of the timber and spares that were cluttering up the garage. These shelves in the cupboard with the central heating boiler made a massive difference to our available storage in the house.

17742888935_0f4b428d1e_c.jpg


There's also been a few loads of rubbish taken to the tip for recycling

17221211309_014d51a160_c.jpg


And a few beers drunk along the way

17407413575_8c990c2f31_c.jpg
 
OP
C

Cris B

Well-known member
Joined
Mar 21, 2011
Messages
416
Location
Lancashire, UK
I've also been working on the tot rod. The little car was in storage or unaccessible for the best part of over 12 months, since then it's been reassembled and used a few times. The boys still love it. Last weekend I stripped it down and gave it a shot of satin black which it has needed since it was built, but other priorities just got in the way.

As I was painting it up I kind of paused over whether or not to zap the rear mudguards. I don't really like them, but then I don't really like the whole rear track being narrower than the front. It's like that because of the original design powered by an electric drill running against one of the rear tyres.

So after some contemplation and exploration of options again, I pulled the trigger on these:

17743272201_f1600b731e_b.jpg


I am liking the change from this:

17743268291_2b83722fca_b.jpg


To this...

17716554856_5c509b2510_b.jpg


The camera angle distorts it as the track is roughly equal in this mockup, I am waiting for a few more bits to get both front and rear axles operational.
 
OP
C

Cris B

Well-known member
Joined
Mar 21, 2011
Messages
416
Location
Lancashire, UK
Tot rod made it to the next level:

18620739740_c41b431724_c.jpg


Currently working on the motor (just fab'd up a sub frame to mount it to the chassis):

21237812336_9415241c10_c.jpg


I have done some more organisation in the garage too. Including investing in some storage boxes and creating some more high-level space. I'll get some pics later this week.

One of the projects I'm currently finishing off is refurbishing this old Army chest I bought a few years ago at an antiques dealer.

21272832881_ce61e935c0_c.jpg


20643628153_bca4ee54dd_c.jpg


21254253192_9412d5576a_c.jpg
 
To avoid these ads, REGISTER NOW!
Top Bottom