To avoid these ads, REGISTER NOW!

Shawn's 32x32 two story Garage

sreno

Well-known member
Joined
Dec 5, 2008
Messages
661
Location
Eastern Townships, Qc. Ca.
Shawn's 32x32 Double Decker

Thanks for looking at my garage thread. The project got started in June of 2008 and has been progressing ever since.

Note (Dec 2017) Before going any further it's important to underline the purpose of this garage is to do any needed work on my vehicles. Upstairs is dedicated to storage and a large music room.

It has been nearly 10 years since breaking ground and a little over 9 years since I began this thread. In that time I have painted cars, built custom exhausts and done all of my own maintenance. This does not make me or my garage better than any others on this site. It just "is what it is" and if you're into DIY, you should find some of this thread of interest.

As always, post a question if there's anything I can clarify or help with.


Here's a quick overview:

On the ground floor it's 32x32 with a 12 ft ceiling and chain-lifted staircase. I set the building up mostly to keep my old cars on the road for my daily 120 mile commute.

Two tire machines, tire repair equipment, a wheel balancer, MIG welder, sandblasters, a two post lift and a scissor lift, auto-body and alignment equipment help me get it done.

The top floor: features a 32x18 room area with over 8 feet of headroom at the center. There's also plenty of storage space beyond that; between the rafters where I've added flooring.

The upstairs makes a great studio/jam room and is now insulated and usable year round.

To see more of the build part, scroll down to post #5 and check out PART 1: Breaking Ground

Shawn

1-01.jpg


One of my first projects was the 1964 Fairlane Thunderbolt tribute/basket case. It arrived (below) more or less ready to assemble but with many challenges.
01-+Fairlane+Arrives.jpg


This is a more recent photo of the Fairlane to give you an idea of what it came to look like.
BG1XBIFKIGFN-gvtTHuZPc02xMl4_9MLn9QOR7lt0SB13q6M2sGh8XhT8O4tB9Fh2DwsM8nvdt2HFrXD-yc_vy2wa-75VwiPeYE84O_yO5kQgannodEEd6dxq-Y3dWTzgF283MyO73-2kDW6bFNv7JlbbN5XdTb8C_5yBVzdjYNchowYxbfRew1J17RH9nNZdCUxH4D2aa_nuVAGj2lq6of73uQGxmNVMPdGLM2mkPeQgedn8P4FfMOLOiW32VGDZeByU5rY_7WPEGMAoBpF7D0YydVdzpVFuNOD_sI--4092hnB5DdjOm4SoXYMyUkNo8lsAmHC-TfrLEBHqIKOwpb3cgg96GA3mvpu0Kyh4amtlXa021FW9raPw-vIDtPsEVqfM5s94052nJyClUAyyhq_vpI9ww6wCt4k4VTAuKODAKx5FnCZ5AhhTxMmjl-iSbSyjl93YjHTfJbwwOTAout9LAUUB-BFpgnTpPnfYi3eWRF6JV1l_MY6_EPlMFGwJab6b7mT6VsnxRoJF0Lst54YPRG3NOYTlkNaScLdM32YLFLBbyUNK_13pMcgA8p5RAEiblOIyOEcGo8nDAPvL5fLFBubXZ40mSoTlb_YwGREZxOYjn4OAg=w800-h600-no


I've tried to document my progress as clearly as possible.
Fairlane_02.jpg


This photo of the garage itself was taken in the Fall of 2012. The roof vents were installed and the 2nd floor insulation project had just begun.
The+Look-02.jpg


Once the driveway was expanded to provide access to the garage, an extra hundred feet of snow removal was added to the 'to-do' list! OUCH!

For that, the '73 John Deere 140 comes in real handy. My Dad bought it new with the tiller attachment and single tiller extension. I added the snowblower a few years ago.
The tractor is an H3 model, with three separate hydraulic circuits, and two power takeoff setups.
IMG_2833.jpg


Once inside the garage, the two-post Rotary lift is the centerpiece of most of the serious work that gets done.
1-02.jpg


This Norco Mid-Rise lift (pictured below) is a good alternative to the two-post lift. For body-work, tires and brakes, it's ideal. It's portable too so it slides out of the way when necessary. It was originally red but got painted blue to match the 2-poster.
1-03.jpg


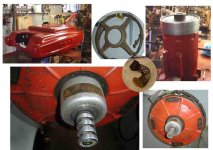
I was lucky to stumble onto some hard to find Dunlop equipment that allows me to do my own alignment work at home. The turntables alone would have been too expensive to buy new.
DSC01003-+Dunlop+Alignment+Tools.jpg


In an attempt to save space, I designed a set of stairs that lifts up and out of the way.
259-03.jpg


With 32X32 feet to work in, I was able to build a temporary tent in which to spray automotive paint. Doing my own body work has saved me a bundle over the years.
1-04.jpg


As mentioned, I decided in the Fall of 2012 to insulate the 2nd floor.
Ceiling+Batt.jpg

Floor+Washed_01.jpg


Many of my instruments, speakers and amplifiers have been idle for over a decade and a half. In the Summer of 2012 however, I began a real effort to get everything repaired, cleaned and generally sorted-out. One of my amps, a Gibson Lab series, was bought in 1976!! My favorite is a HiWatt 100 Watt Bulldog, produced around 1982.
Floor+Washed_02.jpg


With all the attention paid to keeping the cold out, the heat source is critical; especially at 30 to 40 degrees below zero. I need a way to get the place warm enough to work in, as quickly as possible. I had previously tried a smaller, more attractive wood-burning stove with a glass door. The second floor, however, took five or six hours to warm up. The present system fell into my lap, costing next to nothing. It has a huge combustion chamber, two door access, a high-volume light metal plenum and a turbine-style fan. With just basic ducts the hot air is sent upstairs like you wouldn't believe.
Forced+Air+Wood+Furnace.jpg


I welded in the window frame from my previous stove because I enjoy sitting in front of a warming fire during the Winter. This monster had only a metal plate up front.
Stove.jpg


I hope you take the time to browse through almost 10 years of building, modification and related projects. If you run across something that requires more detail, just click 'QUOTE' or 'MULTI-QUOTE' or 'QUICK REPLY' and ask me about it! I'll be happy to provide you with the clarification you need.
 
Last edited:
To avoid these ads, REGISTER NOW!

GuerrillaCycles

Well-known member
Joined
May 1, 2007
Messages
75
Location
Powell, OH
I'm definitely looking forward to seeing more pix of your barn. Hoping to begin my own build in the next few months, and I've been leaning towards a Gambrel roof barn.

BTW: what kind of truss design did you use?.I've been looking at the plans from a website that specializes in Gambrel's, and I'd love to see what you've got going on under that roof.
 
OP
S

sreno

Well-known member
Joined
Dec 5, 2008
Messages
661
Location
Eastern Townships, Qc. Ca.
Preparing the Terrain

Well Its looks good...more pics !!
I agree. More pictures please.
I'm definitely looking forward to seeing more pix of your barn. Hoping to begin my own build in the next few months, and I've been leaning towards a Gambrel roof barn. BTW: what kind of truss design did you use?.I've been looking at the plans from a website that specializes in Gambrel's, and I'd love to see what you've got going on under that roof.

Thanks Guys! I'll post more info about the trusses soon.

UPDATE:Here are some pics dating back to July 2008.

Shawn


PART 1: Breaking Ground

This first picture is a shot of the land taken just hours before the heavy equipment rolled in.
001.jpg


The excavator tore into the lot with a vengeance, exposing an unexpected swampy mess. This drainage issue made the build more complicated than expected.
Breaking+Ground.jpg


Breaking+Ground2.jpg


Hundreds of feet of weeping tile (perforated plastic tube) were laid, 'criss-crossing' under the slab's future location as well as around its perimeter.
04+Buried+under+Gravel.jpg

05-+Laying+Pipe.jpg


We covered it all with the supplied 'sock' and then buried it under gravel, as per instructions. All lines met to the south of the building and the water gets sent off to the road ditch.
06+The+Last+Bit.jpg


Load after load of rock, sand, shale and gravel were trucked in and dumped for days. Talk about shock and awe. The terrain was lifted and transformed.

19+More+of+the+Same.jpg

002.jpg


This hammer-roller (below right) literally shook the neighborhood. Awesome power.
003.jpg


This is what 1,000-plus tons of material can do to a swampy hole.
004.jpg


After the big rigs had done their part, we made it all level with a laser and set up the form for the concrete slab. By the time the dust had cleared and the concrete was ready to pour, a decent base had been created.
005.jpg
 
Last edited:

GuerrillaCycles

Well-known member
Joined
May 1, 2007
Messages
75
Location
Powell, OH
truss's look nice. You have them built off site? The design I was looking at gets built on site by owner. But I'm thinking about what I can have done to save time and get the barn up quickly.

You're barn definitely improves the look of the lot back there. Congrats!
 
OP
S

sreno

Well-known member
Joined
Dec 5, 2008
Messages
661
Location
Eastern Townships, Qc. Ca.
Concrete and Walls

Looks good, lets see some inside pics!

truss's look nice. You have them built off site? The design I was looking at gets built on site by owner. But I'm thinking about what I can have done to save time and get the barn up quickly. Your barn definitely improves the look of the lot back there. Congrats!

Thanks, Guys!

PART 2: Concrete Slab

Here we are preparing, then pouring the slab. All the leveling and prep work was DIY but we brought in the pros for the pour.
2ftX4ft interlocking foam; 2 inches thick was laid down, staggered on the sand base and taped to prevent movement. Chunks of cement were used to keep the rebar at the desired height.
Two PVC pipes (far corner) were buried beforehand. One for electrical and the other for future plumbing.

007.jpg

008.jpg

009.jpg

010.jpg

011.jpg


There was just about a trickle left of the 15 yards of concrete I had ordered.
Cement+Trucks.jpg

014.jpg


Still hot, the concrete was smooth to the touch and almost reflective.

PART 3: Building the Walls

With the slab poured and curing, it was time to start building the walls; 12 ft high and in two 16 ft sections. With exterior sheathing they were heavy. The eight 4X4 window openings were framed-in but covered by the sheathing.
Framing+Walls01.jpg

Framing+Walls01a.jpg


The rear wall was built to fit inside the two sides.
Three+Walls.jpg

Front+Wall+on+Floor.jpg

Front+Wall+UP.jpg

The+Box.jpg


The walls are up and it's a good thing, too. The trusses are due to arrive within a couple of days.
 
Last edited:
OP
S

sreno

Well-known member
Joined
Dec 5, 2008
Messages
661
Location
Eastern Townships, Qc. Ca.
From Trusses to Wrap

PART 4: The Trusses

Here they come! Seventeen of them! We had planned ahead to have them laid on top of the wall and I was glad we did!
015.jpg


Check out the walkway we made to help with safety for the higher work.
Temporary+Walkway.jpg


We set up an old fashioned pulley on a center post and pulled each truss into place old school style.
016.jpg

Trusses+UP-2.jpg


With all trusses secure, the flooring could then be screwed into place.
Flooring.jpg


We converted an old toboggan into a manual shingle elevator to get them all upstairs in one shot.
Tobagan+Shingle+Shuttle.jpg


PART 5: Roofing

With the trusses in place we then constructed some pretty elaborate scaffolding on each side of the garage. We built them up higher as the need arose. It was safer than working on ladders.
Material costs for the DIY scaffolding was near zero. Virtually all of it got used elsewhere on the project.
Before putting on the shingles, the roof needed sheathing to be installed.

RoofSheathing01.jpg


We laid down a membrane in strategic areas. Here's an illustration showing what I mean.
RoofSheathing02.jpg

Roofing+Starts-Higher+Walkway.jpg

017.jpg

Roofing+Top+Center.jpg

Shingles+Finishing-View+of+Walkway.jpg

Above right is a good view of the two-tiered walkway and hand rail system that made the work a lot easier. The second level was simply built on top of the first one.


PART 6: Upper Sheathing


With the roofing completed, some daredevil high-wire risks were taken to get all the sheathing done. Hey, it's higher than it looks when you're on a ladder!
Sheathing01.jpg


Sheathing02.jpg


Sheathing03.jpg

Sheathing04.jpg


Sheathing05.jpg


It's finally time for the house wrap. At the same time, in preparation for the siding, furring strips are strategically placed.
House+Wrap01.jpg


PART 7: More Irrigation and Landscaping

The heavy equipment came back and we had another 300 tons dropped in to bring up the terrain for future landscaping. Lots of that material went into improving the driveway...
Driveway0.jpg


...but much of the work was concentrated on better drainage around my wife's little studio/workshop.
Emma%27s+Studio+Irrigation01.jpg

Emma%27s+Studio+Irrigation02.jpg

Emma%27s+Studio+Irrigation03.jpg

Emma%27s+Studio+Irrigation04.jpg

Driveway1.jpg


Another 250-300 tons of material were brought for this step.
Driveway2.jpg


While the landscaping was going on, I finished up installation of the house wrap and began putting the doors together.
Doors+to+Install+10X8.jpg

Door+Hardware.jpg

Door+Install+1st+Panel.jpg


To the right is the snowblower attachment for the John Deere 140. I found it in NY state.
021.jpg
 
Last edited:
OP
S

sreno

Well-known member
Joined
Dec 5, 2008
Messages
661
Location
Eastern Townships, Qc. Ca.
PART 8: SEALING THE GARAGE FOR WINTER

We're cutting it pretty close; sealing up the building with the cold weather closing in fast. The second floor sliding doors are not trivial installations. Too tight and they won't slide properly. Forget the spray foam and they'll be leaking cold air all Winter.
022.jpg


This is the huge roll of electric cable that will bring house current down to the garage electric box. It needs to circle 'round the house and then head 100 feet to the garage.
023.jpg


Inside, the 1st floor is sealed off from the second floor with R20 fiberglass insulation and .006 (six mil) vapor barrier. At the time I had not decided what to do with the upstairs. For now, I'd treat it as 'outside'.
024.jpg


The TYPAR house wrap will have to do for the first winter. We had to do it that way, given the time remaining before Winter.
025.jpg


We had the stove professionally installed while on blocks at the desired height. Then we poured concrete into a form built around the blocks.

026.jpg


Below you can see the form with concrete poured.

033.jpg


My wife thought it would be a nice touch to place patio stones in the concrete. It's not something I would have thought to ask for but it turned out okay.
027.jpg


I had put up just the panels required for the stove's installation.
028.jpg
 
Last edited:

rinker1

Well-known member
Joined
Aug 30, 2008
Messages
289
Location
Ohio
I know the feeling of waiting till spring for siding install, just working on the inside of mine wiring for now. Keep updating new photos!!
 
OP
S

sreno

Well-known member
Joined
Dec 5, 2008
Messages
661
Location
Eastern Townships, Qc. Ca.
I know the feeling of waiting till spring for siding install, just working on the inside of mine wiring for now. Keep updating new photos!!

Will do, rinker1 !! :)

To my surprise, the insurance company said I was already covered for a wood-burning stove. The house has one so...

I had all chimney work done by a pro, which guaranteed municipal certification of the whole setup. The run of chimney pipe through to the second floor is double as well as stainless steel.
029.jpg


This is how the system exits the roof.
030.jpg


The front sliding door is an 8 foot unit, since I plan on having a few get-togethers and BBQs. It'll be easier with a nice, wide 4 foot opening.
031.jpg


Then, Winter hits. It gets cold real fast around here.

032.jpg


This is where the wood stove truly shines.
033.jpg
 
Last edited:
OP
S

sreno

Well-known member
Joined
Dec 5, 2008
Messages
661
Location
Eastern Townships, Qc. Ca.
The Rotary Lift arrives; and just in time for the Holidays.

Unpacking and setting up the lift.
034.jpg


035.jpg


036.jpg


All the nuts, bolts and washers are sorted and labeled to the point where it's pretty hard to mess up.
037.jpg


038.jpg


039.jpg


Due to drainage sloping, the floor under the left post is lower than the right. I used the grinder to level off the lift pad area and then a quarter inch steel plate to bring the left pillar even with the right.
040.jpg


041.jpg


Finally, the lift is installed, calibrated and wired. I wish the first lifted car had been cleaner. There will be more and more toys arriving as the inside nears completion...
042.jpg


Shawn
 
Last edited:
OP
S

sreno

Well-known member
Joined
Dec 5, 2008
Messages
661
Location
Eastern Townships, Qc. Ca.

Norco 86002 48'' Mid-Rise Lift; 6000 Lb Capacity
I brought in my scissor lift to be painted blue, like the Rotary...

14-01.jpg


...a used 40-40 Coats tire changer for regular steel wheels
14-02.jpg


...and bought a snow blower attachment for the old '73 John Deere 140.
14-03.jpg


Interior wall sheathing in progress. It's slow-going as the lights' wiring needs to be done as well.
14-05.jpg

14-06.jpg

14-04.jpg
 
Last edited:
OP
S

sreno

Well-known member
Joined
Dec 5, 2008
Messages
661
Location
Eastern Townships, Qc. Ca.
Tire Machines

.
The company that sold me the Rotary lift had a Coats tire changer/wheel balancer combo in stock and the price was right so I bought them.
15-01.jpg

15-02.jpg
 
Last edited:
OP
S

sreno

Well-known member
Joined
Dec 5, 2008
Messages
661
Location
Eastern Townships, Qc. Ca.
This is the small 25X12 garage, attached to the house. Heated and with hot and cold running water, I use it for winter car washing and work not requiring a lift. I guess you could call it my garage's 3rd bay. :)
16-01.jpg


Although it's quite small, I prepped and painted three vehicles in there.

16-02.jpg


16-03.jpg


16-04.jpg


The last pic shows how I got the fumes out in a hurry.
16-05.jpg
 
Last edited:
OP
S

sreno

Well-known member
Joined
Dec 5, 2008
Messages
661
Location
Eastern Townships, Qc. Ca.
Thanks for your comments,

Yes, the lot was like a wet sponge. I remember seeing the excavator pull out an old, buried stump; roots hanging from the bucket, dripping like a damn tea-bag.

On the other hand, if I had put the garage closer to the house it would've been dryer and much cheaper!

But when I thought about it beforehand, it seemed almost claustrophobic. Plus, the newly filled section has added value to the property, offsetting a bit of the new building's cost.


Shawn
 
Last edited:
OP
S

sreno

Well-known member
Joined
Dec 5, 2008
Messages
661
Location
Eastern Townships, Qc. Ca.
Feeling a bit under the weather so I retired to the attached garage and continued with the restoration of my Dad's old Hunter wheel balancer/spinner. It's much lighter work.
 

Attachments

  • Hunter Balancer_Restore 3.jpg
    Hunter Balancer_Restore 3.jpg
    57.9 KB · Views: 1,222
Last edited:
To avoid these ads, REGISTER NOW!

FakeName

Well-known member
Joined
Nov 10, 2008
Messages
171
Location
San Diego, CA
WOw. I used to use one of those over 30 years ago. The problem was I was never taught how to use it properly, and I'd spin the wheels too fast. Could NEVER get a balance that way. Once slowed down, it worked OK. Advantage was that the entire assembly, including brake drum, was balanced as a unit.

Damn lucky I didn't kill myself with it. It was a helluva rotating mass of stuff. Gotta tell you, I'd enjoy seeing it again, and I'm no fan of padding the corners of the world. But that thing is dangerous.
 
Last edited:
OP
S

sreno

Well-known member
Joined
Dec 5, 2008
Messages
661
Location
Eastern Townships, Qc. Ca.
You're so right! I had the assembly come off the right front wheel once. It just spun its way up my left arm and fell to the floor. Think I may have dodged a bullet...

Shawn
 
Last edited:
OP
S

sreno

Well-known member
Joined
Dec 5, 2008
Messages
661
Location
Eastern Townships, Qc. Ca.
Aha! Do you see that white fog on the plastic?

The recent deep-deep-freeze revealed problem areas with cold infiltration appearing in several spots along the base of the walls.

They're caused by outside air creeping in under the wall, between the concrete floor and the wood walls.

I used a couple of flat-ended pry-bars to lift the bottom plate a fraction of an inch. Then I slipped in lengths of foam designed for this purpose. That worked and the spots never came back.

23-01.jpg


PS Building is hard work. I've lost 22 lbs since the day in June that we broke ground :))
 
Last edited:
OP
S

sreno

Well-known member
Joined
Dec 5, 2008
Messages
661
Location
Eastern Townships, Qc. Ca.
how do you access the upstairs

That's a question I've been wrestling with since the beginning. This spring, I'm planning to add to the rear of the building (6X18 already covered by the rear deck) and build a decent staircase inside.

Here's a photoshop mock-up of an enclosed stairwell with possible storage.
27-01.jpg


In the meantime, I'm using the ladder that you see out front. Not ideal, but I don't want to lose precious work space when there's no need to decide immediately.
27-02.jpg


To make certain my large items can be safely lifted to the 2nd floor, I'm adapting a winch/swivel setup designed for 'up to' 1,000 pounds.
 
Last edited:

rburke65

Well-known member
Joined
Nov 10, 2007
Messages
12,349
Location
Canfield, Ohio
How long have you owned thr Rotary lift? Can I ask the price and any comments on it . Looked at one last summer at a car swap meet.
 
OP
S

sreno

Well-known member
Joined
Dec 5, 2008
Messages
661
Location
Eastern Townships, Qc. Ca.
How long have you owned the Rotary lift? Can I ask the price and any comments on it. Looked at one last summer at a car swap meet.

I just bought it. Rotary SPOA-10 Asymmetrical, 10,000 lbs rated

I bought it before the Holidays and installed it myself in two weekends. All nuts, bolts and washers come packaged and separately labeled.

Saw it for $3,400/Delivered, in U.S. but paid more here in Canada. Still I shopped around and bought at $4,500CAN, including tax and delivery, saving $1000 compared to the local distributor's best price.

It's fun to use, all parts fitting and moving well and said to be structurally stronger due to one-piece manufacturing of columns.

Two of the large ROTARY decals were damaged but Rotary sent me all four in a box, no hassle.

Lifts like these employ 'cable and sheave' carriage height equalization, whereas more expensive units use hydraulics. Never owned the latter but this system seems to work just fine.

Single phase 220-240 volt motor requiring 17 amps (wired myself with electrician consulting by phone) seems plenty strong and is Italian-made for this very application, not general use.

I wouldn't hesitate to recommend it for mostly automobile and light truck repair. Its center of gravity works well for these vehicles.

For mostly trucks I'd get the symmetrical version. Same price.

I'll be adding frame adapters for convenience sake later on, but the standard 3-way system works pretty well.

You can get three-section telescoping arms for the front, in order to shorten or lengthen their reach but they compromise lift capacity somewhat.

Hope this information is of some value to you.

Shawn
 
Last edited:

Mikea57

Well-known member
Joined
May 28, 2008
Messages
262
Location
Olive Branch, MS
Sreno,
I want to do the same type thing with my shop and add a "patio" upstairs and enclose below it to house my air compressor and a few other pool related odds and ends. I'll have the sliding doors on that end of mine though instead of on the front end. My stairs going up are right on the back wall so I don't know that I'll have a door to access it from inside. But, I shouldn't need access from inside really so I think it'll work.

Your build looks great though.

Mike
 
OP
S

sreno

Well-known member
Joined
Dec 5, 2008
Messages
661
Location
Eastern Townships, Qc. Ca.
Sreno,
I want to do the same type thing with my shop and add a "patio" upstairs and enclose below it to house my air compressor and a few other pool related odds and ends. I'll have the sliding doors on that end of mine though instead of on the front end. My stairs going up are right on the back wall so I don't know that I'll have a door to access it from inside. But, I shouldn't need access from inside really so I think it'll work.
Your build looks great though.
Mike

Thanks, Mike...We put sliding doors both front and rear, by the way.

These things are works-in-progress. Do you have your project posted here so I can get a look?

Shawn
 
Last edited:

gcan

Well-known member
Joined
Dec 30, 2006
Messages
152
Location
Alabama
I like the idea of building a deck and stairs to access. I put stairs on the back wall and hate the loss of space but a problem I have is I have central H/C and it has the t-stat down stairs and regsters upstairs.

SRENO - great build!!
 
OP
S

sreno

Well-known member
Joined
Dec 5, 2008
Messages
661
Location
Eastern Townships, Qc. Ca.
[/QUOTE]
I like the idea of building a deck and stairs to access. I put stairs on the back wall and hate the loss of space but a problem I have is I have central H/C and it has the t-stat down stairs and registers upstairs.
SRENO - great build!!

Thanks! I don't know what I'll do yet.

I saw foam being used to organize tool drawers and I tried to find some. Instead I came across this black mesh drawer liner. It's not bad...


01.JPG


02.JPG


03.JPG


04.JPG


05.JPG


06.JPG
 
Last edited:

greg

Well-known member
Joined
Dec 12, 2006
Messages
201
Location
Eden NC
I would love to have a spin balancer . While your garage may not be one of the prettiest ones in the end , it will be super functional which is what I am after too .
 
OP
S

sreno

Well-known member
Joined
Dec 5, 2008
Messages
661
Location
Eastern Townships, Qc. Ca.
I would love to have a spin balancer . While your garage may not be one of the prettiest ones in the end , it will be super functional which is what I am after too .

Thanks Greg.

Just finished installing most of the remaining ceiling lights; those around the service bay, at least. I really want to be able to see what I'm doing in here.

36-01.jpg

36-02.jpg

36-03.jpg

36-05.jpg
 
Last edited:
OP
S

sreno

Well-known member
Joined
Dec 5, 2008
Messages
661
Location
Eastern Townships, Qc. Ca.
I'm storing my old music equipment and wasting otherwise useful space. Smaller amps and instruments have already been carried upstairs on a ladder.
My soon to arrive pickup truck winch/hoist will get the heavy stuff up to the top floor.

37-01.jpg

37-02.jpg

37-03.jpg

37-04.jpg
 
Last edited:
OP
S

sreno

Well-known member
Joined
Dec 5, 2008
Messages
661
Location
Eastern Townships, Qc. Ca.
I added a retractable work light on the ceiling. I also moved some audio stuff upstairs by the ladder.
DSC06145.jpg


I'm getting close to finishing the sheathing job. It's almost ready for paint.
38-02.jpg

38-03.jpg

38-04.jpg
 
Last edited:
OP
S

sreno

Well-known member
Joined
Dec 5, 2008
Messages
661
Location
Eastern Townships, Qc. Ca.
I'll be glad when the OSB jigsaw puzzle is solved. The last pieces are inevitably the toughest...
Possible 'snow-day' holiday tomorrow. If so, the sheathing's going to get done!

40-01.jpg

40-02.jpg

40-03.jpg

40-04.jpg
 
Last edited:
To avoid these ads, REGISTER NOW!
Top Bottom