To avoid these ads, REGISTER NOW!

westracing01's 10x20 Shed Build and Garage Plans

westracing01

Active member
Joined
Nov 14, 2014
Messages
37
Location
New Milford, CT
OK here's my first post. Let's get the background out of the way. We bought our current home in 2012. What lead up to that purchase was a series of disasters in our former hell hole rental condo. The primary bane of our existence was a basement that ceased to keep out water and a landlord whose purse was welded shut. After the Halloween storm of 2011 we had a basement with about a foot of water in it. At wits end and with barely enough in the bank, we struck out to buy figuring that at least if the house we bought had problems, we'd fix them instead of turning a blind eye.

So, with that, we looked at a bunch of houses and finally settled on a 1900 farmhouse in town. It needed a roof, a new boiler, electrical work, chimney work and some plumbing work. Ooof. Luckily it all didn't need to be done at once. So, after 3 years of ownership, the house has a nice new aluminum shingle/standing seam roof, a lined chimney with a cap, a new boiler and 200A service.

Enough of that. Now, onto the shed. After cleaning it all out, this is what I started with.

8wzR1D4UExm7rVDU-MMmu6bGxPoos2ZNPrsSOPLZOg=w1672-h941-no


It had a dirt floor and since this was never intended to be anything other than storage and temporary work space I wanted a floor that was cheap. Pallets and OSB.

ehqgLx3Q4fJC7_8KeEBHMfmmXy67bixaqlg-whMvOg=w1672-h941-no


U1FqC7D4UH49lpwhnJVwkgJUBUZ_q9Kv5woYjf-xwA=w1672-h941-no


After a year of that, I always wanted power out there. So, figuring that I can use the shed as a halfway point and bring power to it along with one day using the sub panel in there to feed a garage, out to the shed with power we went. First step was going to town to get the permit. $35 later and some explanation to the building inspector of what I planned to do I just had to wait for the ground to thaw this spring.

id2n39AUhZoLtPkeBicFGRpJoi8biB4WybGdgxn5MA=w530-h941-no


Got that dug in a day... And it sucked. Did it all by hand. Right up against the deck is the sewer line. The conduit goes under that. I went crazy with the wire and way over code running 1-1-1-2 Copper. That's good for 130A. The shed has our houses old 100A box in it. That will one day be replaced with a 125A box and the 100A box will go to the garage. Here's some wiring shots and conduit.

Shed
d8OAMCKX4T2L8P43coXNGVuA3_EI8HOgerbhUlOJWg=w530-h941-no


Basement
O6-UUqcXZpGHYZUGKudlEfta9hEv_0fl-5xYwbquFg=w1672-h941-no


Where the conduit exits the basement
-sQud7SiM8dCMahRqhLP6WTkkKR-xcRjqV-zFc3EmQ=w1672-h941-no


There's another box on the end of the deck and a third on the side of the shed. I broke the run up into basically 4 parts. In the basement, under the deck, through the ground and into the shed. Drove in two 8 foot ground rods and threw the breaker... After the inspector blessed it. Told me some electricians he's seen don't do as good a work, which was of course a huge compliment.

After that, it was time for lights, plugs and to get my welder and tools out of the basement and into the shed. Wired in a 6-50R NEMA plug for my Hobart Welder, ran 4 T8 Lithonia lights, put a spot light on the front of the shed and wired in a panel plug.

bzRVzgiZI3fsIIns2z3FUAqHQQCl6dBHA537UQBgYA=w530-h941-no


-inpjwreiCl7aUCzBSLovYuFJ_duJ35ay1H_mdJq5A=w1672-h941-no


The shed itself is a bit of a pile but it's stood this long so it can't be all bad.

As for the future garage, this is what I have to work with.

aHfa0ED9oopn92Kk3lPMXstitc_TVPNQMoMRdNyWBQ=w1672-h941-no


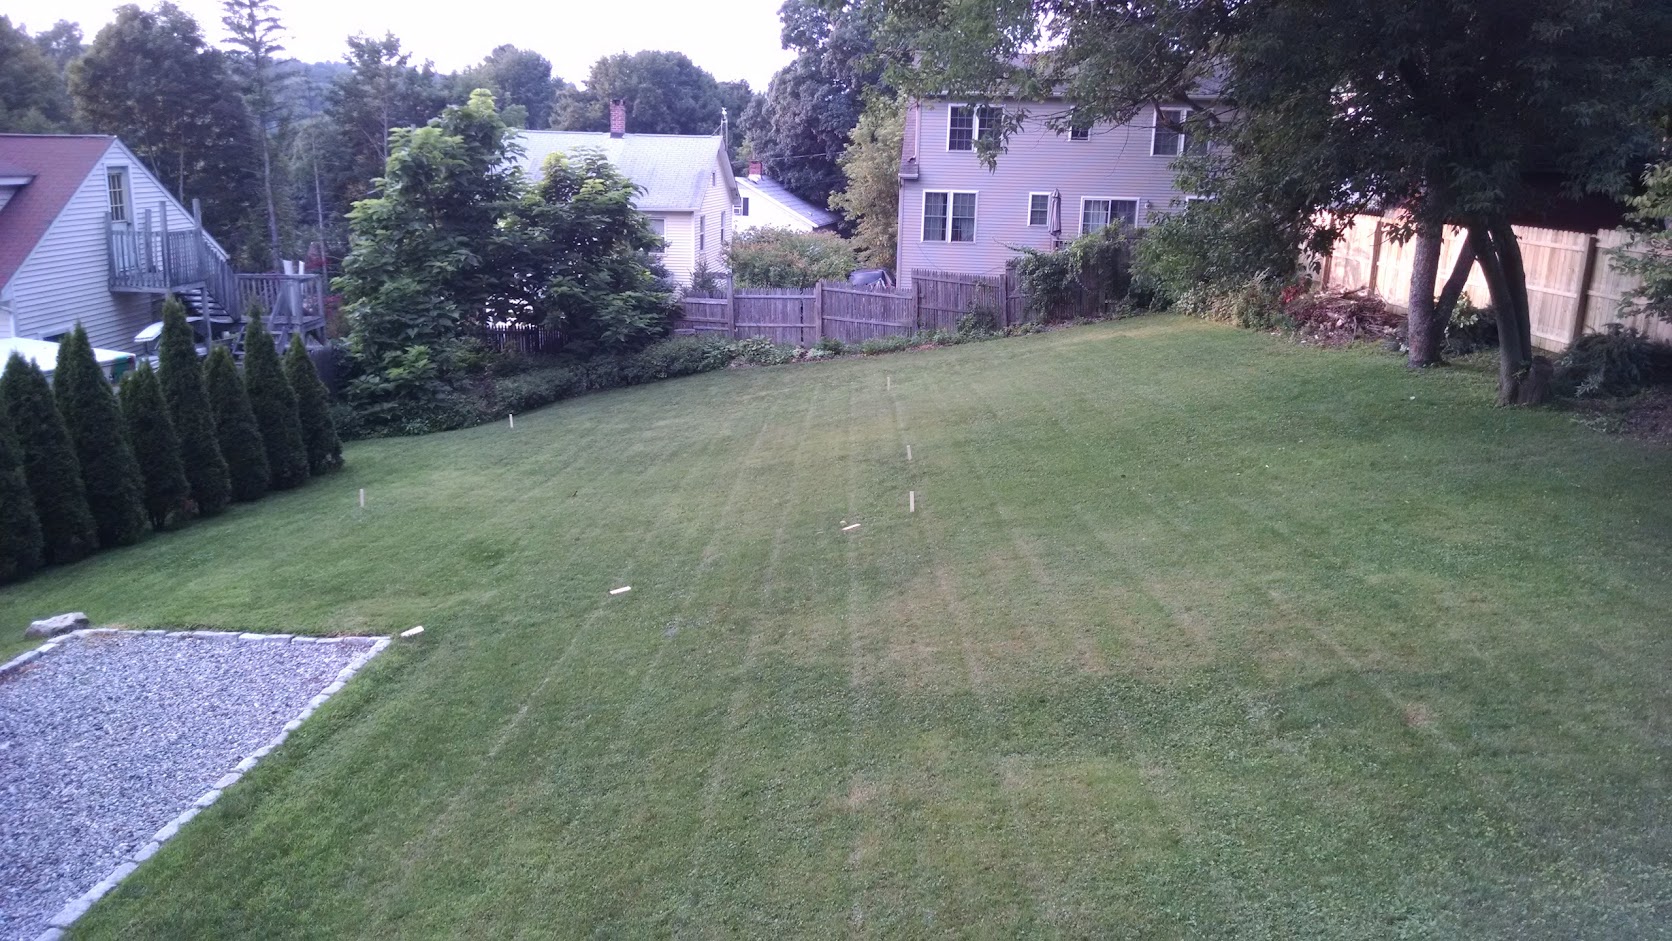
Ignore the stakes, they weren't placed right. Shooting for a 28x28 with a room above and a two post lift. Whether I can get that is another story. Special permits are needed for any peak height above 20' and ideally I'd like to push it back closer to the back fence. Our current offsets are 25' in the back and 10' on the sides. I'm early in the planning stage so all input is helpful.

This is the amount of space it's going to take up.

PnWFx2UW7686vTbJFMlDDCCj7Y9y7B3bO_rpWDPc2Q=w1672-h941-no


Yellow is the garage, red is the concrete/asphalt driveway/pad and blue over on the left is where I will add stone like I did in the lower left (which will be paved over) for added turn around. This will be stone because I plan to run the electric after the garage is up and as time and money allow.

Well, that's what I got so far. Good, bad, garbage, let me know what you think. The undisputed garage masters reside here from what I've seen.
 
To avoid these ads, REGISTER NOW!
OP
W

westracing01

Active member
Joined
Nov 14, 2014
Messages
37
Location
New Milford, CT
LOL. Nah, no updates. It's very early planning stage to build a garage. Got real busy with other stuff so there's no updates on the shed either.

I did get a quote from pre-bilt garages in Branford for a 24x26 garage, doors, sided, site work and foundation. Basically everything but the driveway and no finishes inside (no electrical, sheetrock, etc.) Estimate came out to $70/sqf.

I didn't think that was too bad. The real issue is I'm not so sure what's going on with work at the moment and in my grand plan I want to get a trailer to tow my 4x4 to the trails. I live on a real narrow street with neighbors who like to park in the road. Going to be difficult to swing a trailer in and around so that's a downer and leads me to looking at renting shop space, which is asinine amounts of money in this area.

If I strode down to the bank I'm pretty sure I could get the money to build the garage but if I could find reasonable shop space within 20 mins of my house I'd jump on it and worry about building the garage at the house later.
 
OP
W

westracing01

Active member
Joined
Nov 14, 2014
Messages
37
Location
New Milford, CT
Well, I had a long, rambling update typed, but this thing crashed...

The quicker version...

Went to bank, got cash. Budget is $50k for a 26x32x10 two car garage, no electrical or finish work of any kind. Called 3 GC, one prefab guy and Morton Buildings...

1 GC - Detailed bid, $70K. Nope.

2 GC - More like I'm the GC and have to arrange a lot of the job. Ballpark is $60K. He's flaky so nope.

3 GC - Came out, took a look, nice guy, never heard from again.

Pre-Fab - Said he can't do it with the existing shed in place. Asked him what about if I tear it down? Never heard from again.

Got a price for the building from another Pre-Fab joint, but haven't heard from their concrete/site guy about coming out to take a look at our 10% slope of a yard...

Look at a steel carport style... Not bad, but I do not like the building process and seems like a serious hassle. $35-40k all in, give or take.

Morton was supposed to come today but that got rescheduled for Tues. I hope they have good news for me. Talking with the guy he said it's about $40k with the slab, with site work it'll be more but he has to see it. I told him he's in the ballpark so let's talk. I like their buildings and have seen quite a few of them so hopefully he has good news. "If it's close and we like it, write the man a check when he's there," said the wife.

Survey done and Zoning signed off on the size. Need to find a guy, put down a deposit and get a building plan, then I can pull the permits and off we go.

I DO NOT have the skills to build this myself or I would just do that. I also don't want to be the guy scheduling all this. I can do insulation, electrical, etc myself. I actually like doing electrical work so that's a plus.

Any one reading this, if y'all have any idea's I'm listening. Thank you for reading!
 
Last edited:
OP
W

westracing01

Active member
Joined
Nov 14, 2014
Messages
37
Location
New Milford, CT
UPDATE: Not happening. Site work/foundation, hell the whole project, is just way too damn expensive. $70K for a 2 car garage is a joke. That's 33% of what we paid for the damn house. That's just stupid, so no garage.
 

andyvh1959

Well-known member
Joined
Feb 15, 2020
Messages
2,590
Location
Green Bay WI
If not building it yourself, you could act as the general contractor; work up the design, get the bill of materials, get the permits, schedule the subcontractors. That alone could save you a lot of bucks, assuming you can find subcontractors to work with you.

Menards is a very common big box materials supplier here in the midwest, like Home Depot but still private owned. Menards.com has a really good free garage design program on their website that will develop the complete bill of materials, the design elevations, all the details you can present to the city to get the permit. I did it for my recent garage build and did it all online, including submitting for the permits and paying the permit fees while out of town for work.

I bought all the materials from Menards, back in September 2019, for a 24x28 garage with some extra design features, for $9000. Site prep cost me $1500. Slab cost me $4500 (I installed heating coils before the concrete pour). Two rows of 8" block around the slab perimeter cost me $1500. Hired a friend to do the basic framing, get the walls up and trusses in place for $2500. I took it over from there: finished the roof sheeting, shingles, trim, doors and windows, OH door, electrical. All total I'm in for $20,000.
 
OP
W

westracing01

Active member
Joined
Nov 14, 2014
Messages
37
Location
New Milford, CT
See, there in lies part of the issue. One of the contractors that came out, basically I was the GC. He'd put up the building, I had to schedule the site work, I had to schedule the foundation construction, I actually drew up the foundation, site slopes, I have an open zoning permit application, by the time I added up the site work quote, the building and the foundation we were passed the $60k mark.

I flat out don't know how to build the thing. The land is trash to work with. 10% slope at minimum going two different directions, so it has to be dug down on one end, filled on the other end with a foundation wall high enough to keep the whole shebang from sliding down the hill and obviously at least 42" down. I even drew it with a step foundation.

Combine the lack of knowledge with a drastic lack of time... It's just not there. It's a not a project I am even remotely comfortable trying myself. I never in a million years dreamed that it would be this difficult to even get people to look at the job. At the end of the day though, I'm the fool. I took the word of one guy, tacked on $10K and figured that would be good. Clearly that was a huge mistake.

This would possibly be our forever house if we could get the garage, but it's absolutely not worth it at these costs. The quotes aren't even for what I would consider my "dream" garage, just a two car shell.

We found a house two weeks ago for sale that was a 3 bay, 13' ceilings, 12x10 doors, 8" slab with a super nice two bedroom bath and a half above it with an unfinished attic ready to go on 5+ acres. It was a place we could swing too, just too far away from work. When I look at the price of that place and then run the numbers against what it would cost to build a garage not half as nice as that on our small lot, the total of our house plus improvements plus the garage comes out at $80k less than substantially more house elsewhere. The numbers don't lie, it's not worth it.

We're going to do a market analysis on our house and see what the score is.

I do thank you for typing out the response and it's a good idea, but it's not for me. If that changes I will update this again but I don't see moving anywhere in our current house.
 
OP
W

westracing01

Active member
Joined
Nov 14, 2014
Messages
37
Location
New Milford, CT
Sadly, no on moving it. Where I have it staked out is the flattest part of the land. It just gets worse the farther right you go. The top driveway is too tight to the property line to do anything up there anyway.

As for extending the shed... It's possible, but it's not worth it. It's proximity to the line would mean leaving one wall there I believe and there isn't really enough room to build anything reasonable there without opening up a whole separate can of worms.

We'll see what the market analysis comes out at. Our realtor is good. If she tells me spending $70k on a 2-car garage would add 80%+ of the cost to build to the home value, we might still do it. I can tell you that if we do built it, and it does cost that, we're going to go with the guy I initially thought was insane. His bid was by-far the most complete and professional and it's the closest to what I actually asked for. 26x28, 10' ceiling, two 10x9 doors, couple windows and entry door.

We'll see how it shakes out. Home valuation is next Saturday. I can get the money to cover the difference between what we originally budgeted for and the actual cost. Not a terrible place to be. But, we got to this place by not being stupid and unless the cost of adding the garage makes sense, we won't do it.

Back up plan is to tear apart the shed, reinforce it, dig the dirt floor down and build a regular wood floor suitable to support the wife's Subaru and add a rollup door (maybe) so she can get her car out of the weather. It's a 10x20 and her car will fit easily, especially once I re-brace it and move the interior storage floor up. Then I'll just add another shed to the lot (under 200 sq.ft. I don't need a building permit) for my tools and yard equipment. That's a lot of work, but nothing I haven't done before and not nearly as daunting to me as building an entire building from scratch.
 
OP
W

westracing01

Active member
Joined
Nov 14, 2014
Messages
37
Location
New Milford, CT
Forgot about this...

Long story shortish... After the market appraisal and some other back and forth, we basically did a cash out refi on the house, lowered the interest, got the money needed to build the garage and wound up saving about $10k overall on the mortgage and equity line we had. So, we figured what the hell, let's do it. The truth of the matter is this... We couldn't buy what we have now for the cost we have into the house and building the garage.

So, since no one cares so much about the backstory (though I can give it if anyone really wants it), on to the pictures!

Here she is right after major construction finished.20211105_161623.jpg

I pulled the permit and did all the electrical myself. Passed inspection without hassle. I can post all those pictures if anyone cares, but it's got the same setup the shed does (did.) 100A sub-panel. Everything in the garage is run in EMT conduit.

Here we have the lights going in...
20211206_150224.jpg

Using the new truck as a workbench to build my workbench.
20220109_122831.jpg

Exterior lighting added.
20220122_172151.jpg

Plugs by the workbench.
20220517_150647.jpg

Plenty of decorations... Obviously a necessity.
20220522_184803.jpg

A good picture of how it looks today. This was actually taken over the weekend. Lawn is back, retaining wall built, etc.
20220917_133817.jpg

And finally the picture I took this morning after I re-did my loft storage.
20220920_124049.jpg

We actually wound up going with the guy I thought was out of his mind on price. At the end of the day, excluding the two concrete pump trucks we needed (which weren't in the estimate) he was bang on the estimate.

The white frame on the front is the frame for the barn quilt my wife is trying desperately to make, but not having a ton of success at. She likes to paint God bless her, but she hasn't got the world's steadiest hand.

26' x 28' with 10' ceilings (actually 10'8" to the bottom of the rafters) and two 10' x 9' doors. Easily fits an F450... Which was the reason I wanted doors that size.
 

zc15

Well-known member
Joined
Dec 22, 2020
Messages
433
Location
SE Michigan
Was there a reason you went with conduit for the electrical instead of romex through the walls? I feel like surface mount is usually done in renovation work with already closed-in walls
 
To avoid these ads, REGISTER NOW!
OP
W

westracing01

Active member
Joined
Nov 14, 2014
Messages
37
Location
New Milford, CT
Was there a reason you went with conduit for the electrical instead of romex through the walls? I feel like surface mount is usually done in renovation work with already closed-in walls

Ability to change it later without having holes through all the studs and protection. It won't be insulated anytime soon, if ever.

I have a habit, good or bad, of building something, using it for a while, then thinking of another way to do it and wanting to change it. I figured this way, if that should happen, I won't have a bunch of 1/2" holes going through the studs. I can also be a klutz sometimes and I didn't want the wires exposed to anymore damage than was necessary.

Plus I think this looks cleaner, but that's individual preference.
 
OP
W

westracing01

Active member
Joined
Nov 14, 2014
Messages
37
Location
New Milford, CT
So, how does one hang a 4x4 barn quilt by themselves, when they're not real keen being on a ladder to begin with? Carefully, that's how...

In the below image you can see what appears to be a small white rectangle. That's actually an aluminum bracket I made that I screwed into the bottom of the frame. The two step ladders have a board across them to act as a scaffold. I pre-drilled two screws into the quilt, heaved it up the 3' step ladder onto the scaffold, then scampered up the 11' step ladder (that was money wisely spent), grabbed the quilt, heaved that up onto the bracket so I could adjust it without having to hold onto it at the same time. We have a Werner 11' Podium Step Ladder, a Werner 8' Standard Step Ladder and a little 3' job that I can't remember where I got it.

20221114_114721.jpg

6 of 8 screws in using the 11' step, but the top two I couldn't get to without busting out the Werner 24' Extension... I am NOT real comfortable on that thing. I got to one step below where I needed to and thought, "Nah, it doesn't need the top 2 screws..." Then I thought, "Fool, you're already here... **** it up and go up one more rung." Got the top 2 screws in then promptly hauled *** off that thing. Took this pic just to show all the ladders I needed to be able to do this alone.

20221114_120415.jpg

Finished product... With my toolbag and the boards/bracket used to level the ladders/install the quilt.

20221114_121553.jpg
 
OP
W

westracing01

Active member
Joined
Nov 14, 2014
Messages
37
Location
New Milford, CT
looks good, she and you did a nice job!

f450? Holy Smokes, sweet truck. What do you pull with it?

Technically nothing... LOL. We bought the truck under the theory that no one ever said they wished they hadn't bought so much truck. The plan was get the truck and then get the camper. We'd been camper shopping for quite some time but haven't quite found what we want yet.

So, in the meantime, I've just rented a camper and towed that.

Need vs Want... Want won.
 
OP
W

westracing01

Active member
Joined
Nov 14, 2014
Messages
37
Location
New Milford, CT
Built a new shelf. Was going to put it on either side of the garage, but didn't want the potential for opening the truck door and hitting it or having the wife bump her head if on the other side. So, back wall is what won.

20221203_141114.jpg

Yesterday I added the light underneath. After I built the damn thing I realized that the back ceiling light is blocked.

20221204_151929.jpg


Small steps of organization. This gets all the electrical junk in those buckets off the floor and frees up additional space under the bench to put all the jackstands.
 
OP
W

westracing01

Active member
Joined
Nov 14, 2014
Messages
37
Location
New Milford, CT
No picture, will grab one Weds when I'm home. Added internet to the garage today. Wife got me another powerline adapter so I paired it to the existing and then went out and plugged it in the garage. I didn't think it would work since technically you're supposed to be on the same panel, but apparently so long as the whole thing is connected, it works. Obviously the garage sub-panel gets its power from the main panel in the house, which is, to my great surprise, all that is needed.

So... Now, while there's no heat in the garage (yet, that may change), once Spring/Summer arrive, I can work from home from my workbench in the garage. I may add another cheap router to the equation, or some kind of cheap splitter, which would allow me to have a smart TV playing while I mess around with work. Handy on those days I'm at home but practice at the Speedway is on, or qualifying from Le Mans, etc.

EDIT: Picture added with the box. Available on Amazon.
20221228_153329.jpg
 
Last edited:
OP
W

westracing01

Active member
Joined
Nov 14, 2014
Messages
37
Location
New Milford, CT
20230502_112554.jpg

Moved my light-up AC Delco sign from the shed to the garage. That was actually a pivotal piece so that I could rearrange the shed and get the extension ladders out of the garage. You can barely see it over the top of the wife's car, but in the background right below the license plate on the wall, you can see my work laptop. The internet deal totally works as intended. Signed into the work VPN and everything right from the garage.

Needed it too since I also put the vent visors on the wife's car. I got the actual Subaru ones and they come with no instructions. But unlike most, they have these little metal clips that go in the channel underneath the weather stripping. Before I did anything stupid, I wanted to make sure they went in like I thought they did. Youtube to the rescue... LOL.

And, the reorganized shed...

20230427_125056.jpg
 
OP
W

westracing01

Active member
Joined
Nov 14, 2014
Messages
37
Location
New Milford, CT
Damn, didn't think I'd been this long without an update... Well, not much of one really. Built another shelf (no picture), did some work on the truck... Damn Barn Quilt is delaminating despite my best efforts prior to install to prevent it, so I have a 4x4 piece of Aluminum Composite to remake it out of... Last time it'll rot/fall apart.

But, my real question pertains to the PDF below. I'm toying with finishing off the interior, so step one will be to insulate it. I plan to use R-15 Faced Batts but am a little unsure about orientation, specifically with regards to what will be the ceiling (bottom of trusses.) I have soffit vents along with a ridge vent currently and I'm confused with warm side/cold side. Clearly I don't want to block the vents or create any kind of mold/moisture mess.

I'm not 100% sure what I want to do for walls/ceiling yet, but I'm leaning toward metal of some form. Something light that's screw it in place and forget it. I don't want to mess with drywall, or painting, etc.
 

Attachments

  • Insulation_Plan.pdf
    62.6 KB · Views: 6
OP
W

westracing01

Active member
Joined
Nov 14, 2014
Messages
37
Location
New Milford, CT
I guess going right along with the insulation plan...

I've been looking at all kinds of ceiling options. Metal, T&G, Ply, etc. I just don't want to mess with sheetrock. Trusses are 10PSF.

I, and the wife especially, likes the look of T&G and I think it offers the most options for easier install around some of the things that are already affixed to the trusses that I don't want to mess with.

So, the question at hand... What is the thinnest (1/4, 3/8, 1/2, etc) T&G that could be put up for a ceiling, directing attached to the Trusses and with R15 Batts on top? I'd like to use 1/4, but I don't want it to turn into a rippled mess either. Not opposed to face nailing them either if that would help. Would plan to angle nail on each truss regardless.

Trusses are 2x4 bottom cord, 24" OC.
 
OP
W

westracing01

Active member
Joined
Nov 14, 2014
Messages
37
Location
New Milford, CT
Working on messing with a ceiling and I want to be prepared to insulate it once in but I'm not 100% sure how the truss vents go. I assume that the first two are correct as the vent extends beyond the blocking.

20250502_180011.jpg


20250502_180004.jpg

Whatever gap there is between the block and bottom of the vent would be taken up by insulation (batts most likely.)

I also assume that install this way is incorrect...

20250502_180043.jpg

Where the vent would be stapled to the inside of the blocking.

NOTE: Please, please, please ignore the fact I ripped that styrofoam to shreds as I didn't even think about the nails for the roof.
 
OP
W

westracing01

Active member
Joined
Nov 14, 2014
Messages
37
Location
New Milford, CT

Looking around, I'm curious if I should block off the air gap that will exist between the top of the blocker and the bottom of the baffle (see image link for drawing.)

Apologies for needing a link. The image is too large (drawn in CAD to scale and exported.) It's faint until you zoom in.
 
To avoid these ads, REGISTER NOW!
Top Bottom