To avoid these ads, REGISTER NOW!

Quincy 325 craigslist find and repair

mattblast

Well-known member
Joined
Jan 30, 2013
Messages
784
Location
Bridgewater, NJ
For years I've been looking for a Quincy compressor. Even though I found a great Saylor Beall a couple years ago I never stopped looking for a Quincy. Every few months one would appear on the local Craigslist but be too much, in poor shape or already sold. Well last week I saw what appeared to be a 325 about 45 mins away. The listing was a month old and seller was asking $1000 which was way more than I wanted to spend. I offered $300 figuring I didn't really need it, didn't have space for it, plus it would need a new single phase motor and starter. My thought was that if it was still available he would be more open to negotiate.

Over two days he confirmed it was a 325 ROC 104 and said his best was $500. He got in touch with me on Saturday and we settled on $400. He mentioned he had to head to work at 4pm and suggested I arrive at 4:30 so he could borrow a work truck to simplify the loading. Turns out he drives a flatbed tow truck on weekends. This was the simplest loading job ever. Picked up from garage and in my truck bed in 15 mins.

b57c0933864d87956d98f23a1e159588.jpg

He is a professional machine mover during the week and comes by all sorts of equipment. He had hauled this compressor from a machine shop that was relocating and used it as a spare. They decided they didn't need it and he got it.

He was a great guy and offered to keep an eye out for the items in looking for as long as I'm willing to pay more than scrap value. He mentioned he scraps loads of broken equipment regularly. Equipment that I'd be happy to get my hands on and restore.

The compressor was very well cared for. Regular oil and filter changes and seller even gave me an extra oil filter and air filter.

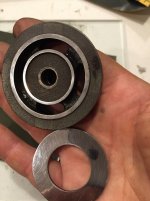
On Sunday I spent over 3 hours removing the film of oil, then removing the motor and pump fro he tank so I could lower it to the ground (with the help of my son)

16b3bd40cf35233c06199350a43d435f.jpg

8bf831a6a7102142caf27dfb55a59c94.jpg

It has a continuous run feature which is great for constant demand such as in blasting. That could be handy.

37f1ccc6c9d4ac9c9d5d9a19bb31b12b.jpg
 
Last edited:
To avoid these ads, REGISTER NOW!

CNGsaves

Well-known member
Joined
Sep 26, 2012
Messages
13,233
Location
KS and OK
+1 . . . . that cleaned up nice. :beer:

For $400 that Quincy is a screamin' deal . . . . YOU **** !!! :thumbup:
 
OP
M

mattblast

Well-known member
Joined
Jan 30, 2013
Messages
784
Location
Bridgewater, NJ
It took some effort to remove the compressor pump from the tank. I'm guessing it was about 300lbs. I used the 6 gallon milk crates I picked up at a garage sale over the weekend as a platform to lower the pump a foot at a time. The first lift was from the tank to the carton sitting on the truck bed. It was a struggle but my 16 year old son and I managed it. Then we lowered it to the bed. Then to two crates on the ground, then to a single crate, then to a dolly. From there it was easy to roll into the garage.

The tank was too awkward for the two of us to lift, so I put down two milk crates on the ground and we pulled the tank out and set the back legs on top of the crates. It was simple from here to lift the tank up in front, to about a 45deg angle. I held it there while my son pulled the truck forward, then together we lowered the front onto two crates. Then to one crate then onto the driveway where it still sits. I borrowed two dollys from work yesterday but haven't had a chance to move the tank yet, and besides there isn't room in the garage anymore.

I drained the oil and removed the oil filter - this was the cleanest oil I ever drained from a compressor. And the right quantity drained (I've seen several that had black oil oozing out, or just a few drips coming out - that's a bad sign) The previous owners took care of it. Based on the ROC it is a 1997 model pump. I did end up calling Quincy with some questions and they verified it was 1997 based on the SN.

Oddly, the tank is certified in 1988. I'm guessing the old pump died and they replaced it with this one. It is a little concerning that the old pump failed in 9 years. Or maybe they upgraded the pump or something fell on it. Actually, the last theory may be the answer - the is a dent on the fan cage that doesn't make sense to me.

When I picked up the compressor I was disappointed that it didn't come with a starter - even a 3 phase starter would have been useful as I could rework it for a single phase motor. Still it was a good (great) deal and I was happy to get it.

Quincy is a great company to deal with. First off they keep all their documentation on their website for free download (even some going back to the 50s!). I found the parts manual there, but had trouble finding the operation manual. The service tech at Quincy let me know that the manual is shared and that I need to look up QR-25 for the right manual.

QR 325 ROC 104 Parts Manual Parts Manual PDF
QR 25 Operation Manual QR Operations Manual

I didn't plan to spend all day working on the compressor, but I couldn't help tearing right into it. I opened the inspection plate, removed the flywheel and pulled the valves. The valves are really well built in this machine - and I appreciate that no special tool is required to open them (unlike the Saylor Beall). Before I did anything to the valves I called Quincy to make sure that I was following the proper procedures. Their phone number was well hidden on their web site (that seems to be the case these days - the Contact Us page often just has a form to submit a query. Their number is 251-937-5900, then option 3 then 2. Or they can be contacted at [email protected]

The tech was very helpful, but wasn't as familiar with this model as I hoped. Here are the questions I asked along with his answers: (my questions are a bit random...)

1. Valves have heavy carbon deposits. How do I clean them? Use a wire wheel.
2. What size pulley do I need for 5 HP motor? 7.35" OD pulley (he had to run some calculations to determine this)
3. What control version is my pump? LVD (head assembly with two unloader towers, a hydraulic unloader and a pilot valve with a lockout and check valve)
4. Original oil filter warns against using automotive style filter, is it OK to use one? You can use what ever filter you like if it is out of warranty. Though it was unclear if there is some advantage to using OEM filters.
5. Do valves need any lubricant on them, or keep them dry? Dry.
6. Is there a kit that contains parts needed to rebuild valves (4 gaskets, 4 plates, 4 springs). The VIP kit (110516-325) contains all these parts, plus a few more.
7. What are the specs of the pump (weight, CFM range for each HP motor, etc). He wasn't sure.
8. Can I reuse the copper crush washers that seal between the valve body and the head? Yes, just clean them up first.
9. Are the valve parts the same between all the valves? Do they all use the same spring (on the SB compressor, each was slightly different). Springs are the same. Two intake are shared and two exhaust are shared.
10. How do I clean unloader piston? Just rub it with some fine sand paper.

The tech spent close to 20 mins on the phone with me and it gave me the knowledge I needed to proceed with the valve rebuilding.
 
OP
M

mattblast

Well-known member
Joined
Jan 30, 2013
Messages
784
Location
Bridgewater, NJ
So I needed a motor and starter and scoured eBay and Craigslist in hopes of getting a deal. I did buy new for my Saylor Beall but didn't want to spend another $500 on this one.

Finally it dawned on me to look on Craigslist for another compressor that already has a motor. At 7 am Monday I saw this: (took photo later when I thought it might be worth posting about)

a3ff3c02f34bf41051e7a7377a5134e0.jpg

Just what I needed about 45 mins away and the funny thing is it's a Quincy too! I emailed him that I'll take it and asked for photo of motor plate to make sure it's the right one.

f624cf99d03c1476c3ee519eff2fdea5.jpg

Didn't want to wait and arranged to meet him last night after work. The seller got it cheap with the intention of hooking it up but decided it was too much work to hook up 220 line. He said he never ran it but guy he got it from told him motor is good and pump makes a noise. That's ok with me as there tank could be useful along with motor and starter. He actually had the original paperwork of the pump (AT5 ROC 103 model from 1990)

Got there and discovered it had no starter. Still a good deal if motor works. Seller was a certified welded and rigged up a hoist in his 9' ceiling garage. We hooked compressor to chain hoise and jacked it up about 10". That's all we needed as the weight at the top was supported. My son was able to lift he bottom to make tank horizontal and I backed my truck up and we lowered it. Funny thing is it only took 5 mins to load but about 10 mins to discuss how we were going to do it.

417fa731de61d679ffcf4238a582612f.jpg
That's my son holding bottom up just after I backed truck up. Then we added some straps and headed back home.

Of course I had to unload it that night in the dark. It was a bit tricky to remove the motor and pump when it was on its side. Plus the bolts were super tight and needed some persuasion with a dead blow on the wrench.

The motor is what I cared about but I couldn't resist opening the pump up. This is an AT5 pump with reed valves. It had no oil (seller told me it was drained) but lots of gunk that had to be cleaned out. Head and tray are aluminum. Looks like someone was in it before me as one head bolt was missing. This is a lower end Quincy pump. I'll probably fix it up and sell it later.

It took some time to remove pulley from motor. A minute of my torch then a 3 armed puller to get it off. I stopped by Home Depot today to get an L6-30 plug and some 10g SOOW wire to test the motor (plan was to use beaker instead of starter) but they had plug mislabeled and I ended up with L5-30. Didn't want to waste any more time so I tapped into starter on my other compressor and motor fired right up!

I only told my wife tonight that motor I got included free compressor. I may come home with a 3rd compressor when I find a motor starter. I can't complain about her shoe collection anymore...

f02e04c59bfa1522f00c8d80c9222fea.jpg

Guess I'm heading back to HD tomorrow for a return.
 
Last edited:
OP
M

mattblast

Well-known member
Joined
Jan 30, 2013
Messages
784
Location
Bridgewater, NJ
Cleaned up the valves tonight.

Here is how one looked before honing (but after wire wheel).

e2e8ed61e1836b3ce99482b3d8de52e0.jpg

and after honing on 400, then 1000 then 2000 grit wet/dry sand paper

4c1888f2276e8388752e8ae534d3096e.jpg

Look closely and you can see the Apple logo from my phone in the mirror finish of the valve disc.

I still need to order a set of 4 gaskets (PN 1852).

Each valve assembly took about 10 minutes to wire wheel and hone. I used a 8x10" piece of 1/4" glass which I picked up this afternoon for $5 from a local glass place (during my lunch break from my real job).
 

Attachments

  • IMG_3663.jpg
    IMG_3663.jpg
    137.8 KB · Views: 159
  • IMG_3662.jpg
    IMG_3662.jpg
    137.1 KB · Views: 160
Last edited:

MacMcMacmac

Well-known member
Joined
Oct 21, 2014
Messages
1,583
Location
canada
I remember lifting a Quincy 325 on a pallet onto a workbench once. It was listed as being 265lbs on the waybill. Might have been a guesstimate, but I didn't do it again.

Heavy carbon buildup is a classic sign of using automotive oil in a compressor. once you have them cleaned up, use only compressor oil, or full synthetic that won't carbon and gum up the valves.

I wouldn't worry about using automotive filters. Sounds like a ploy to get you to use the OEM stuff. Make sure you have the pump running the correct direction for the oil pump. It is directional, and to change it requires swapping those set screws inside the filter housing and, if I remember correctly, inverting the pump housing (don't quote me on that). Anyhow, just have it rotating correctly for the fan blades to blow air back over the pump and make sure it is making pressure.

The valves get all the lube they need by sucking in the crankcase vapors from the PCV valve down by the block base.

If there is heavy carbon inside the head, you might want to consider pulling it and the intercooler and getting them hot tanked. There is an internal passage in the head from the LP exhaust valve to the intercooler that loves to collect carbon, spitting it into the intercooler where it makes its way to the HP intake valve, jamming it open. your interstage safety valve will pop and it will ruin your day. At least you can pull valves from this machine without pulling the head, that's a big bonus.

The best test for the valves is to assemble them after cleaning and dunk them into a pan of parts washer. Then, let them sit on a level surface for a bit and see if the solvent runs out. If it does, you have some more lapping to do.

The valve discs are the same for all valves. I'm pretty sure the springs are too. I don't remember sorting them at all when I used to rebuild them.

Reusing the copper washers shouldn't be a problem.

I'm not sure which unloader piston you are referring to.

Set up for a 5hp motor, you should get about 17-18cfm from that machine.

If both motors are the same rpm and shaft size, re-use the pulley from the 3ph motor on the 1ph motor. They are both true 5hp motors..
 

Burgerkong

Well-known member
Joined
Apr 17, 2010
Messages
2,501
Location
Markham, Ontario, Canada
Just like me haha, bleeding compressors everywhere. You ****, but only because the Kellogg I got for free isn't as nice as the Quincy due to it being an extra 40 years older and the tank was junk. Needs a bit of work!
 
OP
M

mattblast

Well-known member
Joined
Jan 30, 2013
Messages
784
Location
Bridgewater, NJ
Make sure you have the pump running the correct direction for the oil pump. It is directional
The QR 25 manual actually covers the steps. You need to rotate the front cover 180 degrees if you reverse motor direction. But I'm keeping it the same so it's fine.


The best test for the valves is to assemble them after cleaning and dunk them into a pan of parts washer. Then, let them sit on a level surface for a bit and see if the solvent runs out. If it does, you have some more lapping to do.


Great idea. I'll try this tomorrow.


I'm not sure which unloader piston you are referring to.


This one 480fa8f6f7abb8696727863c4a7c0d74.jpg

I'll try to post photos of all the valve parts tomorrow.
 
OP
M

mattblast

Well-known member
Joined
Jan 30, 2013
Messages
784
Location
Bridgewater, NJ
Just like me haha, bleeding compressors everywhere. You ****, but only because the Kellogg I got for free isn't as nice as the Quincy due to it being an extra 40 years older and the tank was junk. Needs a bit of work!


I've been reading your posts. Nice compressor you picked up. Your post is what reminded me to do my periodic Craigslist compressor search. Kelloggs are solid units.
 

MacMcMacmac

Well-known member
Joined
Oct 21, 2014
Messages
1,583
Location
canada
The QR 25 manual actually covers the steps. You need to rotate the front cover 180 degrees if you reverse motor direction. But I'm keeping it the same so it's fine.


Great idea. I'll try this tomorrow.


This one 480fa8f6f7abb8696727863c4a7c0d74.jpg

I'll try to post photos of all the valve parts tomorrow.


Just buff it with some brillo pad and wd-40. That o-ring looks pretty flat. You should change it out. That plunger can be disassembled by punching out the tiny roll pin in it. They should be in the rebuild kit.
 

On-Wheel

Well-known member
Joined
Oct 6, 2014
Messages
487
Now that's getting what you want! Would you have paid $400 for an ROC 13 needing a single phase motor and starter, like this?
http://s3.postimg.org/env3l1wc3/image.jpg
I heard it's like $700 to update it like yours which is in the area of oil filter.You got a great deal ! I seen a few places saying the weight is 290.Thats a lot for 2 men using crates! Sorry poor pic.My iPad won't post for some reason,again...
 
Last edited:

icedoc

Member
Joined
Mar 24, 2015
Messages
24
Location
Ontario, Canada
Nice score! (on both compressors)

The 325 is an awesome unit. I bought one two years ago that had a broken connecting rod and did a complete rebuild on it. One of the best investments I've made for my home shop.

Btw, it might just be the picture, but it looks like you have some deep scratches on the valve disc. I would keep working them on a flat surface (granite plate or piece of glass) until those buff out. Don't forget to change up the buffing pattern (figure-eights work well).

 
Last edited:

MacMcMacmac

Well-known member
Joined
Oct 21, 2014
Messages
1,583
Location
canada
Actually, that's not a bad amount of carbon and oily buildup for a near 20 year old machine. Severe carbon buildup is when you take off the valve covers and have to turn the head over and pound out the valves with a wooden peg and hammer to get them to budge. It just looks well used.
 
OP
M

mattblast

Well-known member
Joined
Jan 30, 2013
Messages
784
Location
Bridgewater, NJ
Thanks for the tips and feedback. I decided to re-hone the valves and discs to improve the finish. Started again but at 600 grit then 1500 grit then 2000. I was out of 1000 or would have used that for the middle grit.

After an hour (or maybe a few minutes more) here is what they look like.

21d5eefc9b32454d5c822aab4b41be19.jpg

On the top disc you can see what appears to be oxidation forming on the stainless. It formed a few minutes after I did final grit.

I placed the valves in the oven for 10 minutes to dry them off before reassembly.
23c18febf61e32bc0e93cc2795aeca24.jpg

While cooking I wire wheeled the high pressure intake valve components. Shown below next to low pressure intake which is next in line to get cleaned up.

0b84c1469ac0b583a423c5b17a3ada92.jpg

I asked Quincy about the piston - if o ring can be replaced and they replied "the o ring has been replaced by people in the past and some with luck and some not so great the o ring is held in by the brass slightly rolled over to hold in the groove. I would suggest replacing the entire piston 7532X. case closed"

I looked online and saw that the o ring had a lot of wear versus new but figured it was worth repairing the piston rather then spend $20 each for the replacement assembly.

Here is the piston cleaned up with ring removed.

063d8d161c6b3481ea01cbdc0182499e.jpg

O ring is silicon and measures 0.101" thick, 0.65 ID and 7/8" OD. Looks like it is a -115 sized ring according to http://www.marcorubber.com/sizingchart.htm

Only problem is they sell as a 100 pack for $15. Anyone have a couple extra they would be willing to part with?

And the two exhaust valves cleaned up and ready to assemble.

5ff9b3602bcde32526966467ac0fc27b.jpg

The bolt at right is supposed to be tightened to 50ft-lbs once valve body is installed to keep it in position then the nit get tightened to lock it in place. Seems previous owner cleaned valves at one point but didn't retighten the bolt and valve must have rattled a bit.
 
To avoid these ads, REGISTER NOW!
OP
M

mattblast

Well-known member
Joined
Jan 30, 2013
Messages
784
Location
Bridgewater, NJ
I saw that video a couple years ago. Good stuff. That tech doesn't fool around, he gets right to the job. I used his technique opening up the intake valves with an extension (or a screwdriver shaft).

Something doesn't seem right on the exhaust valves. Got them back together but the two body pieces don't bolt tight together. The bolt that holds them had a shoulder that prevents them from getting closer. I can add a washer at the top to get around it but original didn't have a washer nor does parts manual show one.

Gap is about 0.010". ca684375939c2afee23ddfd451609b2e.jpg
 
OP
M

mattblast

Well-known member
Joined
Jan 30, 2013
Messages
784
Location
Bridgewater, NJ
The motor makes a spark at startup and again at shutdown. The spark comes off the starting capacitor. Could this be due to a bad cap?

When I run motor with access panel open I see a spark jump at the cap terminals. Then when the centrifugal switch disengages on power down there is a second spark.

The motor had 3 caps and spark seems to come from front one.

4530e898ee7411587a35f6f55d4cc0d7.jpg

Motor Spark Video
 
Last edited:
OP
M

mattblast

Well-known member
Joined
Jan 30, 2013
Messages
784
Location
Bridgewater, NJ
This morning I took the motor to a local motor repair shop along with the original 3 phase motor to have them checked out. The motor shop is in Somerville NJ just about 5 minutes away. They have been in business since 1975 and specialize in big industrial motors but are happy to work on smaller motors as well. http://njelectricmotors.com

5236670d4eecc78735c0fb0322c4e392.jpg

This shows half their shop plus they have a second floor with offices and supplies. First I showed them the video of the spark and they felt it wasn't a serious issue. Most likely there is a crack on the insulation on the wire near the capacitor and it discharges. They suggested I check for cracks in the wire and if that isn't the issue just replace the cap. Then they tried out the original 3 phase motor and it worked fine so I'll put it up for sale on eBay. It did make a slight bearing noise so eventually the bearings should be replaced.

After work I checked the motor wires and saw no cracks but added electrical tape anyway. It actually helped but still I got a small spark. I'm going to call them in the morning and see if they stock this cap (probably they do)

I looked online for other oring suppliers to see what options I had to repair the piston. Harbor freight is about 15 mins away and has a 382 piece set for about $6 after coupon (and a free flashlight for my daughter). So I picked up the set and discovered the correct oring size is 116, not 115. It took some maneuvering to get them in place. Here are the repaired pistons (I wore gloves today whole working on this so my hands are a lot cleaner)

83502fec710100d589f2fb78e60aa048.jpg

Notice one had a roll pin for disassembly? I guess the machine shop that owned the compressor before me had the same oring issue and they fabricated a piston assembly that can be disassembled for easier replacement.

The diaphragm discs on the intake valves also don't match. The one with feet is brass. The other is steel. Not sure which is OEM.

387b6d227333062c1edd5bd43556fcc2.jpg

The brass one is slightly thicker than the steel one.
 

MacMcMacmac

Well-known member
Joined
Oct 21, 2014
Messages
1,583
Location
canada
I saw that video a couple years ago. Good stuff. That tech doesn't fool around, he gets right to the job. I used his technique opening up the intake valves with an extension (or a screwdriver shaft).

Something doesn't seem right on the exhaust valves. Got them back together but the two body pieces don't bolt tight together. The bolt that holds them had a shoulder that prevents them from getting closer. I can add a washer at the top to get around it but original didn't have a washer nor does parts manual show one.

Gap is about 0.010". ca684375939c2afee23ddfd451609b2e.jpg

That clearance is completely normal. It will be taken up when you torque the setscrews in the valve caps.

Those pistons should both have roll pins.

Those o-rings sit up inside the unloader towers against a conical seat. This makes an airtight seal when the unloader pistons retract. When the pistons are forced down under pressure, the o-rings lift off the seats and air is blown up the sides of the pistons, through the sleeve with the holes in it, and out through the holes in the sides of the unloader tower. This can be vented directly to atmosphere, or is in most cases, tubed back into a port at the intake to keep the noise down.
 
OP
M

mattblast

Well-known member
Joined
Jan 30, 2013
Messages
784
Location
Bridgewater, NJ
When the pistons are forced down under pressure, the o-rings lift off the seats and air is blown up the sides of the pistons, through the sleeve with the holes in it, and out through the holes in the sides of the unloader tower.

That makes sense. Diaphragm disc made of steel must be for high pressure side since it doesn't have feet to lift it up. Not much air needs to escape high pressure side since low pressure side is dumping most of the air.
 

On-Wheel

Well-known member
Joined
Oct 6, 2014
Messages
487
In a video I seen said diaphragm discs were brass first then went to steel.
 

MacMcMacmac

Well-known member
Joined
Oct 21, 2014
Messages
1,583
Location
canada
While cooking I wire wheeled the high pressure intake valve components. Shown below next to low pressure intake which is next in line to get cleaned up.

0b84c1469ac0b583a423c5b17a3ada92.jpg

If I were you, I would unscrew those unloader towers from the valve caps and back off the threaded ring. If the caps are torqued down unevenly, or if the threaded collars are screwed in too far, there is a real possibility of cracking those caps. Best practice is to back it all out, torque down the caps, screw in the threaded collars to seat the valve body in the head, then reinstall the unloader tower
 
OP
M

mattblast

Well-known member
Joined
Jan 30, 2013
Messages
784
Location
Bridgewater, NJ
If I were you, I would unscrew those unloader towers from the valve caps and back off the threaded ring.


Thanks for the tip. I tried to separate the tower from the cap but they aren't easy to separate. I put it in my vise and used 24" pipe wrench but it wouldn't budge. I sprayed some Kroil on the threads and will hit it with the torch to try breaking the bond. Any other insight on how to separate?

On the way to work I stopped by my mechanic to see if they could clean up the intercooler in their parts washer. Turns out they don't have a parts washer but they gave me a new can of brake cleaner to try. I sprayed it outside after reading all the warnings and hazards and it worked great. Wish I took a before photo to show how well it cleaned up. Just sprayed up and down the coils and all the grease melted away. It was a bit windy out so no smell. Here is how it looks now.

72c4603bf9aa88ade45b4051a301baf9.jpg

I ended up using entire can.
 

Heavymetalmechanic

Well-known member
Joined
Apr 4, 2013
Messages
625
Location
Calgary, Alberta, Canada
I love CRC Brake clean, that's stuff is great. A bit pricey though.

I must say I'm jelous of your find, that's going to be a compressor your grandchildren can count on if it is properly serviced.

Thanks for sharing your project with us. I wish I were better at pausing to document my progress on projects.
 

Mikerodrig27

Well-known member
Joined
Oct 22, 2014
Messages
171
I would recommend hitting it with some foamy engine degreaser from an aerosol can.

Something like this:
http://www.amazon.com/dp/B000ABGA6W/?tag=atomicindus08-20

Then get a brush with long strands like a bottle brush or maybe a thin scotch brite pad and work it between the fins. I've used the Firestone brand foamy engine degreaser but that isn't available to the public. It works great though.
 

Burgerkong

Well-known member
Joined
Apr 17, 2010
Messages
2,501
Location
Markham, Ontario, Canada
I've done the wire brush, ultimately to clean it up real good you'll have to end up dipping it in a hot tank or blasting away all the crud. Or use a hot pressure washer.
 
OP
M

mattblast

Well-known member
Joined
Jan 30, 2013
Messages
784
Location
Bridgewater, NJ
Towers apart.

e557a09cd9b4327a320bbfefa1db6370.jpg

Took some time to figure out how to apply enough force without damaging surface. Here is what I did

c1a3a3922ecd730cadf2704eece4384a.jpg

Put in cap on vise and put another vise on top and applied force with 4ft pipe. Came off relatively easy with the long pipe.

Valves reinstalled in head and awaiting gaskets to install caps. They should arrive later next week.

3ba5139df9b100a6dcf299f2fdd2f864.jpg
 
Last edited:
OP
M

mattblast

Well-known member
Joined
Jan 30, 2013
Messages
784
Location
Bridgewater, NJ
The valve cover gaskets arrived in the mail yesterday and I wasted no time installing them. The pump was sitting on a dolly and the dolly kept rolling when I torqued the bolts so it was time to reinstall the pump on the tank. My son and I used the milk crate trick again to limit lifts to about a foot at a time. Once it was on the tank it only took a few minutes to secure it and attach all the loose parts. Here is current progress:

3786648e84592a07e90fd97410b3860b.jpg

I even installed a new filter and tightened a full turn after gasket made contact per directions from Quincy.

After valve covers were installed I rotated flywheel and valves made a satisfying groan as they chattered from the pressure. I left flywheel loose so I can tune position once I get motor attached.

Only trouble is that after torquing down the high pressure intake tower, the 5/16 compression fitting ended up on opposite side of the tower and so I need to make a new copper line. You can see the fitting on the back tower. The reason this causes some trouble is that the 5/16 OD size is hard to source locally unless I want a full 50 ft coil. I have plenty of 1/4" and 3/8" soft copper but never knew 5/16 was available. Odd that they chose to use this size.

At lunch today I stopped by a HVAC place to see if they had any scraps. They had every size but 5/16. Then I stopped by a mechanical contractor who had lots of cut offs from AC line sets, but again no 5/16. Then I tried NAPA to see if they sold 5/16 copper brake line by the foot (website said they did) but my local dealer doesn't stock it.

Guess I'll order 2ft online from eBay (along with a pair of nuts and ferrules).

This evening I tried to open the 2" inspection ports but they would not budge. One had a 1" inset square and other is 1-1/4" protruding square. I don't want to damage them so I'll leave them be.

8d3abec664d1409a5ea0a918de164dca.jpg

Not too much left - install 5/16 line, fill with oil, replace motor start cap, install motor, buy and install motor starter, secure flywheel, tension belt, install drain **** in tank, install belt guard (requires a few 1/4-20 cage nuts and flange bolts which were missing) and maybe a few items I'll think of later.
 

CNGsaves

Well-known member
Joined
Sep 26, 2012
Messages
13,233
Location
KS and OK
^ ^ ^Soak that ********* plug with Kroil/PB Blaster and consider using heat (Oxy torch) to help break it loose.

THEN . . . the long cheater bar !! ;)
 
OP
M

mattblast

Well-known member
Joined
Jan 30, 2013
Messages
784
Location
Bridgewater, NJ
Lots of progress this week. Hope to start pumping in the next week. (or so)

The inspection plugs didn't want to budge and I was afraid to put too much force on them and potentially damage them. The reason I wanted to remove them was to clean out the tank. There was a bit of sludge at the bottom and I didn't want it to clog the draincock.

At the other end of the tank was an open 2" port. I put my shopvac hose in and it slurped up the sludge at first then didn't do so well. Probably a crazy idea but I figured I should get some degreaser in the tank and let it soak since sludge was oily. I hooked up a hose and filled tank up to port (about half way up) with water plus 2 gallons of orange degreaser and let it sit. Then I vacuumed liquid out. The tank was now clean inside but had a strong scent. I filled it again with water and rolled the tank back and forth to make waves (it is on a set of dollies). Let that sit and vacuumed again and it looks great inside tank now. It was awkward to do this with the limited space in the garage.

744dfb3b6530eb1e86e2a82aac970be7.jpg

I ordered a start capacitor on eBay for about $8 and it fixed the motor sparking issue. The old cap had some residue that appeared to come from inside and that must have caused it to short out. New cap was easy to replace. The only issue is that listing didn't say it was 1-1/2" diameter when the original was 2". I had to wrap some foam tape around it so clamp would secure it. This cap (708-850 mfd) is available in both dimensions and I assumed it was standardized.

The spare tank/pump sold over the weekend for $150. So motor ended up costing -$50.

I have a few more parts coming to complete the plumbing and that should arrive this week.

I used a home made spreader to tension the belt. The Quincy manual has a full page on how to figure out the right tension.

0e15ee2e8fb279f669967f915f315c4d.jpg

My "A" belt rides a sheave over 5" so proper tension is 4.1-5.3 lbs. The horizontal distant between shafts is about 16" and 1/64th of that is 1/4". So I put a straight edge over belt and pressed down in middle of belt using tension gauge until 1/4" shim would fit. Repeated until it took about 5 lbs. Tricky to do alone. I picked up the tension gauge a year or two at a garage sale. Photo shows gauge pressing down but without straightedge or shim (not enough hands to do that and take a photo)

3ac9fec495a3b39828216be9ce40db07.jpg

Once it had right value I snugged up motor bolts. Quincy literature didn't specify a torque value so I made it very tight. (As tight as I could using combination wrench)

ba5bc9b620db099f17b160a4cbe50102.jpg

One project I didn't show was removing a dent from belt guard. I didn't expect to get very good results and didn't bother with photos. The cover was crumpled along the edge probably from a time before this pump (tank and guard are about 10 years older than pump). I took screen off one side of guard and used shop press and a piece of 2x4 to press dent back in place. Then I used a piece of an angle bracket and large c clamps to form the corner. Here is what it looks like now. Sorry for not having before photos.

I'll have to reconnect the inner screen before I install it.

992af9357c3981a81759103939df637d.jpg
 
Last edited:
OP
M

mattblast

Well-known member
Joined
Jan 30, 2013
Messages
784
Location
Bridgewater, NJ
Learned a good lesson working on the motor. Don't use a screw as a tap. Screws are not strong enough and will snap.

When I got the motor, the access panel was secured with 4 slotted sheet metal screws. They were very hard to remove and because they were slightly recessed I couldn't use a vise grip on them. Two came out with some effort but the other two required a chisel and hammer to spin them out.

A few days ago when I put motor on the tank I tried to fix this by turning the screw with cover off and torquing them to set new threads. The very first try the screw snapped. I tried to drill it out but drill bit snapped off too. I fought it for a while then gave up and now panel will only have 3 screws.

I did drill and tap for 10-32 bolt on the other three holes. This is what I should have done instead of forcing a screw.
 
OP
M

mattblast

Well-known member
Joined
Jan 30, 2013
Messages
784
Location
Bridgewater, NJ
Last week I picked up 2 ft of 5/16 soft copper along with a couple nuts and ferrules and connected the unloader tower.

dbe09a49f62e54b4a8458cb5fdc838eb.jpg

The copper loops around the back of the tower and then connects. It's functional but immediately after I tightened it up I realized it would have been better to route the tube between the two toward in an S shape. Shorter run and I think it would look more professional. It's these details that bug me. I'm really tempted to pull it out and redo. The only hesitation is it will take another week to get more tubing.

The last thing I need is the motor starter. I found one online but got busy at work and didn't have a chance to order it yet. Guess this project will take a bit longer than expected.
 
To avoid these ads, REGISTER NOW!
Top Bottom