
TNToy
Well-known member
Who here has done it?
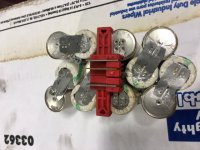
I have a box full of forty sub-C 2800 mAh cells sitting on my workbench (sourced from eBay, of course) ready to get slapped into the dead/dying battery packs for my Snap-On 14.4 and 18v tools (3/8" and 1/2" impacts and a flashlight)
I watched a few online tutorials and it's a shockingly simple process, and you can't beat restoring three battery packs to better-than-new capacity for $52 shipped - I'll take that to keep these rather pricey tools operational!
14.4volt pack = 12 cells (2 batt. packs being rebuilt)
18.0volt pack = 15cells (1 batt. pack being rebuilt)
I haven't seen mention of anyone here breaking out the soldering gun and restoring their Milwaukee/Makita/etc tool - so I'm curious if a lot of you are doing this or simply upgrading to a new set of tools every few years.
Last edited:


")
