Pupuhd
Well-known member
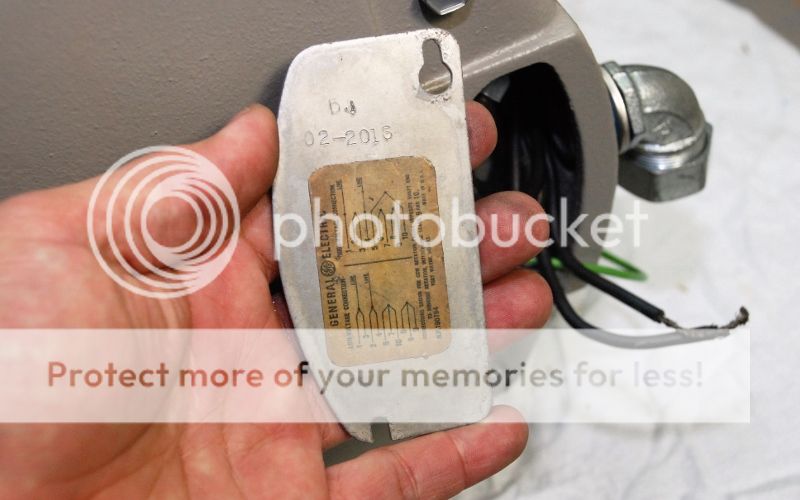
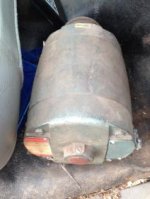
Recently I finished rebuilds on two electric motors, one a vintage 1940s-1950s Century Electric Company 1HP capacitor start (http://www.garagejournal.com/forum/showthread.php?t=311993) and a smaller more modern Century Electric 3/4HP capacitor start (not posted). These along with other old Arn items were occupying space on my workbench, so I decided to continue with the motor rebuild flow and hit the 3HP General Electric Triclad Capacitor Motor, roughly 1950s. This particular one was started almost 4 years ago but however got pushed back. This motor came on a vintage Westinghouse Air Brake Company air compressor from the same era. Somewhere on this forum is the original thread to that, however to this date not yet completed. Here I will only post the rebuild on the GE 3HP electric motor, since I believe here and in another forum there was an interest in the Triclad motors.
Like the 1HP Century electric motor rebuild, in this new thread I will include details, photos and a video uploaded onto Youtube. I'm hoping this information will help some one else with a similar motor, like many post here have help me. I'll start with some of the original photos taken four years ago of the disassembly, but first some facts regarding this motor:
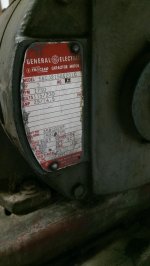
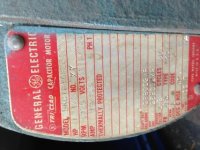
General Electric Triclad Capacitor Motor
Model: 5KCJ215AG201B
HP: 3, No.: XV
Volts: 115/230
Amp: 29/14.5, PH: 1
Service Factor: 1.15, Cycles: 60
Continuous duty at 40 deg. Celsius rise
Like the 1HP Century electric motor rebuild, in this new thread I will include details, photos and a video uploaded onto Youtube. I'm hoping this information will help some one else with a similar motor, like many post here have help me. I'll start with some of the original photos taken four years ago of the disassembly, but first some facts regarding this motor:
General Electric Triclad Capacitor Motor
Model: 5KCJ215AG201B
HP: 3, No.: XV
Volts: 115/230
Amp: 29/14.5, PH: 1
Service Factor: 1.15, Cycles: 60
Continuous duty at 40 deg. Celsius rise