To avoid these ads, REGISTER NOW!

Jeep garage lighting and electrical

thdewey

Well-known member
Joined
Feb 26, 2008
Messages
532
Location
Gastonia, NC
Alright, first of all this was my first garage build ever. I've never even helped anyone build. So the electrical was a real challenge. I read and read and read BASIC electrical books.
Here are some photos.
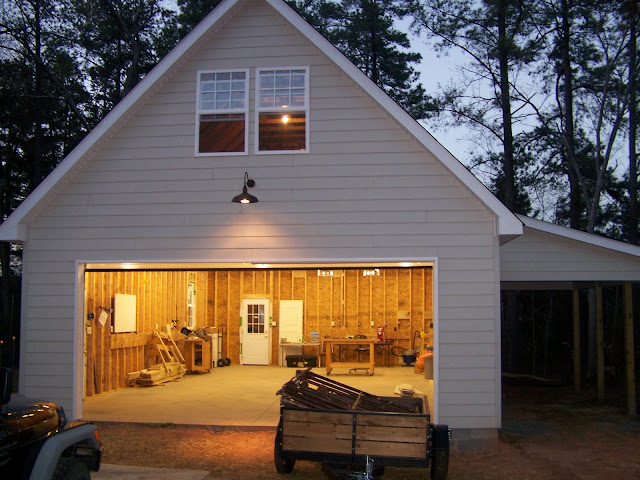
100_2237.JPG

The carport motion activated flood light.
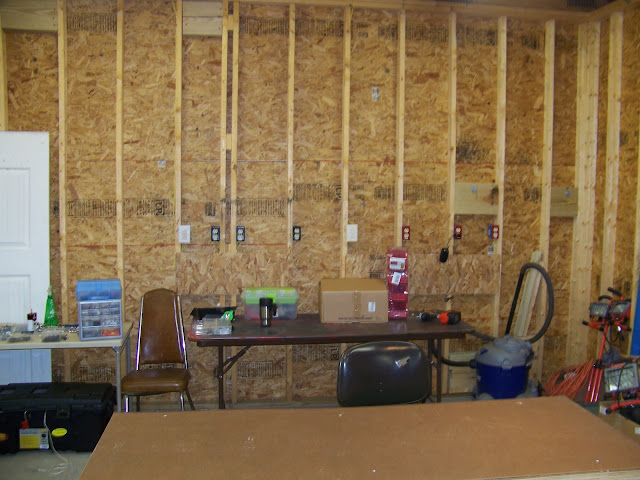
100_2241.JPG

These are the 8 outlets at the future workbench.
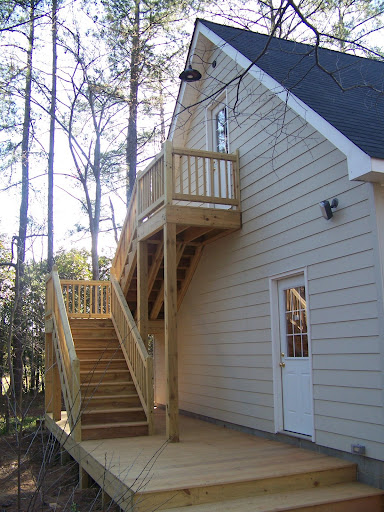
100_2247.JPG

The gooseneck light above the back door of the bonus room and dusk-dawn CFL Flood.
100_2263.JPG

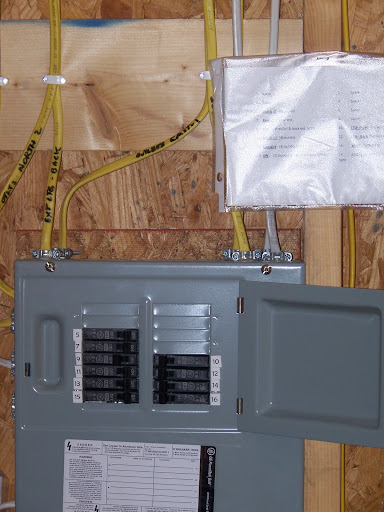
This is the small 16 ckt panel.
100_2248.JPG

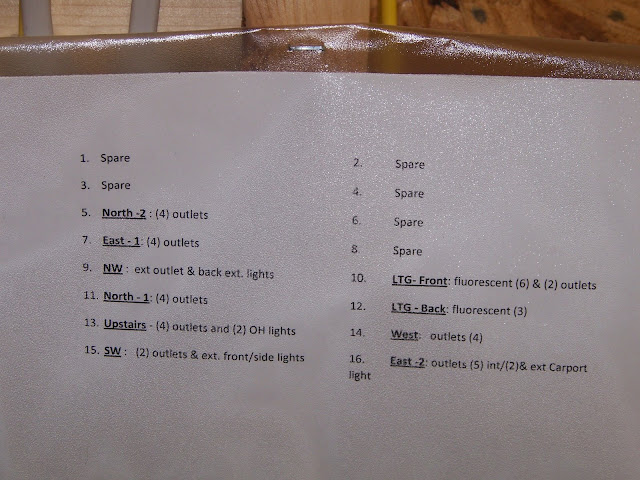
The circuit list.
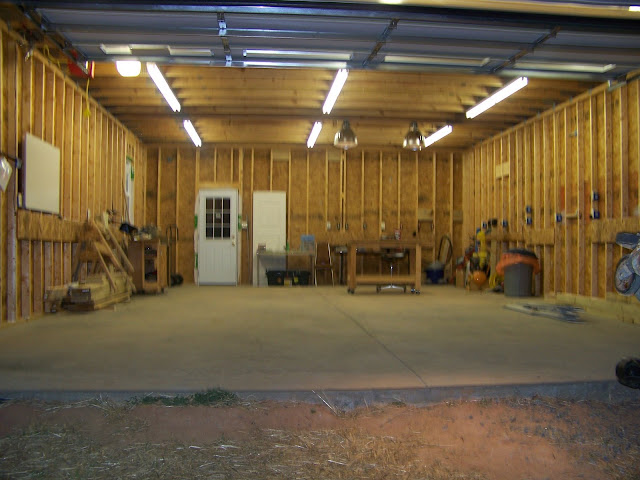
100_2250.JPG

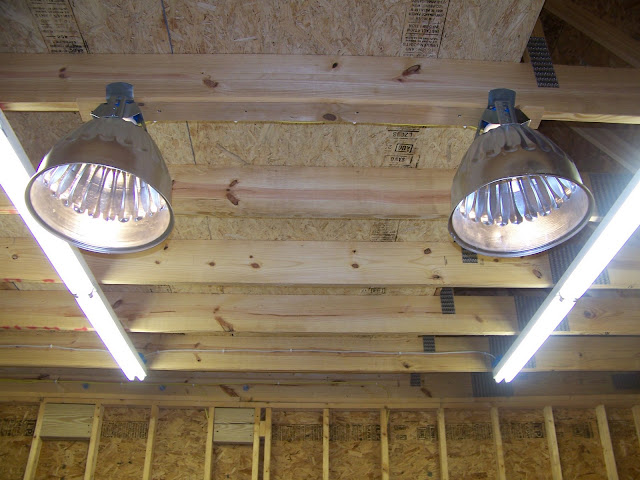
Nine 8' T-8 flourescent fixures. I went with 4 foot bulbs. Much easier to get home from the store. Sorry that this is fuzzy.
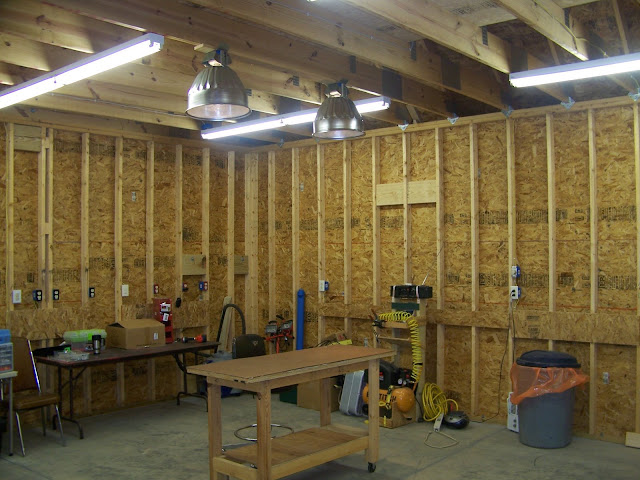
100_2243.JPG

Alright this is my special lighting project. I got some scrap high bay Merc vapor lights with the guts removed and a standard 100 W fixtures installed above the wokbench.
100_2245.JPG

Light post with outlet ~ 20 feet from garage. I used plans from Handyman Magazine. It's about 5' tall.
100_2234.JPG

Here are my lessons learned.
1. Plan yor lighting fixtures early. Studs in the way of locations for fixture boxes. Small pancake boxes are really not code anymore.
2. You can live with half the number of outlets if you have one or two well placed extention cord reels.
3. Cramming wires into a box can rub some of the inulation off causing a short.
4. Make switched circuits as simple as possible.

Tom
 
To avoid these ads, REGISTER NOW!

Tech Guy

Well-known member
Joined
Dec 17, 2008
Messages
828
Location
Ontario Canada
Good lessons that you learned. some thoughts though :

Maybe add another head off the carport motion if it will accept it as the picture looks dim.

Why so many outlets at the bench ? Are they all on the same breaker ? Cant really tell by your legend but it appears they are.

Maybe change the CFL flood to motion to save you some money if no one is out there at night. A motion coming on would draw your attention to the shop if someone was out poking around.

Nice to see your broke the lights up breaker wise in case you need to do more electrical you will have some lighting available.

Like the light post !
 

dkcase

Well-known member
Joined
Jan 7, 2006
Messages
93
Location
Illinois
Very Nice.
On your breaker box directory, the ones labeled "spare" are really "space."

Since I'm not an electrician, I thought I would say this. The real electricians probably won't because they'd be criticized for picking on you. :thumbup:

Again, nice.
 
OP
T

thdewey

Well-known member
Joined
Feb 26, 2008
Messages
532
Location
Gastonia, NC
Good lessons that you learned. some thoughts though :

Maybe add another head off the carport motion if it will accept it as the picture looks dim.

Why so many outlets at the bench ? Are they all on the same breaker ? Cant really tell by your legend but it appears they are.

Maybe change the CFL flood to motion to save you some money if no one is out there at night. A motion coming on would draw your attention to the shop if someone was out poking around.

Nice to see your broke the lights up breaker wise in case you need to do more electrical you will have some lighting available.

Like the light post !

The carport motion is not nearly as dim as it looks in the picture, but I will add another light eventually.

The workbench outs are on two ckts and are indicated by the red and black colored covers to remind me once the walls are covered. I still need to paint the GFCI covers though. They are labeled North - 1 and North - 2.

In the back I'd like to make both lights work off a motion dector. That might spook the baddies.

I still need a top for the post light. It's really big, 8"x8". So I'm going to need to join some boards together to make it big enough.
 
OP
T

thdewey

Well-known member
Joined
Feb 26, 2008
Messages
532
Location
Gastonia, NC
Very Nice.
On your breaker box directory, the ones labeled "spare" are really "space."

Since I'm not an electrician, I thought I would say this. The real electricians probably won't because they'd be criticized for picking on you. :thumbup:

Again, nice.

I've learned so much from the pros and amatures here at GJ. I am so very greatful for all the advice. Thanks to all that helped.

I guess the space is spare not the breakers that are not installed. You're right.
 

2LTim

Well-known member
Joined
Nov 9, 2008
Messages
143
Location
Central Iowa
Photo tip: When taking a picture of the "lighting" projects, turn off the flash on your camera, they can be tough to compete with and make your lighting project apear weak.
I would imagine the electrical guru's will weigh in on the fact that you have outlets and lighting circuits together on breakers, that's a no no.
Tim
 

ddawg16

Well-known member
Joined
Jul 11, 2008
Messages
21,005
Location
S. California
I would imagine the electrical guru's will weigh in on the fact that you have outlets and lighting circuits together on breakers, that's a no no.

I think I can understand why.....would this also include a garage door opener?
 
To avoid these ads, REGISTER NOW!

Kevin54

MEMBER EMERITUS
Joined
Jan 12, 2005
Messages
29,341
Location
Urbana, Ohio
To heck with the electrical....damn great job for a first build!!!!! :thumbup: I like the style and looks of the building.

Now I have a question......or two......well maybe three :lol_hitti

On the right hand wall you have blocking 2/3's of the way up that look like 2x8's or 10's. What is that for? Also you are showing some blocking at the top on the back wall at the top. same thing or different? And why the OSB strip around the perimeter of the wall midways up. And can you post up some upstairs pics?

100_2245.JPG


One other little hint while you have pics. Before you cover your walls with drywall or such....pick out a corner (for instance the back corner in the pick I posted) and measure to your next stud in both directions. I am assuming that after that, the studs are 16" on center. The reason i say that is that the stud each way from the corner looks to be shorter than 16". If it is, mark a picture with the dimension and store it away in your toolbox, computer, or a drawer. That way after the walls are covered and you want to hang something, you won't need a stud finder or a knuckle to find the studs.
 
Last edited:

LoneGunman

Well-known member
Joined
Mar 27, 2007
Messages
2,081
Location
The Gunshine state
I'm not crazy about the idea of mixing lighting and receptacles in a garage but heck if that's all there is to complain about you did a good job. I don't like mixing the two because you have a lot better chance overloading a receptacle and tripping a breaker than you would a lighting only circuit. Breaker trips from an overloaded receptacle and the lights go out. Let's be realistic though, how many houses have shared circuits, MANY of them.

While you have everything still open I would love to see an emergency light put in, not required by code but it is an inexpensive insurance policy.
 
OP
T

thdewey

Well-known member
Joined
Feb 26, 2008
Messages
532
Location
Gastonia, NC
To heck with the electrical....damn great job for a first build!!!!! :thumbup: I like the style and looks of the building.

Now I have a question......or two......well maybe three :lol_hitti

On the right hand wall you have blocking 2/3's of the way up that look like 2x8's or 10's. What is that for? Also you are showing some blocking at the top on the back wall at the top. same thing or different? And why the OSB strip around the perimeter of the wall midways up. And can you post up some upstairs pics?

100_2245.JPG


One other little hint while you have pics. Before you cover your walls with drywall or such....pick out a corner (for instance the back corner in the pick I posted) and measure to your next stud in both directions. I am assuming that after that, the studs are 16" on center. The reason i say that is that the stud each way from the corner looks to be shorter than 16". If it is, mark a picture with the dimension and store it away in your toolbox, computer, or a drawer. That way after the walls are covered and you want to hang something, you won't need a stud finder or a knuckle to find the studs.

The blocking is to support the carport beams (not a super high load because of the other supports) and the ones on the back wall support the ledger board for the stair landing.

The OSB strip covers the horizontal run of romex. This is required by code for exposed framing. So that you can't (or unlikely to) hang things on it or store stuff behind it. This is only needed until I cover the all walls with OSB.

I will include some upstairs pictures soon.

Thanks for the tip on framing pics. I started both walls as 16" oc from the front and did the back wall left to right. So at the most visible corner in the pictures the two short stud bays are adjacent to each other.
 
Last edited:

bluesman2a

Well-known member
Joined
Aug 16, 2005
Messages
1,312
Location
Atlanta, Ga.
Great build... A couple of questions:

1) where did you get your goose-neck light fixtures? they look great!
2) When you take the OSB down over the romex runs (before you sheath the walls) are you considering putting up protective plates? It's cheap insurance to keep screws and nails out of your wire runs. If not you probably should. If you insulate, do that before you insulate too, easier to see.
3) for all the internal boxes you have, there don't seem to be many external or "in-use" outlets on the outside. Have you considered adding some of them? Would be easy to do now, and you'll thank yourself later for those messy projects you don't want to do inside (like grinding, etc). On mine I put in one outlet on either side of each exterior door.
 
Last edited:
OP
T

thdewey

Well-known member
Joined
Feb 26, 2008
Messages
532
Location
Gastonia, NC
Great build... A couple of questions:

1) where did you get your goose-neck light fixtures? they look great!
2) When you take the OSB down over the romex runs (before you sheath the walls) are you considering putting up protective plates? It's cheap insurance to keep screws and nails out of your wire runs. If not you probably should. If you insulate, do that before you insulate too, easier to see.
3) for all the internal boxes you have, there don't seem to be many external or "in-use" outlets on the outside. Have you considered adding some of them? Would be easy to do now, and you'll thank yourself later for those messy projects you don't want to do inside (like grinding, etc). On mine I put in one outlet on either side of each exterior door.
Thanks for your comments.

1. The gooseneck lights are really nice. They are only $50 each with a $100 min order. So I got 2. They came from: http://www.affordablequalitylighting.com/docs/outdoor/wall/utility/pwsv925/index.html
2. I was considering the plates although not required due to the fact I took so much time to make sure that the holes were in just the right spot.
3. Exterior outlets: I've got 4. I put 3 at the most accessible corners and one on the back of the light post.
 

Old61

Well-known member
Joined
Nov 12, 2008
Messages
157
How did the 100w lights over your workbench workout? Do they give you enough light? Shadows?
 
OP
T

thdewey

Well-known member
Joined
Feb 26, 2008
Messages
532
Location
Gastonia, NC
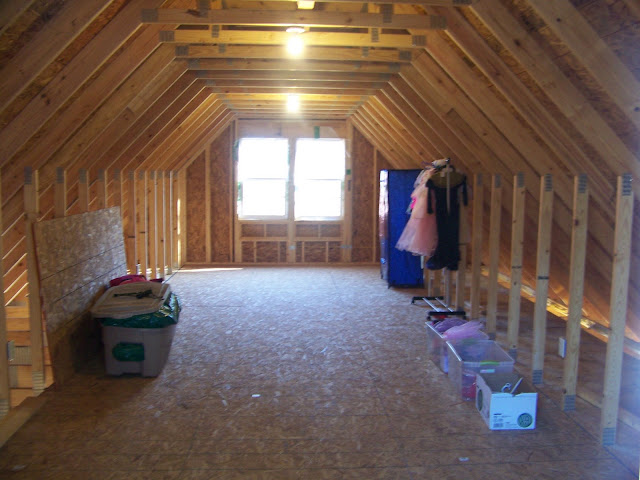
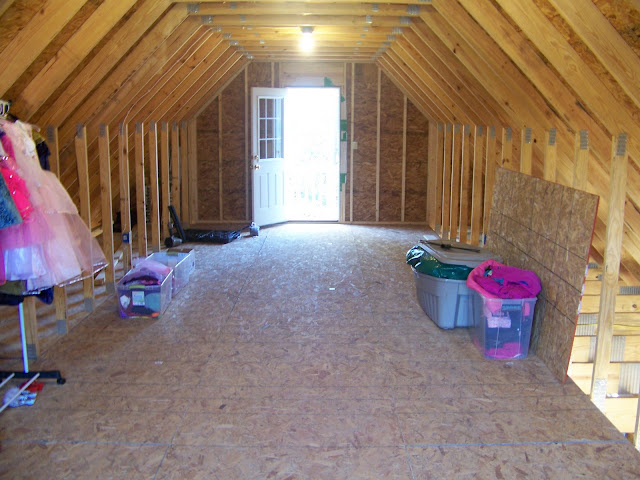
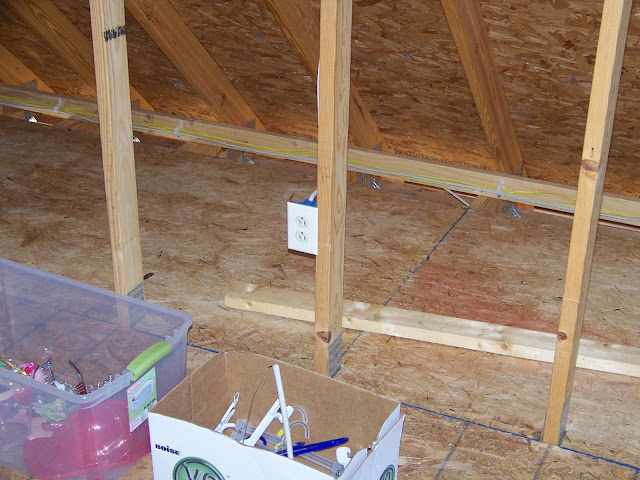
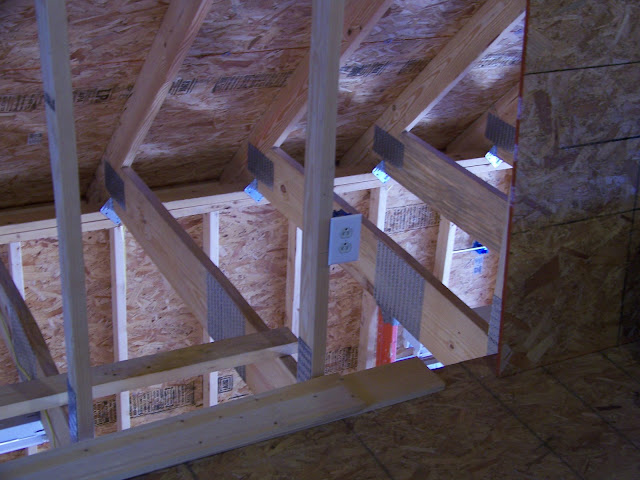
My wife is already storing stuff upstairs. The room is 15' X 36'. I'm planning on splitting it up into a store room and a TV/movie room.

100_2274.JPG


100_2278.JPG


I have 4 outlets upstairs (2 on each wall).

100_2276.JPG


100_2275.JPG


How did the 100w lights over your workbench workout? Do they give you enough light? Shadows?

I'm trying both spot and flood lights in them to see which I like best. I think that I actually like the flood lights the best. I can also adjust the shade up and down to see if that makes a difference. These lights can be moved closer together If needed. I plan on making a larger workbench in the future (4'X8').

100_2246.JPG
 

ddawg16

Well-known member
Joined
Jul 11, 2008
Messages
21,005
Location
S. California
I like the looks.....

Have you considered using the space between the short wall and the roof as storage? In on pic you show how you have already put down OSB....a coupe of small doors and you would have a lot of space to store that odd stuff...you know, the junk that sits there for 30 years before you do something with it.....

15' wide? It looks more like about 12-13' usable feet to me.....
 
Last edited:
OP
T

thdewey

Well-known member
Joined
Feb 26, 2008
Messages
532
Location
Gastonia, NC
I like the looks.....

Have you considered using the space between the short wall and the roof as storage? In on pic you show how you have already put down OSB....a coupe of small doors and you would have a lot of space to store that odd stuff...you know, the junk that sits there for 30 years before you do something with it.....

15' wide? It looks more like about 12-13' usable feet to me.....

Storage; absolutely! I plan on at least one small door on each side. When I build the room, I'm thinking of putting in some built-in book shelves inbetween the trusses. This will still leave plenty of storage.

You know, I guess it is about 12' wide. I looked at the pictures and I have 3 rows of osb sub-floor (3x4=12 duh-huh).
 
To avoid these ads, REGISTER NOW!
Top Bottom