To avoid these ads, REGISTER NOW!

concrete floor polish product

country boy

Well-known member
Joined
Oct 26, 2011
Messages
99
Location
Birmingham Alabama
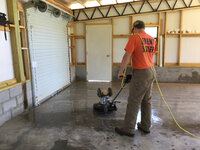
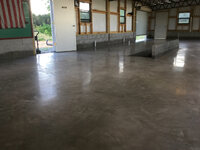
Ok so i know this topic has been talked about a lot but i ran across this product.

http://concriausa.com/

There system looks to be very easy with out having to rent the high dollar equipment and high power.

you can rent or even buy the floor buffers cheep.

I got a price quote from them to do my new shop i am building 70x60 and it was $1700 and that was all 6 steps. all i needed to have was the floor buffer.

Im still looking into this product and talking to them about it.

any thoughts ?
 
To avoid these ads, REGISTER NOW!

LegacyIndustrial

ALLIANCE MEMBER
Joined
Jun 7, 2010
Messages
7,993
Location
deerfield, IL
I am familiar with products like this. A Twister pad is a similar product that we offer.
Any improvement to the surface is a plus. However, I know that similar products take many, many passes to see improvement and you need to start with a pretty good floor to begin with.

If you have the equipment and the time, why not try it?
 

Armorpoxy

Well-known member
Joined
Aug 18, 2013
Messages
3,731
Location
NJ
We had had customers use this and they had a difficult time getting the results they wanted and they called in our Prep Crete Division to bail them out.

A floor buffer doesn't have much downward weight or strong motors to do much grinding. Agree up unless your concrete is really great and not super hard this may work, otherwise could be an expensive test.
 
OP
C

country boy

Well-known member
Joined
Oct 26, 2011
Messages
99
Location
Birmingham Alabama
Well i have looked at a lot of diff products and i am going to try this one out .

Got all my product on order . will post pics as i finish my floor.
 
OP
C

country boy

Well-known member
Joined
Oct 26, 2011
Messages
99
Location
Birmingham Alabama
Floor has been slick finished. No oils or any chemicals been on the floor . 18cbcfb81585da56630ff43329d24087.jpg6173cb0b267001c9b34e17f065341fe0.jpg


Sent from my iPad using Tapatalk
 

Attachments

  • 18cbcfb81585da56630ff43329d24087.jpg
    18cbcfb81585da56630ff43329d24087.jpg
    635.2 KB · Views: 0
  • 6173cb0b267001c9b34e17f065341fe0.jpg
    6173cb0b267001c9b34e17f065341fe0.jpg
    536.3 KB · Views: 0
OP
C

country boy

Well-known member
Joined
Oct 26, 2011
Messages
99
Location
Birmingham Alabama
I started at step 3 which is for new concrete ( step 1 and 2 will expose more rocks .)

Floor buffer needs 150 lbs of down pressure .

I run step 3 , 8 passes might have been a bit much but they said go 4 - 8 so I when's 8 lol
4117a77df3882d767dc94691175d0232.jpgd1018f60a2f09e264131f6a7ca89a0cc.jpg8846a65e05adcca64456a447823601f3.jpgab03ee6e8f5f11945658ad61214a8e71.jpg


Sent from my iPad using Tapatalk
 

Attachments

  • 4117a77df3882d767dc94691175d0232.jpg
    4117a77df3882d767dc94691175d0232.jpg
    687.3 KB · Views: 1
  • d1018f60a2f09e264131f6a7ca89a0cc.jpg
    d1018f60a2f09e264131f6a7ca89a0cc.jpg
    737.7 KB · Views: 1
  • 8846a65e05adcca64456a447823601f3.jpg
    8846a65e05adcca64456a447823601f3.jpg
    696.6 KB · Views: 1
  • ab03ee6e8f5f11945658ad61214a8e71.jpg
    ab03ee6e8f5f11945658ad61214a8e71.jpg
    690.2 KB · Views: 1
OP
C

country boy

Well-known member
Joined
Oct 26, 2011
Messages
99
Location
Birmingham Alabama
After step 3 clean up the slurry then you need to put down a defuser , let that dry then move on to step 4 pucks under the buffer d9ef8e53b779c6856b25b68e78a4b970.jpg
This is after the defuser.
41b22e1efadc647d70a77572deb9055a.jpg


Sent from my iPad using Tapatalk
 

Attachments

  • d9ef8e53b779c6856b25b68e78a4b970.jpg
    d9ef8e53b779c6856b25b68e78a4b970.jpg
    673.8 KB · Views: 1
  • 41b22e1efadc647d70a77572deb9055a.jpg
    41b22e1efadc647d70a77572deb9055a.jpg
    617.5 KB · Views: 1
OP
C

country boy

Well-known member
Joined
Oct 26, 2011
Messages
99
Location
Birmingham Alabama
Now I am of step 4 making 4-8 passes .508d90614c899d2e87b684f8d227e091.jpg48db695011de4f5ed430b4fb3817d7cb.jpg


Sent from my iPad using Tapatalk
 

Attachments

  • 508d90614c899d2e87b684f8d227e091.jpg
    508d90614c899d2e87b684f8d227e091.jpg
    729.6 KB · Views: 1
  • 48db695011de4f5ed430b4fb3817d7cb.jpg
    48db695011de4f5ed430b4fb3817d7cb.jpg
    667.2 KB · Views: 1
OP
C

country boy

Well-known member
Joined
Oct 26, 2011
Messages
99
Location
Birmingham Alabama
Got done with step 4 made about 5 passes. Got floor cleaned and letting it dry over night befor I run step 5 pads which are run dry. 4ed13b1bb4c9931de71ce298e669b9b1.jpgfc060f43b908a68de37f2d9f4de1bc1b.jpg5d95067d86ef1fe96fb98ef59274a7fa.jpg


Sent from my iPad using Tapatalk
 

Attachments

  • 5d95067d86ef1fe96fb98ef59274a7fa.jpg
    5d95067d86ef1fe96fb98ef59274a7fa.jpg
    340.7 KB · Views: 2
  • 4ed13b1bb4c9931de71ce298e669b9b1.jpg
    4ed13b1bb4c9931de71ce298e669b9b1.jpg
    53.7 KB · Views: 3
  • fc060f43b908a68de37f2d9f4de1bc1b.jpg
    fc060f43b908a68de37f2d9f4de1bc1b.jpg
    297.8 KB · Views: 2
OP
C

country boy

Well-known member
Joined
Oct 26, 2011
Messages
99
Location
Birmingham Alabama
Yes Step 1 and 2 works the same way as 3 and 4 it will grind the floor down more and expose rocks.

I might wish i had done step 1 &2 would prob look better, and so far i can see where i have some small low spots that dident relay rub on. but that cost i just wasent sure about .
 
To avoid these ads, REGISTER NOW!
OP
C

country boy

Well-known member
Joined
Oct 26, 2011
Messages
99
Location
Birmingham Alabama
Made 4 passes on step 5 dry .

Then I run a impregnated pad with little water did not get a pic of that.

Then cleaned

7799a92a18b533fd3733bd1815fb9391.jpg

2954aa6cd787d93eb5295173bd4f5184.jpg
 

Attachments

  • 7799a92a18b533fd3733bd1815fb9391.jpg
    7799a92a18b533fd3733bd1815fb9391.jpg
    288.2 KB · Views: 3
  • 2954aa6cd787d93eb5295173bd4f5184.jpg
    2954aa6cd787d93eb5295173bd4f5184.jpg
    308.5 KB · Views: 3
OP
C

country boy

Well-known member
Joined
Oct 26, 2011
Messages
99
Location
Birmingham Alabama
This is after I got the floor all clean 2435fd0153282b717d3d0011a1e74a8f.jpg3205e6b84209bf561855810d29becbc3.jpg


Sent from my iPad using Tapatalk
 

Attachments

  • 3205e6b84209bf561855810d29becbc3.jpg
    3205e6b84209bf561855810d29becbc3.jpg
    299 KB · Views: 3
  • 2435fd0153282b717d3d0011a1e74a8f.jpg
    2435fd0153282b717d3d0011a1e74a8f.jpg
    303.7 KB · Views: 3
OP
C

country boy

Well-known member
Joined
Oct 26, 2011
Messages
99
Location
Birmingham Alabama
Let floor dry and put 2 light coats of the sealer they sent. 825af441e0cd8faea1edb8b8a2ce5d40.jpg

The shower floor I did not polish or seal . You can see a pretty big difference in the floor. 640c28d182fe599c484ca4c954135194.jpg


Sent from my iPad using Tapatalk
 

Attachments

  • 640c28d182fe599c484ca4c954135194.jpg
    640c28d182fe599c484ca4c954135194.jpg
    290.3 KB · Views: 3
  • 825af441e0cd8faea1edb8b8a2ce5d40.jpg
    825af441e0cd8faea1edb8b8a2ce5d40.jpg
    304.1 KB · Views: 2

-Brent-

Well-known member
Joined
Dec 23, 2009
Messages
4,709
Location
Utah
I think that's pretty decent, for sure. I'm planning on densifying and polishing my 70-something year old floor. If it came out near as good as that, I'd be satisfied. I've got a lot more work to do on mine, obviously.

Thanks for sharing.
 
OP
C

country boy

Well-known member
Joined
Oct 26, 2011
Messages
99
Location
Birmingham Alabama
Took a pic durning the day can see more of it's true color . 7fbb26181e5dae4f87d372fae48d9797.jpgbd563a2de7f57d00b8201306be003813.jpg


Sent from my iPad using Tapatalk
 

Attachments

  • bd563a2de7f57d00b8201306be003813.jpg
    bd563a2de7f57d00b8201306be003813.jpg
    328.6 KB · Views: 2
  • 7fbb26181e5dae4f87d372fae48d9797.jpg
    7fbb26181e5dae4f87d372fae48d9797.jpg
    321.7 KB · Views: 2

Radix2

Well-known member
Joined
May 28, 2014
Messages
1,853
Location
the thumb!, MI
I think is looks great!

Have you tested it in a corner or somewhere to see how it handle staining, oil, etc?

When I look at the website it shows the tools used with power trowels, do they still support the buffer based stuff?

I don't see any reference to the U S on the website either?. Who did you deal with to get your supplies?
 
Last edited:

jav

Well-known member
Joined
Mar 5, 2010
Messages
108
Location
Massachusetts
Looking at doing this to my 6 month old power troweled floor (4KPSI @ 25x42). I was hoping for some feedback on DIY polishing.

My floor was power troweled to a burnished finish & looked fantastic- almost polished. Then- they spayed a curing sealer that ruined the looks - the sealer made it look dull, orange peeled and milky.

I removed a small section of sealer & polishing with my granite polishing diamond disks and it came out AMAZING!!! The concrete was already extremely smooth so I used 100,200,400,800,1600 and 3000 grits (6 steps) - no densifier- just wet polish. I'm convinced this is the finish I want.

I own a commercial floor buffer- so adding some weight and using this system seems like a decent option?

Anyone know:
1) of an efficient way to strip the sealer off?
2) What grits the pucks are in the concria 3 step/6 step system?
3) how long should each pass take on a 25x42 floor?
4) How much sheen comes from the polish versus the final sealer on the concria system? (my 3000 grit polish looked more mirror smooth than the 3 step sealed pictures above- but not sure I want to invest the time and $ to go full 3000 polish?)
5) Any other DIY polishing systems out there?

TIA

John
 
Last edited:

katilicous

Well-known member
Joined
May 20, 2017
Messages
86
Location
Laguna Niguel
If you own a floor machine, have you tried crystallizing? Stonepro makes a crystallizer you dont have to use steel wool pads on that gets a pretty decent reflection. Not sure if its recommended for concrete.if you are gonna strip contact tech support of the company where the sealer was manufactured. They know the best method and product.

Sent from my LG-H631 using Tapatalk
 
OP
C

country boy

Well-known member
Joined
Oct 26, 2011
Messages
99
Location
Birmingham Alabama
They do support the swing machines it just takes a lot longer and for a small shop it kinda makes it easier. You could also use a walk behind machine but cost of renting that was more than i wanted to pay so i took the harder cheaper way.

When i first talked to the company i was talking straight to them then later i could not get a hold of him and they send me to this company here in the states.

Dana Kowalski, I.C.E.-GB
Director of Marketing
ARNOLD SALES
(989) 894-2931 x109

So my finial thought of the product !

So far the floor looks great and seams to clean up very well. The dirt will just push right off with a broom and a mop will clean the rest right up.

This part of my shop i have not worked on any cars or trucks due to its my man cave so cant relay get a good feel for it there with oil and grease.

I spent prob 1300 $ total + The used floor buffer $225 . But i still have product to do my next part of the concrete which is a 50 x 60.

So that comes up to $ .31 Cents a square foot not to bad.
 

jav

Well-known member
Joined
Mar 5, 2010
Messages
108
Location
Massachusetts
Thanks all- I sent Concria an email through their contact and I've yet to hear back. I have looked into other products and most were "maintenance" products for floors that had already been polished.

I did make one encouraging contact. I called a company called superabrasivew and spoke directly to the principle who was very helpful. I'm likely going to try his approach.

They Manufacture a diamond electroplated steel disc that goes under a swing machine (or high speed burnisher if run wet with a surficant- which is what I have). He's very confident the disc with it's "open" diamonds will have not trouble cutting into my concrete with no added weights. Once cut/honed, I will densify and polish with their diamond impregnated abrasive pads and finally seal and burnish.

I don't want to expose any aggregate- I just want a high polish on the cream layer and he's pretty sure that if my power troweled finis is reasonably flat and smooth already- I should be fine with this approach.

I'm still several weeks from completing all the other projects until I can actually get the floor polishing but this is where I'm leaning and I'll check in and update as I get further along.
 

Radix2

Well-known member
Joined
May 28, 2014
Messages
1,853
Location
the thumb!, MI
Thanks all- I sent Concria an email through their contact and I've yet to hear back. I have looked into other products and most were "maintenance" products for floors that had already been polished.

I did make one encouraging contact. I called a company called superabrasivew and spoke directly to the principle who was very helpful. I'm likely going to try his approach.

They Manufacture a diamond electroplated steel disc that goes under a swing machine (or high speed burnisher if run wet with a surficant- which is what I have). He's very confident the disc with it's "open" diamonds will have not trouble cutting into my concrete with no added weights. Once cut/honed, I will densify and polish with their diamond impregnated abrasive pads and finally seal and burnish.

I don't want to expose any aggregate- I just want a high polish on the cream layer and he's pretty sure that if my power troweled finis is reasonably flat and smooth already- I should be fine with this approach.

I'm still several weeks from completing all the other projects until I can actually get the floor polishing but this is where I'm leaning and I'll check in and update as I get further along.

Sorry, I sent you the wrong link to the parish supply video using a swing machine and diamond pads to polish concrete.

Worth a watch, basically the same as concria and pads are available from many suppliers.

http://www.parish-supply.com/metal-concrete-grinding-discs.aspx Video above is from this page if you click on the video tab


I'm in the same boat and trying to decide which diamonds to try and what machine. I am surprised that they think a high speed buffer (1500 rpm? ) will work, there are many terrazzo and stone floor guys that use 175rpm machines to grind and polish, usually they add some weight too. A high speed buffer does not have much gearing, so it may be tough to get the torque to turn these pucks and pads. Part of the key to making it work is to have enough pressure per unit area on the abrasive - a light machine needs small area abrasives- thus the use of the 3in pucks,

Keep us appraised of your progress!
 
Last edited:

jav

Well-known member
Joined
Mar 5, 2010
Messages
108
Location
Massachusetts
yes- 1500 rpm. I have my reservations but I'm told it should work as long as it's done wet and I use surficant. The mesh wheel is about $150 and I already have the buffer so that will be my first test. My buffer has a load meter as well as a pressure adjuster but everything will hinge on if the buffer can spin the mesh disc.
 

Radix2

Well-known member
Joined
May 28, 2014
Messages
1,853
Location
the thumb!, MI
yes- 1500 rpm. I have my reservations but I'm told it should work as long as it's done wet and I use surficant. The mesh wheel is about $150 and I already have the buffer so that will be my first test. My buffer has a load meter as well as a pressure adjuster but everything will hinge on if the buffer can spin the mesh disc.

Around here you can get used buffers for $150-250, and considering the cost of the velcro driver pad and diamond abrasives...it isn't too bad if you need to switch.

Can you post a link to the mesh wheel you are getting?
 
To avoid these ads, REGISTER NOW!
Top Bottom