pendragon1998
Well-known member
I posted the first part of this in the Vintage Blackhawk thread, but I wanted to just go ahead and give this its own thread.

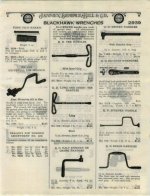
1928 Janney Semple Hill & Co advertisement
I was at an antique store a few months ago and saw this Blackhawk T15 crank speeder in a basket of old wrenches. It was pretty rusty and I liked it, but I passed that day. A few months went by, and I kept thinking about it from time to time, so I went back to see if it was still there. It was, so $5 later, and 90 years and 5 days after its patent date of Feb 23, 1926, I brought it home with me.

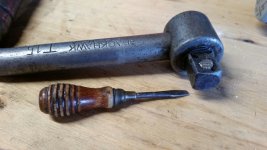
After an electrolysis bath, a scotch-brite scrub down, and some paste wax.

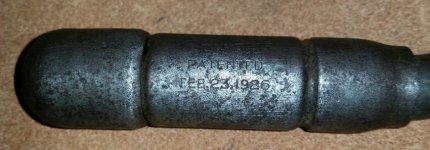
Blackhawk Made in U.S.A. T15

Patented Feb 23, 1926
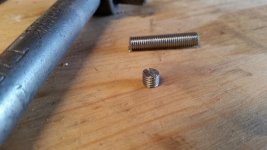
Unfortunately, after I derusted it, I discovered that the ball detent was non-functional. After some consideration, I decided the spring that was behind the ball was broken. The part was originally drilled, a spring was dropped in, the ball was dropped in, and the hole was swaged shut. This was a no-maintenance part. Eventually, the spring either rusted apart or broke from stress. Either way, the ball bearing would push down and wouldn't push out again, so the tool would not hold a socket and was therefore, more or less unusable.
I decided to fix it. I drilled a #3 hole into the back of the drive square, entering the base of the cylinder that houses the spring. Then I used a pick, some needle nose pliers, and finally a magnet to pull out all the broken pieces of spring. The ball bearing is too large to come out the #3 hole, so it remained trapped inside.

Difficult to see, but the pieces of the rusted, broken spring are in the hole I drilled.

Starting to pull out bits of spring. It broke several times, but I got it out in pieces.

Easy does it...
1928 Janney Semple Hill & Co advertisement
I was at an antique store a few months ago and saw this Blackhawk T15 crank speeder in a basket of old wrenches. It was pretty rusty and I liked it, but I passed that day. A few months went by, and I kept thinking about it from time to time, so I went back to see if it was still there. It was, so $5 later, and 90 years and 5 days after its patent date of Feb 23, 1926, I brought it home with me.
After an electrolysis bath, a scotch-brite scrub down, and some paste wax.
Blackhawk Made in U.S.A. T15
Patented Feb 23, 1926
Unfortunately, after I derusted it, I discovered that the ball detent was non-functional. After some consideration, I decided the spring that was behind the ball was broken. The part was originally drilled, a spring was dropped in, the ball was dropped in, and the hole was swaged shut. This was a no-maintenance part. Eventually, the spring either rusted apart or broke from stress. Either way, the ball bearing would push down and wouldn't push out again, so the tool would not hold a socket and was therefore, more or less unusable.
I decided to fix it. I drilled a #3 hole into the back of the drive square, entering the base of the cylinder that houses the spring. Then I used a pick, some needle nose pliers, and finally a magnet to pull out all the broken pieces of spring. The ball bearing is too large to come out the #3 hole, so it remained trapped inside.
Difficult to see, but the pieces of the rusted, broken spring are in the hole I drilled.
Starting to pull out bits of spring. It broke several times, but I got it out in pieces.
Easy does it...