To avoid these ads, REGISTER NOW!

Restoring my grandfather's vise

goofiefoot

Well-known member
Joined
Jun 24, 2016
Messages
196
Location
Rockport, TX
My grandfather was a mechanic and owned a small-engine repair shop until he passed in 1998. My father and I took some of his tools, but I didn't have room for all that many at the time, and my dad had plenty of his own. Looking back, I would have benefited greatly from just putting most of the stuff in storage for later, but hindsight blah, blah, blah.

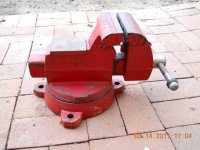
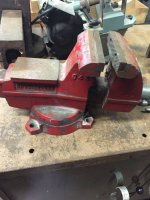
I have this vice from his shop that I've used fairly regularly. It's always functioned as I needed, so I've never really maintained it. Joining GJ and seeing all the inspiration around here, I figured it was time to restore the old thing and make it look nice.

Quick Google searches have linked the numbers on the vice with Wilton, so I will assume it's at least related, though there are no brand names anywhere on the piece

2016-07-01%2010.55.45.jpg


These numbers read "N", "2", "110008", "111937"
2016-07-01%2010.54.56.jpg


These both read "1644"
2016-07-01%2010.55.12.jpg


I disassembled the vise yesterday and put the small parts in some vinegar to soak overnight. I brushed them off this morning, and they turned out pretty nice. I had to drill out the original jaw face screws, so I bought new ones last night and ground the heads down to the correct diameter.
2016-07-02%2010.56.44.jpg


The snap ring for the spindle did not cooperate when coming out. I'm hoping this is a fairly common size and is easily replaced. I'll start with a trip to HD or Lowes today and hope for the best.
2016-07-02%2010.57.40.jpg


The rest of the parts are set, ready for an overnight soak. 2 gallons of vinegar should do it.
2016-07-02%2010.56.53.jpg


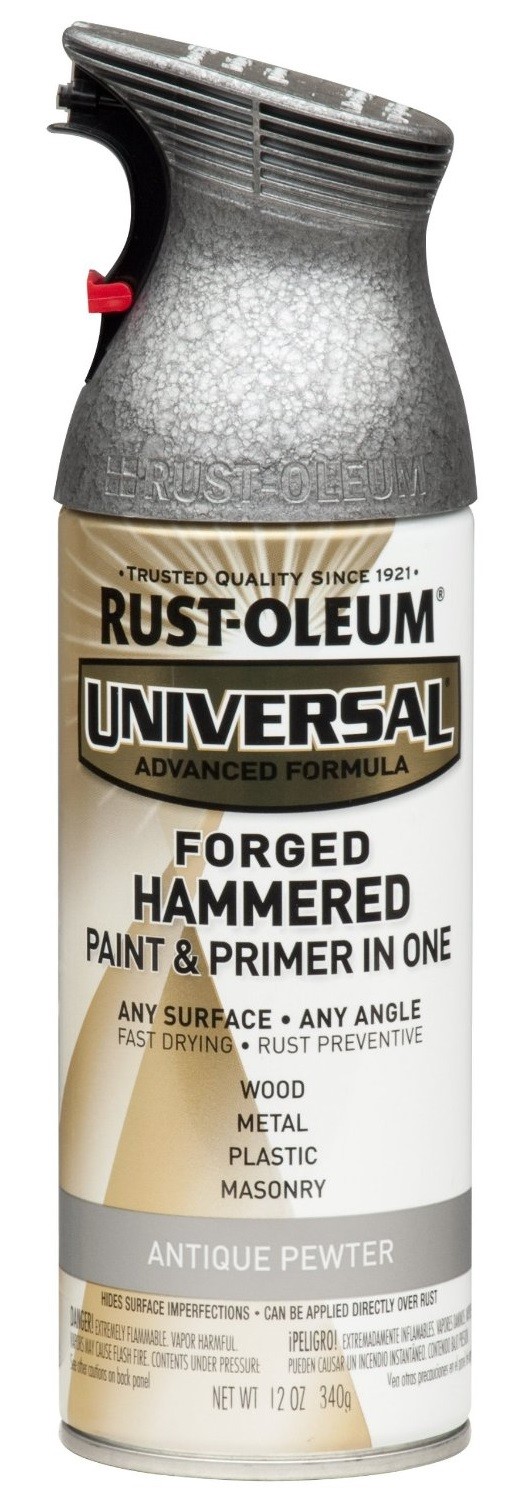
My plan is to clean up, get it lubricated, and paint it. I'm thinking hammertone grey or red. I scored into the jaw face on one side trying to get the screw out, so I may replace that if I can find the right part.

While this seems a fairly straightforward project, feel free to pass along any ideas or insight, especially with identification info, that may help me along.
 
Last edited:
To avoid these ads, REGISTER NOW!
OP
G

goofiefoot

Well-known member
Joined
Jun 24, 2016
Messages
196
Location
Rockport, TX
No luck finding the clip. I'll make a quick trip to Fastenal sometime during the week.

The large parts are soaking, and I'll get them cleaned up tomorrow.
2016-07-02%2013.14.26.jpg


I went ahead and dropped an axe head I found at my deer lease in the there, since there was room, and I plan to turn it into a large-headed hatchet once I find the right handle. I've restored a few of them, and love getting them back in working order.
2014-06-27%2019.13.37.jpg
 
Last edited:

drivesitfar

Well-known member
Joined
Oct 23, 2013
Messages
36,007
Location
Pacific Northwest
GF: it looks like a Chinese made Wilton with the cast in jaws. if the pipe jaws actually are removable and have a phillips screw holding them in then it would have been made in the USA. if you can't find a clip that will work at Fastenal then call Wilton because i'm guessing they still make them for your vise. also if you end up calling Wilton ask them if they have a label to sell or give you that should fit nicely in the little about 2x5 inch inset on the side of your vise.

BEE CAREFUL using vinegar to clean up cast iron because you need to make sure to rinse it all off and dry it either in the hot sun of Texas or in a BBQ to keep the vinegar from continuing to eat the cast iron which it can.

good luck and ask questions if you have any.
 
OP
G

goofiefoot

Well-known member
Joined
Jun 24, 2016
Messages
196
Location
Rockport, TX
GF: it looks like a Chinese made Wilton with the cast in jaws. if the pipe jaws actually are removable and have a phillips screw holding them in then it would have been made in the USA. if you can't find a clip that will work at Fastenal then call Wilton because i'm guessing they still make them for your vise. also if you end up calling Wilton ask them if they have a label to sell or give you that should fit nicely in the little about 2x5 inch inset on the side of your vise.

BEE CAREFUL using vinegar to clean up cast iron because you need to make sure to rinse it all off and dry it either in the hot sun of Texas or in a BBQ to keep the vinegar from continuing to eat the cast iron which it can.

good luck and ask questions if you have any.


Great info, thanks! I was hoping it was American made, but I know my grandfather was frugal, so Chinese-made wouldn't be a surprise. I'm happy to restore it, regardless. I'll note how the pipe jaws are attached (I didn't notice a screw when disassembling, but honestly, I didn't really look there).

I've used vinegar often on other projects, and I do follow your suggested protocol, but thanks for pointing it out! Yes, things can go south fairly quickly when vinegar is left on there (don't ask me how I know).
 

Shiftless

Well-known member
Joined
Mar 9, 2014
Messages
14,528
Location
East Bay SFO
Even if it is a low value vise, it was your grandfather's vise. He spent many hours in his shop with this vise and it is fitting and proper for you to make it something you can be proud of when using or showing people around in your shop. Imagine your grandfather looking over your shoulder as you use some of his old tools. He would be proud.
Those of us who are grandfathers ourselves no doubt wish that our grandsons and/or granddaughters will be using one or more of our old vises someday when we are gone.
 

crguy

Well-known member
Joined
Jan 24, 2016
Messages
2,653
Location
SW Washington
The proper name for that snap ring is an E clip. Fairly common if you go to an industrial supply, or a good automotive supply.
 

Shiftless

Well-known member
Joined
Mar 9, 2014
Messages
14,528
Location
East Bay SFO
The proper name for that snap ring is an E clip. Fairly common if you go to an industrial supply, or a good automotive supply.

While restoring an old Sears vise, I needed one of those e-clips and found it in a lttle drawer at my local Ace hardware for under 25 cents IIRC.
 
OP
G

goofiefoot

Well-known member
Joined
Jun 24, 2016
Messages
196
Location
Rockport, TX
Even if it is a low value vise, it was your grandfather's vise. He spent many hours in his shop with this vise and it is fitting and proper for you to make it something you can be proud of when using or showing people around in your shop. Imagine your grandfather looking over your shoulder as you use some of his old tools. He would be proud.
Those of us who are grandfathers ourselves no doubt wish that our grandsons and/or granddaughters will be using one or more of our old vises someday when we are gone.

Well said, and yes, I think of my grandfather any time I'm working in the garage, especially using one of his old tools.
 
OP
G

goofiefoot

Well-known member
Joined
Jun 24, 2016
Messages
196
Location
Rockport, TX
I've got everything stripped down and ready to paint. There were quite a few crevices to hide rust, so lots of hand scrubbing.
2016-07-03%2011.47.16.jpg


I polished the parts I don't plan to paint. Lots of pitting, but it gives it character.
2016-07-03%2011.52.00.jpg
 
Last edited:

Shiftless

Well-known member
Joined
Mar 9, 2014
Messages
14,528
Location
East Bay SFO
Great work so far!
I'm sure you are not planning to paint the slide or the anvil top right?
A wire wheel is your friend. But work safe!
Keep us posted and be sure to post a pic of the finished product. You going with red? Some guys like to match the color of their tool box. However...there is a saying over on the main vise thread..."your vise, your color"
 
OP
G

goofiefoot

Well-known member
Joined
Jun 24, 2016
Messages
196
Location
Rockport, TX
Great work so far!
I'm sure you are not planning to paint the slide or the anvil top right?
A wire wheel is your friend. But work safe!
Keep us posted and be sure to post a pic of the finished product. You going with red? Some guys like to match the color of their tool box. However...there is a saying over on the main vise thread..."your vise, your color"

Of course I wasn't going to paint those pieces (sneaks off to the garage to tape them up...) :D

I ended up finding a "Antique Pewter" hammertone that I think will look nice. I do have some red tool boxes, but my rolling carts are black and grey, and my cabinets are blue. Clearly, matching in the garage is not my "thing."
 

drivesitfar

Well-known member
Joined
Oct 23, 2013
Messages
36,007
Location
Pacific Northwest
GF: did you try to pull the vise nut out of the inside of the static jaw? if you do you can clean it easier and get a fresh coat of grease on it and clean out the gunk that seems to be in every old vise's insides. also you can then primer or paint the inside of the static to keep it from rusting.

i'm not positive how that vise nut is removed so post up pictures if you have some to post or maybe somebody else that's restored that vise before can tell you. also I was pretty certain the pipe jaws were cast in the static and not removable so were they?

good luck and looks great so far. i like leaving scars and character marks too so WELL DONE.
 
OP
G

goofiefoot

Well-known member
Joined
Jun 24, 2016
Messages
196
Location
Rockport, TX
GF: did you try to pull the vise nut out of the inside of the static jaw? if you do you can clean it easier and get a fresh coat of grease on it and clean out the gunk that seems to be in every old vise's insides. also you can then primer or paint the inside of the static to keep it from rusting.

i'm not positive how that vise nut is removed so post up pictures if you have some to post or maybe somebody else that's restored that vise before can tell you. also I was pretty certain the pipe jaws were cast in the static and not removable so were they?

good luck and looks great so far. i like leaving scars and character marks too so WELL DONE.

Yes, I was able to remove the nut, and it is allowing me to get some paint inside the body. First two coats are on. Looking good so far!

2016-07-03%2017.30.37.jpg
 
Last edited:

drivesitfar

Well-known member
Joined
Oct 23, 2013
Messages
36,007
Location
Pacific Northwest
GF: another painting tip i'll offer for your next vise or in case you change color later is to either tape a plastic bag on the slide or use newspaper to avoid using half a roll of expensive tape. your method works too and just saying.

good luck and looking good so far.
 
OP
G

goofiefoot

Well-known member
Joined
Jun 24, 2016
Messages
196
Location
Rockport, TX
GF: another painting tip i'll offer for your next vise or in case you change color later is to either tape a plastic bag on the slide or use newspaper to avoid using half a roll of expensive tape. your method works too and just saying.

good luck and looking good so far.

Much appreciated! I got about halfway down and realized there could be a more efficient way, and that would have been it.
 
OP
G

goofiefoot

Well-known member
Joined
Jun 24, 2016
Messages
196
Location
Rockport, TX
Productive day. Everything is painted and will cure for a couple of days until I can find the clip.

2016-07-03%2020.24.25.jpg
 
Last edited:

Shiftless

Well-known member
Joined
Mar 9, 2014
Messages
14,528
Location
East Bay SFO
Looking great so far!
Your textured paint looks fantastic and I love your choice of color. I hesitate a guess that this is not the first time you have spray painted something, right?
Do you have any inside information about how to achieve great results with the textured paint besides simply following the directions on the can?

Well done my man! :beer:
 
OP
G

goofiefoot

Well-known member
Joined
Jun 24, 2016
Messages
196
Location
Rockport, TX
Thanks! I really like how the color turned out. No, not my first spray job. I paint light coats with time to dry between. I usually hang the pieces I paint so I can hit all sides with each coat, but that wasn't possible with this project. In this case, I had to just wait a couple of hours before I turned the pieces over to get the other side

I hadn't used the Rustoleum hammered before, and while the texture just worked out with my technique, I really hate the design of the can.

rust-oleum_271481_universal_forged_hammered_spray_paint.jpg


The trigger mechanism is awkward and takes some effort to squeeze which makes it difficult to spray evenly. I'm more comfortable with a simple traditional spray tip, but I've also had luck with the clip on triggers.

sphold.jpg
 

Shiftless

Well-known member
Joined
Mar 9, 2014
Messages
14,528
Location
East Bay SFO
Just follow the directions..nothing special...Hmmm....
When I used the hammered finish paint, black, out of the same odd shaped can, it resulted in a mess.
I used the Rustoleum primer over bare metal on a Prentiss Bulldog. I let it dry several days. Final product was so blotchy I recoated with textured rather than more hammered.

Did you use primer first? Your paint job was excellent in hiding the imperfections in the surface of the jaws where dings usually telegraph through.

Once again... Great Work!
 
To avoid these ads, REGISTER NOW!
OP
G

goofiefoot

Well-known member
Joined
Jun 24, 2016
Messages
196
Location
Rockport, TX
It's just a trick of the eye. Most of the texture you're seeing IS the imperfections. That's really by design - I want most of the character to come through.

2016-07-04%2009.17.20.jpg


2016-07-04%2009.17.35.jpg


I did not prime first, just prepped the bare metal as best I could.
 
Last edited:

drivesitfar

Well-known member
Joined
Oct 23, 2013
Messages
36,007
Location
Pacific Northwest
GF: looks great. should be ready to grease and put back together soon.

Shift: if you want a great finish with the spray can hammered paint i opt for the $10 per can version instead of the $5 one that GF posted. both will give a good hammered look if you can put it on the right thickness. the key is to warm up the piece either by laying in the sun at 70 degrees or in an oven or smoker. then spray on a final coat a little thicker where it almost runs. you don't need to spray on a primer coat, but if you do just a light one works ok.

BAGGED & JOE and a few other guys bought a new $100 smoker at their local tractor supply store and they cook their vises. i'll probably go that route or if i can find the space to put in a vintage old school 50's range oven i'll use that in my shop to bake on the paint. i've seen BLO baked on vises by these guys and they look amazing, but i also hear you need to cook them outside because of the smell.

sorry to derail your vise thread a bit GF and hope you don't mind.

have a great 4th all
 

exmaxima1

Well-known member
Joined
Jun 25, 2011
Messages
6,339
Location
Midwest
GF: it looks like a Chinese made Wilton with the cast in jaws. if the pipe jaws actually are removable and have a phillips screw holding them in then it would have been made in the USA.

Drives,
I came across a pic today of USA Wilton with cast in jaws, so there are probably other models as well that defy that cast jaw rule of thumb.
 

Attachments

  • wilton646.jpg
    wilton646.jpg
    57.2 KB · Views: 100

Shiftless

Well-known member
Joined
Mar 9, 2014
Messages
14,528
Location
East Bay SFO
Drives and GF:
Maybe that's where I went wrong. I laid down 2-3 coats of primer thinking that would result in a smoother job. Also, IIRC it was the normal chilly temp in the garage that night. Lacking a smoker or a dedicated wall oven rescued from the scrapper (wish I had the space for that!) I suppose a guy could just warm up the vise with an old hair dryer or a heat gun. Many of us have non contact thermometers to check the final temp. 200 degrees is the target I remember from the guys who use the smoker. Is that correct?
 

drivesitfar

Well-known member
Joined
Oct 23, 2013
Messages
36,007
Location
Pacific Northwest
EX: it's hard for my old eyes with my scratched up readers to see if those jaws are cast or removable. did you see the vise in person? i think the Wiltons that have that design and were made in the US are stamped saying so like the one you posted seems to have on it's side. the one GF didn't have MADE IN USA or I didn't see it.

Shift: once the paint is on yes 200-250 degrees sounds about right to bake/dry your paint on your vise or tools. i used to paint in the winter in my unheated garage with terrible results so usually do all my painting during the warmer months now or fire up a torpedo heater and get the garage or shop warmed up nice before attempting to paint.

yes a vintage oven in a shop would be nice wouldn't it??
 

exmaxima1

Well-known member
Joined
Jun 25, 2011
Messages
6,339
Location
Midwest
EX: it's hard for my old eyes with my scratched up readers to see if those jaws are cast or removable. did you see the vise in person? i think the Wiltons that have that design and were made in the US are stamped saying so like the one you posted seems to have on it's side. the one GF didn't have MADE IN USA or I didn't see it.

GF's vise is pretty old, and made during an era when Wilton didn't cast "USA" into it. But it didn't have "Taiwan" on the bottom of the base, so I would say it's a USA model. Plus the shape of the base and the plating on the clamps looks very much USA.

In any case, I just wanted to note that there are indeed some USA Wiltons with cast pipe jaws. In fact, there's another one being sold locally.
 

Attachments

  • wilton646.jpg
    wilton646.jpg
    78.1 KB · Views: 80
Last edited:

drivesitfar

Well-known member
Joined
Oct 23, 2013
Messages
36,007
Location
Pacific Northwest
EX: since i don't own a Wilton of that style or pay that much attention to it because i love their bullets and especially their C series vises it's good to have these little threads to learn more. i'll take note of your posts and see if i can gather a little more history about Wilton's non bullet line of vises that they sent overseas for production at some time.

any idea when Wilton started making their vises overseas and did they first go to Taiwan or Japan before China where they make their lower quality Wiltons and Columbians now?
 

exmaxima1

Well-known member
Joined
Jun 25, 2011
Messages
6,339
Location
Midwest
any idea when Wilton started making their vises overseas and did they first go to Taiwan or Japan before China where they make their lower quality Wiltons and Columbians now?

I recall having a 645 from the late 60's/70's with "Taiwan" on the bottom. I don't think they went to China until late 90's. AUTOPTS would be the guru on stuff like that.
 

G-ManBart

Well-known member
Joined
Jan 24, 2015
Messages
2,059
Location
Michigan
While restoring an old Sears vise, I needed one of those e-clips and found it in a lttle drawer at my local Ace hardware for under 25 cents IIRC.

Same here. I've also found them in the specialty fasteners drawers at Lowe's.
 
OP
G

goofiefoot

Well-known member
Joined
Jun 24, 2016
Messages
196
Location
Rockport, TX
Success! I finally found the e-clip at Pep Boys, of all places.

2016-07-072012.41.50.jpg


I greased up the internals, and was finally able to reassemble the vise. I'm pleased how it turned out.

2016-07-072012.53.24.jpg


2016-07-07%2012.53.33.jpg


2016-07-07%2012.54.14.jpg


2016-07-072012.55.31.jpg


Thanks for following along on my little restoration. I have contacted Wilton to see if they can give me the specifics on the vice, and if they have decals for the sides. I'll post back when I hear from them.
 
Last edited:

drivesitfar

Well-known member
Joined
Oct 23, 2013
Messages
36,007
Location
Pacific Northwest
GF: it looks like it will last long enough now to pass on to your grandson and should with a little cleaning and greasing every 6 months to a couple years depending on usage. WELL DONE SIR!!
 

WWShop

Well-known member
Joined
Aug 25, 2015
Messages
948
Location
MN
Looks great! I've checked this thread the last couple days for the final result. Turned out real nice!
 
OP
G

goofiefoot

Well-known member
Joined
Jun 24, 2016
Messages
196
Location
Rockport, TX
Well, I think I can call it DONE!

I contacted Wilton and had a terrific experience from their staff. While they couldn't identify the approximate year, they did confirm it was "very old" and a good example of the Wilton 1644 Utility Vise. They sent several decals so I could determine how best to finish out the vise.

2016-07-202020.47.36.jpg


2016-07-202020.47.07.jpg


2016-07-202020.47.47.jpg


From my searches, it looks as if the red and blue "Made in the USA" badges show up on vises that already have the Wilton logo cast into the iron. I'll hold onto them for when I have the opportunity to restore a larger vise. :D
 
Last edited:

drivesitfar

Well-known member
Joined
Oct 23, 2013
Messages
36,007
Location
Pacific Northwest
GF: great looking vise that should last you to pass on to your grandson especially if you hang around here long enough and find a HUGE OLD US MADE VISE for the other side of your bench.

nice to hear Wilton is still got great people working there and love the way the label looks.

yes save the others for a Wilton Bullet that might be a little spendy but a very nice vise.
 

JTH

Well-known member
Joined
May 4, 2012
Messages
167
Location
MO Ozarks
Very nice looking vice!! Great job on the restoration and keeping family history alive! We're not dead if there's someone alive who has some knowledge of us. Your grandad lives on in memory and the knowledge of him using this vise! Hope it will be passed on with stories of both of you! JT
 

motorman1133

Member
Joined
Mar 22, 2017
Messages
12
my 1644 is identacle but it says wilton on the side... but it has the same numbers stamped in it...is it worth anything ?
 

Jeremy77

Well-known member
Joined
Mar 7, 2015
Messages
602
Location
Coastal Alabama
Just read through the whole thread and thoroughly enjoyed it. Your grandfathers vise looks amazing after the work that was put into it. Congrats.
 
To avoid these ads, REGISTER NOW!
Top Bottom