
cash68
Keeper Of Rotor Hill
Goal: To build a modern, clean, minimal garage area for wrenching/automotive/mechanical work.
House: 1958 MCM ranch, tucked into a wooded lot with an acre of rolling kettle moraine forest. Feels like you're very far up north, but not too far from civilization. This is my first house, so I'm still learning a lot.


Background: Industrial Designer / Budget DIY background, multiple build threads under my belt.
Here's my previous garage build, and a few projects

3800 Sq Ft Warehouse w Loft Apartments
78 Sleekcraft Muscleboat Restoration
95 Audi S6 Restoration
91 Arctic Cat Wildcat 700 Restoration
The lower garage will be my primary workshop until I have time to finish Garage #2. It already has heat and it's close to the house, so it makes sense to do most of the work in here. Planning on a quick, low budget build here to make it usable ASAP. I want to do things cheap, but also pay attention to the aesthetics and try to keep it a bit modern looking. Garage #2 will be more focused on wood working and larger power tools.
Lighting: Luckily for me, the ceiling was prewired with 4 outlets for shop lights. I took a trip to costco and picked up some LED shoplights, $39ish each.

Slab Prep: Slab is original and in poor shape. Had water issues and time and salt have taken their toll. I looked into renting a diamond grinder but have a quote from a guy who will shot blast it, patch it, fill all cracks, then come back with a grinder. I plan to install the epoxy myself. Here's the current condition of the floor:


Solidworks Planning: Thinking about running a wooden french cleat system on the wall. Wider board in center for some neutral gray hooks to hang bikes. RGB LED strips running on the back of the boards to provide some nice accent lighting. Originally I was going to put the bench in the back of the shop, but I plan on shoving two cars in here so I think it makes more sense to build along the side of the wall. Pictured here is a simple 8' bench. Will figure out details later.

Quick Lighting Study Rendering: What I am shooting for, aesthetically.

Update: It's been a while, but I've been making some progress.
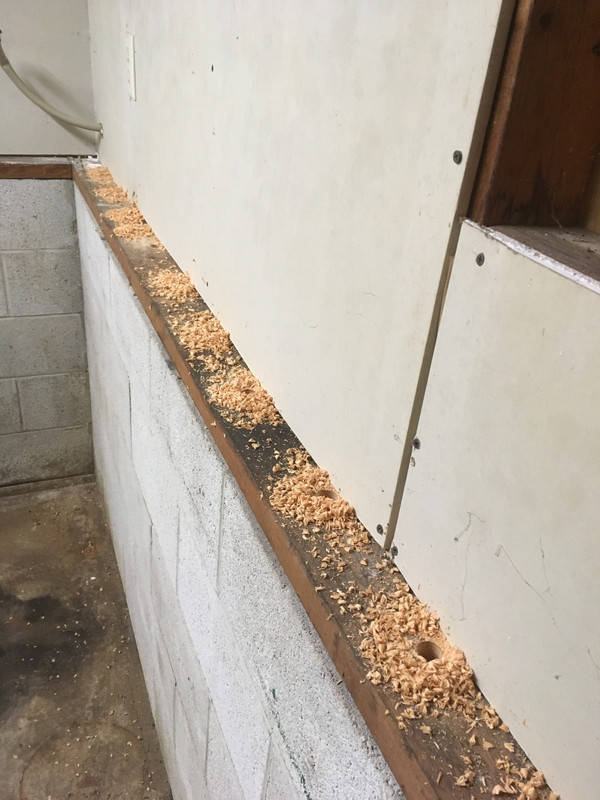
There was this dried out looking caulk up in the corner/perimeter of the garage. I have since found out it is some sort of fire barrier caulk, but it was dried out and cracked and just looked like ****, so I spent hours with a wrecking bar and a hammer smashing it all out.

So I am trying to prep the floor, and I noticed these odd bumpouts in my garage, I never really looked into them but I figured they were hiding pipes of some kind. Note the random 2x4 on the side, we'll get to that in a bit

Nope!!! Apparently some conduit was too much work. I mean; since it's enclosed I guess it's to code, but it's pretty hood.

Furthermore, there was a box in the wall right there, so I'm not sure why they didn't just run the wiring through the wall. ?!

And the quality work continues, as someone just said "**** it, just use the framer" on the base board, with no moisture foam.

The other one always had this weird extra 2x4 on the side, and I never understood what it was for.

So conduit was too expensive, and so was a 2x4 of the proper length, so not only did they brace some scrap 2x4s, but they put the brace... on the outside. Some people shouldn't breed.

So I had a guy scheduled to come prep the floor, so I needed to take care of this quickly. A sawzall and a prybar made short work of it, leaving the full access to the floor.
I didn't have fish tape handy, but I did have some conduit, so I put this up for now, at 10:30 at night the day before the floor guy was going to be here at 9am.

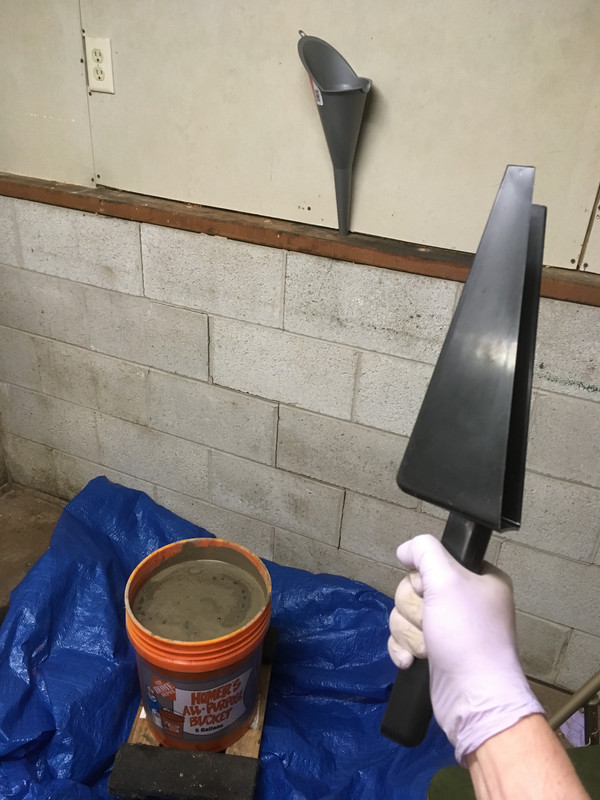
Emptied out the garage, swept up all the dried red chaulk and ****, so this is the 'before' photo of the floor.

I didn't get too many photos of this, but the floor had already been blasted/diamond grinded a first time, and a skim coat applied.

Curing a bit more

Flooring guys were busting ***, from Midwest Industrial Flooring. They did another surface grind, smoothing out most of the spalling, but then went around and checked for imperfections with some patching compound if they missed any.

And here she is, prepped, curing, and ready for action tomorrow. I've never been so excited by a floor before!

House: 1958 MCM ranch, tucked into a wooded lot with an acre of rolling kettle moraine forest. Feels like you're very far up north, but not too far from civilization. This is my first house, so I'm still learning a lot.
Background: Industrial Designer / Budget DIY background, multiple build threads under my belt.
Here's my previous garage build, and a few projects
3800 Sq Ft Warehouse w Loft Apartments
78 Sleekcraft Muscleboat Restoration
95 Audi S6 Restoration
91 Arctic Cat Wildcat 700 Restoration
The lower garage will be my primary workshop until I have time to finish Garage #2. It already has heat and it's close to the house, so it makes sense to do most of the work in here. Planning on a quick, low budget build here to make it usable ASAP. I want to do things cheap, but also pay attention to the aesthetics and try to keep it a bit modern looking. Garage #2 will be more focused on wood working and larger power tools.
Lighting: Luckily for me, the ceiling was prewired with 4 outlets for shop lights. I took a trip to costco and picked up some LED shoplights, $39ish each.
Slab Prep: Slab is original and in poor shape. Had water issues and time and salt have taken their toll. I looked into renting a diamond grinder but have a quote from a guy who will shot blast it, patch it, fill all cracks, then come back with a grinder. I plan to install the epoxy myself. Here's the current condition of the floor:
Solidworks Planning: Thinking about running a wooden french cleat system on the wall. Wider board in center for some neutral gray hooks to hang bikes. RGB LED strips running on the back of the boards to provide some nice accent lighting. Originally I was going to put the bench in the back of the shop, but I plan on shoving two cars in here so I think it makes more sense to build along the side of the wall. Pictured here is a simple 8' bench. Will figure out details later.
Quick Lighting Study Rendering: What I am shooting for, aesthetically.
Update: It's been a while, but I've been making some progress.
There was this dried out looking caulk up in the corner/perimeter of the garage. I have since found out it is some sort of fire barrier caulk, but it was dried out and cracked and just looked like ****, so I spent hours with a wrecking bar and a hammer smashing it all out.
So I am trying to prep the floor, and I noticed these odd bumpouts in my garage, I never really looked into them but I figured they were hiding pipes of some kind. Note the random 2x4 on the side, we'll get to that in a bit
Nope!!! Apparently some conduit was too much work. I mean; since it's enclosed I guess it's to code, but it's pretty hood.
Furthermore, there was a box in the wall right there, so I'm not sure why they didn't just run the wiring through the wall. ?!
And the quality work continues, as someone just said "**** it, just use the framer" on the base board, with no moisture foam.
The other one always had this weird extra 2x4 on the side, and I never understood what it was for.
So conduit was too expensive, and so was a 2x4 of the proper length, so not only did they brace some scrap 2x4s, but they put the brace... on the outside. Some people shouldn't breed.
So I had a guy scheduled to come prep the floor, so I needed to take care of this quickly. A sawzall and a prybar made short work of it, leaving the full access to the floor.
I didn't have fish tape handy, but I did have some conduit, so I put this up for now, at 10:30 at night the day before the floor guy was going to be here at 9am.
Emptied out the garage, swept up all the dried red chaulk and ****, so this is the 'before' photo of the floor.
I didn't get too many photos of this, but the floor had already been blasted/diamond grinded a first time, and a skim coat applied.
Curing a bit more
Flooring guys were busting ***, from Midwest Industrial Flooring. They did another surface grind, smoothing out most of the spalling, but then went around and checked for imperfections with some patching compound if they missed any.
And here she is, prepped, curing, and ready for action tomorrow. I've never been so excited by a floor before!
Last edited:


 You and I have different priorities. Do you really want to be driving an upgraded S6 in the snow?