To avoid these ads, REGISTER NOW!

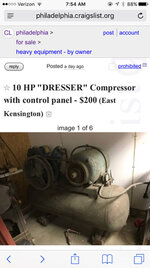
Leroi - Dresser 550A Air Compressor with 10HP 3p Motor - my next project

mattblast

Well-known member
Joined
Jan 30, 2013
Messages
788
Location
Bridgewater, NJ
I came across good deal for a big old air compressor on Craigslist Friday evening. It looked interesting but was 60 miles away plus I really didn't need a new project to work on. The garage just started getting cleaned up so there was a little space, but the point of cleaning it up was to have space to work, not to fill it up again.
20627f650519003caa98c4a0f1bc479b.jpg

Woke up Saturday morning and took another look. It was too hard to resist so I got in touch with the seller and offered him his asking price if he threw in the spare motor he mentioned in the listing (the original post was for $200 for the compressor plus another $75 for the motor). I half hoped that I was too late and that the compressor was gone, but he texted me back a couple minutes later and agreed.

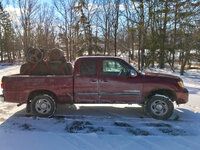
I've purchased big compressors before - often I have to take the pump and motor off the tank to be able to lift them into my truck. But once in a while I get lucky and the seller has a forklift or a hoist to lift the entire unit up and place it into the truck. He had a hoist but just in case I brought some tools and my 18 year old son to assist. He likes to sleep in on the weekends so we didn't get out of the house until noon, just after the snow started to fall. My Tundra is rear wheel drive and doesn't do too well in the snow but I figured that by the time it got bad I would have a lot of cargo weight and that would improve handling.

The seller purchased the compressor 3 years ago from a small noodle factory (it has a coating of flour all over it) but it was too big for his RPC phase converter so he stuck with his Quincy for light sand blasting and decided to sell this to make room. It operates properly and quietly (at least it did 3 years ago).

The compressor was on a large dolly and we were able to push it (with a lot of effort) over to the hoist. He had a 1000lb hoist and it struggled to get the compressor off the ground. The balance point was to the inside edge of the motor. I backed the truck up and we lowered it right into the bed. It was secured with 4 2" straps, plus I used another strap to secure the starter and two more for the spare motor.

5 hours after we started (we stopped at Joe's Steak and Soda Shop for lunch and 95 was slow going), we pulled back into the driveway and were home. I'm glad it was slow going because the truck was at its weight capacity (the unit was a lot heavier than I expected). I had no issue with traction though with the added weight.

b48a02aeaca57b9a7be1ace7e387e0d7.jpg

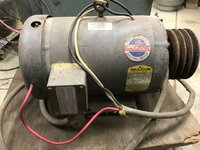
Unloading would be the old fashion way - disassembly and carry each component into the garage. It was too cold to unload that day, and is still too cold (5F this morning!) but it will go up to 60F on Thursday and that is when I'm going to attempt to get this out of my truck. Its huge! The pump is 220lb and the spare motor is 130lb. I'm guessing the old motor is close to 300lb from its size. I've never seen a compressor motor this big.

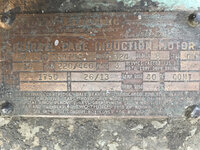
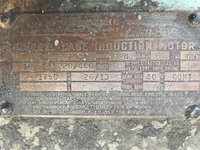
Its an IDEAL ELECTRIC SQUIRREL CAGE INDUCTION MOTOR 10HP 3P 1750RPM 220/440V 26/13A Frame 324 Code G
24d31f23bef1200ae74d4ba55b8e775f.jpg

This thing is huge. Its just about as tall as the pump. Clearly this is not the original motor. The pump is old, but not this old. Plus the motor has a 2 groove sheave while the pump flywheel is 3 groove. I plan to take the sheave off to use with the pump and sell this vintage motor. If you are looking for a deal on an old motor let me know.

The spare motor is a Baldor M3714T 10HP 3P 1725RPM 208-230/460V 28-26/13A Frame 215T Code J

3c7ddbb26921278cc30f50e4ad417c31.jpg

3eacbeb8df023dbc89d20940c18e1e37.jpg

The seller didn't know the condition of this motor so I'll do my best to test it without having to take it to the local motor shop.

The compressor also included a Cutler Hammer NEMA size 2 starter. That was a bonus. The last few compressors I purchased didn't include a starter.

I've worked on a lot of compressors before - Saylor Beall, Quincy 325, IR T30, etc. This one has the heft of the T30 and should be interesting to work on.

1bbb9510592e33246bed8f2236169015.jpg

There are few issues that I'll have to address
1. As far as I can tell, Leroi - Dresser is now owned by Compair which is owned by Gardner Denver. I sent them a request for a parts list and operations manual. Google searches for one turn up an endless number of sites that host garbage PDF files that you can only get if you sign up and download their app (you can tell they are garage from viewing the cached version of the PDF file from google). I filled out their Contact Us form on their site and hopefully they get back to me.

If you have any documentation on this please let me know

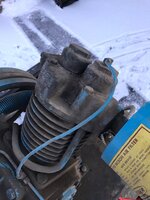
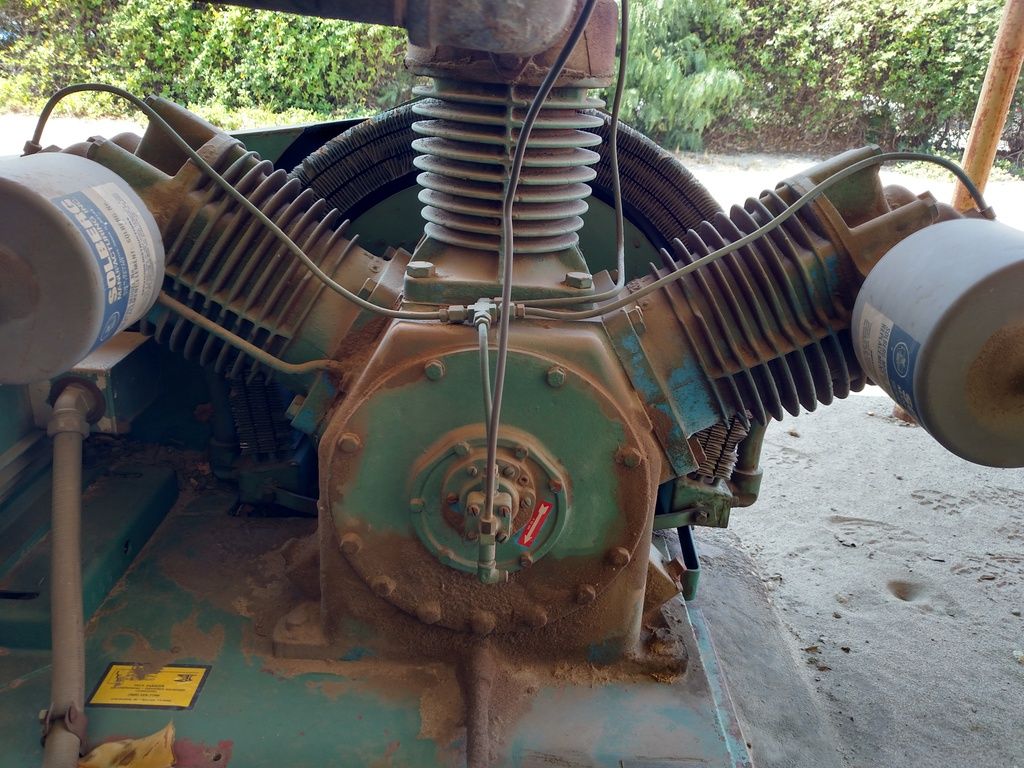
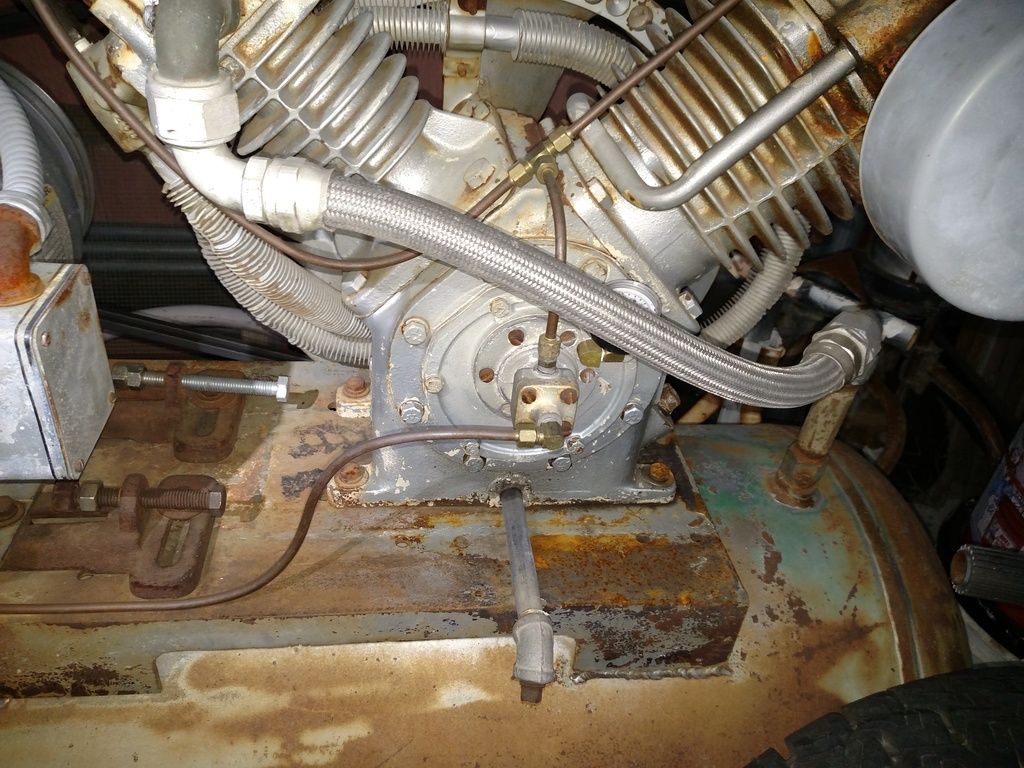
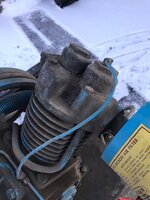
2. I've read all the posts I could find on Westinghouse, Wayne, Leroi and Dresser and it looks like the oil pressure gauge is missing on my pump (there is a hole where it should go that you can see in the photo). If that is the case I'm not sure how it would have operated. Maybe it snapped off in the previous move. Maybe it is plugged off. Maybe it doesn't have an oil pump.

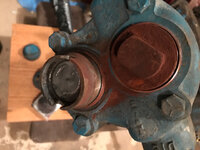
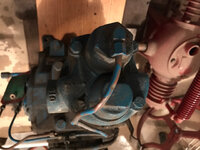
3. There are three copper lines going to the front of the compressor. It is either an oil pump or a centrifugal unloader (or maybe both). The top port goes to a valve on each head. The front port goes to the air supply from the HP head and the bottom port goes to an odd looking mechanical unloader on the tank. Why does this need to be connected to both the tank and to the air supply?

69c34c2a723436f1dc9f3e8e46849f4e.jpg

3e97148dc1544c6c41886c6512aeed5b.jpg

4. Do I need any special tools to access the valves? I guess I'll find out as I start working on this.

For now I'm at a stand still until it warms up. Some rain is expected tomorrow night so I did venture out in the 15F cold to put a tarp over everything to stay dry.
 

Attachments

  • b48a02aeaca57b9a7be1ace7e387e0d7.jpg
    b48a02aeaca57b9a7be1ace7e387e0d7.jpg
    450.2 KB · Views: 2
  • 3eacbeb8df023dbc89d20940c18e1e37.jpg
    3eacbeb8df023dbc89d20940c18e1e37.jpg
    304.8 KB · Views: 7
  • 1bbb9510592e33246bed8f2236169015.jpg
    1bbb9510592e33246bed8f2236169015.jpg
    423.2 KB · Views: 3
  • 69c34c2a723436f1dc9f3e8e46849f4e.jpg
    69c34c2a723436f1dc9f3e8e46849f4e.jpg
    873.8 KB · Views: 3
  • 3e97148dc1544c6c41886c6512aeed5b.jpg
    3e97148dc1544c6c41886c6512aeed5b.jpg
    130.7 KB · Views: 3
  • 20627f650519003caa98c4a0f1bc479b.jpg
    20627f650519003caa98c4a0f1bc479b.jpg
    40 KB · Views: 2
  • 3c7ddbb26921278cc30f50e4ad417c31.jpg
    3c7ddbb26921278cc30f50e4ad417c31.jpg
    64.6 KB · Views: 2
  • 24d31f23bef1200ae74d4ba55b8e775f.jpg
    24d31f23bef1200ae74d4ba55b8e775f.jpg
    459.6 KB · Views: 1
Last edited:
To avoid these ads, REGISTER NOW!

Norcal

Well-known member
Joined
Mar 16, 2008
Messages
13,770
Do you have 208,240 or 480 volts 3 phase power? Or a motor swap planned?
 
OP
M

mattblast

Well-known member
Joined
Jan 30, 2013
Messages
788
Location
Bridgewater, NJ
Good start to an interesting project.Keep the photos coming.
I should have more photos Wednesday or Thursday as I unload it and get a closer look.

Do you have 208,240 or 480 volts 3 phase power? Or a motor swap planned?
Nope - I may try to run it single phase, but that can't be done with a 10HP motor. The other option would be to change the sheave to slow it down to work with a smaller motor but then I don't get the full CFM out of it. I bought it more to have a project than to have another compressor. I'm very happy with my Saylor Beall. Once I've refurbed this I'll probably end up selling it.

My email to compair was forwarded to a local service center. They got in touch with me this morning to get the SN off the unit so they could provide me the correct documentation.
 
OP
M

mattblast

Well-known member
Joined
Jan 30, 2013
Messages
788
Location
Bridgewater, NJ
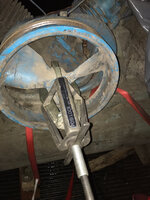
It got to 50F today and that was warm enough to attempt to unload the compressor from the truck. First step was to remove the flywheel to reduce the weight. I have a Posi Lock 3 jaw puller which makes easy work of getting large flywheels off. I got it several years ago when working on a dual pump IR T30 compressor and ended up renting one for the job. Once I found how useful they were I found one to buy (got a good deal of course)

01b55b9342c4f89e7e1d043eb3910c74.jpg

Turns out that this compressor had a tapered shaft so one turn of puller to pull it loose and then it slid right off. Good thing I took it off because it weighed in at 75 lbs. I also removed the intercooler to reduce the chance of damaging it then it was possible to lift it off the tank onto the truck bed and then again onto a dolly. I used some 6 gallon milk crates to reduce the lowering to about 18" at a time.

4010c094a6ca5b312cb324fbd79c960b.jpg

You can see the flour from the noodle factory caked on. That actually was a good thing as it protected the paint. A light brushing and it shows the original paint underneath.

90c30d6e19dfae1376d2767971d95757.jpg

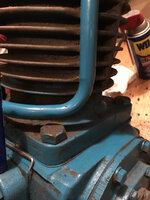
This is the first compressor that I was able to turn by the shaft without the flywheel. It has very smooth operation. It spins easily and I can feel the suction as I turn but there is a leak in the valve that causes it to blow some air out of the intake. That's ok. I intended to work on the valves anyway.

0f0c658588b89c4d36c12286627ccfdb.jpg

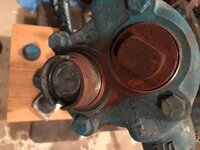
The low pressure side has 2" hex head caps on the valves. My 18" adjustable just barely fit and a few wacks with a dead blow hammer and the intake opened up.

108a796dd63d3847f8e6aa1d7386ab45.jpg

The lp exhaust valve was more stubborn and needed some kroil before it would turn and it still took about 50 wacks before it budged.

76375c2be975a7dabe9f30d771cfb597.jpg

The high pressure side had a 1-1/2" hex head cap on the intake and a 1" flat on the exhaust. I'm sure they make a special tool for this but I made it work with the adjustable wrench.

d706c470484bc2c6f21e1a217c711b5a.jpg

I used a scrap piece of 1/4" steel to remove the valve body from each cylinder.

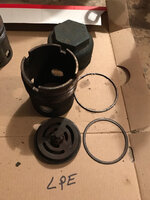
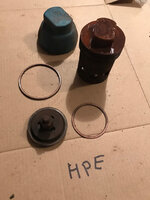
Here what I ended up with.

5249e33f0d7acf323e987751efd8e0ff.jpg
Low pressure intake

756fd7ce35007c24ebb10fcecdc9d628.jpg
Low pressure exhaust

a90bf6f63b6643d4b022528909e9869e.jpg
High pressure intake

7c6bb66438146d4d3533e44a651cc9c6.jpg
High pressure exhaust

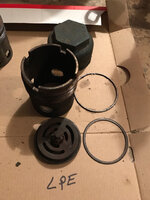
There is a plug that moves up and down in both intake valves that was jammed. The lp valves have castle nuts and cotter pins so they will be easy to work on.

263de3d1437852ffc9331df53f4a59a5.jpg
Intake

bce7bfafd99d705b6c84a07d25ace6a2.jpg
Exhaust

The hp valves look to have a roll pin on the nut that may be trickier to remove.

a1e867fd59d54e482777cc1584fb94e2.jpg
Intake

fd02f4debedbf398e705663121cd4dc7.jpg
Exhaust

Tomorrow should be warm again and I'll try to unload the motor from the truck.
 

Attachments

  • 01b55b9342c4f89e7e1d043eb3910c74.jpg
    01b55b9342c4f89e7e1d043eb3910c74.jpg
    374.9 KB · Views: 1
  • fd02f4debedbf398e705663121cd4dc7.jpg
    fd02f4debedbf398e705663121cd4dc7.jpg
    284.3 KB · Views: 1
  • a1e867fd59d54e482777cc1584fb94e2.jpg
    a1e867fd59d54e482777cc1584fb94e2.jpg
    298.1 KB · Views: 1
  • bce7bfafd99d705b6c84a07d25ace6a2.jpg
    bce7bfafd99d705b6c84a07d25ace6a2.jpg
    288.6 KB · Views: 2
  • 4010c094a6ca5b312cb324fbd79c960b.jpg
    4010c094a6ca5b312cb324fbd79c960b.jpg
    396.2 KB · Views: 1
  • 7c6bb66438146d4d3533e44a651cc9c6.jpg
    7c6bb66438146d4d3533e44a651cc9c6.jpg
    286.1 KB · Views: 1
  • a90bf6f63b6643d4b022528909e9869e.jpg
    a90bf6f63b6643d4b022528909e9869e.jpg
    289.5 KB · Views: 1
  • 756fd7ce35007c24ebb10fcecdc9d628.jpg
    756fd7ce35007c24ebb10fcecdc9d628.jpg
    308.5 KB · Views: 1
  • 5249e33f0d7acf323e987751efd8e0ff.jpg
    5249e33f0d7acf323e987751efd8e0ff.jpg
    319.9 KB · Views: 1
  • d706c470484bc2c6f21e1a217c711b5a.jpg
    d706c470484bc2c6f21e1a217c711b5a.jpg
    325.7 KB · Views: 1
  • 76375c2be975a7dabe9f30d771cfb597.jpg
    76375c2be975a7dabe9f30d771cfb597.jpg
    320.5 KB · Views: 1
  • 108a796dd63d3847f8e6aa1d7386ab45.jpg
    108a796dd63d3847f8e6aa1d7386ab45.jpg
    314.9 KB · Views: 1
  • 0f0c658588b89c4d36c12286627ccfdb.jpg
    0f0c658588b89c4d36c12286627ccfdb.jpg
    51.8 KB · Views: 2
  • 263de3d1437852ffc9331df53f4a59a5.jpg
    263de3d1437852ffc9331df53f4a59a5.jpg
    289.2 KB · Views: 2
  • 90c30d6e19dfae1376d2767971d95757.jpg
    90c30d6e19dfae1376d2767971d95757.jpg
    351.3 KB · Views: 3

koditten

Well-known member
Joined
Apr 10, 2008
Messages
5,528
Location
Midland, Michigan
I love these rehab stories.

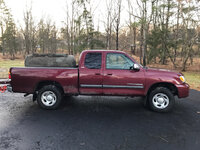
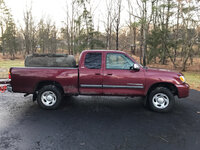
In other news, being a 20 year veteran of owning Toyota trucks, I'm concerned about the frame on the Tundra. Has it been inspected recently?

My last one looked like yours just before the frame broke.

Good luck on the compressor rebuild.
 
OP
M

mattblast

Well-known member
Joined
Jan 30, 2013
Messages
788
Location
Bridgewater, NJ
I'm concerned about the frame on the Tundra. Has it been inspected recently?

My last one looked like yours just before the frame broke.

It is a lot lower in back but I attributed that to the weight of the compressor. Once I took the pump off it did lift up, and I'll see how it looks once I get the motor out. The frame is actually new a couple years ago from the recall.
 
OP
M

mattblast

Well-known member
Joined
Jan 30, 2013
Messages
788
Location
Bridgewater, NJ
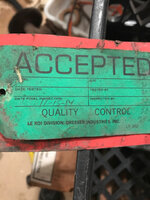
The original tag was hanging off the oil pump. This compressor passed the factory final inspection on 11/15/1984.88b90441ff14a7cb04ea4a199a106be7.jpg

And the mystery of the missing oil pressure gauge is solved - this unit doesn't appear to have had one. There is a set screw in the hole that looked like it was for the gauge. It looks to have thread compound on it.

0c0c317fc85c2313fc84008978c03833.jpg

I did a preliminary cleaning in the valves in the ultrasonic cleaner and later this week I'll start working on polishing them up.


Here is the high pressure intake valve after initial cleaning

0048dc00042081253c3ca69e0cc49ad9.jpg

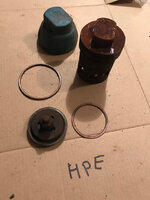
Inside the tower were two felt rings and a silicon oring to seal against the unloader piston. A second oring sealed the cap to the tower. I'll have to source these and replace them on both intake valves. Exhaust valves use a copper washer instead of the oring and don't have unloader piston or felt.
 

Attachments

  • 88b90441ff14a7cb04ea4a199a106be7.jpg
    88b90441ff14a7cb04ea4a199a106be7.jpg
    54 KB · Views: 1
  • 0c0c317fc85c2313fc84008978c03833.jpg
    0c0c317fc85c2313fc84008978c03833.jpg
    339.2 KB · Views: 1
  • 0048dc00042081253c3ca69e0cc49ad9.jpg
    0048dc00042081253c3ca69e0cc49ad9.jpg
    385.1 KB · Views: 1
Last edited:

EOC_Jason

Well-known member
Joined
Jun 25, 2012
Messages
11,388
Location
Bentonville, AR
Did you ever figure out what the deal is with that extra mechanical unloader on the tank?

Maybe the whole thing also acts as a safety pop-off in case of over-pressure?
 

Strouty

Well-known member
Joined
Mar 21, 2010
Messages
38,224
Location
Southern Maine
So that motor is just huge, it made the compressor look small in the first picture, then when you showed it in the truck I could see it was much bigger than expected! You can find 10 hp single phase motors, I have a 200 amp service and it starts mine without an issue. My compressor has unloaders as well, I would guess that if it didn't, things would be a bit worse when it starts chugging. I am looking forward to your thread, I need to rebuild mine (Quincy 350 series) soon too.
 
OP
M

mattblast

Well-known member
Joined
Jan 30, 2013
Messages
788
Location
Bridgewater, NJ
It was a huge effort to get the motor off. I wouldn't be surprised if it is 300lb. No way to lift even with two people so I rolled it off onto two milk crates then into the truck bed then onto two crates in driveway then onto dolly. This thing is huge.

f5d77df604a7c778a24b669daeefbbad.jpg

Here it is on a full size dolly.

The tank is 24" diameter and about 68" long. That converts to 120 gallons. Sure didn't look that big in original cl post.

Once the motor was off I got a better view of the tank unloader looking thing (maybe a pilot valve?). The copper line from this connects to the bottom port on the oil pump. I'm not sure exactly what it does or if I need to use in on the rebuild.

038586bb0cba26cc51dfe67f628984de.jpg

This is a very well built compressor but there are a few things I like better on the Quincy 325 - the Quincy has an inspection cover that can be removed to look inside the crankcase where this pump requires removal of the oil pump and bearing to look inside.

Also I got a copy of the parts manual and it is helpful but not as good as the Quincy. I guess folks that buy a Leroi Dresser pay a tech to work on their unit instead of doing it themselves. For example in the Quincy manual each bolt is listed by name, size, and part number. Here are some exactly as they appear in each manual.

Quincy
123157-116 "o"ring, 3/32 wide x .94 o.d.
223478-K1 hex. screw, 5/16-18 unc x 1.00, grade 5 (@ 12 ft.-lbs.)

LeRoi Dresser
SCREW, Cap 92-6
SEAL, O-Ring H125-286
 

Attachments

  • 038586bb0cba26cc51dfe67f628984de.jpg
    038586bb0cba26cc51dfe67f628984de.jpg
    318.6 KB · Views: 1
  • f5d77df604a7c778a24b669daeefbbad.jpg
    f5d77df604a7c778a24b669daeefbbad.jpg
    285.3 KB · Views: 1
OP
M

mattblast

Well-known member
Joined
Jan 30, 2013
Messages
788
Location
Bridgewater, NJ
Maybe it's some sort of unloader setup for continuous run? That's too weird...


That's what I'm thinking - but odd that it's on the tank and not on the pump. Here are some close ups after cleaning it up.

752af9a77253dc59e1fedaca77ec00cc.jpg

Spring adjustable with indicators for 3, 8, and 13. RCS marked on casting.

322b0c6649b9d8cba4ab42796c76d538.jpg

Ah ha. A Patent number! It was hidden under the dirt. 1927153

Hmm, it's a "Conrader Pressure Response Device" with a 1929 date.

53073c4dc2c8873c5da3e858a10afc59.jpg
 

Attachments

  • 53073c4dc2c8873c5da3e858a10afc59.jpg
    53073c4dc2c8873c5da3e858a10afc59.jpg
    86.5 KB · Views: 1
  • 322b0c6649b9d8cba4ab42796c76d538.jpg
    322b0c6649b9d8cba4ab42796c76d538.jpg
    300.5 KB · Views: 1
  • 752af9a77253dc59e1fedaca77ec00cc.jpg
    752af9a77253dc59e1fedaca77ec00cc.jpg
    330.7 KB · Views: 1

EOC_Jason

Well-known member
Joined
Jun 25, 2012
Messages
11,388
Location
Bentonville, AR
From what I gather it's some sort of adjustable safety valve. I guess tied into the unloader lines to help prevent pressure buildup if the tank reaches too high. I have my doubts though those small lines could vent the air that the pump would be generating.
 
OP
M

mattblast

Well-known member
Joined
Jan 30, 2013
Messages
788
Location
Bridgewater, NJ
Here's the Tunda about 700lbs lighter. It bounced back up.

2b516490dc742ff09bee9a2513f3eb24.jpg

Still have about 300lb of tank in it to unload later.

I don't notice the tank certification before. Found it under the paint. Hard to make it out though.

d96393006a23bdfcc3466bd09ca9af16.jpg
 

Attachments

  • d96393006a23bdfcc3466bd09ca9af16.jpg
    d96393006a23bdfcc3466bd09ca9af16.jpg
    445.9 KB · Views: 1
  • 2b516490dc742ff09bee9a2513f3eb24.jpg
    2b516490dc742ff09bee9a2513f3eb24.jpg
    390.5 KB · Views: 1

Strouty

Well-known member
Joined
Mar 21, 2010
Messages
38,224
Location
Southern Maine
To me it looks like you got a decent pump on a really old tank and motor. I would do some serious looking at the tank condition, you may be better off to scrap the old motor, sell the newer one, and sell that pump in order to find a quincy 325 that is on a newer tank.
 

930dreamer

Super Moderator
Staff member
Joined
Oct 7, 2009
Messages
22,997
Location
Amarillo,TX and Stinnett,TX
Nothing better than a vintage compressor resto, a 7.5hp motor might be a good option. Do you have a rotary phase converter? Was the tank full of water? We did a crude hydro test on my 1957 Kellogg American tank and it didn't leak.
 
Last edited:

Firebrand

Well-known member
Joined
Feb 23, 2010
Messages
294
Location
New Hampshire
Nice find at a good price given the parts and quality construction! I like Strouty's strategy since this find seems like a means to an end. Good luck and nice score!
 

86turbodsl

Well-known member
Joined
Jul 1, 2005
Messages
6,558
Location
Michigan
WOW. That's the biggest 10HP motor i have ever laid eyes on. My 10hp compressor motor looks about like your spare. I wonder if it has anything to do with the tag reading "Squirrel cage motor"

Any sparkies comment on that? I'm not familiar enough with the nuances.

Love the rehab thread! I want to do one on my Curtis someday.
 
To avoid these ads, REGISTER NOW!
OP
M

mattblast

Well-known member
Joined
Jan 30, 2013
Messages
788
Location
Bridgewater, NJ
you may be better off to scrap the old motor, sell the newer one, and sell that pump in order to find a quincy 325 that is on a newer tank.

That's no fun. I sold my single phase Quincy 325 with Oil Filter and Pilot Valve back in July. I really don't need another compressor as I'm happy with my Saylor-Beall. But I do enjoy rebuilding them.

Do you have a rotary phase converter? Was the tank full of water?

No RPC, but I'll probably get a single phase motor to test it with.

Nice find at a good price given the parts and quality construction!

It's very well made. It even has a low oil unloader that will not allow it to build pressure if the oil level is too low.

WOW. That's the biggest 10HP motor i have ever laid eyes on.

It made the compressor pump and tank look small in the photos.

Hey MattBlast, what model POSILOCK puller are you using in the photo...113?

It's a model 110 - 3 jaw 20 ton. I did have a model 116 which is their biggest, but I only got it since I found a good deal on craigslist. Ended up selling it a couple years ago on ebay. The model 110 is just the right size for pulling compressor flywheels. It didn't include the removable tip protector, and I've been using it without, but I'm going to order one for next time to keep the original top in good condition.
 
Last edited:
OP
M

mattblast

Well-known member
Joined
Jan 30, 2013
Messages
788
Location
Bridgewater, NJ
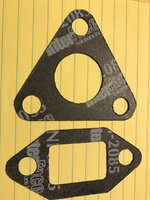
At the very least I will need to replace the intercooler gaskets and the orings and felt seals on the valves. The official gaskets for the intercooler are $30 for both but they are small and simple so I'm going to custom make them.

068db8d02ac02c894f6c323abbd9e4dc.jpg

The first step was to get an etching. When possible I put the part on a scanner but the angles didn't allow that.

f314170583c983aeb05796a2c0cc0a4e.jpg

It's rough but it's good enough for a tracing over. I scanned in the sketch then used it as a template and redrew it symmetrically in cad.

835e4003c82135b7cd3ffd30c59bd13e.jpg

It only took about 10 mins to draw. Final step is to cut the gasket material. I have a bunch of different sheets from Interface Solutions to use. Just need to read the specs to see which would be best for the temps and pressures expected at the intercooler.

fb8c7c4012a696b54ac2b4d61aef1758.jpg

NI-2085 is rated for 375F which is more than enough. It is water and oil resistant. Since the file is in cad, I can cut it on the flatbed cutter at the office but the vacuum hold down isn't working right so I plan to just cut it by hand using the print out as a tracing template.
 

Attachments

  • fb8c7c4012a696b54ac2b4d61aef1758.jpg
    fb8c7c4012a696b54ac2b4d61aef1758.jpg
    366.6 KB · Views: 1
  • f314170583c983aeb05796a2c0cc0a4e.jpg
    f314170583c983aeb05796a2c0cc0a4e.jpg
    283.3 KB · Views: 1
  • 068db8d02ac02c894f6c323abbd9e4dc.jpg
    068db8d02ac02c894f6c323abbd9e4dc.jpg
    300.6 KB · Views: 1
  • 835e4003c82135b7cd3ffd30c59bd13e.jpg
    835e4003c82135b7cd3ffd30c59bd13e.jpg
    144.4 KB · Views: 1

Mooky

Well-known member
Joined
Jul 6, 2014
Messages
257
Location
PA
If you need parts and want the valves professionally rebuilt, contact this company, local:

http://www.hi-techcompressor.com/

Smaller than they usual work on, but the process to rebuild and test is the same. Some of the photos & testimonials on the site are from me.
 
Last edited:
OP
M

mattblast

Well-known member
Joined
Jan 30, 2013
Messages
788
Location
Bridgewater, NJ
Thanks for the tip on the service center. I'll get in touch with them to get pricing on a few parts I need.

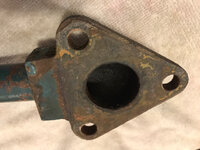
This morning I worked on cleaning up the valves. They were secured with a castle nut and cotter pin on the lp side and with a double nut and 1/16" roll pin on hp side. The nuts were impossible to remove by hand but a few seconds on the air impact wrench and they came right off. Besides a posi lock puller for the flywheel removal, an air impact wrench is essential for working on large compressors. The only other tools I'll need are basic hand tools (socket set, adjustable wrench, dead blow hammer, pipe wrench, and a gasket scraper)

d36fb98c1d21644fd6fcbcacf06493b2.jpg

The valves were in bad shape. Besides a build up of flour and carbon and oil, some were badly scored. They look to have not been serviced in years.

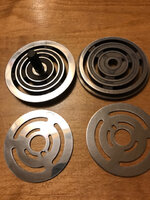
Here is the lp valve plate after some cleaning with soap and water

78241139a3d77cf7dbab2fd44a9c57d4.jpg

And after a few minutes of sanding on a 1/4" glass plate with 180 paper the damage is starting to disappear. The glass plate is flat and keeps the sanding even.

848c830724e77ebf55aa2f3de12b0112.jpg

I worked up from 180 to 320 then 400, 600, 800 and finally 1500. Each valve plate and seat took about an hour so 4 hours total.

Final results of lp valves seats and plates

43e7997bc449b07ee5981aab5a0a18bc.jpg

The tricky part was that the exhaust valves have a stud pressed onto them that cannot be removed (parts list shows plate with stud as single pn). I ended up sanding it over the edge of the glass plate so that the stud was just off the glass. I had to slide it back and forth on the paper then turn then repeat. I couldn't make these as perfect as the stemless seats but it is flat now and polished to a mirror finish.

At one point LeRoi modified the exhaust seats to have removable studs but after 700 units they switched back to the pressed in stud. I'm guessing that the threaded studs had an issue in the field and were discontinued.

I can't reassemble the valves until I order a new roll pin and spacer for the lp exhaust valve and a new spring for the hp exhaust valve. And I cannot install them until I pickup some replacement orings. The dealer I contacted wanted $4-$5 for each oring but they were able to get me the dimensions so I can use some from my oring set.
 

Attachments

  • 43e7997bc449b07ee5981aab5a0a18bc.jpg
    43e7997bc449b07ee5981aab5a0a18bc.jpg
    371.8 KB · Views: 2
  • 848c830724e77ebf55aa2f3de12b0112.jpg
    848c830724e77ebf55aa2f3de12b0112.jpg
    319.5 KB · Views: 1
  • 78241139a3d77cf7dbab2fd44a9c57d4.jpg
    78241139a3d77cf7dbab2fd44a9c57d4.jpg
    74.1 KB · Views: 1
  • d36fb98c1d21644fd6fcbcacf06493b2.jpg
    d36fb98c1d21644fd6fcbcacf06493b2.jpg
    475.4 KB · Views: 1
Last edited:
OP
M

mattblast

Well-known member
Joined
Jan 30, 2013
Messages
788
Location
Bridgewater, NJ
Valve assemblies are mostly put back together.

9e9ed06bd52bd22af8a9ad82b1fe07ef.jpg

Lp intake - done
Hp intake - need to install 1/16" roll pin in top nut to secure
Lp exhaust - needs a locating pin (roll pin) for valve seat and a valve guide (spacer). Both were heavily worn
Hp exhaust - one of the two springs has a split

bedfad20bd5a779e305d117ce22c4630.jpg

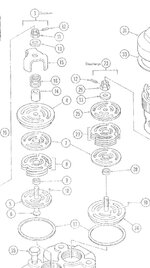
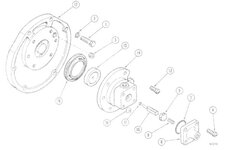
The damaged pin and spacer are parts 10 and 28 in this diagram. The valve plate and springs (7 & 27) wore out a section of the pin (10) and that allowed them to swivel. That caused heavy wear on the guide (28)

2bc52bb681808e7b35e610afd2c7fa1a.jpg

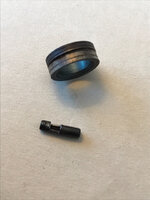
Thankfully I was able to pull the pin out of the valve seat without snapping it in half. It uses a 3/32" x 3/8" roll pin which I'll get at the local hardware store.
 

Attachments

  • bedfad20bd5a779e305d117ce22c4630.jpg
    bedfad20bd5a779e305d117ce22c4630.jpg
    93.3 KB · Views: 3
  • 2bc52bb681808e7b35e610afd2c7fa1a.jpg
    2bc52bb681808e7b35e610afd2c7fa1a.jpg
    311.7 KB · Views: 3
  • 9e9ed06bd52bd22af8a9ad82b1fe07ef.jpg
    9e9ed06bd52bd22af8a9ad82b1fe07ef.jpg
    359.4 KB · Views: 2

CGT80

Well-known member
Joined
Aug 29, 2014
Messages
869
Location
IE, SoCal, USA
Found a manual online if anyone would like to download a full copy of it.
LeROI Dresser Air Compressor Manual

This one is a better quality scan than the one that the factory sent me.

The link didn't work.
I was looking for a parts diagram to see where the tiny o ring in the unloader assembly goes.

The bottom port on the unloader should be for a pilot valve so that the compressor can run continuously to stay cool, but unload the heads when pressure builds. The middle port goes to the tank. When there is no oil pressure, the unloaders (on the heads) are activated and the pump will not have load on it. When the compressor first starts up (when the tank has air but it needs refilled..maybe 115 psi or so), there is no oil pressure, therefore it can get up to speed without load. When the tank is empty, the unloaders are not activated, but there isn't much resistance on the pump anyway.

My pump did not have an oil pressure gauge either, so I added an old air gauge that had a low rating. It seems to work.

What size pump is that?

Mine is a 2AVC which is the same as a 400. I bought a rebuild kit for $240 online with just about everything needed to do an overhaul. For valve wrenches, I cnc plasma cut some 1/4" plate and then fine tuned it with a die grinder. A sledge hammer loosened the parts with just a few taps, but one of the HP valves is still stuck in there and I haven't got back to it.

The problem I have right now is that I increased the max pressure to 165/115 startup and the pump would run, but the unloaders would stay open until the pressure dropped a bit more. It was fine at 150/105. The other day, the pump didn't want to turn. I don't know if the unloaders didn't open or if rain water caused an issue in the motor. It has been fine outside and was in a field for years before I got it. The baldor 5hp motor is built in a way that water doesn't easily get inside through the vents.

I love my LeRoi Dresser. The 2avc is rated at 17.x cfm at 175 psi and it filled an 80 gallon tank in around 5.5 minutes to 150 psi. According to an online calculator, that works out to 20 cfm. It will keep up with a large **** blast tip/gun, on a HF size cabinet/gun, and actually turn off for a little while before it runs again. The tip is for 20-25 cfm.
 

CGT80

Well-known member
Joined
Aug 29, 2014
Messages
869
Location
IE, SoCal, USA
Here is the unloader rebuild kit: https://www.pacificaircompressors.c...leroi-dresser-550a-770a-air-compressor-parts/

I was missing the tiny o ring in that kit. After I posted, I went out and took my unloader apart. There was a little build up on the face of the housing where that plastic/teflon puck seats. It is in the middle of the diaphragm in the pic of the rebuild kit, and it is a bit hard to see. Some fine sand paper cleaned that up, then I installed the o ring and used a bit of air tool oil on the plunger that moves back and forth in the assembly. Also, I replaced the white puck and stuck the old one in the rebuild parts kit I keep in the top of the garage, just in case I ever need it.

When I got it all together, I ran the compressor and shut it off at different pressures and restarted it. At 150 psi, it started right up and took only a second for the unloaders to close so it could make pressure. It seems like it might be leaking a bit of air from the bottom port of the unloader valve, so I will have to keep an eye on it.

Thanks for the manual. It showed exactly what I needed, so now I know I did get that o ring in the right place. I know what you mean about just finding fake/bogus sites with these manuals.

The rebuild kit I bought is the same as this, but I linked the one for your pump:
https://www.pacificaircompressors.c...mpressor-parts-rebuild-tune-up-kit-two-stage/

There are a number of places on the net that have these kits, so I just chose the best price. It has tons of parts and gaskets. If you want more pics, I pull out my kit and get some. People claim these are some of the best pumps made, but parts aren't as readily available as other brands. It seemed like a good idea to just have all the parts on hand while I know I can get them. My luck the machine would break down and I wouldn't be able to get parts. My kit was less expensive than your kit and it didn't seem like a bad price compared to what people have said about getting Quincy parts.

Check out this beast. It was at a shop that my family just closed down. I would have loved to have it, but it was a 25hp unit and the pump by it's self weighs around 600 pounds. A single phase motor wouldn't be too likely to spin it fast enough and I didn't have money to buy it or space to store it for the future. It was a nice daydream though. I did get some other great equipment from the shop, though.

IMG_20160527_105139229_HDR.jpg


Here are some pics of the compressor I picked up last year:

IMG_20160521_113617219.jpg


After I correctly plumbed the unloaders.
IMG_20161112_212848500.jpg


IMG_20160521_140832667.jpg


IMG_20160130_171455216.jpg
 
OP
M

mattblast

Well-known member
Joined
Jan 30, 2013
Messages
788
Location
Bridgewater, NJ
Each intake valve has 2 orings, 2 felt gaskets and 1 copper washer
Each exhaust valve has 1 copper washer of the same size

Low Pressure Intake
H125-277 #230 Oring (2-1/2" OD, 1/8" CS)
H125-286 #222 Oring (1-3/4" OD, 1/8" CS)
H125-256 Felt Seal (0.15" square, ~5" long) (Qty 2)
H16-1466 Copper Gasket (2-1/2" OD, 0.125" CS, 0.030" Thickness)

Low Pressure Exhaust
H16-1466 Copper Gasket (2-1/2" OD, 0.125" CS, 0.030" Thickness)

High Pressure Intake
H125-263 #223 Oring (1-7/8" OD, 1/8" CS)
H125-285 #218 Oring (1-1/2" OD, 1/8" CS)
H125-259 Felt Seal (0.15" square, ~4" long) (Qty 2)
H16-1872 Copper Gasket (1-1/2" OD, 0.080" CS, 0.030" Thickness)

High Pressure Exhaust
H16-1872 Copper Gasket (1-1/2" OD, 0.080" CS, 0.030" Thickness)

You can buy all the orings at any hardware store for less than the standard cost of a single oring from LeRoi Dresser.

I haven't found a good source for large copper gaskets and will likely just re-use the originals

The felt seal may be custom made for LeRoi Dresser and I'll have to purchase that through a distributor.

While investigating these parts I came across a site that has most of the parts available online. killerfilter.com The site isn't well organized so you cannot browse, but it has a powerful search that shows you the parts and prices. Their prices appear to be below average.

One other part I will need for the valves - the "PIN, Locating"PN 220-148-37. This keeps the valve and springs aligned so they don't rotate. Mine was heavily worn but LeRoi Dresser reported this part is no longer available and that I would need to purchase a new valve assembly (almost $200). After some careful measurements I determined that it is a 3/32" x 3/8" Plain Finish Steel Slotted Spring Pin, available $0.03 each from Fastenal. I'll splurge and order 2 of them!
 
OP
M

mattblast

Well-known member
Joined
Jan 30, 2013
Messages
788
Location
Bridgewater, NJ
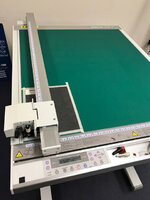
I was going to hand-cut the gaskets for the intercooler. But since I already drew them in CAD and I had a flatbed cutter at work, I decided to try digitally cutting them. The vacuum hold down wasn't working but I was able to tape the sheet of gasket material to the table and it cut perfectly.

f5a23110b41d13cd6fef14c8756ae0de.jpg

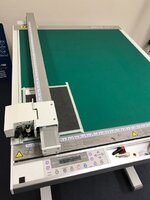
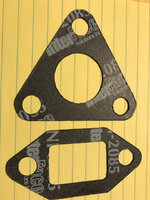
This is a 24" x 36" Graphtec FC2250-60 capable of cutting with 1000g of force using a swivel knife. The gasket material I used was NI-2085 0.020" thick. It cut using about 600g force with a dull blade. Here are the gaskets. The dull blade caused some tearing along the cut but that will never be seen once I install them.

ed1ad21ded894cfdbf905690e5b9a133.jpg
 

Attachments

  • ed1ad21ded894cfdbf905690e5b9a133.jpg
    ed1ad21ded894cfdbf905690e5b9a133.jpg
    344.9 KB · Views: 1
  • f5a23110b41d13cd6fef14c8756ae0de.jpg
    f5a23110b41d13cd6fef14c8756ae0de.jpg
    299.5 KB · Views: 1

CGT80

Well-known member
Joined
Aug 29, 2014
Messages
869
Location
IE, SoCal, USA
Nice job on the gaskets!

Yes, the price for small items like O rings is just crazy. I ran into the same thing with the capacitors for the HF on my Miller tig welder. The miller name makes them exponentially more expensive.

Eventually, I would like to get my LeRoi Dresser all cleaned up. It did leak after I changed those parts in the unloader, so I have to figure that out. It had air in the tank, so I finally placed some blocks under one end so it has a bit of a slope to the drain, and I drained the water. It was clean and there wasn't a lot. It would be better to install an auto drain, since I keep junk piled up around the compressor and it isn't always easy to get to that ball valve.

I look forward to seeing how yours turns out.
 
OP
M

mattblast

Well-known member
Joined
Jan 30, 2013
Messages
788
Location
Bridgewater, NJ
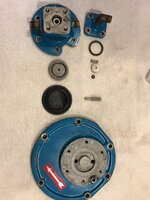
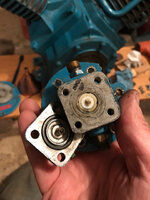
Since I'm already ordering the orings for the valves, I decided to open up the unloader and oil pump to get measurements on the remaining orings. The original rings were getting brittle and it was time to change them.

Some photos of the disassembly

8480ea6b5a57257b84aa7fe9cd465266.jpg

2ed86ed2f436b560f73eef2ccb070ef1.jpg

085974dcabdacc1c436a52b9610dc2f3.jpg

And parts cleaned and ready for new orings

7c08bb7fd796f61e0965905efb31d261.jpg

The first oring between the cover and the body is pn H125-279 and is a #210 oring (1" OD, 1/8" CS)

The next oring is set in the body to seal the pin. It's pn H125-280 and is a #005 oring (7/32" OD, 1/16" CS)

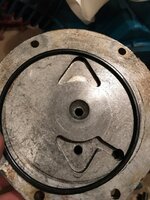
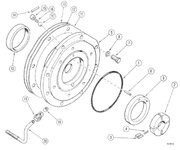
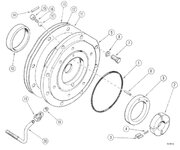
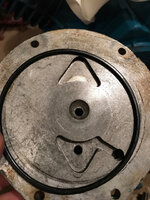
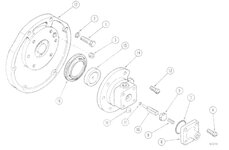
According to the parts manual the bottom port is supposed to be plugged (18 on diagram) but mine is plumbed to what appears to be a pilot valve. Also the oil pump cover has a plug that can be removed to monitor oil pressure (3 on diagram)

It's an interesting setup with the piston and diaphragm for the unloader mounted in front of the oil pump. On a Quincy the piston and diaphragm are above the valves in the unloader tower.

Now that it is apart I can see how it works
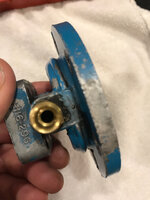
When there is oil pressure in the pump the diaphragm pushes on the piston which pushes the pin which seals off the front port. A tube connects this port to the pipe that connects the pump to the tank. When there is no oil pressure the front port is opened to connect to the top and bottom port. The top port connects to the top of each intake valve and the bottom port connects to the pilot valve that is connected to the tank. The result is that this pump will remain unloaded if there is insufficient oil pressure. That is why the piston is mounted in front of the pump.

There is also a bleed hole on the unloader body to vent out the pressure. It's right in front of the diaphragm where the piston is positioned. It's circled in this photo

32fead4d4b8e41a5131c040bfbb0510d.jpg

It vents behind bottom port.

749d9218d132f25975fabdc4f6ca3ffa.jpg

The oil pump is behind the unloader.
74c7a5ee2a40a4808e50fc8ad208b36d.jpg

732491c5720d25aa26e9c06f2d51035b.jpg

ae85906321f095ce5793312eea6dc2ad.jpg

The oring that seals between the cover and pump is pn 125-186 which is a #242 oring (4-1/4" OD, 1/8" CS).
 

Attachments

  • 749d9218d132f25975fabdc4f6ca3ffa.jpg
    749d9218d132f25975fabdc4f6ca3ffa.jpg
    285.5 KB · Views: 1
  • ae85906321f095ce5793312eea6dc2ad.jpg
    ae85906321f095ce5793312eea6dc2ad.jpg
    133.6 KB · Views: 2
  • 732491c5720d25aa26e9c06f2d51035b.jpg
    732491c5720d25aa26e9c06f2d51035b.jpg
    373.7 KB · Views: 2
  • 74c7a5ee2a40a4808e50fc8ad208b36d.jpg
    74c7a5ee2a40a4808e50fc8ad208b36d.jpg
    315.2 KB · Views: 2
  • 32fead4d4b8e41a5131c040bfbb0510d.jpg
    32fead4d4b8e41a5131c040bfbb0510d.jpg
    284 KB · Views: 3
  • 7c08bb7fd796f61e0965905efb31d261.jpg
    7c08bb7fd796f61e0965905efb31d261.jpg
    381.6 KB · Views: 3
  • 085974dcabdacc1c436a52b9610dc2f3.jpg
    085974dcabdacc1c436a52b9610dc2f3.jpg
    70.6 KB · Views: 4
  • 2ed86ed2f436b560f73eef2ccb070ef1.jpg
    2ed86ed2f436b560f73eef2ccb070ef1.jpg
    335.3 KB · Views: 3
  • 8480ea6b5a57257b84aa7fe9cd465266.jpg
    8480ea6b5a57257b84aa7fe9cd465266.jpg
    349.2 KB · Views: 8
Last edited:

NitroGarage

Well-known member
Joined
Mar 2, 2016
Messages
203
Location
Cleveland, OH
Great work!

Quick question on one of those beast compressors - could you use two single phase 240v motors to run one instead of the big 3ph 480v units? Or can some of them be re-wired to 240v and ran with a vfd?
 

EOC_Jason

Well-known member
Joined
Jun 25, 2012
Messages
11,388
Location
Bentonville, AR
Quick question on one of those beast compressors - could you use two single phase 240v motors to run one instead of the big 3ph 480v units? Or can some of them be re-wired to 240v and ran with a vfd?

I doubt you could use a phase converter with an air compressor simply because of the startup load.

You could probably use two smaller single phase motors, one on each side, each with one belt, if you could get it all to fit.... They do make 10HP single phase motors, but IMO if you could run the pump from a 7.5HP at a lower RPM I think that would be the way to go.
 

NitroGarage

Well-known member
Joined
Mar 2, 2016
Messages
203
Location
Cleveland, OH
I doubt you could use a phase converter with an air compressor simply because of the startup load.

You could probably use two smaller single phase motors, one on each side, each with one belt, if you could get it all to fit.... They do make 10HP single phase motors, but IMO if you could run the pump from a 7.5HP at a lower RPM I think that would be the way to go.

Not a standard phase converter but a VFD, which I believe that some have soft start features on them?
 

sberry

Banned
Joined
Jun 18, 2005
Messages
35,747
Location
Brethren, Michigan
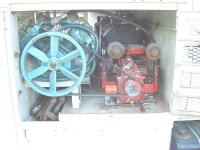
I bought a nice comp when I was a bit younger, didn't realize the potential of the net at that time. Today would definitely be looking at that gem if needed vs buying new like I did. That would have been the ideal conversion to engine drive also. Had unloaded heads and pilot valve, can hook it to the engine throttle also.
That one is actually a better pump than the 1 I have.
Nice write up, I read most of it.
 

Attachments

  • air comp.JPG
    air comp.JPG
    57.3 KB · Views: 70
Last edited:
To avoid these ads, REGISTER NOW!
Top Bottom