To avoid these ads, REGISTER NOW!

26 x 32 Chevelle Shop

Stnbrgn

Member
Joined
Oct 6, 2013
Messages
23
Location
SouthWestern Ontario
Hello everyone. I've been lurking on this forum for a few years admiring members shops and garages and learning about them at the same time. I was doing some dreaming when I first came to this forum about building my own shop some day.
Well the dream has become a reality.
My brother-law had built himself a garage in the city of Windsor and offered me the plans he had as an example for what I might want. Luckily my youngest son is an Architectural Technologist who helped me design my own building using those plans and did some drawings for me. We had designed a building using stick framing with a foundation which was something he had never designed (he works with steel buildings i.e arenas, factories, fire stations etc. which I think are more complex). It took some time for him to get them finished as he has a young family which keeps him busy. When he finished the drawings I took them to a person I've known for years that's in the building trade who has built many shops, garages and barns over the years. He suggested using the design we had but change it to a pole barn style building. He explained that going this route rather than stick frame with a foundation would save enough money to pay for the concrete floor in the pole barn style building. He then got a quote for building materials for the pole barn and we agreed he would build it. I submitted the request for a building permit a week later and after waiting for 10 days was issued the permit.

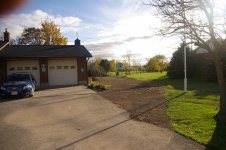
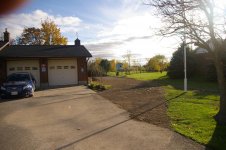
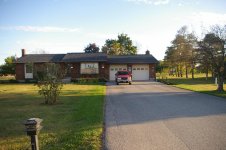
This our home. To the right and behind our house is an open area where we decided was the best location to build. We had talked about adding on to our existing garage but our well is located about 8 feet away from it which meant we would have to try and build around it. We also talked about adding on to the back of the garage but there are two maple trees directly behind which we didn't want to lose.

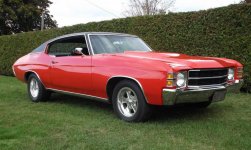
P.S. This is why it's called "Chevelle Shop".
 

Attachments

  • IMGP2930.jpg
    IMGP2930.jpg
    149 KB · Views: 307
  • IMGP2931.jpg
    IMGP2931.jpg
    150.6 KB · Views: 269
  • 71 chevelle2.jpg
    71 chevelle2.jpg
    101.9 KB · Views: 281
To avoid these ads, REGISTER NOW!

revamped

Well-known member
Joined
May 23, 2012
Messages
312
Location
Bremerton, WA
Definitely take advantage of the threads on "what I wish I knew before I built my garage" and the concrete threads. I learned a lot about reinforcing for my lift, anchor pots, finishes, etc.

Good luck! It is an amazing feeling to build it your way... take your time during the planning and make sure you get everything you want; even if it means stopping and saving a little more for those really important things!
 
OP
S

Stnbrgn

Member
Joined
Oct 6, 2013
Messages
23
Location
SouthWestern Ontario
Thanks Guys. I appreciate the input from experienced people who have been through process.
Just to clarify something some of these pictures are a couple of weeks old. I wasn't posting because of a lack of time, so I'll try to catch up to present day as quickly as I can.
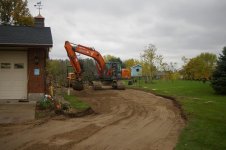
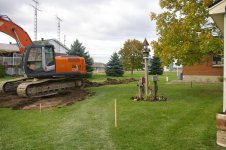
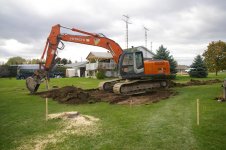
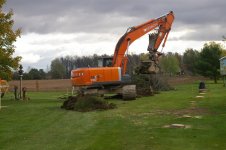
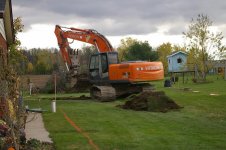
A neighbour of ours works for an excavation company so needless to say after getting more than positive information on his work, it was a no brainer to get him to do the work. I've never seen anyone operate an excavator the way he does. Just to back track a little, when he came to see the site and what needed to be done I was a little taken aback because he said we would need to bring up the back elevation about 14 inches. I saw no such amount of slope to our property, but when he got out his laser level he was right. He started about a week later and this is what he accomplished.
 

Attachments

  • IMGP2954.jpg
    IMGP2954.jpg
    148.8 KB · Views: 134
  • IMGP2953.jpg
    IMGP2953.jpg
    144.7 KB · Views: 135
  • IMGP2952.jpg
    IMGP2952.jpg
    151.1 KB · Views: 112
  • IMGP2951.jpg
    IMGP2951.jpg
    148.4 KB · Views: 112
  • IMGP2950.jpg
    IMGP2950.jpg
    150.4 KB · Views: 128
  • IMGP2949.jpg
    IMGP2949.jpg
    145.5 KB · Views: 115
  • IMGP2948.jpg
    IMGP2948.jpg
    149 KB · Views: 126
OP
S

Stnbrgn

Member
Joined
Oct 6, 2013
Messages
23
Location
SouthWestern Ontario
More of the final excavation. It's hard to see in the pictures but there is an elevation at the rear of the building grade.The final grade is going to be 7 inches higher than this. I plan on installing in floor heating, if that doesn't happen I'll install a 2 inch insulation (rigid) under the concrete.
 

Attachments

  • IMGP2957.jpg
    IMGP2957.jpg
    151.1 KB · Views: 149
  • IMGP2956.jpg
    IMGP2956.jpg
    152.5 KB · Views: 162
  • IMGP2955.jpg
    IMGP2955.jpg
    151.9 KB · Views: 139
  • IMGP2954.jpg
    IMGP2954.jpg
    148.8 KB · Views: 137
OP
S

Stnbrgn

Member
Joined
Oct 6, 2013
Messages
23
Location
SouthWestern Ontario
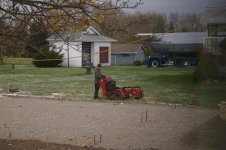
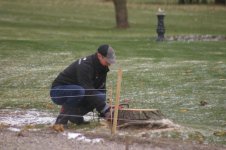
As some of you may have noticed there were some stumps from the trees we cut down. We had a father and son come in to grind the stumps and remove the big pile of brush that was left behind. They came in on a Saturday and ground all of the stumps then came back the following Monday and Tuesday morning and got rid of all the brush. The only thing left to do is get rid of the shavings left over from the grinder and an old stump that was pulled out previously. The father and son run this as a business and as a way for the son to earn some cash. Where we live is out in the country and there isn't much in the way of part time jobs for students and since the Dad is a trained and licensed arborist (he's an full time firefighter at the moment) he had this equipment sitting around not being used so why not help out his 15 year old son.
 

Attachments

  • IMGP2958.jpg
    IMGP2958.jpg
    149.1 KB · Views: 141
  • IMGP2962.jpg
    IMGP2962.jpg
    142.3 KB · Views: 150
  • IMGP2963.jpg
    IMGP2963.jpg
    145 KB · Views: 152
OP
S

Stnbrgn

Member
Joined
Oct 6, 2013
Messages
23
Location
SouthWestern Ontario
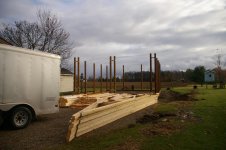
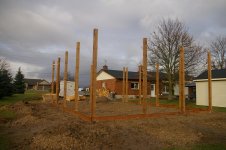
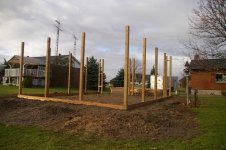
I missed the opportunity to photograph the holes that were bored for the posts. They were 24 inches in diameter and 53 inches deep. They had to be inspected after they were bored which was done the same day. The guys came back the following day and poured concrete in the bottom of the holes after which they had to be inspected again. Once that was done the poles could be set. These guys drill a hole through the bottom of the posts for anchoring purposes which also allows the posts to be shifted for squaring up the building. They also have learned over the years to put the native soil back in the hole which allows for the best drainage. These photos show all the posts in the final location as well as them having been backfilled.
 

Attachments

  • IMGP2975.jpg
    IMGP2975.jpg
    145.5 KB · Views: 147
  • IMGP2973.jpg
    IMGP2973.jpg
    147.9 KB · Views: 150
  • IMGP2972.jpg
    IMGP2972.jpg
    149.4 KB · Views: 170
OP
S

Stnbrgn

Member
Joined
Oct 6, 2013
Messages
23
Location
SouthWestern Ontario
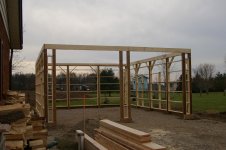
Inner framing has been started. The framing consists of 2 x 6's nailed in on their side (bookshelf) . Most of the upper bracing is started as well.
 

Attachments

  • IMGP2978.jpg
    IMGP2978.jpg
    141.1 KB · Views: 133
  • IMGP2979.jpg
    IMGP2979.jpg
    141.9 KB · Views: 127
  • IMGP2989.jpg
    IMGP2989.jpg
    144.5 KB · Views: 129
  • IMGP2993.jpg
    IMGP2993.jpg
    151 KB · Views: 167
OP
S

Stnbrgn

Member
Joined
Oct 6, 2013
Messages
23
Location
SouthWestern Ontario
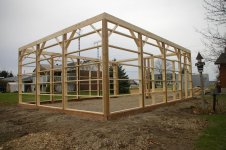
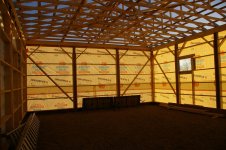
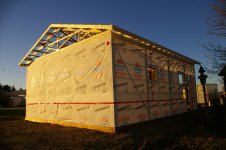
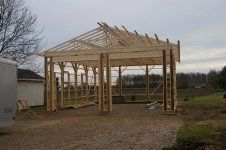
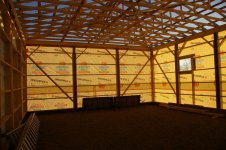
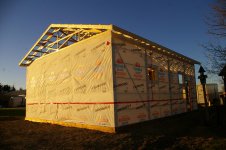
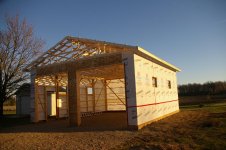
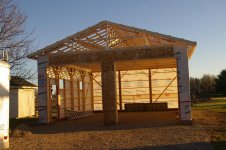
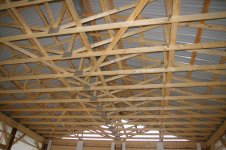
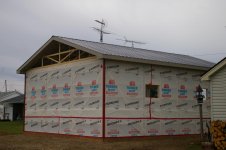
The trusses have been installed as well as all the bracing and framing required by code. The building has also been wrapped. I was going to go with only 2 windows in the shop but opted for 2 more on the opposite side. Since we took all the trees down on the west side of the property, which would have been right beside the shop, we thought it would be a good idea to take advantage of the light.

This is now up to date.

As of yesterday, they were starting to do the soffits and facia. I didn't get any photos of that because they weren't able to get much done because it started to rain.
 

Attachments

  • IMGP3013.jpg
    IMGP3013.jpg
    152.6 KB · Views: 172
  • IMGP3012.jpg
    IMGP3012.jpg
    149.8 KB · Views: 167
  • IMGP3011.jpg
    IMGP3011.jpg
    157.8 KB · Views: 159
  • IMGP3010.jpg
    IMGP3010.jpg
    144.9 KB · Views: 162
  • IMGP3008.jpg
    IMGP3008.jpg
    148.3 KB · Views: 184
  • IMGP3004.jpg
    IMGP3004.jpg
    150.5 KB · Views: 1,582
  • IMGP3002.jpg
    IMGP3002.jpg
    148.5 KB · Views: 171

Bears Fan

Well-known member
Joined
Jan 26, 2012
Messages
3,442
Location
Indiana
attachment.php


Wow! Congratulations on the new shop, I have to say looking at the photo's of your build I was really impressed with the quality of the bookshelf construction of the walls, I was really surprised to see that the cross braces on the corners were recessed in :thumbup: Looks like some top notch craftsmanship...I'm subscribing so I can follow along. Looks like it will be a good one...
 
OP
S

Stnbrgn

Member
Joined
Oct 6, 2013
Messages
23
Location
SouthWestern Ontario
Thanks Bears Fan. I really like the way this looks as well. He takes his time making sure the quality is there. My builder was telling me the other day he's built 21 of these in various sizes since he started in 1999. He's trying to teach his 22 yr.old son the trade so maybe he'll carry on after Dad retires.
 
OP
S

Stnbrgn

Member
Joined
Oct 6, 2013
Messages
23
Location
SouthWestern Ontario
A lot has happened in the last 2 weeks. The framing was finished and passed inspection. The building was wrapped and the steel was put on the roof. My builder did something he's never done before and that was to work on a Sunday. The forecast was such that it was supposed to be very windy for Monday, Tuesday and Wednesday so he decided to put the roof on when it was a nice mild calm day and that happened to be a Sunday.
He stopped by on the Saturday to pick up his flatdeck trailer which he had left here. He was told he could pick up the steel for the building on Saturday but he had to be there before Noon. Since he wanted to put the steel on the roof the next day he had to rush over to get it. He asked me if I was interested in going for a ride (glad I did). The business we went to is run by Amish people (the kind that don't have electricity or phones). They had an overhead crane, a rolling machine and a power brake that all run off a generator (very interesting). While he was tying the load of steel down I had a chance to talk to the owner of the business. I asked if he had any seconds or blems he wanted to sell. He just happened to have a 1,000 sq. ft. of off white 12 ft. lengths. I asked him how much and when he told me I told him I'd buy them (about $1.00 a sq. ft. cheaper than regular price) but I didn't have the cash on me but said I would be back before the following Saturday to pick them up. So they're sitting on a trailer with the J-Trim and screws in my back yard until I can put them in the shop.
 

Attachments

  • IMGP3021.jpg
    IMGP3021.jpg
    148.3 KB · Views: 98
  • IMGP3017.jpg
    IMGP3017.jpg
    139.9 KB · Views: 102
  • IMGP3014.jpg
    IMGP3014.jpg
    149.7 KB · Views: 120
  • IMGP3012.jpg
    IMGP3012.jpg
    149.8 KB · Views: 108
  • IMGP3010.jpg
    IMGP3010.jpg
    144.9 KB · Views: 105
  • IMGP3008.jpg
    IMGP3008.jpg
    148.3 KB · Views: 106
  • IMGP3006.jpg
    IMGP3006.jpg
    149.9 KB · Views: 111
OP
S

Stnbrgn

Member
Joined
Oct 6, 2013
Messages
23
Location
SouthWestern Ontario
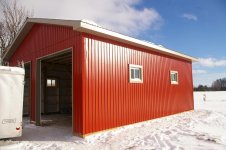
The ends of the shop were clad in steel but the sides couldn't be done until the capping of the doors and windows were done. The capping couldn't be done because the lumber yard couldn't locate the windows that were ordered, so that was about a week wait. Finally the windows arrived on Monday of this week at about 3:30 in the afternoon so they were installed the next day which turned out to be bitterly cold, all the guys did was install the 4 windows and spray foam around them that day (couldn't blame them).

They came back the following day and capped everything and also caulked everything (had to use hot water to keep the caulk warm).

Today they finished off the steel on the building. I think it looks excellent.

The only thing left for him to do is install the 2 roll up doors then his part is done.
 

Attachments

  • IMGP3032.jpg
    IMGP3032.jpg
    149.9 KB · Views: 206
  • IMGP3033.jpg
    IMGP3033.jpg
    147 KB · Views: 181
  • IMGP3028.jpg
    IMGP3028.jpg
    145.4 KB · Views: 152
  • IMGP3027.jpg
    IMGP3027.jpg
    141.7 KB · Views: 151
  • IMGP3026.jpg
    IMGP3026.jpg
    144.2 KB · Views: 158
  • IMGP3025.jpg
    IMGP3025.jpg
    147 KB · Views: 1,316
  • IMGP3024.jpg
    IMGP3024.jpg
    142.7 KB · Views: 165

hpw

Well-known member
Joined
Oct 7, 2007
Messages
989
I would like to echo what bearsfan said......nice framing job, some beautiful work

just a thought, you mentioned roll up doors, can those be insulated? If your taking the time and expense to insulate the slab, wouldn't you want insulated garage doors?
 
OP
S

Stnbrgn

Member
Joined
Oct 6, 2013
Messages
23
Location
SouthWestern Ontario
I would like to echo what bearsfan said......nice framing job, some beautiful work

just a thought, you mentioned roll up doors, can those be insulated? If your taking the time and expense to insulate the slab, wouldn't you want insulated garage doors?

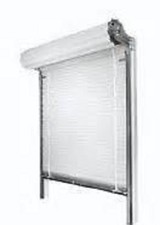
Yes it has roll up doors and they are insulated. They are a commercial door so they're insulated to an R-14. Your right no point in having an insulated floor or walls with out insulated doors.

Speaking of which they've been installed. The shell of the building is done.
I've been working on wiring the shop over the last couple of days. I want to get this done before I put up the ceiling after which the insulation will be blown in.

This is where I'd like some help.

I'm trying to ensure I'm not missing something when it comes to accessories or needs when doing the wiring. So far I've got outlets every 8 feet, I bought 26 T-8 double tube fluorescent fixtures of which I plan on using 18 of them on the ceiling (3 rows of 6), I've also allowed for a ceiling fan, an outside pot light in the overhang over the man door, I've also allowed for an outdoor outlet between the roll up doors. I'm not sure I'm missing anything other than things on my wish list such as an air compressor or hoist. I've been looking at solar powered security lights for in the peak at the front of the shop but might go with a regular LED fixture wired in just haven't made up my mind.

Any suggestions would be much appreciated.
 

Attachments

  • IMGP3036.jpg
    IMGP3036.jpg
    138.2 KB · Views: 79
  • IMGP3035.jpg
    IMGP3035.jpg
    142.1 KB · Views: 61
To avoid these ads, REGISTER NOW!

Bears Fan

Well-known member
Joined
Jan 26, 2012
Messages
3,442
Location
Indiana
Sounds like you have the electrical wiring pretty much covered...Somethings I added when I put up my barn was coax for a TV antenna and a coax for a FM radio antenna and I ran speaker wire for 5-1 surround sound speaker system...If you ever have intentions of adding a lift you might pre-wire for that? And there is always gas lines to run if your going to use propane or natural gas for heating and maybe 220 volt plugs for a air compressor or a welder down the road...
 

hpw

Well-known member
Joined
Oct 7, 2007
Messages
989
Of course, my bad, I assumed this what you meant

s-l225.jpg


once again, beautiful building:thumbup:

as far as wiring, and you didn't mention it, but will security cameras ever be used/needed in the future?
 
OP
S

Stnbrgn

Member
Joined
Oct 6, 2013
Messages
23
Location
SouthWestern Ontario
Sounds like you have the electrical wiring pretty much covered...Somethings I added when I put up my barn was coax for a TV antenna and a coax for a FM radio antenna and I ran speaker wire for 5-1 surround sound speaker system...If you ever have intentions of adding a lift you might pre-wire for that? And there is always gas lines to run if your going to use propane or natural gas for heating and maybe 220 volt plugs for a air compressor or a welder down the road...
I'd have to mount a satellite dish and run line into the shop for it as we don't have cable out here. As for speaker wire, that's a good idea since it's pretty simple to run with nothing on the walls or ceiling. I just talked to our neighbour today about running a gas line so that's in the works. As far as 220 for a welder or compressor my plan is to have the breaker panel mounted in one corner which would also be my utility area so those 2 things would be located in that area and could be wired in later. The compressor would be very near to the panel, and since I'm not a welder I don't think I'll ever be one I could always wire for one and have the outlet for it in the utility area . I've thought about the hoist and like I said it's on my wish list so if I do get one in the future, I could if I had to, run some conduit along the ceiling over to it's location but I may consider running a line to where I would want it now.
Of course, my bad, I assumed this what you meant

s-l225.jpg


once again, beautiful building:thumbup:

as far as wiring, and you didn't mention it, but will security cameras ever be used/needed in the future?

I had thought about the security camera's but not a lot. I'd have to look into that a bit more to see what might be needed. Thanks for the input and no problem about the door, it's an honest mistake I probably would have thought the same thing.


Thanks. Yes I am a member at that site. I've been a member for about 8 or 9 years. It's been very helpful at times although I haven't been on the site for a while.
 
OP
S

Stnbrgn

Member
Joined
Oct 6, 2013
Messages
23
Location
SouthWestern Ontario
Happy New Year everyone.

Things have progressing a little slowly around here since the shell was finished. I had my 2 sons help me with the ceiling vapour barrier during the Christmas, New Year break. We installed 3 separate lengths of vapour barrier then strapped the ceiling for the steel. I was hoping to get some of the steel up but that didn't happen. I'll have to figure out how and when we can get that done.

I just have to finish a little bit more wiring then we're ready for insulation and wall board or steel.

I ordered the wall insulation and vapour barrier online the other day. The lumber yard was offering 20% off any purchases over $1,000 so it's getting delivered tomorrow. I'm going with R-22 in the walls hopefully that'll keep heating costs down.

Speaking of heating costs. My wife works for the natural gas company for our area and she came home the other day after talking with one of her co-workers with a question. Why wouldn't we go with a radiant tube heater instead of in floor heating? His suggestion was that we could get the tube heater at the gas company cost which would be substantially less that retail. He also said he has one in his shop and loves it (another friend of ours says the same thing). He said that unless your in the shop a lot in the winter it doesn't make economic sense to run the in floor heating all the time. So we're investigating the tube heating for now but aren't set on which way to go. We allowed for 2" of insulation under the floor so we'll still have to install that but if we go with radiant tube we'll just have to go with extruded polystyrene rather than the puck style insulation.

Hopefully things warm up around here as I'd like to get more done but with temperatures hovering around -12 degrees Celsius it makes it a little tough to get anything done.
 
OP
S

Stnbrgn

Member
Joined
Oct 6, 2013
Messages
23
Location
SouthWestern Ontario
We were able to get some more done in the shop since my last post. By "we" I mean my oldest son, who spent his days off driving here (about 45 mins.), helping me with screwing the steel to the ceiling as well as some of the vapour barrier on the walls.

All the wiring is in place except for a thermostat cable. We haven't decided as yet on where we are going with that. Still waiting for the radiant tube manufacturer to give us a correct size for BTU's so we know what size line to run to the shop. Also need to know in case we have to change out the gas meter.

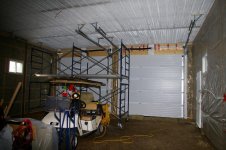
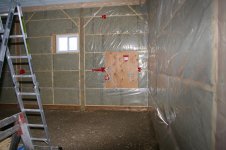
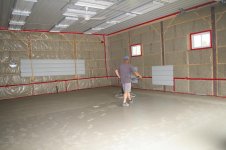
I managed to get all the insulation in the walls myself. It took me about 2 weeks of off and on working at it but it's done. There are a lot of angles to cut when you get to the top rows but thankfully I had the neighbours scaffolding to cut down on ladder climbing.

I'm in the process of installing the ceiling lighting. It took me a day just to get them ready to install. These were used lights (2 x 4 double t-8's) that I bought from a friend. I'm going to install 18 of them in 3 rows of 6 on 3 separate circuits. Hopefully this is going to work out.

After this is done I hope the weather co-operates so I can dig the trench from the house to the shop so the gas line and electrical can be hooked up or at least ready for hook up.
 

Attachments

  • IMGP3165.jpg
    IMGP3165.jpg
    146.9 KB · Views: 131
  • IMGP3166.jpg
    IMGP3166.jpg
    147.6 KB · Views: 123
  • IMGP3168.jpg
    IMGP3168.jpg
    145.7 KB · Views: 115
  • IMGP3169.jpg
    IMGP3169.jpg
    146.5 KB · Views: 117

Bears Fan

Well-known member
Joined
Jan 26, 2012
Messages
3,442
Location
Indiana
Nice job on the insulation! looks like it will be nice and toasty inside with the heat on!!!
 
OP
S

Stnbrgn

Member
Joined
Oct 6, 2013
Messages
23
Location
SouthWestern Ontario
Nice job on the insulation! looks like it will be nice and toasty inside with the heat on!!!

Thanks. It was a pretty big job and I wasn't sure how it would turn out, I must say it looks good but who's going to see it after it's covered up. I hope it helps keep the heating costs to a minimum.
 
OP
S

Stnbrgn

Member
Joined
Oct 6, 2013
Messages
23
Location
SouthWestern Ontario
Well the insulation was blown into the attic this week. It's 13 inches thick which translates to around an R-40. I also attached all 18 fluorescent fixtures to the ceiling (haven't got a photo yet). Now I have to pick up the conduit and wire to connect them all together. They'll be on 3 separate circuits so I can turn all of them on or less.

After that I want to get some 2 inch rigid foam insulation and install it on edge around the perimeter of the building where the concrete will be poured as an added insulation. I think I'll just use construction adhesive to attach it since the concrete is going to hold it in place.

As for heat we still haven't decided. We sent the "Heat Loss Design Data" request to Schwank to find out the recommended BTU for a radiant tube heater but haven't heard back. When we get that info we'll talk to the supplier in our area to get a quote on cost. The BTU info will also decide what size gas line we need to run as well.

Things are moving a little slowly right now but it's mostly because of the weather. It's been snowing here for the last 2 days and before that it was very cold. I'd like to get the trench done for the gas and electricity but with weather like I mentioned it makes it very difficult.
 
OP
S

Stnbrgn

Member
Joined
Oct 6, 2013
Messages
23
Location
SouthWestern Ontario
Well it's been a while since I last posted. Things have been progressing slowly but surely.
As I said in my previous post I installed the lighting. I also ran the conduit and wiring to the lights and down to the switches. I have an extension cord running to the shop so I can plug in the lighting and/or ceiling fan when I need to (don't have electricity running to the shop yet).
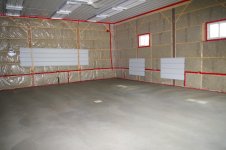
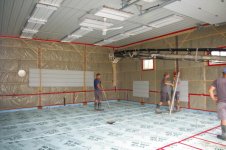
I also installed the insulation around the perimeter of the shop as I explained in the previous post. I also ran a drain in the middle of the shop not for any other reason but for rain water that I chamois off the Chevelle if we happen to get caught in a rain storm when we're out for a drive or cruise night.
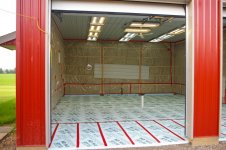
As you'll see in the pictures there is a 2" layer of insulation on the floor. I had previously stated that we wanted to put in floor heat in the shop but after doing research found that it was cost prohibitive so we're going with radiant tube. When the excavation work was done it was done with a 2" insulation in mind. Therefore we had to either raise the floor base 2" or install insulation. I'm sure it will help with heating and possibly keep the floor from sweating in the summer.
 

Attachments

  • IMGP3409.jpg
    IMGP3409.jpg
    156 KB · Views: 63
  • IMGP3408.jpg
    IMGP3408.jpg
    155 KB · Views: 56
  • IMGP3407.jpg
    IMGP3407.jpg
    156.6 KB · Views: 68
OP
S

Stnbrgn

Member
Joined
Oct 6, 2013
Messages
23
Location
SouthWestern Ontario
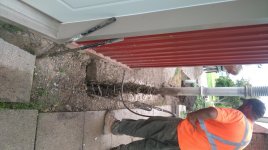
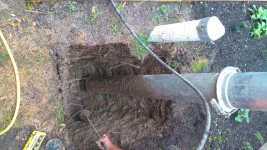
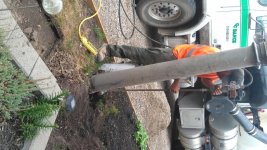
Part of the planning for the shop included a water line. One of our neighbours has a business that involves cleaning sewer lines for towns and cities as well as private companies. His trucks are also capable of hydro-excavating which they also do on a regular basis. The nice thing about hydro-excavating is that if they don't know where cables, water lines or hydro lines are they can excavate down till they find them without worrying about damaging them.

I asked if they would be able to find my water line from our well so I could tap into it and run a trench to the shop, since our well is only about 20 feet in front of the shop.

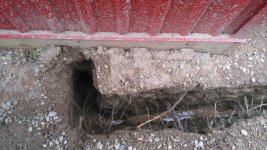
One Saturday morning Scott came out and did just that. We found out that the water line was deeper than we thought (about 5 feet down). I'm glad we went this route as it's much neater than digging. He ran the trench about 4 feet down all the way to the shop and then went into the shop and excavated a hole about the same depth.

I tee'd into the water line and ran it to the shop. Once I needed to go up into the shop I ran the water line through an ABS pipe (to give it some protection) and installed a shut-off. Now we have water in case it's needed.

Sorry photos are sideways and I don't know how to fix it.
 

Attachments

  • Waterline8.jpg
    Waterline8.jpg
    155.1 KB · Views: 49
  • Waterline7.jpg
    Waterline7.jpg
    153.1 KB · Views: 49
  • Waterline5.jpg
    Waterline5.jpg
    150.8 KB · Views: 49
  • Waterline3.jpg
    Waterline3.jpg
    156.9 KB · Views: 49
  • Waterline1.jpg
    Waterline1.jpg
    157.9 KB · Views: 59
  • Waterline2.jpg
    Waterline2.jpg
    156.2 KB · Views: 58
OP
S

Stnbrgn

Member
Joined
Oct 6, 2013
Messages
23
Location
SouthWestern Ontario
Floor is poured.
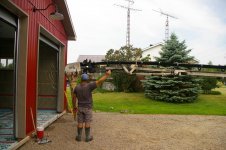
After waiting about 3 months because everyone is busy, the floor got poured a couple of weeks ago. They picked one of the hottest and most humid day's to do this but the guys did a nice job. There's only one low spot and it's not much to speak of. I had to keep it wet for a few days and it seems to have cured nicely.
 

Attachments

  • IMGP3438.jpg
    IMGP3438.jpg
    142.4 KB · Views: 67
  • IMGP3434.jpg
    IMGP3434.jpg
    148.1 KB · Views: 76
  • IMGP3424.jpg
    IMGP3424.jpg
    148.6 KB · Views: 70
  • IMGP3416.jpg
    IMGP3416.jpg
    151.6 KB · Views: 67
  • IMGP3413.jpg
    IMGP3413.jpg
    152.6 KB · Views: 73
  • IMGP3412.jpg
    IMGP3412.jpg
    156.5 KB · Views: 68
  • IMGP3411.jpg
    IMGP3411.jpg
    153.9 KB · Views: 67
OP
S

Stnbrgn

Member
Joined
Oct 6, 2013
Messages
23
Location
SouthWestern Ontario
Apron and sidewalk are poured.

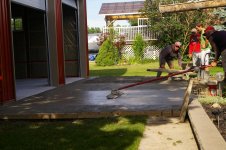
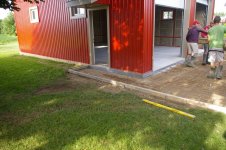
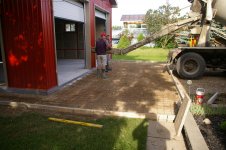
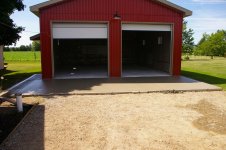
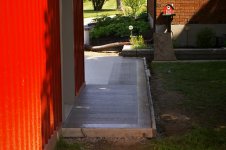
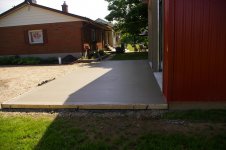
Tuesday of this past week the guys came back and poured the apron (12 x 26) and sidewalk. They lagged it to the shop floor and put in wire mesh. It has a brush finish and came out very nice.

Next on the list is to run a trench from the house to the shop so gas and electricity can be installed. Then it's time to get some cladding for the inside but I'm still contemplating what to do there.
 

Attachments

  • IMGP3470.jpg
    IMGP3470.jpg
    151.1 KB · Views: 66
  • IMGP3469.jpg
    IMGP3469.jpg
    151.7 KB · Views: 69
  • IMGP3465.jpg
    IMGP3465.jpg
    158.7 KB · Views: 68
  • IMGP3460.jpg
    IMGP3460.jpg
    156.8 KB · Views: 65
  • IMGP3458.jpg
    IMGP3458.jpg
    156.9 KB · Views: 61
  • IMGP3457.jpg
    IMGP3457.jpg
    152.4 KB · Views: 65
  • IMGP3468.jpg
    IMGP3468.jpg
    155.6 KB · Views: 78
To avoid these ads, REGISTER NOW!
Top Bottom