To avoid these ads, REGISTER NOW!

My Gladiator (and friends) Garage Shop

jimreed2160

Well-known member
Joined
Aug 7, 2016
Messages
3,589
Location
Tallahassee FL
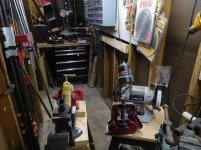
It took awhile, but my shop reorganization is finally in full swing. I thought a thread on the recent phase might be interesting. To begin I will share a little history. If you are looking for clean looking magazine quality fixtures with racing deck flooring, then keep moving because this is certainly not that. Think more along the lines of your redneck cousin with a little money to spend.

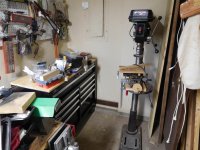
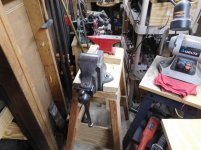
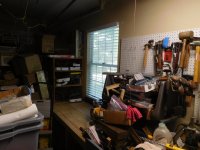
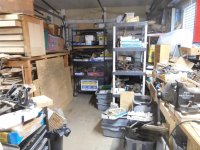
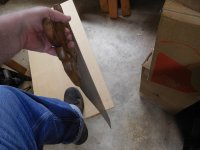
My 24x24 garage shop is used mostly for woodworking but does accommodate metalworking. I used to make furniture but now work on smaller projects. You can follow those in the Woodworking 101 thread. Handplanes are my specialty and there are boxes of them to restore. In fact, my garage shop is haphazardly stuffed with tools after a move 10+ years ago. My part time retirement job has been to sort all of this stuff out.

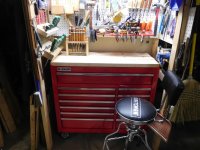
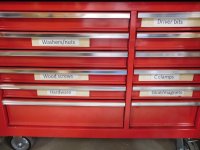
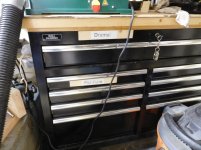
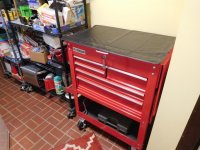
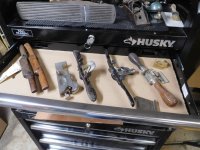
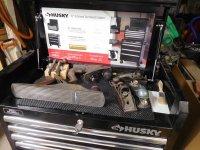
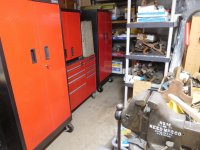
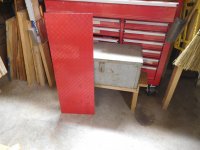
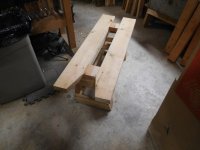
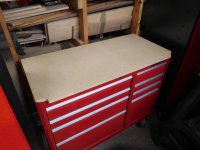
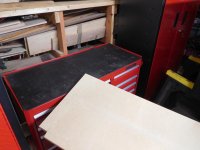
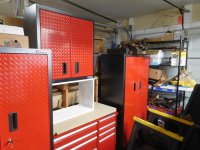
I began by replacing 2x4 and plywood shop furniture with rolling toolboxes to get more storage. Currently I have a mixture of US General HF, Husky, and Kobalt rolling boxes.

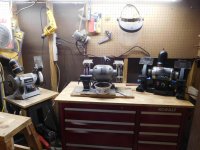
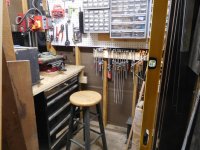
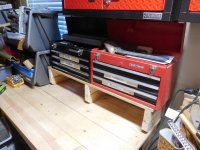
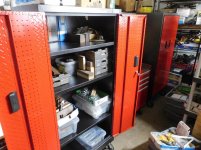
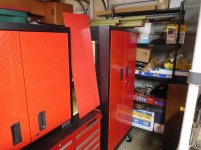
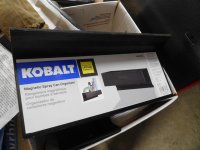
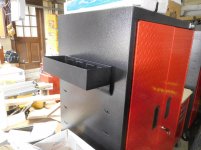
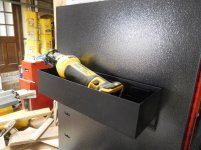
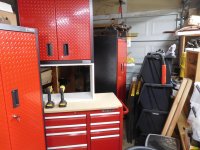
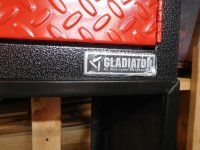
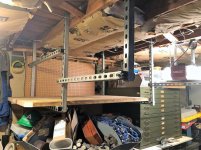
But then HD put me over the edge when they put Gladiator products on sale and also sent me a 10% off coupon. I started by attacking a messy pegboard wall.
 

Attachments

  • DSCN6568.jpg
    DSCN6568.jpg
    150.4 KB · Views: 1,793
  • DSCN6571.jpg
    DSCN6571.jpg
    148.2 KB · Views: 1,424
  • DSCN6574.jpg
    DSCN6574.jpg
    122.1 KB · Views: 1,363
  • DSCN6606.jpg
    DSCN6606.jpg
    150 KB · Views: 1,513
  • DSCN6748.jpg
    DSCN6748.jpg
    141.4 KB · Views: 1,503
To avoid these ads, REGISTER NOW!
OP
J

jimreed2160

Well-known member
Joined
Aug 7, 2016
Messages
3,589
Location
Tallahassee FL
53P--Thanks for stopping by. There is more to come.

The easiest way is to start fresh with a plan and a blank canvas. Everything is touched once and placed accordingly. BUT this is my working shop where I have limited time, limited funds, and limited energy. AND I have projects that are in the works. Blank canvas option is out and was replaced by the "fix the tire while riding down the road" option. That is not a bad plan if it is done in small chunks. Incremental change is less intense so it takes fewer resources and causes less disruption.

My first little project was to replace my fixit bench. This is one of the main hubs of my workshop. The back wall of the garage ends in a 4 foot lean to which has flanking doors. It is a small confined area that is dedicated to metalworking--specifically milling and grinding. When I moved into the shop, I built a little 2x4 cage between the two back doors and created a workbench cubby. It served me well, but was inefficient when it came to storage. I replaced the plywood top and sketchy lower shelf with a US General roller from HF. I made a sturdy top using glued up 2x6s.

It has been in service for over a year now and I am pleased. It was a step in the right direction.
 

Attachments

  • DSCN2623.jpg
    DSCN2623.jpg
    157.9 KB · Views: 889
  • DSCN2546.jpg
    DSCN2546.jpg
    151.5 KB · Views: 881
  • DSCN2536.jpg
    DSCN2536.jpg
    155 KB · Views: 876
OP
J

jimreed2160

Well-known member
Joined
Aug 7, 2016
Messages
3,589
Location
Tallahassee FL
Corner bench

Let's get into the WayBack machine and travel to the Christmas holidays of 2016. I had just upgraded my shop lighting to LED fixtures and decided to make use of a dead corner. So I cleaned it out and added a 41" Husky box that I found on sale during the holidays. It had an OK top but I wanted more. The garage footer keeps the box very proud of the corner of the wall and dropping stuff is a real bother. Glued up 2x6s with a generous overhang and a corner splashback cured those issues.

It was nice to get an additional flat surface and I really appreciated the drawers. This bench has handheld power tools (biscuit cutters, sanders, Dremel), sandpaper, drill bits (it is beside the drill press), and my sharpening plate. The wide top drawer is really nice. It contains the Dremel and dozens of bits and attachments. It is great to have a work surface so close to all the bits.

I made magnetic drawer labels for most of the drawers so I would remember where I stashed my treasures.
 

Attachments

  • DSCN1129.jpg
    DSCN1129.jpg
    152 KB · Views: 616
  • DSCN1130.jpg
    DSCN1130.jpg
    150.4 KB · Views: 561
  • DSCN1997.jpg
    DSCN1997.jpg
    152.6 KB · Views: 594
OP
J

jimreed2160

Well-known member
Joined
Aug 7, 2016
Messages
3,589
Location
Tallahassee FL
More labels

As I added toolboxes, I was able to stash more things away. The clutter was beginning to vanish. But with all of these drawers came the potential problem of losing stuff. So I made labels by using the bandsaw to slice a 2x4 into paddles. Then I used the laser printer to print eye friendly labels and hot glued a magnetic strip to the reverse side. When I move things around I can easily move the labels.
 

Attachments

  • DSCN2754.jpg
    DSCN2754.jpg
    144 KB · Views: 572
  • DSCN2730.jpg
    DSCN2730.jpg
    152.1 KB · Views: 468
  • DSCN2729.jpg
    DSCN2729.jpg
    147.8 KB · Views: 518
OP
J

jimreed2160

Well-known member
Joined
Aug 7, 2016
Messages
3,589
Location
Tallahassee FL
It was an inside job

Things were going so well in the shop, I decided to add a few cabinets inside. I got the HF roller for the pantry/laundry room. It holds miscellaneous tools as well as socket sets and batteries.

Then there was another Husky sale at HD and I picked up a SS roller to use as a kitchen island. Nice to have another flat surface along with more storage.
 

Attachments

  • DSCN3324.jpg
    DSCN3324.jpg
    148.9 KB · Views: 562
  • DSCN3251.jpg
    DSCN3251.jpg
    155.4 KB · Views: 696
OP
J

jimreed2160

Well-known member
Joined
Aug 7, 2016
Messages
3,589
Location
Tallahassee FL
Grinding room upgrade

Now we are up to the holiday season of 2017 and I realized that my grinder room needed attention. Lowes had begun closing out Kobalt boxes and I really took a shine to the 41" model. I got two of them and gutted the grinding room.

I covered the top with plywood and made a spark shield using oven liners. My grinding is pretty light duty--mostly plane blades and chisels. There are very few spark showers but I did appreciate replacing much of the exposed wood with metal.

While I was at it, I also replaced the 2x4 and plywood milling machine table with a 26" Husky box. More drawers!
 

Attachments

  • DSCN4591.jpg
    DSCN4591.jpg
    156.2 KB · Views: 554
  • DSCN4614.jpg
    DSCN4614.jpg
    148.2 KB · Views: 540
  • DSCN4616.jpg
    DSCN4616.jpg
    152.6 KB · Views: 508
  • DSCN4624.jpg
    DSCN4624.jpg
    154.5 KB · Views: 535
  • DSCN4626.jpg
    DSCN4626.jpg
    154.8 KB · Views: 529
OP
J

jimreed2160

Well-known member
Joined
Aug 7, 2016
Messages
3,589
Location
Tallahassee FL
Grinder room cleanup continued

So by now I am on a roll. I moved a shelf and some junk to clear out the other end of the grinder room. In its place I added another Kobalt box to match. It got a plywood top and the drawers were filled with Bedrock planes. I call it my "Backroom Bedrock" stash. I recently moved my oscillating spindle sander and vacuum to this table and it makes a nice work area. The OSS is great for repairing plane totes and I like to have it handy.
 

Attachments

  • DSCN4758.jpg
    DSCN4758.jpg
    152.2 KB · Views: 358
  • DSCN4756.jpg
    DSCN4756.jpg
    153.1 KB · Views: 338
OP
J

jimreed2160

Well-known member
Joined
Aug 7, 2016
Messages
3,589
Location
Tallahassee FL
Moving the handplanes

I have lots of handplanes and use them for woodworking. Most of them are in a closet inside to keep them rust free. The daily users are inside on a shelf I built. Like all of the other shop furniture, that shelf is going away so I moved the handplanes to a Husky roller.
 

Attachments

  • DSCN6692.jpg
    DSCN6692.jpg
    152.3 KB · Views: 514
  • DSCN6691.jpg
    DSCN6691.jpg
    155.8 KB · Views: 421
  • DSCN6687.jpg
    DSCN6687.jpg
    146.7 KB · Views: 457
  • DSCN6685.jpg
    DSCN6685.jpg
    153.2 KB · Views: 436
  • DSCN6686.jpg
    DSCN6686.jpg
    151.4 KB · Views: 449
OP
J

jimreed2160

Well-known member
Joined
Aug 7, 2016
Messages
3,589
Location
Tallahassee FL
Gladiators arrive!

So now you have caught up with the garage rehab history. We are now in the Gladiator phase. It is the result of happy accidents. By purchasing random cabinets, I actually began a color theme. The Husky boxes are black. The vintage Craftsman, US General, and Kobalt are all red. Heck, I even have a JC Penney roller from the 1970s that is black and red. So that became my unifying color theme. So you can imagine my delight when HD put Gladiator products on sale and I discovered that the Premier series is black and red. :beer:

I began with three 30" wall cabinets from HD. Two of them replaced a nasty pegboard and one replaced a plywood shop cabinet by the door. I wanted to add a cabinet over the corner bench but thought it would crowd out the electrical service panel. My buddy Bob turned me on to the smaller 24" cabinet that Amazon had on sale.

In the meantime, Lowes had a great deal on the rolling lockers so I ordered two of them and also picked up another 41" Kobalt roller on closeout. The next project is to build a work area to replace two junk filled shelving units.

Today's update from Lowes is that the tall rollers have been delayed until Friday. So now I am in a holding pattern.
 

Attachments

  • DSCN6598.jpg
    DSCN6598.jpg
    158.3 KB · Views: 578
  • DSCN6606.jpg
    DSCN6606.jpg
    150 KB · Views: 459
  • DSCN6613.jpg
    DSCN6613.jpg
    150.3 KB · Views: 508
  • DSCN6702.jpg
    DSCN6702.jpg
    151.5 KB · Views: 436
  • DSCN6748.jpg
    DSCN6748.jpg
    141.4 KB · Views: 437
OP
J

jimreed2160

Well-known member
Joined
Aug 7, 2016
Messages
3,589
Location
Tallahassee FL
Looking good! I think you can never have too many cabinets and drawers. It keeps things hidden and much cleaner. Nice theme red and black. Oh, you could have picked up some paint paddles at HD and cut them to use for label holders.

Billy

Thanks for your kind words. Funny that you should mention the paint paddles. I noticed that the slices of 2x4 resembled them very much.

And I am amazed at how stuff just disappears in the drawers. My current task is to find homes for the good stuff and dispose of the rest. I guess phase II will be to move things around and organize it better. That is where the movable markers will pay off. Stay tuned.
 
OP
J

jimreed2160

Well-known member
Joined
Aug 7, 2016
Messages
3,589
Location
Tallahassee FL
The little things

Sometimes the little things make the most difference. One big advantage of these Gladiator cabinets is that they are steel. That means MAGNETS! Here is a cup hook turned into a keyholder. I have some hammered black paint and will give it a spray once the monsoon rains are over.

I know you can buy magnetic hooks but they are a buck or two each and I might end up needing a few dozen. Lucky for me I have a bin full of wood scraps and a 100pc bag of brass cup hooks. And then there are the disk drive magnets from my IT days. All I need is a little shop time and that I have in abundance.
 

Attachments

  • DSCN6759.jpg
    DSCN6759.jpg
    146.4 KB · Views: 501
OP
J

jimreed2160

Well-known member
Joined
Aug 7, 2016
Messages
3,589
Location
Tallahassee FL
North Annex refurb

My shop refurb continues. Today I added lighting to the North Annex. You will remember that this shop has been carved out of a two car garage. Stall for car #2 has been a storage area. My current project is to reclaim that space and put it to use.

Reminds me of Columbia, SC, where I used to live. The state capitol building was burned during the war but rebuilt in the later part of the 19th century. Soil there is sandy and the foundation was a series of small stone rooms that were filled with compacted soil. During the later part of the 20th century, building engineers found that they could excavate these rooms and use them for offices. So they added usable space to the capitol building by reclaiming the basement. I am using the same strategy in my garage shop by removing much of the stuff I put there over ten years ago and then repurposing that space.

Today's task was to add some lighting. Lowes has promised cabinets sometime today and I wanted to get the lighting out of the way. Costco provided the 4 ft LED fixture and I plugged it into the garage door opener outlet.
 

Attachments

  • DSCN6573.jpg
    DSCN6573.jpg
    147.1 KB · Views: 256
  • DSCN6834.jpg
    DSCN6834.jpg
    149.1 KB · Views: 265
  • DSCN6835.jpg
    DSCN6835.jpg
    154.3 KB · Views: 295
OP
J

jimreed2160

Well-known member
Joined
Aug 7, 2016
Messages
3,589
Location
Tallahassee FL
Lee-Thanks for stopping by. The biggest challenge I have found reworking my small shop is, of course, space. Every time I start an update improvement project I have to clutter up my workspace as I move stuff out of the way. But at last I am seeing some bright spots now because I organize as I go. Throwing out junk really helps.

Stay tuned. After a long wait, Whirlpool finally shipped the cabinets. They should be here today, or tomorrow, or maybe Sunday. Lowes is really not sure when but they are both loaded on trucks for delivery. For my convenience, they are shipping one to each of their stores. :willy_nil
 

Lee Celtic

Well-known member
Joined
Jul 1, 2016
Messages
336
Location
Llanberis, North Wales UK
I feel your pain.. I still need to move stuff to do stuff but at least now I can see floor here and there..lol

As for throwing stuff out I dumped tons of stuff and cashed in a lot of metal.. Tomorrow I have some people coming to collect stuff I put on freecycle just to make more space.. one mans junk is another mans junk... but in their space not yours..lol
 

SuperCat

Well-known member
Joined
Jan 6, 2012
Messages
1,100
Location
Sacramento, CA
Great idea for a thread, jimreed2160. I also like your idea of incremental improvement. I feel inspired by your posts, so I am going to find something in the garage this weekend to improve and/or organize. I do have a question: why are the two small toolboxes that are on your workbench on top of a small wood stand? Do you have tool kits/cases that you store under them? Inquiring minds need to know. (lol) :thumbup:
 
To avoid these ads, REGISTER NOW!
OP
J

jimreed2160

Well-known member
Joined
Aug 7, 2016
Messages
3,589
Location
Tallahassee FL
Great idea for a thread, jimreed2160. I also like your idea of incremental improvement. I feel inspired by your posts, so I am going to find something in the garage this weekend to improve and/or organize. I do have a question: why are the two small toolboxes that are on your workbench on top of a small wood stand? Do you have tool kits/cases that you store under them? Inquiring minds need to know. (lol) :thumbup:

Thanks for your kind words and good luck with your improvements. Every little bit helps.

As for the toolboxes, they represent my first stab at organization and yes, most of them are orphan tops. Back in the day, I picked up small toolboxes frequently and dedicated them to stuff--like plumbing and electrical. Then I loaded up boxes of accumulated chisels and many boxes of handplanes. I guess I never noticed large rolling boxes until I stumbled on GJ. :dunno:

So now I am graduating from small boxes to larger boxes and cabinets. I guess I need to do a photo tour of the boxmania.
 
OP
J

jimreed2160

Well-known member
Joined
Aug 7, 2016
Messages
3,589
Location
Tallahassee FL
Garage paint

This house is 40 years old and was a little worn when we moved in 13 years ago. I have been refurbing it ever since. The big projects were a gut job on kitchen a few years back, refurb both baths, replace doors and windows, paint inside and out. Kinda. The bedrooms have not been repainted yet and the garage is looking a little tired.

It is in about as good a shape as you would expect. The ceiling looks like thin builder white but I think the original owner repainted the walls sometime in the 1990s because some idiot used beige paint and rolled over the breaker box. I am going to paint the box grey soon so the firemen can spot it easier in an emergency. Although total repaint is out of the question for now, I have not ruled it out sometime in the future. A nightmare of prep and dropcloths, it would really brighten up the place.

Until then, I will add white pegboard on open wall space. It is handy and looks much better than the tired old beige paint. Not a big issue because there is very little open wall space. Here is what I did today.
 

Attachments

  • DSCN6837.jpg
    DSCN6837.jpg
    130.2 KB · Views: 163
  • DSCN6839.jpg
    DSCN6839.jpg
    141.5 KB · Views: 164
OP
J

jimreed2160

Well-known member
Joined
Aug 7, 2016
Messages
3,589
Location
Tallahassee FL
Gladiator floor cabinets are here!

At last. After conspiring to drive me crazy with anticipation, Whirlpool and Lowes finally sucked all their fun out of the delays and delivered my cabinets to the stores. I placed the original order on the 5th and picked them up today so I guess 23 days was not too bad. It was thoughtful of them to deliver one cabinet to each of their stores in town.

So far, I have purchased Gladiator cabinets from Home Depot, Amazon, and Lowes. Home Depot by far had the best customer experience, with Amazon a close second. I think I will stick with HD for any future purchases.

Anyway, I received an email just before lunch that one of the cabinets was ready. Tropical storm Alberto is bestowing north Florida with rain and a big band was forecast for late afternoon. I hustled out after lunch and picked up the cabinet. While I was at the store, I got a notification that the second was ready at store #2. I hustled home and slapped the casters on the cabinet, rolled it into the garage, and went to get #2. I got a little wet installing those casters, but I managed to keep it inside the Navigator while I soaked up the summer fun.

What I got was two of the Gladiator Premier 66 inch rolling cabinets. The wheels are funky. There are two swivels on the rear and two non swivel lockers on the front. It makes them easy to move because you just grab the front and dance. The issue is my shop is negotiating the rabbet warren to snake them into place. I cribbed up my HF furniture dolly and had no problems. These cabinets weigh 125 lbs. Not excessive, but certainly heavy enough to think about. They get real slippery once the rollers are installed.

I installed them in my new North Annex part of the shop. Here are a few rushed pictures. Sorry but I had a big day. More pictures to follow as the plan unfolds. Now I have the two cabinets flanking the recent Kobalt closeout rolling toolbox. My plan is to build a frame for it and hang a 30" Gladiator on the back. One side of the top cabinet will align with the rolling cabinet and I will build a shelf beside it to bridge the gap between it and the other rolling cabinet. I might also put a 24" on top of the left cabinet. I will build a work surface for the Kobalt and install more lighting so it can be a multipurpose bench. Shop cleanup dictates that the plastic shelf and all the stuff on it must go away. Ditto with the gray buss trays on the floor.

Of course, starting with a blank slate is easier, but we work with what we have. I am pleased with my efforts so far and I think I am a one or two pickup loads away from having a workable shop. Stay tuned for more fun.
 

Attachments

  • DSCN6898.jpg
    DSCN6898.jpg
    154.8 KB · Views: 263
  • DSCN6897.jpg
    DSCN6897.jpg
    155.6 KB · Views: 248
  • DSCN6891.jpg
    DSCN6891.jpg
    155 KB · Views: 228
OP
J

jimreed2160

Well-known member
Joined
Aug 7, 2016
Messages
3,589
Location
Tallahassee FL
North Annex

Work continues in the new North Annex part of the garage. I unboxed the last Gladiator cabinet today and put it on the Kobalt bench. I am going to build a riser and a wooden benchtop with an overhang. Then I will put the cabinet on the riser along with the other grey box. The new North Annex workbench should make a nifty little workspace once the shelf and discards on the shelf go away.

The little grey box is something I have had for years. I acquired it in Petersburg, VA and the story was that it came off a US Navy ship. Well, it IS painted battleship grey. It is thick gauge steel and weighs a ton. I hauled my small tool collection in it for years but outgrew it. The plan is to diamond plate it and paint it to match the Gladiator cabinets. I might also add some shelves inside.
 

Attachments

  • DSCN6901.jpg
    DSCN6901.jpg
    88.8 KB · Views: 129
  • DSCN6900.jpg
    DSCN6900.jpg
    109.3 KB · Views: 138
  • DSCN6899.jpg
    DSCN6899.jpg
    115.2 KB · Views: 145
  • DSCN6903.jpg
    DSCN6903.jpg
    143.2 KB · Views: 142
  • DSCN6904.jpg
    DSCN6904.jpg
    150.2 KB · Views: 134
  • DSCN6902.jpg
    DSCN6902.jpg
    148.1 KB · Views: 154
OP
J

jimreed2160

Well-known member
Joined
Aug 7, 2016
Messages
3,589
Location
Tallahassee FL
Shelf liner for Gladiator cabinets

Well sometimes life gets in the way. I bought two storm doors last week and stored them in the living room as the tropical storm passed by. Yesterday was a nice dry day and thus designated as storm door day. The full view glass doors were right at my lifting capacity but all went well and the $290 I saved on installation has already been passed on to the tools budget.

So now it is back to the Gladiators. The shelf paint is very fragile and I like to protect it with cardboard from the shipping boxes. Luck is my friend because the box lid for the 32" storm door needed only slight trimming to yield four 30x17 1/2 cabinet shelf liners.

My second project was to cut out pieces for the cabinet risers. I need a 30x16 box for the wall cabinet and a 14x24 box for the new painted chest. Bolted together they should make a nice riser for the new work table. Next tasks are to build the boxes, paint the boxes, and paint the chest.
 

Attachments

  • DSCN6905.jpg
    DSCN6905.jpg
    147.6 KB · Views: 128
  • DSCN6911.jpg
    DSCN6911.jpg
    147.2 KB · Views: 140
  • DSCN6910.jpg
    DSCN6910.jpg
    138.4 KB · Views: 145
  • DSCN6909.jpg
    DSCN6909.jpg
    121.5 KB · Views: 124

drivesitfar

Well-known member
Joined
Oct 23, 2013
Messages
35,997
Location
Pacific Northwest
Jim: sorry i haven't visited prior to this, but i just noticed you've been putting up all your cool organizing stuff here while you talk quite a bit about it on your WOODWORKING 101 thread you started last year.

hope it's not too hot in your shop now.

you've been doing a great job so keep it up and you'll be able to FIND THE STUFF YOU ACTUALLY OWN instead of ordering online or going to the store to buy one.

cheers
 
OP
J

jimreed2160

Well-known member
Joined
Aug 7, 2016
Messages
3,589
Location
Tallahassee FL
Drives--Thanks for stopping by. The move to Gladiator cabinets has really transformed my garage shop organization efforts. I guess it is because I am only storing stuff that I intend to keep and having lots of cabinets means that I have room to spread it out and organize it better.

I keep similar items together and my plan is to eventually create themes. For example, I have electrical stuff stored everywhere and it would be nice to have it all in the same place so I don't buy more outlets that I already have. Ditto with plumbing supplies like flappers, etc. I know it is a little thing but it is frustrating to purchase simple repair parts when you know that there are several located somewhere in the mess.

And yes, the shop is cooler. I added an 8000 btu AC window unit. :beer:
 
OP
J

jimreed2160

Well-known member
Joined
Aug 7, 2016
Messages
3,589
Location
Tallahassee FL
So I have made a little progress on the North Annex project. Today I Kreg ed the riser boxes together. It was uneventful except for the blowout screw that pinned the project to my good workbench. :willy_nil

I want everything to match kinda. I don't want to go overboard. The plywood risers will not stand out so my paint job does not have to be perfect to make them blend in. I will trim out the front edges and start with primer. Found some hammered black paint at Lowes.

The grass needs mowing. It is raining frequently. And then there is the 90+ degree heat to contend with. This step may take a few weeks.
 

Attachments

  • DSCN7016.jpg
    DSCN7016.jpg
    150 KB · Views: 123
  • DSCN7017.jpg
    DSCN7017.jpg
    121.5 KB · Views: 116
OP
J

jimreed2160

Well-known member
Joined
Aug 7, 2016
Messages
3,589
Location
Tallahassee FL
Things are moving on. I added some trim to the raw plywood edge on the risers. But then I ran out and had to go to HD. I have used this stuff for years but never bothered to find out what it is called. That makes tracking it down a little difficult but now I know. The best trim for a 3/4" plywood edge is called--"Screen door trim".

So now the two risers are ready to prime and paint. Yesterday the diamond plate arrived. It is powdercoated red and matches well. The color is actually closer to the Kobalt cabinet but it matches the Gladiator well. This piece of aluminum has a hole in it and is a little dirty but does not appear to have been used. At least the price is right. I will be able to cut off the end with the hole.

So now I am stoked. Just need a few rainless days for the paint to dry.
 

Attachments

  • DSCN7039.jpg
    DSCN7039.jpg
    133.1 KB · Views: 139
  • DSCN7040.jpg
    DSCN7040.jpg
    148.6 KB · Views: 144
OP
J

jimreed2160

Well-known member
Joined
Aug 7, 2016
Messages
3,589
Location
Tallahassee FL
Work on the North Annex continues as I inch along a little each day. Yesterday I primed the risers and was amazed to watch the plywood **** up primer like it was free or something. Two cans barely covered them both. I finished with some Kilz I had on hand. It worked so much better that I went out and bought two more cans of that to finish up with. In the meantime, I spackled the defects to cover them up. Next move is to sand and coat again. Hope the weather holds up for that.

Moving along with the risers just increased my anxiety because the North Annex was clogged with that last plastic shelf. The new Gladiator cabinets just could not hold everything on that shelf. Drat! What to do? While I was picking up the Kilz at HD, I noticed that they had my favorite storage bins on sale. I once had a boss who liked to say that sometimes the easiest way to solve a problem was to throw money at it. So I threw $40 at the biggest problem in the North Annex and indeed, the problem vanished.

Some of the stuff went into the new cabinets and some of it went into the bins. But ALL of it disappeared!!! And the new bins take up much less room. As I sell off the tools, I can repurpose them to other areas. Bonus is that they are dark grey/black and match the new color scheme.
 

Attachments

  • DSCN7044.jpg
    DSCN7044.jpg
    149.4 KB · Views: 140
  • DSCN7045.jpg
    DSCN7045.jpg
    146.7 KB · Views: 148
  • DSCN7043.jpg
    DSCN7043.jpg
    109.3 KB · Views: 127
  • DSCN7041.jpg
    DSCN7041.jpg
    143.2 KB · Views: 130
  • DSCN7042.jpg
    DSCN7042.jpg
    99.2 KB · Views: 128
OP
J

jimreed2160

Well-known member
Joined
Aug 7, 2016
Messages
3,589
Location
Tallahassee FL
Revamping the garage shop is a large project and it is all on the shoulders of just one worn out guy. Some 50+ years of working for The Man has destarched my sails a bit and I am neither willing nor able to put in a full shift each day. My strategy is to go steady so I try to accomplish at least one thing each day. Like the drips of water wearing down a stone, I trudge on. Today's task was to cut some MDF for the workbench top. That started with turning on my air scrubber. It is an expensive HD fan with a very expensive filter. In spite of its humble origin, my redneck air cleaner works well.

I made the long cuts on my table saw but went old school on the trim cuts. Every woodshop should have an old school sawbench. I use mine a lot. Today I used it along with one of my rehabbed rip saws and cut the notches in the MDF. More on that later.
 

Attachments

  • DSCN7058.jpg
    DSCN7058.jpg
    110.9 KB · Views: 101
  • DSCN7057.jpg
    DSCN7057.jpg
    121 KB · Views: 107
  • DSCN7056.jpg
    DSCN7056.jpg
    103.5 KB · Views: 105
  • DSCN7055.jpg
    DSCN7055.jpg
    113.9 KB · Views: 114
  • DSCN7054.jpg
    DSCN7054.jpg
    151.3 KB · Views: 114
  • DSCN7053.jpg
    DSCN7053.jpg
    124.8 KB · Views: 120
OP
J

jimreed2160

Well-known member
Joined
Aug 7, 2016
Messages
3,589
Location
Tallahassee FL
The MDF top is what the risers will sit on and the two Gladiator cabinets will sit on the risers. Being a careful woodworker, I like to measure once and cut three or four times until I either get it right or cut a new piece. Today, the notches caused me a little trouble but I finally got it right without having to get out the board stretcher.

I guess the final product would be nicer if I built to a plan but that is not going to happen. I have too many conflicting goals. I want the bench and cabinets to be stable but also mobile. Almost everything in the cramped shop is on wheels because mobile items are easier to rearrange. Most of my vises are mounted on bases that are clamped to workbenches. It is much easier to relocate a vise on a base and I do it frequently. Remember, this is a woodworking and LIGHT metalworking shop where vises do not get pounded much. So my strategy has limited application.

Anyway, I digress. The MDF top fits great and will provide a stable base for the risers. Next task is to finish painting the risers and build a support structure for them. The bench backs up to a wood storage rack and I plan to attach the cabinets to that rack for added support.
 

Attachments

  • DSCN7063.jpg
    DSCN7063.jpg
    106.7 KB · Views: 109
  • DSCN7062.jpg
    DSCN7062.jpg
    78.9 KB · Views: 102
  • DSCN7060.jpg
    DSCN7060.jpg
    89.4 KB · Views: 98
  • DSCN7059.jpg
    DSCN7059.jpg
    110.2 KB · Views: 97
OP
J

jimreed2160

Well-known member
Joined
Aug 7, 2016
Messages
3,589
Location
Tallahassee FL
I was browsing at Lowes today and found a nice magnetic shelf. It is called a "Magnetic Spray Can Organizer" and is black. My tired old eyes says that it matches the Gladiator boxes. So I stuck it up and immediately found an occupant for it. I am sure it will move around a bit before it finds a permanent home.
 

Attachments

  • DSCN7101.jpg
    DSCN7101.jpg
    118.9 KB · Views: 114
  • DSCN7102.jpg
    DSCN7102.jpg
    150.1 KB · Views: 128
  • DSCN7103.jpg
    DSCN7103.jpg
    154.1 KB · Views: 137
OP
J

jimreed2160

Well-known member
Joined
Aug 7, 2016
Messages
3,589
Location
Tallahassee FL
Today I sanded one of the risers and gave it a trial fit. Then I added some supports behind the workbench. It backs up to a woodrack that I built from 2x4s and I think that will be an excellent place to anchor the cabinet. The supports are 24" apart and I scabbed on three vertical 2x4s.

Here is where the mobile cabinets shine. Moving the cabinets and workbench out of the way was a snap and I got the supports installed in less than 20 minutes. Bonus was being able to sweep the floor in an area that accumulated over 13 years of dust and stuff. Begone plastic shelving!

The riser will sit on the workbench and the cabinet will be supported by the riser. Then I can pin both the cabinet and the riser to the 2x4s to keep them from toppling over. This will reduce the mobility of the bench but will keep the dang thing from falling on my head. It is a worthwhile compromise in my mind.

Now I need to modify the riser to add an attachment structure. I will put some plywood strips inside the box. My plan is to put pegboard on the back of the riser.
 

Attachments

  • DSCN7109.jpg
    DSCN7109.jpg
    136.8 KB · Views: 115
  • DSCN7107.jpg
    DSCN7107.jpg
    121.9 KB · Views: 116
  • DSCN7105.jpg
    DSCN7105.jpg
    153.2 KB · Views: 118
  • DSCN7104.jpg
    DSCN7104.jpg
    153.1 KB · Views: 129
OP
J

jimreed2160

Well-known member
Joined
Aug 7, 2016
Messages
3,589
Location
Tallahassee FL
Riser

Today I used the Kreg jig to make a "face frame" for the inside of the riser. I will use this to attach the riser to the 2x4 frame in the rear. I pinned it in place with sheetrock screws that were countersunk with a brace and chamfer bit. I collect short throw 3" braces and keep some of them loaded for action. Works quickly and gets the job done.
 

Attachments

  • DSCN7114.jpg
    DSCN7114.jpg
    142.3 KB · Views: 88
  • DSCN7115.jpg
    DSCN7115.jpg
    123.4 KB · Views: 88
  • DSCN7116.jpg
    DSCN7116.jpg
    142.6 KB · Views: 91
  • DSCN7119.jpg
    DSCN7119.jpg
    146.9 KB · Views: 97
  • DSCN7118.jpg
    DSCN7118.jpg
    140.3 KB · Views: 94
OP
J

jimreed2160

Well-known member
Joined
Aug 7, 2016
Messages
3,589
Location
Tallahassee FL
Paint at last

Here in the tropics of north Florida, we are getting rain every day and I have to plan accordingly. I snuck out today and cranked up the spray booth. I put one last coat of Kilz on the riser and ate lunch while it dried. Then it was time to try out the hammered black Rustoleum paint.

One riser--one can of paint. Coverage is mostly just OK but then not much will show because most of the riser will be concealed. I concentrated on the show areas. The second photo was taken after the first coat. Coat #2 covered everything.

The hammered finish is OK for being on plywood. I can already tell that the black is much darker than the Gladiator hammered charcoal grey/black but I am hoping that it will look fine in the light challenged North Annex.
 

Attachments

  • DSCN7120.jpg
    DSCN7120.jpg
    161.5 KB · Views: 101
  • DSCN7121.jpg
    DSCN7121.jpg
    160.1 KB · Views: 100
  • DSCN7122.jpg
    DSCN7122.jpg
    117.7 KB · Views: 105
  • DSCN7123.jpg
    DSCN7123.jpg
    152.4 KB · Views: 94

drivesitfar

Well-known member
Joined
Oct 23, 2013
Messages
35,997
Location
Pacific Northwest
Jim: nice to see you making progress as per usual. :thumbup:

living in the PNW I know a thing or two about rain and one tip that might help you if you need to paint outside is to pick up or make a wood crate/box to paint your items inside. I've done it a few times, but usually my weather isn't warm enough for painting outside like yours is so you might want to make something a little more permanent like maybe a rack with a tarp on it that you can set up and take down if you don't have a place to put it for long periods of time.

one thing some members do it to just get an old appliance box that a fridge or oven comes in and use it as an outside paint booth and even if it's not raining it really is nice to block the wind if that is an issue. another method is to stretch some 5x5 (you pick the size) plastic over some 2x2's or 2x4's and make 4 of them so you can have 3 sides and a top to screw together and use then put back when your project is finished. I try to spray paint when it's 60 to 80 degrees and we only have those temps up here a few months a year so i don't do a lot of spraying outside, but i have used a few of these methods especially when using a spray can with any wind blowing.

keep up the great work.
 
OP
J

jimreed2160

Well-known member
Joined
Aug 7, 2016
Messages
3,589
Location
Tallahassee FL
Drives--Thanks for stopping by and thanks for the tips. It sure would be nice to have a shed or carport out back. I decided to leave the plastic sawhorses out for awhile and that saves setup time.
 
OP
J

jimreed2160

Well-known member
Joined
Aug 7, 2016
Messages
3,589
Location
Tallahassee FL
Riser continued

I could not wait to try out the riser to see how it looks in place and I was not disappointed. It is hard to photograph because of glare but the black matches pretty well. At least well enough for the North Annex.

Now I am planning the surface. I wanted to use some pine because the surface feels good. But then I tripped over a box of laminate flooring that I used to resurface my spare cabinetmakers bench. The pecan will make a nice top. I can put it on the bottom of the riser and also on the plywood top extension. Then I can **** them together. The top will be 10" x 45"--that provides an ample overhang while allowing good drawer access.

The current issue is how to attach the 30" cabinet at the top. I think I need to make a frame extension from the bottom. Sure don't want the dang thing to topple over on my noggin.
 

Attachments

  • DSCN7131.jpg
    DSCN7131.jpg
    132.1 KB · Views: 110
  • DSCN7130.jpg
    DSCN7130.jpg
    156.8 KB · Views: 106
  • DSCN7128.jpg
    DSCN7128.jpg
    151.1 KB · Views: 114
  • DSCN7125.jpg
    DSCN7125.jpg
    148.7 KB · Views: 120
  • DSCN7124.jpg
    DSCN7124.jpg
    149.4 KB · Views: 104

drivesitfar

Well-known member
Joined
Oct 23, 2013
Messages
35,997
Location
Pacific Northwest
JIM: it's a bit hard to see how you could attach your gladiator cabinet since you don't have a wall behind it, but i'd maybe try using some UNISTRUT (or wood if you don't have any unistrut handy) and hang something from the ceiling and maybe put a french cleat hanger on the frame and the cabinet might work.

i'm not sure if you understand my rambling, but here's a unistrut hanging shelf i built and you might have to put something flush to the ceiling since you have sheetrock up there to attach it to the rafters.
 

Attachments

  • bottom shelving cut and on unistrut 1 (2).jpg
    bottom shelving cut and on unistrut 1 (2).jpg
    156.2 KB · Views: 133
To avoid these ads, REGISTER NOW!
Top Bottom