To avoid these ads, REGISTER NOW!

Got a welder -- built a front-yard fence in my garage

Jack Olsen

Super Moderator
Staff member
Joined
Mar 22, 2009
Messages
6,678
Location
Los Angeles
I'm willing to jump into a projects that I've never even seen someone else bring to completion, much less ones that I've got the correct experience or training for. I guess it's a blessing and a curse. (And in a little bit, some of you will be able to tell me which side of that is going to come out more true with this project.)

I got a Hobart Handler 140 (120v) MIG welder. I rented a couple of videos to figure out how to use it. From there, I started planning a wrought-iron style fence for my front yard. The fact that the fence was going to require about 3,000 individual welds didn't occur to me, right away. The fact that I was planning on putting my first project right out in front of my own yard and house occurred to my wife, but I told her there was nothing to worry about. We'd plant vines on it, which would hide the imperfections. And if it's still ugly, I could always tear it down and sell it for scrap.

I'm posting this to show the process I went through -- it might be useful to other weekend hobbyists who are thinking about a project like this. I'm also interested in more-experienced guys' opinions on what I might have done wrong, along the way. It's too late to fix most of the problems on this project, at this point, but I'm not so self-impressed that I think I didn't get any (probably many) of the parts wrong.

Here's the front yard. I've got a retaining wall that I used to think was 40 feet wide (more on that later), and stands out about 20 feet in front of the house.

JacksHouse1238956776.jpg


JacksWall1238956761.jpg


I had a neighbor with a wrought iron style fence on his wall, and my thinking was that I could pretty much copy his project -- but at a fraction of what he probably paid. Here's his fence.

NeighborLong1238956738.jpg


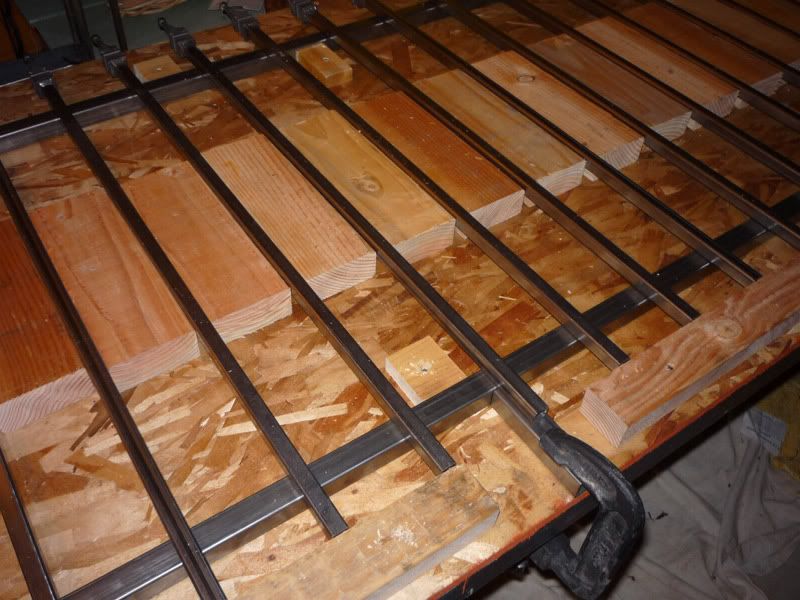
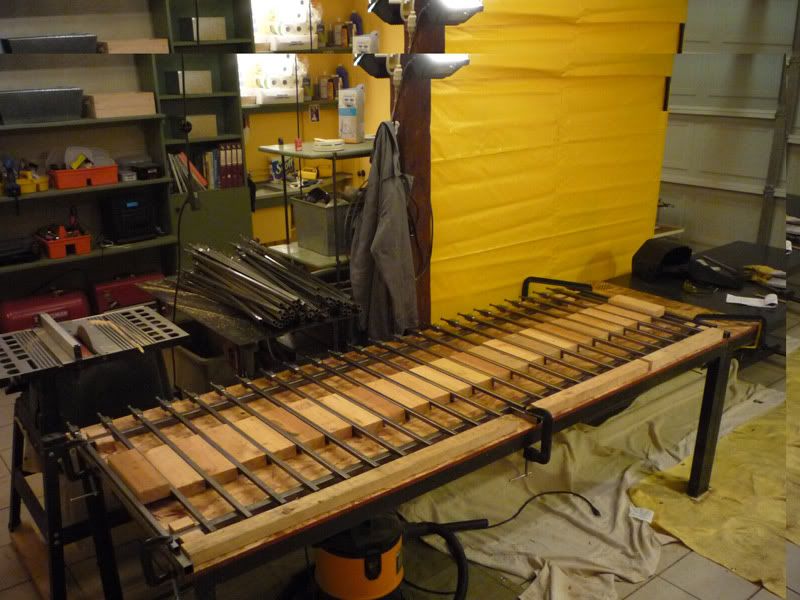
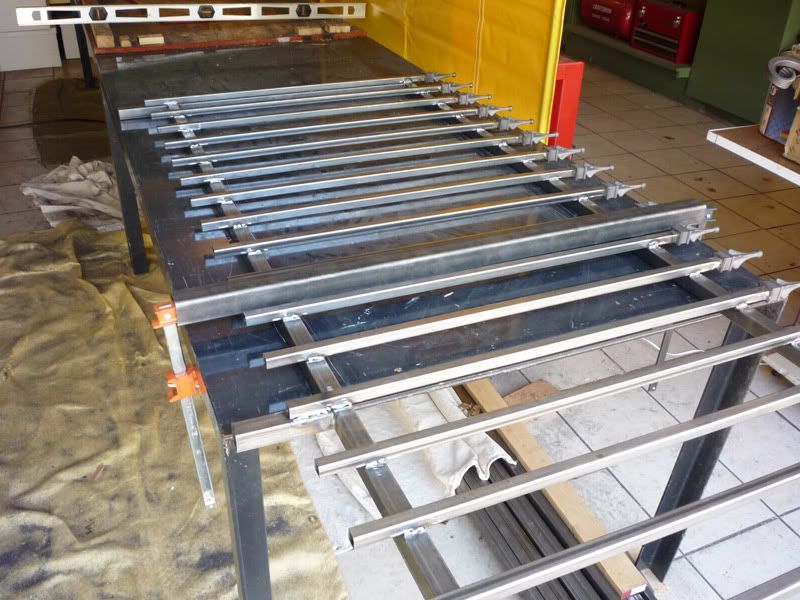
His fence uses 3/4" pickets and 1-1/4" supports to make 9' sections. I decided I wanted a slightly 'lighter' look, and would use 5/8" pickets and 1" supports. I decided to add a support in the middle of each of my 8' sections so that there wasn't more than a 4' span -- as insurance against sag, since I was working with 16 gauge steel.
 
To avoid these ads, REGISTER NOW!
OP
J

Jack Olsen

Super Moderator
Staff member
Joined
Mar 22, 2009
Messages
6,678
Location
Los Angeles
I bought about $400 worth of steel and supplies, all told -- 20' lengths of 5/8" and 1" square tubing, cast iron finials from King Metals, some steel base plates, masonry bolts, hinges, decorative pieces and a gate top. I also got primer and paint from King -- I figured they'd have the right stuff for this kind of work.

I needed to make the first set of (240) pickets the same length. I made them 30" each, so that I could cut eight from each length with no leftovers. With a 4" finial and a 2" gap underneath each picket, I'd have a 36" fence. To save myself from having to measure over and over, I bolted my saw to a piece of wood and screwed in an L-bracket as a stop. That way I could just keep feeding the length of steel to the stop, chop, and repeat. I had to finesse it with some spacers, but it worked.

Both my fold-down tables come down to the same height, making this sort of cutting easier:

ChopShop.jpg


My cutting jig:

PicketCutter.jpg


Stacks of cut pickets:

Pickets.jpg


The cold cut saw is a pleasure to use.

Then I had to attach the finials in a way that would be consistent and easy to repeat (and repeat, and repeat). I set up a kind of goofy-looking jig to hold the two pieces in relation to each other. I just had to drop the parts in, clamp on two vise-grip style clamps, and weld the four edges.

PicketJigAlt.jpg


Simple, right?
 
OP
J

Jack Olsen

Super Moderator
Staff member
Joined
Mar 22, 2009
Messages
6,678
Location
Los Angeles
Well, a couple of things. First, I'm still a terrible welder. MIG is easy, but I don't make it look that way. I'm getting better -- 3000 welds has to be good for something -- but the first set were welding steel to cast iron, which is never going to produce great fusion. But I guess this is the way it's done.

Here's the fledgling welder in his garage:

Jack.jpg


I tore apart a few samples to see what kind of job I was doing. It was nice when my welds were holding up as the cast iron was tearing apart:

StressTest.jpg


The results? Fortunately, I don't have any close-ups. But let me say it again: I'm still a lousy welder. The long and the short of it was that all four sides needed some grinding on all 240 pickets.

I set up a station where I could grind while sitting. It's pretty mind-numbing work.

Grinding.jpg

The good news is that those welds seem to be holding up just fine.
 
OP
J

Jack Olsen

Super Moderator
Staff member
Joined
Mar 22, 2009
Messages
6,678
Location
Los Angeles
Pretty soon I had lots of stacks of pickets:

PicketStack.jpg


And the basic idea of the frame that the pickets would attach to was pretty simple.

FrameIdea.jpg


And I knew how I wanted the fence to look, pretty much:

BasicLayout.jpg


Then it was time to figure out how I was going to put all of this together. Not every section was going to be the same. I knew I needed a jig, but it was going to have to be flexible enough to hold the pieces for different types of panels. I ended up going with loose blocks to set the picket spacing. The frame pieces were dropped into fixed guides. I could make longer or shorter sections with the same jig.

JigAltView.jpg


Maybe that's the way it's usually done? I have no idea. I couldn't find any good pictures of fence jigs when I went googling.
 
OP
J

Jack Olsen

Super Moderator
Staff member
Joined
Mar 22, 2009
Messages
6,678
Location
Los Angeles
This is what the jig looked like. I've never seen a jig for a fence like this, so I might be close to what others do, or I might be off by a country mile.

Jig.jpg


Then, there was a lot more welding -- and grinding -- all over again. Early on, someone had warned me that I might not understand how labor-intensive this project would be.

They were right.

But I worked in my spare time. Fitting. Welding. Grinding.

And oh, bending.

When you only weld on one side of the lateral pieces, the metal curves when it cools. I'd been warned about it. I came up with a quick and dirty system for straightening the sections, clamping the piece under a stiff piece of stock to one of my tables and then bending it in the other direction. If I did this on four different locations on the section, it seemed to straighten out pretty evenly. There was a lot of trial and error. It seemed like a good test for the structural welds.

Bending.jpg


Again, there might be a simpler and more effective way to do this. I was figuring it out as I went along.

Here's my first completed section, prior to grinding:

Fence01.jpg


Next up, the accident. I jump up on top of one of the steel tables to get a piece of stock down from the rafter shelving and I slip. It's a direct hit to the shin on the edge of the table. At first, it feels like I've maybe broken the bone. But no, I can put weight on it. But when I take my hand away from where it hurts, I'm surprised to see a hand-shaped blood stain on my jeans. By the time this picture was taken, the (tiny) cut was under control, but you can see from my sock how much blood had been there initially.

Small-Cut-Big-Blood.jpg


Not a cutting accident. Not a grinding accident. A jumping up on the table accident. Go figure.
 
OP
J

Jack Olsen

Super Moderator
Staff member
Joined
Mar 22, 2009
Messages
6,678
Location
Los Angeles
All right, so the sections are stacking up. Phase one of the fence is going to be all the sections that sit on top of the wall. If I get that done reasonably well, I'll connect the fence to the house on either side and put in some gates.

Testing how they'll join:

TwoSections.jpg


Stacking them up:

UnpaintedSections.jpg


And then, it kind of feels like you're done -- but of course you're not. Each section has to be cleaned, scuffed, primed and then painted. Everyone hates painting. Usually, I kind of like it. But hand painting a fence is very tedious work.

Primed-1.jpg


And then a 50' tape measure arrives in the mail, and I get the big surprise. I measured the wall initially with a 25' tape measure, and -- I'm still not sure how -- I got the measurement wrong by exactly one foot. My wall is 39', not 40'. I've already got five eight-foot sections put together. The answer? I cut the middle one shorter by three pickets, and move the little center anti-sag leg over by six inches. I'm not thrilled to have failed such a basic thing as 'measure twice, cut once,' but there you go. Fortunately, I'm working with 4" sections and 4 goes into 12 just fine. Unfortunately, I'll always notice that one little leg that's between two pickets, not behind one. But there you go. The landscaping will hide it from everyone else -- but not from me.
 
OP
J

Jack Olsen

Super Moderator
Staff member
Joined
Mar 22, 2009
Messages
6,678
Location
Los Angeles
Now the project goes from super-slow to super-fast. Putting together a fence takes lots of time. Putting it up (in the case of this one, at least) is maybe two hours' work.

Because it's C-shaped, I'm able to weld the sections together and let them simply stand on the wall. The big question is whether they're going to be sized right. Once I've established that part of it is okay, I'll slide the thing over a little, drill the holes for the base plates, and mount those to the top of the wall before I get the fence set in position again and weld the legs to the base plates.

The first two form one corner:

TwoSectionsUp.jpg

I moved around some portable welding curtains I picked up cheap to keep from blinding the neighbors. (You can't see it here, but I also had eye protection on the lawn side. This picture was taken with everything out of position.)

Curtains.jpg


Finally getting some idea of how the finished project is going to look:

LookingOut.jpg


An even clearer idea. There in the middle you can see that moved anti-sag leg:

FenceInPlace.jpg
 
OP
J

Jack Olsen

Super Moderator
Staff member
Joined
Mar 22, 2009
Messages
6,678
Location
Los Angeles
And that's about where I currently am. Next step is to finally secure it to the wall. Then I get started on the part that goes over uneven terrain and is going to need holes dug and concrete poured.

DrivewayView.jpg


The whole thing:

FenceStageOne.jpg


And the reason it was built. The little guy immediately tried to climb it. I guess it's only a matter of time before he succeeds.

MaxInACage.jpg


Once it's finished, my wife can take over with the landscaping part. We're going to pull a lot of the plants out and put in more grass for the kid. I think we're going to have vines grow on the fence itself, but I'm happy with the fact that (as a first project), it's not really going to need vines to hide its flaws. They'll just be there because we want them.

Comments? Criticisms? Things I missed that are going to bite me in the behind? After all this typing, I'll be grateful for any of the above. :)
 

Snakeoil

New member
Joined
Apr 9, 2007
Messages
2
Really, really a nice job, alot of thinking had to take place. Cute kid also...
 

usa#1

Well-known member
Joined
Jul 30, 2008
Messages
391
Looks good! Nice fence.

Where did you rent the welding video's from and do you remember the titles?


Thanks
 

pipehack

Well-known member
Joined
Feb 23, 2009
Messages
923
Location
chicago
Hell YEAH!!!! Nice job. How do you like that black and decker angle grinder??? They have them at my Wally World for 20 bucks.... Those shin bangers are a killer!!!
 

pipehack

Well-known member
Joined
Feb 23, 2009
Messages
923
Location
chicago
By the way ... I called the Iron Workers Union Business Agent... They'll be tearing it down tomorrow... (JOKING)
 

babzog

Well-known member
Joined
Apr 20, 2009
Messages
2,117
Location
Eastern Ontario, Canada
Wow! I'm very impressed for your first project! Gives me hope that maybe mine won't look like Franken-weld! Nicely done! :bowdown:

For the little booboo with the support leg being between two pickets. My suggestion would have been to move it over the 1.5"-2" and hide it behind a picket. Your eye would notice that it's standing out more than it would notice it's very slightly off center. After time, even you (the project owner who sees and knows of all things wrong, when noone else does) would probably forget about it.

Cute kid - mine are all about climbing too. I figure between them and shin banging (OUCH!!! !@% $&$#*@ !%&#@), that's why God gave us rum. :bounce:
 

Don 18

Well-known member
Joined
Jan 19, 2007
Messages
427
Location
Buffalo NY
Looks great. I know exactly what you mean about the out of place support leg, I'm the same way. But since you mentioned it, it pops right out. :)

edit ... Beat me to it ...
If you moved that leg one way or the other directly under a picket it would't stick out at all.

Don
 

Keep

Well-known member
Joined
Jan 1, 2009
Messages
1,398
Location
Oshawa, Ontario
Looks great. I have similar (though much smaller scale) plans in the works. I was planning on using something like this on my deck instead of the common wood balusters.

I like the jig and will use something like it when I build mine. But yeah it looks like a ton of work!
 

35mastr

Well-known member
Joined
Dec 6, 2007
Messages
2,534
Location
Norcal
Nice work for your first project. The jig you made was just what I would of done.

1 When welding any parts like you did. You need to clamp them down while you weld and only remove them when they are cool. That will keep the walking of the metal down to a minimal.

2 I normally weld them on the top and bottom of the stringers. That way they are not seen when looking at it from the street.

3 I normally make each foot out of tubing that is large enough to slide the pickets into with a piece of 3x3 flat stock welded to the bottom. then either bolt them through or weld them up. Makes for leveling the whole thing out easier.

But you pulled it off and I would not cover it with no vines. IMO

But I have to say that you have a good choice in saws. I also have a Makita carbide cut off saw and I would not trade it for another abrasive.

For a first timer you also have a nice assortment of C clamps and vise grips.

Dont be afraid to jump into any welding projects. The more you weld the better you will get.

Just always have something near by to put out those pesky fires that will start when you least expect it.

Also on another note. When you weld inside of the shop. Be sure that you keep an eye on it after you are all done for the night. I usually hang out for an hour or so with a couple of brews cleaning up. I have known a few shops burn down in the middle of the night due to a small spark getting under somthing and smoldering till it was too late.

Good luck with your future projects.
 

A_Pmech

Well-known member
Joined
May 8, 2007
Messages
8,002
Location
IL
Your fence looks great! It was well planned and is well executed. No ornamental ironworker would do any better or do it any differently for that matter. Don't cover it with vines!

Fabricating that kind of thing is all about jigs. Your jigs were well thought-out and up to the task of keeping everything even and in alignment.

Don't worry about the little support thing. Only a very few people will ever notice. I think it's well inside the "four week rule". You'll forget about it soon enough. :beer:

The distortion you experienced is due to the cooling weld metal creating areas of tension on the weld side of the main tube. Distortion in welding is to be expected. Learning how to control and use distortion to your advantage is the next thing to study and practice. For a fence like yours, cold straightening is accepted practice, just like what you did.
 
Last edited:
To avoid these ads, REGISTER NOW!

35mastr

Well-known member
Joined
Dec 6, 2007
Messages
2,534
Location
Norcal
If the suppoert is really an issue. Just grab a sawsall and cut it out. Then weld a new one where you would like. Thats the great thing about metal. Just cut, grind, weld, and repaint
 

rsanter

Well-known member
Joined
Dec 22, 2007
Messages
18,493
Location
visalia ca
well let me tell you a couple of things about building fences and welding.

you managed to do you jigs just about exactly how a professional shop would to it. good thinking on your part, you improved your precision and your throughput.

welding cast iron is really tough. actually the lower the quality of the cast iron the harder it is to weld. typically when you weld cast iron the weld will hold and the cast will break right next to the weld. the reason is the the weld is bieng laid down at a high tempature and when it cools it will shrink. if the cast is not strong enough to handle the 'pull' it will recieve then its going to break and it will break at the point of highest stress....right next to the weld.
there are a couple of tricks that you can use to counteract that with what you were doing.
one is that you hold the thing on with just a couple of quick tacks (or very short beads) in the center of the flats on opposite sides.
you can also not completly seat the thing on the top of the material. by leaving it up just a 16th or so hopefully it will just pull down as it cools.
the other thing you can do is to take a torch and heat the area to be welded so the tempature of the metal is closer to the tempature of the weld bead.
you can also place the top of the metal tube (with the finneal on it) in a gas BBQ to heat up as you are welding the other as you pull them one at a time.

lets talk about the bending or curve that was happening in you fence.
this applies to all metal welds you will deal with and will be more noticable when doing thin material (espically tubing)
when you lay a weld bead (an electrical weld) you are applying a large amount of quick heat to a small area. doing this will heat and expand the base metal where you are making the weld (remember when you heat something it expands).
also you will be applying the filler material at an elevated tempature as you are laying the bead. as this bead cools it will shrink and will want to contract the side of the metal that you are welding on. if you do a whole bunch of small welds over the lenth of that material it will tend to want to bow over the lenth of the material.
If you ever get to the point that you are welding on the body panels of a car (like welding in a patch panel) there are a couple of things you can do to counteract this.
first, if you were to try to make the weld right across in one pass it would warp and pull the panel in ways that you would not want. you will want to place small tacks at 1'' to 2'' increments to hold the panel where you want it. once tacked in place you will want to inspect that it is in fact where you want it and lined up as you would want. if its not you can grind the tacks now and correct it before its too late.
you will want to 'stich' weld the panel by making a series of short half in to one inch welds placed several inches apart. do you welding at the lowest setting that will get you the penetration that you need, any more than that will cause more shrinkage and warping and could cause 'blow through'.
if you lay a weld and see that the panel is shrinking in that spot, you can hammer and dolly the area (preferably when the weld is still hot or at least warm) and this will tent to expand or stretch the metal back to the desired shape. be carefull not to over do it as you can over stretch the metal and cause as much trouble if not more.
continue to 'stich' weld the panel in little by little untill you have created a complete weld. dont get too anxious as you can warp it by not letting enough time for cooling between welds.

the 'art' of bieng a chemist is in the knowing of how the chemicals will act or react when you put them together.
the difference between bieng someone that can weld and bieng a welder is in knowing how the metal will react when you weld it. dont feel bad as you cannot learn it all in a book and you cant learn it just by practice. it takes a combination of the book learning and years of experience to master the art.

if you want a real challange, try hammer welding.
this the process of taking two pieces of sheetmetal and placing then together edge to edge but then give them a small overlap that is about the same as the thickness of the material. get a torch and heat up a small spot on the joint untill both pieces get to a red hot. put down the torch and hammer&dolly that spot untill the pieces seem to become one. go onto another spot and stich the pannel together like this and then complete the areas between the stiches in the same way.
if you did it right you will be able to cut across the 'welded' area and it will appear to have been one piece of metal.
by the way, this is how the hot rod crowd did it in their garages back in the day before there was such a thing as an affordable MIG or TIG welder that a homeowner or hobbiest could buy

bob
 

nate379

Banned
Joined
Feb 2, 2009
Messages
7,279
Location
Palmer, AK
Nice job. great project to start welding on.. no worries about it being structural and if a weld failed causing some BAD things.

I learned how to MIG went I welded up up the suspension that is under my Jeep. :shocking: I knew how to stick weld though, so it's wasn't too hard to figure out MIG.


As far the material moving around... tack weld everything in place. Before welding it up. I wouldn't have cut all those blocks, but maybe 1 or 2. Put down an upright or two, tack it and keep moving down.... but of course there is more than one way to skin a cat.

Reason to tack is #1 it won't move around too much, and #2 if you need to adjust something or redo something, it's easy to take it apart.
 

mrb

Well-known member
Joined
Dec 31, 2008
Messages
3,734
Great job on that fence. That highrise in the background looks familiar. Nice neighborhood, i hate you :D
 

vette-kid

Well-known member
Joined
Jul 21, 2008
Messages
3,636
Location
Navarre, FL
Looks good! Nice fence.

Where did you rent the welding video's from and do you remember the titles?


Thanks

:withstupi I was thinking the same thing! I have a little wire feed welder, but cant make two pieces of metal stick together to save my life! :lol:
 

nissan_crawler

Well-known member
Joined
Jan 12, 2008
Messages
9,638
Location
Wichita, KS
Looks great. I've been thinking of doing this. I put up a nice wood fence...let the treated lumber sit in a drying rack i built, bought a meter to check the moisture in it...installed it when properly dried...

3 years later the wood is warped like hell and cracked to ****.:(

When it gets replaced, I'm thinking it will be steel.
 

porschedude996TT

Well-known member
Joined
Oct 28, 2007
Messages
2,384
Location
Santa Maria, California
Great Job on the fence. I build one several years ago in the front of my house, but I cheated and bought the sections and added the Newel Post Balls and the Grape Picket Casting Inserts. The parts came from King Metal as well. Like I said it has been several years (6-7) since I built this and now needs paint (Peeling). Each section is bolted to each of the posts and I think I can get the sections out and have them powder coated. If that is outside the budget, I'll sandblast and repaint by hand.
 

shovel

Well-known member
Joined
Dec 26, 2008
Messages
477
Location
Port Neches, Texas
Cool project and thanks for sharing. I really appreciate the step-by-step photos. This is a time drain on your part, but is really neat for guys like me. And from one OCD guy to another... Quit worrying about the "mistakes". My best friend (Also an OCD guy) tells me to stop! "Its good enough for who its for". That's the signal to quit f...ing with it; Its done! Thanks again and NICE JOB!
 
OP
J

Jack Olsen

Super Moderator
Staff member
Joined
Mar 22, 2009
Messages
6,678
Location
Los Angeles
Thanks, everybody.

Where did you rent the welding video's from and do you remember the titles?
I rented both the Steve Bleile and the Ron Covell MIG/GMAW tapes from www.smartflix.com . $10 for a video rental is kind of irritating, but it’s cheaper than buying them.

Hell YEAH!!!! Nice job. How do you like that black and decker angle grinder??? They have them at my Wally World for 20 bucks.... Those shin bangers are a killer!!!
Thanks. I’ve still got a bump where the shin hit the steel. But the bleeding finally stopped. I like the grinder a lot -- my points of comparison are a few throwaway Harbor Freight grinders, though. If I could get more of the Black & Decker for $20 each, I could have avoided the annoyance of having different tools to looses disks. Oh well.


For the little booboo with the support leg being between two pickets. My suggestion would have been to move it over the 1.5"-2" and hide it behind a picket. Your eye would notice that it's standing out more than it would notice it's very slightly off center. After time, even you (the project owner who sees and knows of all things wrong, when noone else does) would probably forget about it.
I think you’re right. I’ll see what the wife has in store for it, plant-wise. If it’s still going to be vines, then I’ll leave it the way it is -- it won’t be visible at all. If it keeps catching my eye, I’ll bring the sawzall out, or maybe paint it white to match the wall.

Looks great, what a huge starter project. what's next!!!!!!
Finishing the fence by connecting it to the house is next -- I’m planning a gate on either side, and then (once we clear out some of the bushes and stuff) maybe some kind of frame around the big window and a protective thing for the bottom part so the kid doesn’t run through the glass in the future. I also picked up some pipe the other day for a small swingset for the kid. And then, since we’ve got a postage stamp of a back yard, but I’ve got an idea for deck and a kind of pergola cover for it. I guess I want this welder to earn its keep. ;)


Nice work for your first project. The jig you made was just what I would of done.

1 When welding any parts like you did. You need to clamp them down while you weld and only remove them when they are cool. That will keep the walking of the metal down to a minimal. .
Thanks.

I did keep the sections welded down while they cooled. But I suspected I’d still see some bending. It wasn’t terrible -- but they’ve got to be straight when you string them together.

2 I normally weld them on the top and bottom of the stringers. That way they are not seen when looking at it from the street. .
I thought about welding top and bottom. But in the case of this fence, I’m going to see it more (anc closer) from the back than the front. But your way is smarter for most fences.

3 I normally make each foot out of tubing that is large enough to slide the pickets into with a piece of 3x3 flat stock welded to the bottom. then either bolt them through or weld them up. Makes for leveling the whole thing out easier. .
I’m not sure I understand this. Do you mean you manufacture the posts and the base plates together, mount them, and then add the sections of fence between? I thought about putting the base plates on before I stitched the whole thing together, but was worried it would give me less lattitude in terms of getting the thing straight. If I was using more traditional posts, with punched stock for the pickets, I’d probably do posts first -- assuming that’s what you’re suggesting.

But I have to say that you have a good choice in saws. I also have a Makita carbide cut off saw and I would not trade it for another abrasive. .
My saw is a Milwaukee, not a Makita. Do they look the same? It’s a low-RPM cold cut model and it’s been great to work with.

For a first timer you also have a nice assortment of C clamps and vise grips. .
There was a sale at Harbor Freight. Hard to resist, knowing that I'll only be using them occasionally.

Dont be afraid to jump into any welding projects. The more you weld the better you will get. .
That’s what I realized about half way through. All the repetition was improving my skills. A grinder took care of most of my sins. A cutting wheel and new pieces came to the rescue when I screwed up big time.

Just always have something near by to put out those pesky fires that will start when you least expect it. .
I've got three extinguishers there, now. But I want to move in a sand bucket and also one of those pressurized water extinguishers. I also do the ‘hang around and do something else at the end of the day’ trick, just to be safe.

I also put in a big ventilation fan above the welding area -- if I can believe its specs, it replaces all the air in the garage every 4 minutes or so.

Good luck with your future projects.
Thanks!
 
OP
J

Jack Olsen

Super Moderator
Staff member
Joined
Mar 22, 2009
Messages
6,678
Location
Los Angeles
so what was the price diff between yours and the neighbours?
I haven’t ever talked to this neighbor -- he’s not out much, and didn’t come out even when I was in front of his house taking measurements with a caliper and a tape measure. I guess I’m glad he didn’t call the cops. I was informally quoted between $100 and $150 a linear foot, based on my description. My actual material costs were about $5 a linear foot. Bandages for the cut are not included in that figure. ;)

you managed to do you jigs just about exactly how a professional shop would to it. good thinking on your part, you improved your precision and your throughput.
Thanks. I appreciated the jig a little on the first panel, and A LOT by the third and fourth...

welding cast iron is really tough. actually the lower the quality of the cast iron the harder it is to weld. typically when you weld cast iron the weld will hold and the cast will break right next to the weld. the reason is the the weld is bieng laid down at a high tempature and when it cools it will shrink. if the cast is not strong enough to handle the 'pull' it will recieve then its going to break and it will break at the point of highest stress....right next to the weld.
there are a couple of tricks that you can use to counteract that with what you were doing.
one is that you hold the thing on with just a couple of quick tacks (or very short beads) in the center of the flats on opposite sides.
you can also not completly seat the thing on the top of the material. by leaving it up just a 16th or so hopefully it will just pull down as it cools.
the other thing you can do is to take a torch and heat the area to be welded so the tempature of the metal is closer to the tempature of the weld bead.
you can also place the top of the metal tube (with the finneal on it) in a gas BBQ to heat up as you are welding the other as you pull them one at a time.
I suspect that in the coming years I’m going to have some of them come loose. It depends on how much use the boy gives the fence, I suppose. I can always clean it up and re-weld it, but I realized I can also squirt in some structural adhesive if one fails, and probably be good to go. I dropped some of them on concrete and they held up. But they’re cheap finials. I’ll be interested to see how they hold up.

I guess when it’s done professionally, though, the standards have to be a lot higher. In my case, the customer (me) is going to be pretty slow to complain. ;)

lets talk about the bending or curve that was happening in you fence.
this applies to all metal welds you will deal with and will be more noticable when doing thin material (espically tubing)
when you lay a weld bead (an electrical weld) you are applying a large amount of quick heat to a small area. doing this will heat and expand the base metal where you are making the weld (remember when you heat something it expands).
also you will be applying the filler material at an elevated tempature as you are laying the bead. as this bead cools it will shrink and will want to contract the side of the metal that you are welding on. if you do a whole bunch of small welds over the lenth of that material it will tend to want to bow over the lenth of the material.
If you ever get to the point that you are welding on the body panels of a car (like welding in a patch panel) there are a couple of things you can do to counteract this.
first, if you were to try to make the weld right across in one pass it would warp and pull the panel in ways that you would not want. you will want to place small tacks at 1'' to 2'' increments to hold the panel where you want it. once tacked in place you will want to inspect that it is in fact where you want it and lined up as you would want. if its not you can grind the tacks now and correct it before its too late.
you will want to 'stich' weld the panel by making a series of short half in to one inch welds placed several inches apart. do you welding at the lowest setting that will get you the penetration that you need, any more than that will cause more shrinkage and warping and could cause 'blow through'.
if you lay a weld and see that the panel is shrinking in that spot, you can hammer and dolly the area (preferably when the weld is still hot or at least warm) and this will tent to expand or stretch the metal back to the desired shape. be carefull not to over do it as you can over stretch the metal and cause as much trouble if not more.
continue to 'stich' weld the panel in little by little untill you have created a complete weld. dont get too anxious as you can warp it by not letting enough time for cooling between welds.

the 'art' of bieng a chemist is in the knowing of how the chemicals will act or react when you put them together.
the difference between bieng someone that can weld and bieng a welder is in knowing how the metal will react when you weld it. dont feel bad as you cannot learn it all in a book and you cant learn it just by practice. it takes a combination of the book learning and years of experience to master the art.
Thanks. I’m definitely at the very beginning of the learning curve.

But one of the good arguments for long and detailed posts by amateurs is that they tend to bring the guys who are great at it out of the woodwork. I know that in my own profession, the best way to motivate me is to show me the half-assed version. I'll go crazy until I can make it right.

Before welding it up. I wouldn't have cut all those blocks, but maybe 1 or 2. Put down an upright or two, tack it and keep moving down.... but of course there is more than one way to skin a cat.

Reason to tack is #1 it won't move around too much, and #2 if you need to adjust something or redo something, it's easy to take it apart.
The one thing I liked about having enough blocks to do the whole section out flat was that I could fit it all together, and compress it down to a very precise 96”. I could also do diagonal measurements to make sure the full set was squared away. The way you describe is faster, but the way I did it allowed a little more control for a guy with only very basic skills.

Great job on that fence. That highrise in the background looks familiar. Nice neighborhood, i hate you :D
Yeah, but I bought on this street five years ago, when prices were pretty insane. I’m scared to think what the place is actually worth, now. But then, I ain’t moving - I already redid the garage.

Cool project and thanks for sharing. I really appreciate the step-by-step photos. This is a time drain on your part, but is really neat for guys like me. And from one OCD guy to another... Quit worrying about the "mistakes". My best friend (Also an OCD guy) tells me to stop! "Its good enough for who its for". That's the signal to quit f...ing with it; Its done! Thanks again and NICE JOB!
Writing it all up took some time. But it’s easy with cheap digital cameras to just have one sitting out in the garage.
 

WH0DAMAN

Well-known member
Joined
Mar 18, 2007
Messages
106
Location
Oregon
You did a wonderful job and the way you presented it was refreshing. Thank you!!

Was that sock white before the blood? Thats a lot of blood!!!! Glad you are OK.
 

Yonnee

Active member
Joined
Aug 6, 2008
Messages
38
Location
Beyond Cranbourne, Vic. Australia
Nice job Jack. Pretty ambitious for a first time welding project. Top stuff.

One question though... What would you have done differently had you measured correctly the first time? 39' divided by 5... 7' 9 and 77/128" each? LOL


Maybe a front gate next...

gate002.jpg


gate001.jpg
 

mktbully

Well-known member
Joined
Dec 8, 2008
Messages
73
nice porsche...3.2?

oh and the fence is pretty sweet too. :D
i have to build window boxes so this is a good inspiration for me.
thanks!
 

kbs2244

Well-known member
Joined
Nov 11, 2006
Messages
14,065
Very nice.
More so for a first project.
I like the jig.
The only thing I would do different is use epoxy for the finials to picket joint.
That way you are not trying to weld different kinds of metal.
That is always hard. Even for a pro.
That is a non structural joint and in your climate epoxy should last longer than you.
 

stioc

Well-known member
Joined
May 2, 2005
Messages
1,317
Location
SoCal
Saw your post on WW too, good job. Maybe I missed it but how'd you bolt the thing to the cement? Are you still doing track events? I gave it up about 5 years ago but keep wondering if I should jump back in. The half finished race car in the garage is making me do something either get rid or it or finish it.
 
To avoid these ads, REGISTER NOW!
Top Bottom