To avoid these ads, REGISTER NOW!

My First Garage - 20x20 Attached in Vancouver, Canada

lowside67

Well-known member
Joined
Sep 29, 2017
Messages
135
Location
Vancouver, BC
Hi everyone,

Happy to be able to join and to share - I have been a car enthusiast for as long as I have had a driver's license, but living in one of the most expensive cities in the world has meant that it has taken some time to be able to afford to buy a house with a garage. My fiance and I finally bought our first detached home in November of 2018 and for us, the reason to go from a condo to a house was clear: for me, a garage to play with my cars, and for her, a hot tub.

House.jpg


This is our house, a modest 1985-built house in a suburb outside of Vancouver. We took this photo about 2 weeks after we moved in, just after I put up some Christmas lights for our first Christmas in the new house. It's approximately 2100sf on a ~6300sf lot which is actually pretty generous in our city - we bought this house because the back yard, while small, backs on to a nice creek providing us an unusual level of privacy and quiet in otherwise dense neighborhoods we were looking in.

Sketchup_Resized.jpg


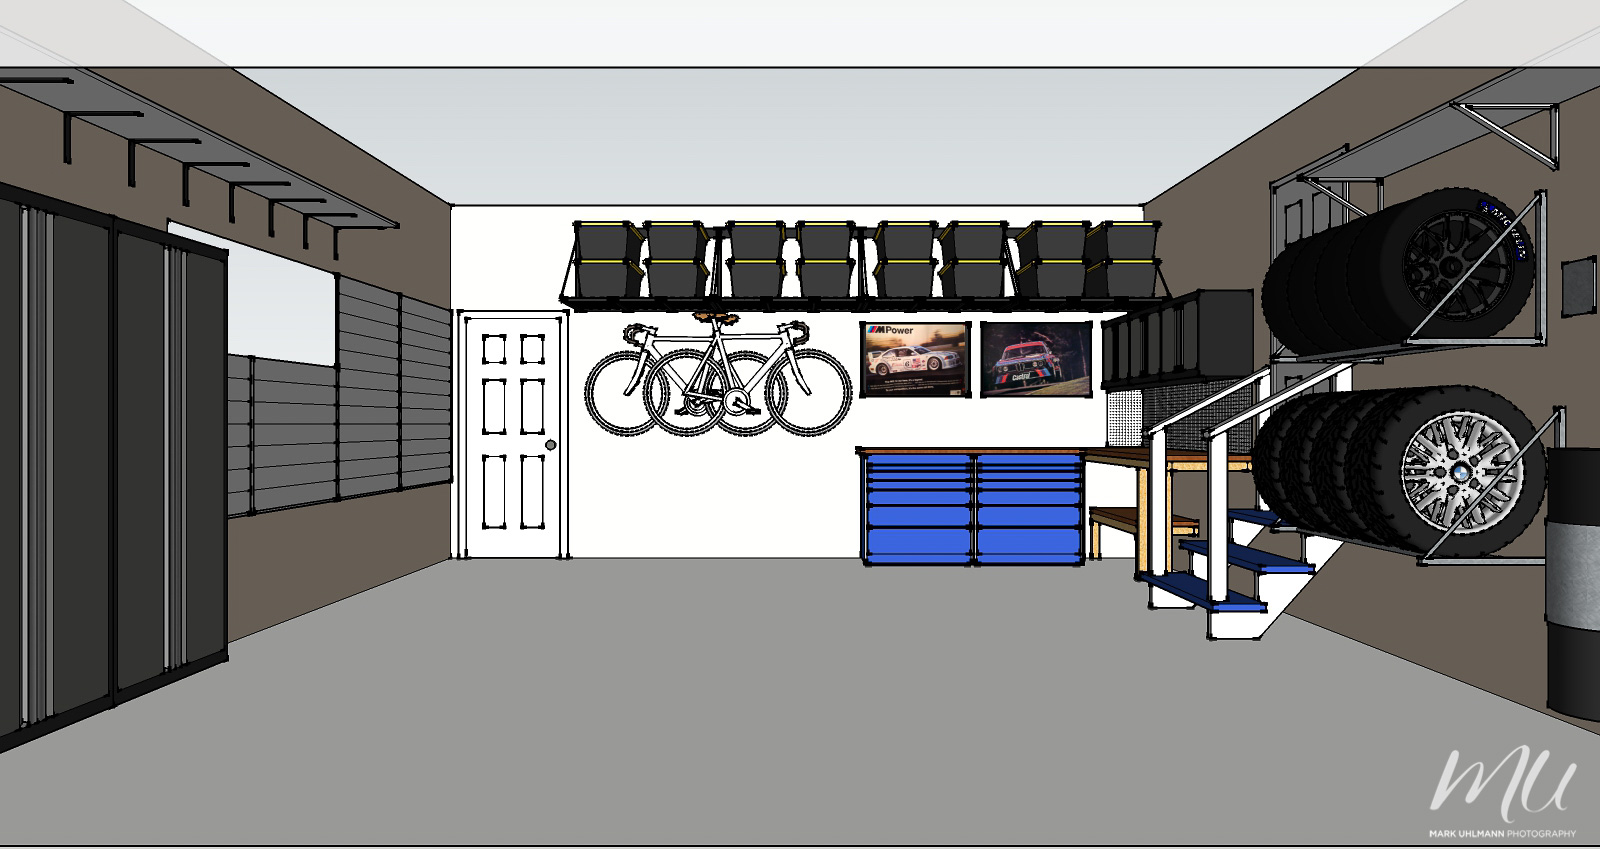
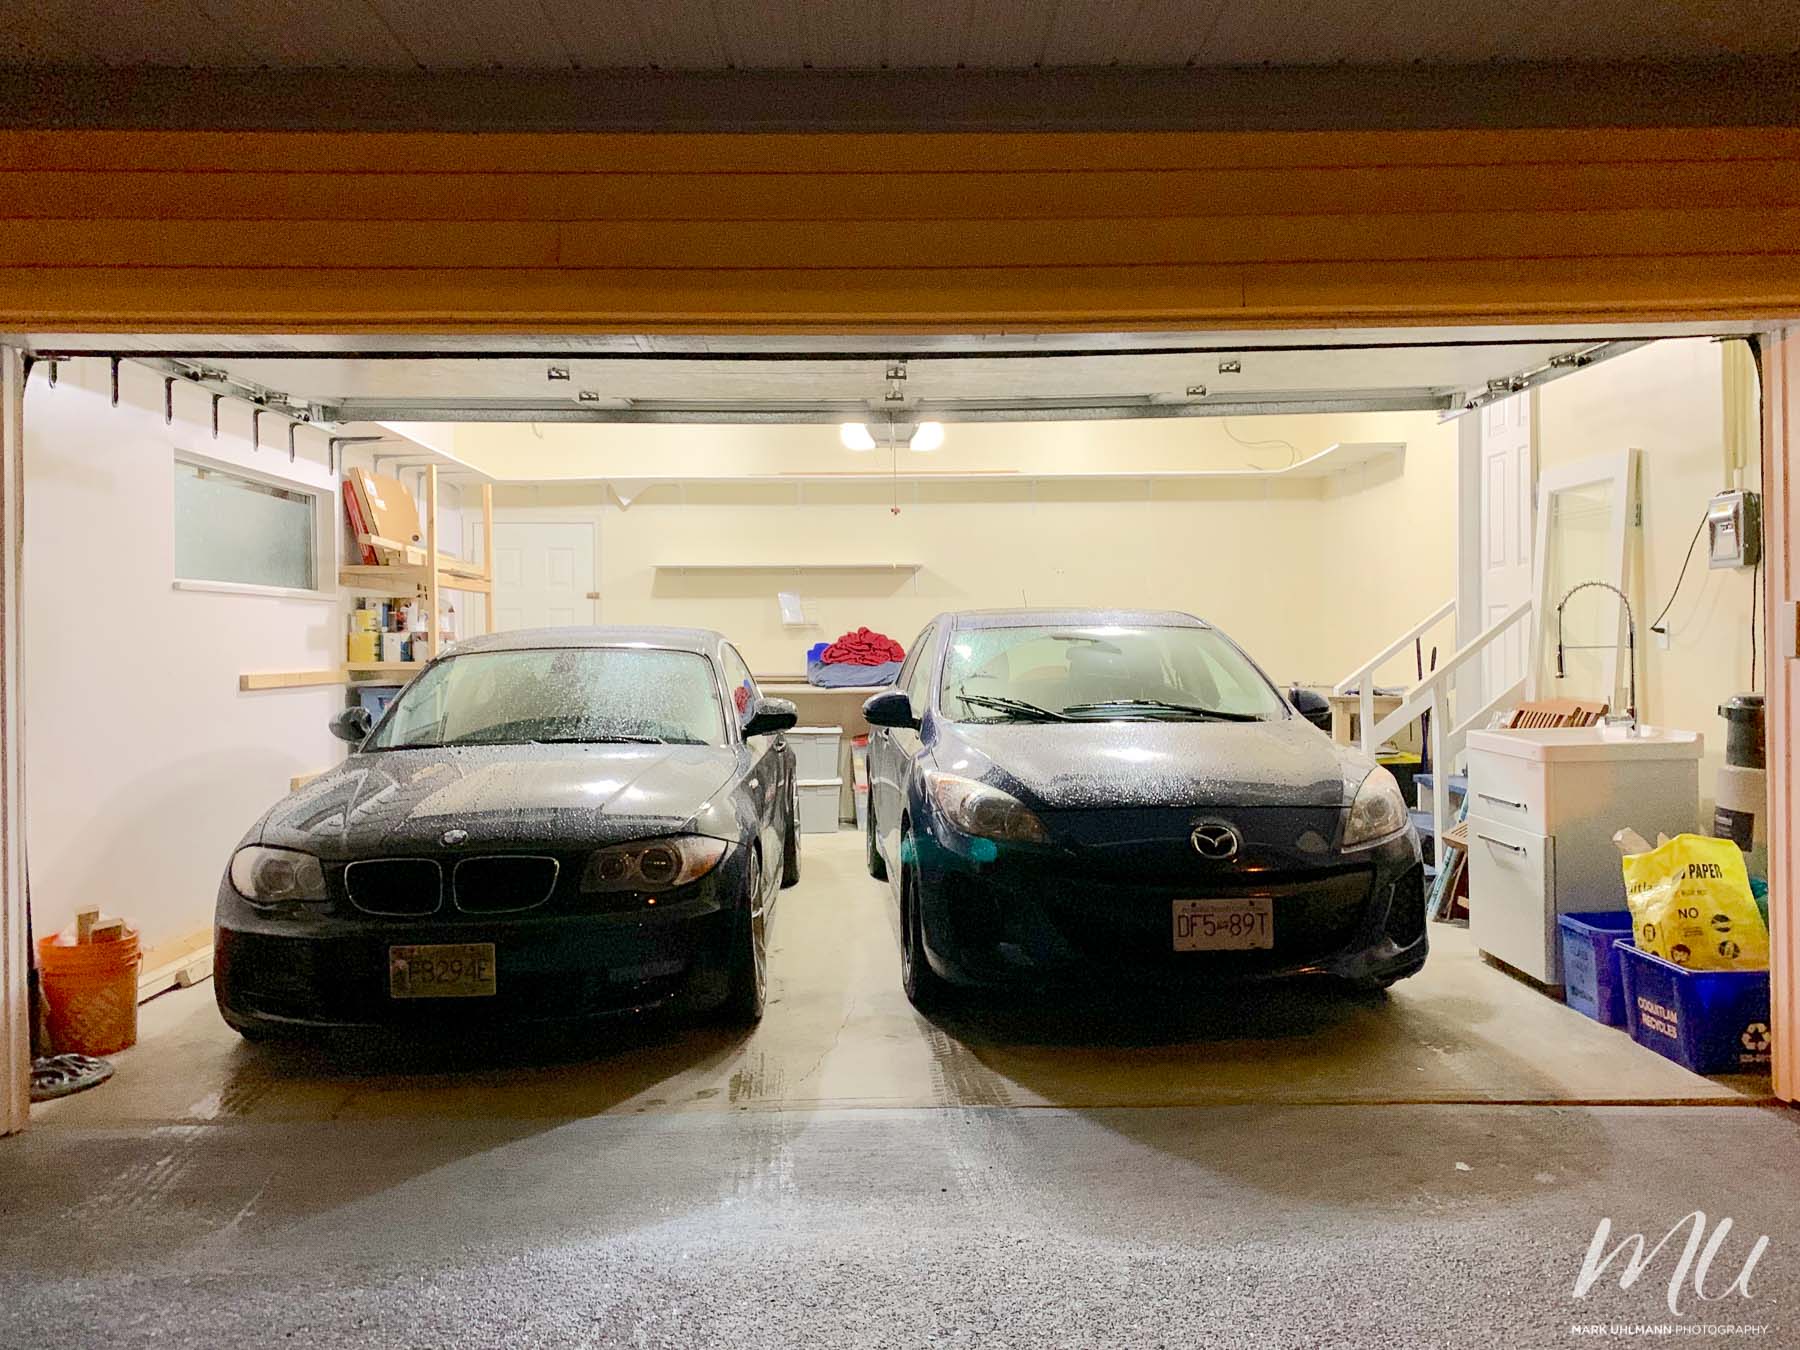
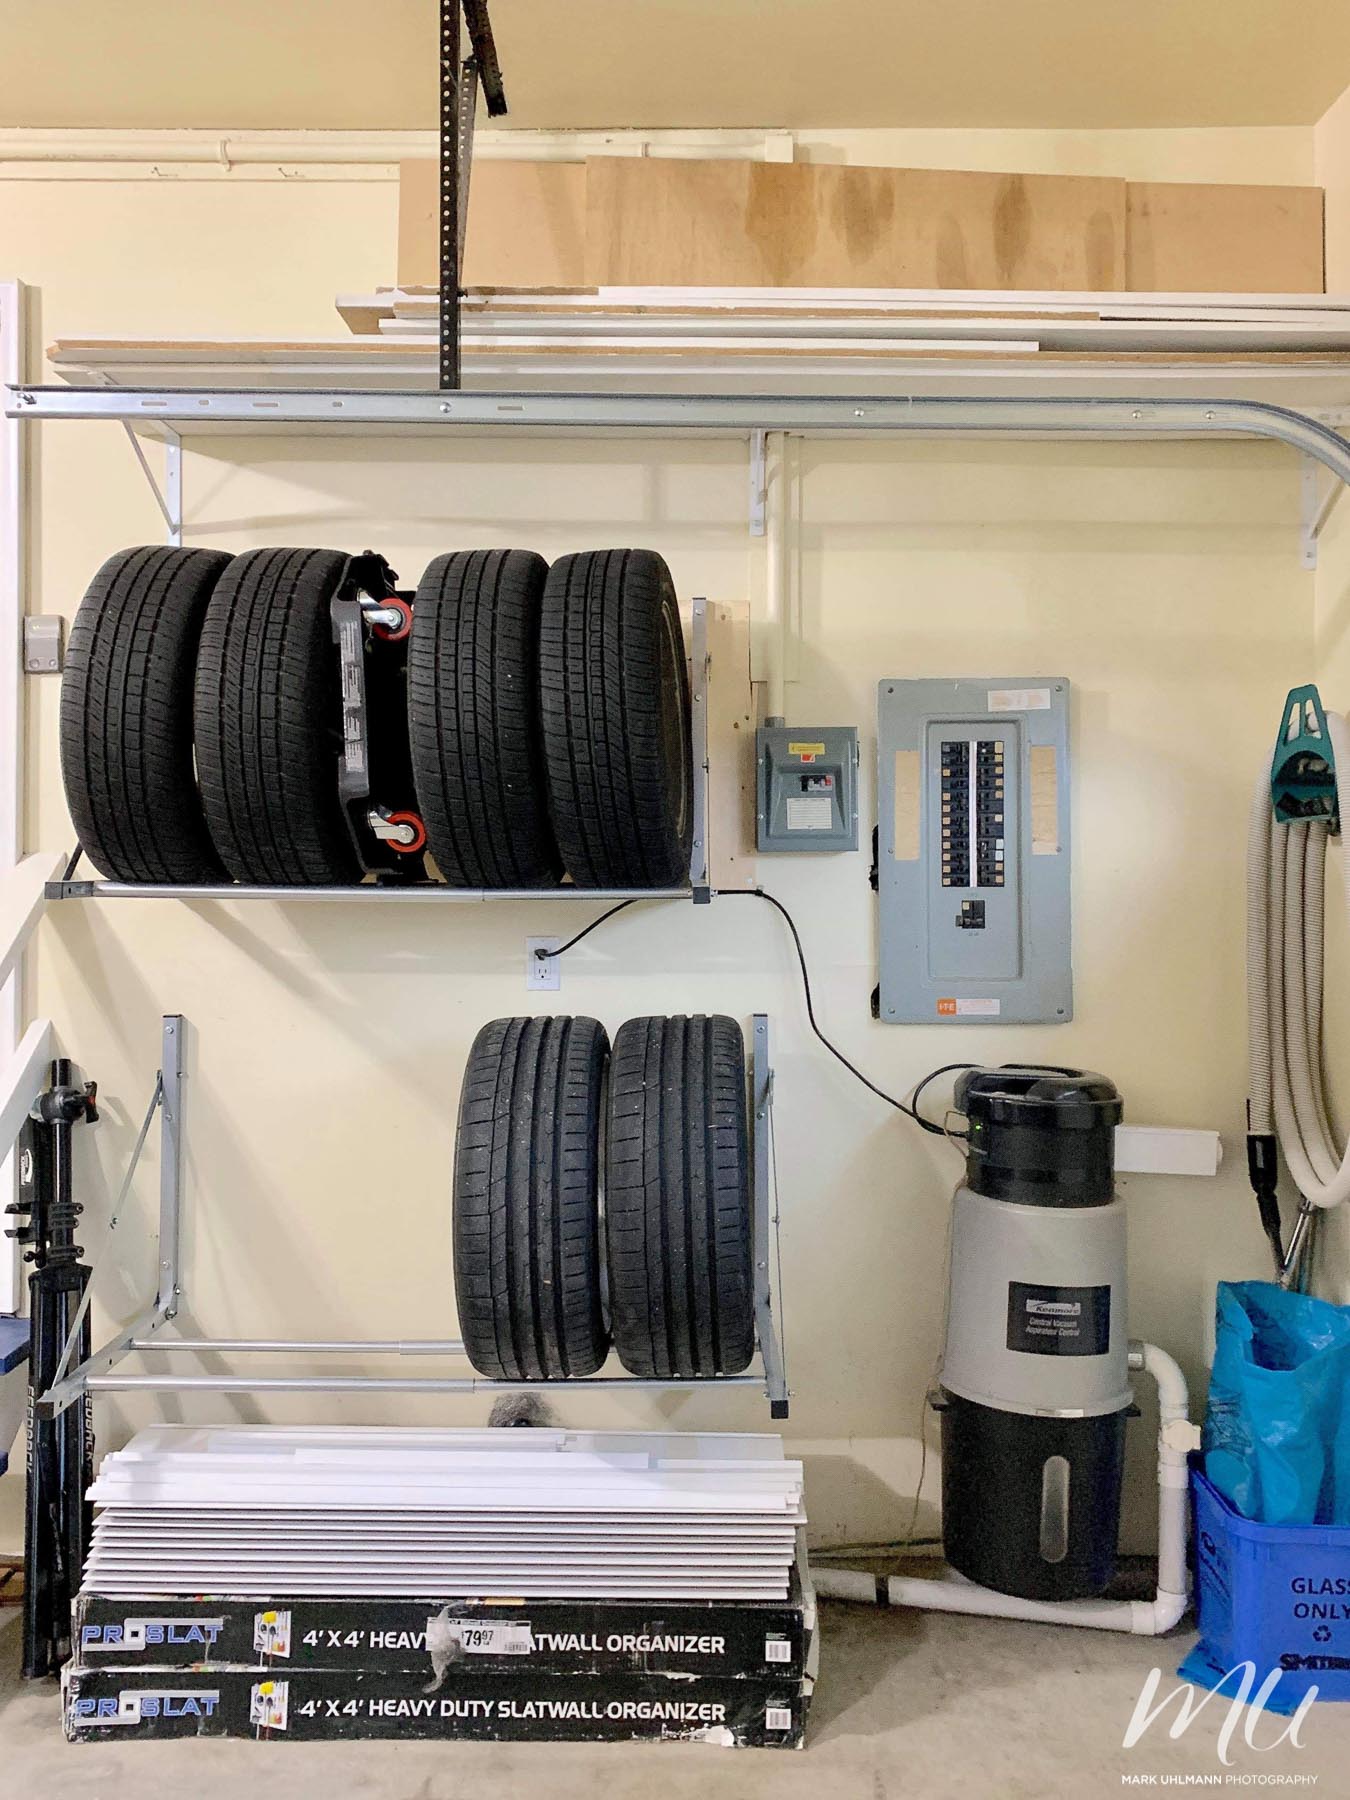
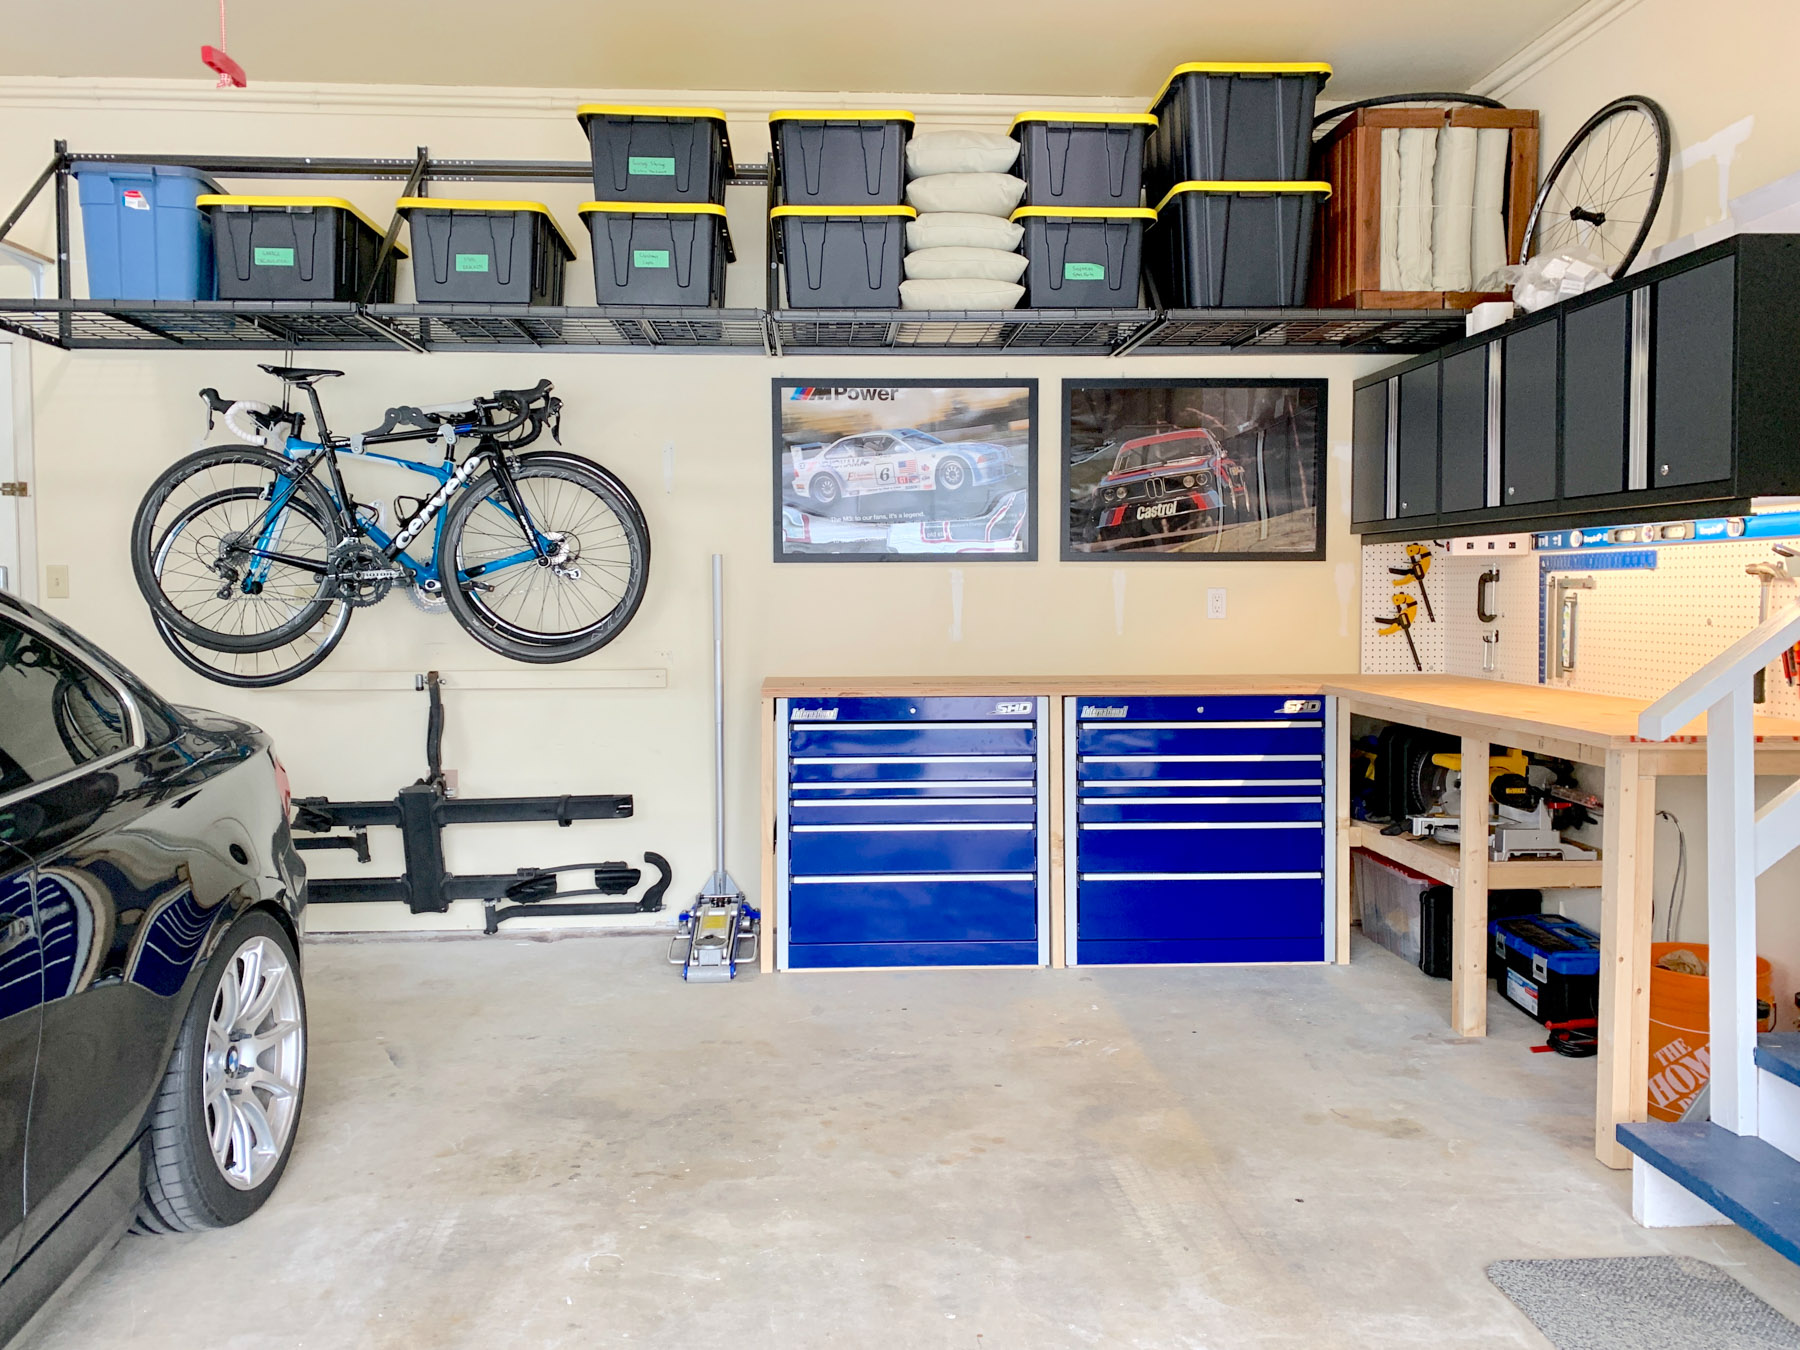
This is my vision for the garage. It is 19'6 x 19'6 x 10' with a doorway to the backyard and a set of stairs from the house to take up space. The goal is to be able to work on my BMW over the winter when I don't drive it, while parking our second car (Mazda3) inside. Then in the summer, the Mazda will live outside and the BMW will be the only car in the garage. To be able to park 2 cars inside and drive one daily will require being ultra-efficient with space around the car for maximum flexibility.

Looking forward to sharing,
Mark
 
To avoid these ads, REGISTER NOW!
OP
L

lowside67

Well-known member
Joined
Sep 29, 2017
Messages
135
Location
Vancouver, BC
Here are a few photos of the garage I snapped at the open house - this is the previous owner's layout. As you can see - he has a lot of shelves built on the exterior wall and a full set of shelves at around 8' up going around the garage. The challenge is that I will definitely need the exterior width so the wood shelving built to the ground will have to go. He also has had a shop sink plumbed in.

Tom1.jpg


Tom2.jpg


This is the first night we moved in with my BMW in its new home:

Day1_Front.jpg


Day1_Side.jpg


-Mark
 

redheelerdog

Well-known member
Joined
Jan 19, 2019
Messages
87
Location
Montana
Hi Mark, I like your house. I was born and raised in Mt. Vernon, WA not to far from you.

I like your garage plan, show us some more pics when you get time.

:thumbup:
 
OP
L

lowside67

Well-known member
Joined
Sep 29, 2017
Messages
135
Location
Vancouver, BC
After I spent a few hours in the garage, I had successfully removed most of the shelving the previous owner built on the left hand side of the garage. It was well constructed of 2x3 but I need the full width of the garage to be able to park two cars inside and have room to work on one. I also started taking down some of the wall-mounted shelves where I intend to have my work bench. I would have left more of his shelving up but they are not very strong with the style brackets he used - I wish he had triangulated them.

Day2_Front.jpg


After taking down the shelving, I was able to repurpose some of the 2x3s to build a good strong frame for a work bench - the frame is mounted into the studs on the two sides that adjoin the wall for extra strength. I had this Ikea desktop left from an office desk that I had built in our previous combo that will serve as a bench top for now. I don't intend to weld or do anything too intensive - my hobbies are largely automotive and house-related and aside from a vise, this should be fine.

Bench_1.jpg


-Mark
 
OP
L

lowside67

Well-known member
Joined
Sep 29, 2017
Messages
135
Location
Vancouver, BC
I went away for a work trip for a few days and I came back to an early Christmas gift to myself from NewAge cabinets:

Cabinets_1.jpg


I ordered 3 Pro 3.0 Upper Cabinets for above my work bench and 2 Bold 3.0 Multi-Use Lockers for next to my garage door on the far wall. I would have preferred to spend the extra for the Pro cabinets for the lockers but at 24" deep they would not have fit as well, the 18" deep Bold cabinets were perfect. I ordered the Lockers from Home Depot and the Uppers from New Age directly as that's where each of them was cheapest at the time I was ordering. Ironically they got drop shipped together anyways.

The cabinets come fully assembled as they are welded at the factory and mine were extremely well packaged and had no signs of damage whatsoever. The only assembly needed for the lockers were putting the feet on. In my case, I actually sat the back of the cabinet directly on the concrete foot around the perimeter of my garage and installed the front adjustable feet to achieve level in both directions.

Cabinets_2.jpg


If I had one complaint with the lockers, it is that the thinner gauge of steel allows them to flex a bit and ultimately the doors are a little sticky to open and close as our attempts to level the cabinet in every way and then screw into the wall under tension have pulled them slightly out of square. It's minor, I can happily live with it, but that's the closest thing to a complaint I can find.

Cabinets_3.jpg


The upper cabinets are absolutely awesome - not a thing I'd change about them. The sturdier gauge of steel is immediately obvious and I am glad I went with them for my more regularly used bench cabinets. I have drilled some holes to positively mount a powerbar since this photo was taken and intend to attach some mounting plates for Akro Mills bins to the doors of another cabinet for hardware storage.

Pallets.jpg


In case anybody is wondering... pallets totally fit into a Mazda3.

-Mark
 
Last edited:
OP
L

lowside67

Well-known member
Joined
Sep 29, 2017
Messages
135
Location
Vancouver, BC
Next up was some strong overhead shelving for bin storage. I had seen the ProRack by Proslat Overhead Shelves at a friend's place and decided they were the way I was going to go. At $125cdn each, they are great value in my opinion.

Shelves_1.jpg


Each 4' section is rated for 800lbs (when mounted in series, each shelf goes down to approximately 500lbs as they share mounting points) and they meet all my other criteria: all metal, grating rather than solid shelving, and look good!

Shelves_2.jpg


They are not difficult to install, but given that the first stud in my wall is barely accessible, unfortunately everything is approximately 1.5" off of perfectly lining up. The shelves have provisions for this but I have drilled a few supplemental holes in the mounting brackets to add additional lag bolts into the studs.

Shelves_3.jpg


I opted to install these at 7' - just over my cabinets. I am not that tall so the lower height makes it easier for me to get heavier bins up and down - I intend to store surplus car parts, etc in the bins so I anticipate these bins getting up there in weight. I will install 2 more in due course, they didn't have any more in stock at my local store and I decided not to bother ordering them, just will be patient.

-Mark
 
OP
L

lowside67

Well-known member
Joined
Sep 29, 2017
Messages
135
Location
Vancouver, BC
Another project I wanted to knock off sooner rather than later was to mount some tire racks and repurpose one of the previous owner's shelves to mount up high to store basically all the other shelves.

OverheadShelf.jpg


I found some good triangulated 16" shelf brackets on Craigslist for $4 each and bought a box of 12. With only 3 in place, the shelf feels plenty sturdy to hold spare wood.

I also wanted some tire racks - ideally folding and ideally cheap. I bought 2x Hyloft folding tire racks from Rona for $25cdn each on a boxing day sale. They are nothing special, but for the price feel well enough built and seem to hold tires with no issues around sagging, etc.

TireRacks.jpg


As you can see, I also removed the sink the previous owner had left. While nice to have, directly inside the door to the house is a laundry room with a good utility sink so happy to repurpose all the floor space in exchange for a very short walk through one door. You can also see 4 boxes of Proslat Slat Wall that my dad found hiding at Habitat for Humanity for 50% off - a future project for the far wall.

-Mark
 
OP
L

lowside67

Well-known member
Joined
Sep 29, 2017
Messages
135
Location
Vancouver, BC
I've had my old Craftsman (I think probably a Waterloo built box, possibly SPG) for some time now stored at my parents' house and have had my eye open for an upgrade. I wanted a 54" box but came across a deal I couldn't resist for the SPG International Super Heavy Duty boxes at 50% off at Home Depot. Sigh... credit cards... such enablers.

Boxes_1.jpg


I love having freight deliveries at the house. According to SPG, the 35" cabinets I bought are ~255lbs each so approx 600lbs with pallet and packaging.

Boxes_2.jpg


Very pleased with the colour and finish when I first pulled off the packaging. No assembly required except to add casters (which I did, and now intend to remove at some point to lower them and integrate them with a bench top to lengthen my work bench into an L).

Boxes_4.jpg


I was very pleased to see a pair of slides for the top socket drawer - a very nice feature not found on all 54" boxes, let alone 35" wide boxes. The slides are fully reconfiguarable to change the order of the drawers which I did.

Boxes_3.jpg


Both boxes assembled and in place.

Overall_Boxes.jpg


Progress in the work bench corner so far - coming together!

WheelsOff.jpg


The next project is actually doing some work on the car - dropped the front suspension to change the front springs and reassemble.

-Mark
 

PhantomEB

Well-known member
Joined
Feb 6, 2006
Messages
6,682
Location
Medicine Hat, AB, Canuckistan
Awesome job from the other side of the Rockies!

If I were to make some suggestions? Mount the tire racks higher to the point the tire just fits. Why? I imagine you only gonna be swapping tires twice a year so have the more useable space where you can use it.

Other thing, are you going to be moving the tool boxes much? If not, take the casters off so it makes it closer to all one level across the toolboxes to the workbench. Oops in seeing that you already got that planned out.
 
OP
L

lowside67

Well-known member
Joined
Sep 29, 2017
Messages
135
Location
Vancouver, BC
Mark, amazing progress so far! Best of luck in pursuit of your vision. She's coming together nicely.
Thanks! I have a long way to go but it's fun so far.
Awesome job from the other side of the Rockies!

If I were to make some suggestions? Mount the tire racks higher to the point the tire just fits. Why? I imagine you only gonna be swapping tires twice a year so have the more useable space where you can use it.

Other thing, are you going to be moving the tool boxes much? If not, take the casters off so it makes it closer to all one level across the toolboxes to the workbench. Oops in seeing that you already got that planned out.
Much appreciated! I actually change tires very frequently as I autocross my car a lot so I wanted the lower set to be very handy, the taller set are about as close to the garage track as I wanted to flirt with. Definitely am planning on lowering the tool boxes - to be determined what I will do as a countertop.

Cheers,
Mark
 
OP
L

lowside67

Well-known member
Joined
Sep 29, 2017
Messages
135
Location
Vancouver, BC
Absolutely - I am envious of all the fantastically large garages on GJ but in our neighborhood, this is about the best you can get.

Cheers
Mark
 
OP
L

lowside67

Well-known member
Joined
Sep 29, 2017
Messages
135
Location
Vancouver, BC
Small bits of progress, but progress nonetheless!

Posters1.jpg


Framed and mounted the two BMW motorsports posters I have been hanging onto for awhile. The left one is particularly exciting for me as my first racecar was a white E36 BMW similar to the one pictured - it is a new old stock poster from 1997, the year of my first racecar. The right is just a cool photo!

I also made a few small pieces of progress around the work bench:

Posters2.jpg


I wanted to have a powerbar permanently mounted to the underside of my upper cabinets as I don't intend to rip open the walls to add more power in this house - it's not our "forever" house and we are hoping to build a house with garage before I turn 40. My must have was through mounting points to bolt it positively - I didn't want key hole mounting.

For $24cdn, I ordered this from Amazon - very pleased with it:
https://www.amazon.ca/gp/product/B01M2WK54B/?tag=atomicindus04-20

I also wanted a 4' LED light for under the cabinets and ordered this for $29cdn:
https://www.amazon.ca/gp/product/B012ENQO14/?tag=atomicindus04-20

I have mounted the LED with doublesided adhesive tape and it shows no signs of going anywhere - I will revisit if it ever comes down but given how light it is and that I don't need to touch it to turn it on and off (wired to the powerbar switch), I think it will be fine.

Next project is organizing a clean way to run that cable down to the work bench - I have some ideas using the excess "J Trim" edging from my Slat Wall.

-Mark
 
OP
L

lowside67

Well-known member
Joined
Sep 29, 2017
Messages
135
Location
Vancouver, BC
I need to do the same for my overhead lights - I am leaning towards 4x 4' LED panels and I think they will be sufficient but will pull down the bulbs I have now to try to calculate the total lumens they output to compare.

-Mark
 

sean Buick 76

Well-known member
Joined
May 7, 2013
Messages
3,221
Location
Edmonton Alberta
Welcome to the forum, you are doing an awesome job! I grew up on Vancouver Island and I know Vancouver is a tough place to get a big garage... Keep up the great work and consider doing some fold down tables or workbenches off the walls. I have a few pics of what I did in my also cramped garage to make it work.... I flip the table and benches down when the second vehicle is out, but they only take up a few inches with flipped up. Click on the link below to see what I did it may help.
 

Geteos

Well-known member
Joined
Jun 10, 2018
Messages
55
Location
Toronto
Nice looking garage! I'm in Toronto, so I feel your pain on house prices and garage sizes especially being a car guy too. But looks like you're making good progress on your build. I find with smaller garages putting stuff on wheels is key so that you can rearrange things to suit the project.
 
OP
L

lowside67

Well-known member
Joined
Sep 29, 2017
Messages
135
Location
Vancouver, BC
Made a little progress today, knocking a few projects out. First up was secure the second segment of pegboard and hide the wiring for the powerbar behind it at the same time:

CleanerBench.jpg


Next up, hang two more overhead shelves and hang the bikes up under it:

2MoreShelves.jpg


Need more bins! We always need more bins!

Next up I am going to engineer a system to hang the bike rack in the position it's in there off of the ground. After that, I do have a giant quantity of slat wall to be installed - just haven't quite found the motivation to get started on it yet.

-Mark
 
To avoid these ads, REGISTER NOW!
OP
L

lowside67

Well-known member
Joined
Sep 29, 2017
Messages
135
Location
Vancouver, BC
I've definitely been delinquent in updating this thread, but have been working on a few projects over the past while. As I showed in the initial render - my goal was to take my toolboxes off their wheels and build the work bench into an "L" shape to expand my work area.

IMG_6328.jpg


I lagged a 2x4 to the wall with a post under it, then used some Simpson 2x4 joist hangers to support the middle segments. I was wrestling between just endnailing a frame but liked the look of the hangers and it let me lag the 2x4 to the wall without having to balance the whole frame.

IMG_6349.jpg


IMG_6359.jpg


I built an overlapping design of two 5/8" sheets as I had exactly 1 1/4" of space for the top to fit under the peg board and was not feeling motivated to take it off and remount it. I glued and screwed each of the two layers and now that it has cured for a few days, I am very pleased with how sturdy it all feels.

IMG_6390.jpg


IMG_6392.jpg


Today was take the toolboxes off wheels, shim them, and shove them into position. I crunched a finger pretty good with the first one, learned my lesson and the second was relatively painless. Now that it's all in place, I'm thrilled with the final product.

Down the road my hope is to have a stainless top fabricated to lay over the plywood. I am picking up my new vise this weekend and will mount it for now, I think the budget needs a little recovery time!

-Mark
 

Terranova

Well-known member
Joined
May 12, 2008
Messages
854
Location
Grove City, OH
Man, everything is coming together great!!

I really like the color combo on your rendering in your early post. Any plans for paint?
 
OP
L

lowside67

Well-known member
Joined
Sep 29, 2017
Messages
135
Location
Vancouver, BC
Man, everything is coming together great!!

I really like the color combo on your rendering in your early post. Any plans for paint?
Honestly - I wasn't going to, and started bolting stuff to the wall, and now I wish I had given it more thought. I am going to see if the previous owner left me any matching paint and I might just do a few sections such as next to my work bench where the previous brackets ripped off paint.

-Mark
 
OP
L

lowside67

Well-known member
Joined
Sep 29, 2017
Messages
135
Location
Vancouver, BC
Oh man, it's been awhile! Now that I've been sticking around the house pretty closely, I've knocked off a few small projects in the garage (mostly just cleaning back to the previous state of organization).

My dad had given me 16' of slatwall that we found on closeout which I've put up on the left wall of the garage:

slatwall.jpg


That stuff is quite a pain to install and makes a HORRIFIC mess when you cut it, but looks good when it's up and I've actually used its functionality to tweak my layout as I get more and more tools to put away. If I was paying full price, I'd absolutely have bought the 8' wide panels as the vertical "seams" are far more time consuming than laying the "planks".

2MoreShelves.jpg


This is an old photo, but shows an area that I hadn't quite figured out what to do with - over the left door and the missing shelving that connects to it. I found one more of my tire racks on sale and put it up over the door:

tirerack_door.jpg


Then I reinstalled one of the shelves I'd taken down, cut down to fit next to the tire rack, and with much sturdier brackets:

shelf.jpg


A few more additions to my work bench as well including a Yost 204 4" machinist vise (that bad boy is heavy!), some more stuff on the pegboards, and some general cleaning:

bench2.jpg


bench1.jpg


More to come!

-Mark
 

PhantomEB

Well-known member
Joined
Feb 6, 2006
Messages
6,682
Location
Medicine Hat, AB, Canuckistan
Looking great! I ain’t visited this thread in a while and actually said how come he ain’t yanked those wheels for a lower workbench addition......scrolled down and ya had done so!
 
OP
L

lowside67

Well-known member
Joined
Sep 29, 2017
Messages
135
Location
Vancouver, BC
Another day, another project. One of the things I've wanted to address since moving in was the stairway from the garage to the house:

before.jpg

(Use your imagination that there are two railings there...)

The primary rationale to make a change was that when I park two cars in the garage, literally every inch matters - those stairs are exactly where my driver's door opens and a bit more clearance there would make it a lot easier in and out of the car.

materials.jpg


I decided to go with an all aluminum design featuring black treads to coordinate with all my cabinets. I am losing a step from the top but it is no real loss in my opinion as you have the bottom of the door frame as the "top step".

assembled.jpg


I appreciate that there are no holes at all on the top of the treads which will make it easier to wipe them down. However, it meant accessing the small bolts between the stringers and the treads was a terrible job... time consuming and awkward.

testfit.jpg


A quick test fit confirmed that they were going to work as designed, but I just decided I couldn't live with all that ripped off paint near my brand new stairs. I had 9 cans of paint left from the PO but none were for the garage... so off to see about a paint match.

finished.jpg


I am pleased with the finished product. Like everything in my garage, the 90/10 rule applies and I didn't do any great detail to repair the wall beyond filling some holes with putty, but I can definitely live with this level of improvement. The paint match is decent so I won't have to repaint a ton of the garage.

A few more projects coming...

-Mark
 
OP
L

lowside67

Well-known member
Joined
Sep 29, 2017
Messages
135
Location
Vancouver, BC
It seems like I'm talking to myself a little bit these days, but I like having this as a "journal" and I hope that others with smaller garages might find inspiration from little things here and there.

bench.jpg


I've continued to refine my workbench in small ways - I added another light over the side with the toolboxes, then ran the power cable through one of the cabinets and interfaced it with the powerbar I have mounted underneath. This way all of my task lighting is on one simple, easy to access switch.

overall.jpg


I haven't posted an "overall" shot in awhile... it shows mostly the same, just lots of small tweaks. The stairs, the 3rd tire rack over the man door, a sneaky home for an extra ladder I bought, a solution for storing the lawnmower and recycling bins, etc.

I bought a new project car and expect it to be here in a few weeks so I'm trying hard to really finish all the organizational projects as best I can as I will be absorbing lots of "stuff" with the new car.

-Mark
 
OP
L

lowside67

Well-known member
Joined
Sep 29, 2017
Messages
135
Location
Vancouver, BC
A real issue in the garage was a lack of good lighting, now that I am working on the race car regularly. My garage came with two screw in fixtures on the ceiling which the previous owner put dual bulb splits into and then 800 lumen CCFL loop style bulbs into them.

I finally ordered some lights - I went with a set of 6x 5000 lumen "dual row" 4' LED fixtures. Super cheap, about $128 CDN from Amazon for all 6.

What a difference... night and day doesn't even begin to describe it. I have manually locked my camera to preserve settings between the two photos, a day apart, so this is an extremely accurate depiction in the difference.

Before:
1F7A5132.jpg


After:
1F7A5133.jpg


The after doesn't even fully do justice as 2 of the 6 LED strips are actually above the garage door when it's open; it's even brighter with the white door down and all 6 fixtures shining.

I found lots of opinions on how much light is "just right" in the lighting forum. For those who are wondering, 30,000 lumens is PLENTY in a ~20x20x10 garage. I genuinely would not want more without either a dimmer or the ability to turn some off.

-Mark
 

mmsheb

Well-known member
Joined
Mar 30, 2008
Messages
364
Location
Wisconsin
Mark,
What a difference! Could you provide more information on what you purchased from Amazon? Thanks.
Mike in WI
 

Jayman17

Well-known member
Joined
Feb 6, 2017
Messages
3,793
Location
Seattle, Wa
Just came across your thread. I like what you have done with the space you have. Those tool boxes seem very stout, I've never seen that brand before. How are you liking them?

The lighting changes you made are well worth it. Big difference! Enjoy your shop.

Jay
 

wasfast

Well-known member
Joined
Apr 10, 2014
Messages
874
Location
San Diego CA
I'm also interested in the specific fixture you got from Amazon. A link or photo of the fixture would be really helpful. The light intensity is really great in your garage!
 
OP
L

lowside67

Well-known member
Joined
Sep 29, 2017
Messages
135
Location
Vancouver, BC
Those tool boxes seem very stout, I've never seen that brand before. How are you liking them?
Those are SPG International Professional boxes - now out of business. They are extremely well built - approx 250lbs per 36" box and I got a crazy deal at 50% off MSRP as they were clearing them out. I don't have many frame of references but they felt like 3x the boxes I was seeing at Home Depot, etc.

On the lights... these are the specific fixtures I bought:
https://www.amazon.ca/dp/B07G2Q4VZN/?tag=atomicindus04-20

They definitely are cheaply built, no doubt about it, they are flexy and the included clips are minimal but I am not worried about them falling off. They are honestly insanely bright - I found reviews that say all the "cheap" LED fixtures off Amazon will dim after 1,000 hours, I won't be bothered if that happens.

-Mark
 
To avoid these ads, REGISTER NOW!
Top Bottom