To avoid these ads, REGISTER NOW!

As promised, my HF 44” bench build

ScottsGT

Well-known member
Joined
Jan 1, 2014
Messages
4,883
Location
Lake Wateree, SC
Okay, lets get the ball rolling! Here’s where it all started. I had this horizontal **** collector under my cabinets. I just didn’t have enough drawer storage. My tool box was out in the middle of the garage floor and it created a wall all by itself.
nnkGPN.jpg


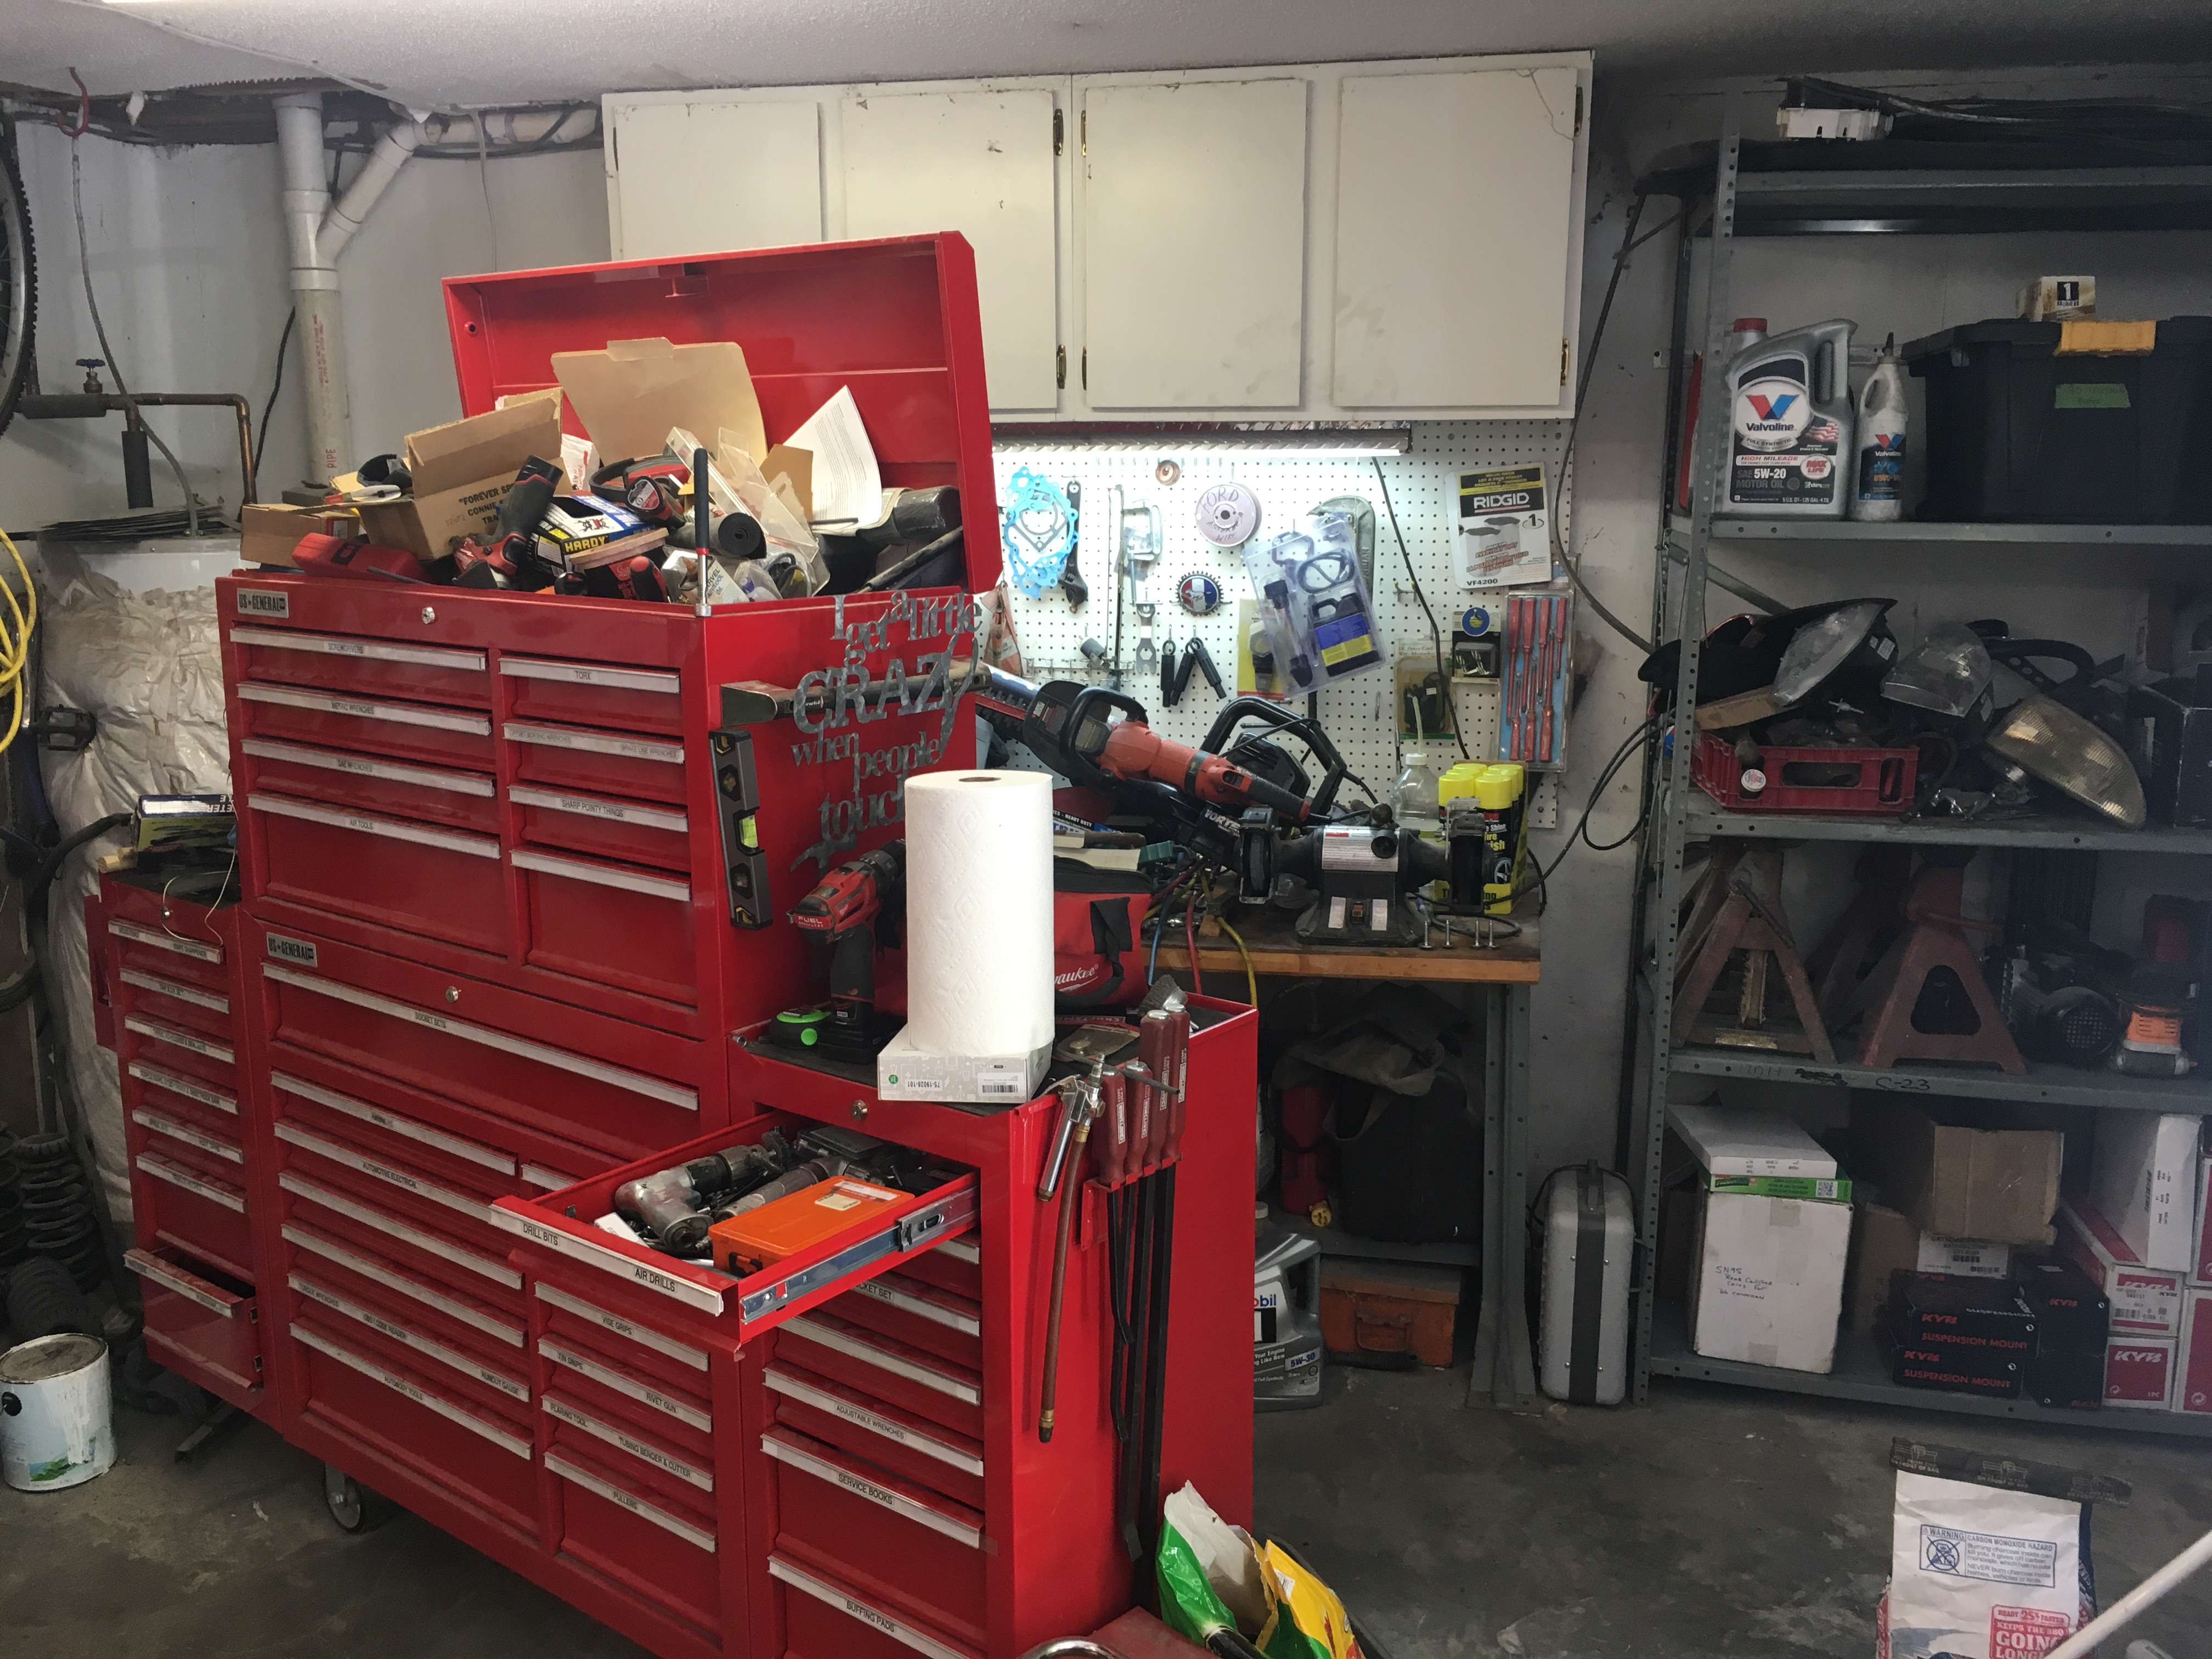
To the right of the shelf in the corner was another huge pile of yard tools. I got frustrated trying to access anything on the shelf due to having to move a ton of yard tools. So I came up with a sliding wall.
bkkGN2.jpg


I felt like my life was much easier, so I wanted to tackle the bench situation. So, first thing I did was to move the bench that was way over size and put the tool chest under the cabinets. I disconnected the pins on the lid that lock the drawers so I can keep the lid closed at all time.
h8LH6k.jpg


So, off to HF after my settlement cards came in.
pVEchl.jpg


At home and unloaded
ygabjl.jpg
 
Last edited:
To avoid these ads, REGISTER NOW!
OP
S

ScottsGT

Well-known member
Joined
Jan 1, 2014
Messages
4,883
Location
Lake Wateree, SC
Let the fun begin
So i thought I would make a set of “legs” to put the box up on top of and remove the casters.
6DbyNB.jpg


That was a joke. I made it too wide and once it was in place, there was no way to lift the box up enough to get it out. I actually had to cut it apart underneath the box to get it out. Changed thngs up and used two cement blocks.

Framework begins....
Using tie down straps I held the bottom 2X2 angle in place and then tack welded the end uprights.
8mMox5.jpg


Dropped the frame out from under the box and proceeded to weld it all up.
Vvfn4r.jpg


Added the “feet” that support the casters and floor locks.
LBS0rz.jpg


Next came the paint. Lots of discussion on this with another thread. I had planned on powder coating, but costs were escalating out of control. I wound up going with Rust Oleum black hammertone in the quart can, using enamel harderner and a sponge roller and a sponge brush. Had to work fast since the harderner makes the paint cure quickly.
UcJIip.jpg


So it came time to get this behemoth inside the frame. All by myself. I have a hoist over in the corner, and thought about it after watching the other thread. But clutter...
k9cCOt.jpg


So I decided on another approach. I laid the box down on it’s back slightly elevated. After removing drawers of course. Had to make things lighter. Slid the frame up in place and used a pry bar and a block to lift the box while I used a BMFH to pound the frame in place.
dR3kf5.jpg


Wrapped a tie down strap around the top and lifted it up on its feet.
Pi519d.jpg
 
Last edited:
OP
S

ScottsGT

Well-known member
Joined
Jan 1, 2014
Messages
4,883
Location
Lake Wateree, SC
So time for the top. I bought this 72” X 24” butcher block top from Global Supply. Wasn’t quite as wide as I needed. My first plan was to simply take a router to the bottom of the top and make recesses for the box edges to sit up inside. But after thinking things through, I realized these lips are 3/4” and the top strength would have really been compromised. So I pulled out the piece of 3/4’ ply sitting behind the hoist in the above photo. Cut it into pieces that would fill in and provide proper support between the box and the top.
WRwAhR.jpg


I was working so fast last night, I forgot to take photos of the ply spacers! But I decided to some width by taking red oak and ripping them down to 1 3/4” and stack them around the edges using my biscuit cutter and gluing up one layer at a time. Front piece is 3/4” wider to conceal the plywood spacers used.
76P76o.jpg


Here’s some photo of the finished product. I like the way the paint turned out. It was a big savings since it was only $50 for paint, rollers and harderner.
foVNAX.jpg

sPpwsz.jpg


This is the side I’ll be working from when using it as a real work bench. You can see the receivers I added. I still need to build my vise bracket so I can add it.
0JScRT.jpg


Another shot after my second coat of BLO to protect the wood.
76P76o.jpg


Got some more cleaning to do in the corner and rearrange the drill press and grinder.
sKY29n.jpg


Hope these came out OK. Imageshack is giving me some problems today.
All in all, after the $500 cards from the HF settlement, I dropped another $900 in everything to make this come together.
Again, I blame everyone here for this effort to straighten up my garage and organize my life a little better.
 
Last edited:

Muggzy

Well-known member
Joined
Jun 29, 2013
Messages
583
Location
Orange Co., NY
Very nice. I like the top a lot. I'm guessing this takes place of the wall created by the original location of the tool boxes since your hitch receiver is towards the "back" ?

Sent from my Pixel XL using Tapatalk
 
OP
S

ScottsGT

Well-known member
Joined
Jan 1, 2014
Messages
4,883
Location
Lake Wateree, SC
Yea, kind of like a “galley kitchen” I’ll work between the two boxes. The front of the box is where I keep odds and ends, shop towels, bandsaw parts, PPE, sandpaper’s, etc.
 

isuhunter

Well-known member
Joined
Aug 27, 2011
Messages
532
WOW you are my hero! This is awesome! Now I wish I could find a side cabinet in the first gen series to go with mine.
 

Rarified27

Well-known member
Joined
Jan 22, 2010
Messages
763
Location
Between PA and NJ
This is out-f'ing-standing and you just gave me a great idea for how to mount a second vise I don't always need on the bench.

The paint really did come out nice as well. Really great job on this!
 

taumac

Well-known member
Joined
Aug 30, 2011
Messages
8,104
Location
Brooksville, Fl
Great build. It’s refreshing to see someone do a 44 build different. There have been many who built a their version of the” Steevo bench” bench it’s great to see one that can moved. This has been one of my biggest question. Sure the bench looks great but what happens when need to moved it? You sir made a bench that can stationary but can also be moved when needed. I see many many people coping your design.
Great job. [emoji481]
 
OP
S

ScottsGT

Well-known member
Joined
Jan 1, 2014
Messages
4,883
Location
Lake Wateree, SC
Great build. It’s refreshing to see someone do a 44 build different. There have been many who built a their version of the” Steevo bench” bench it’s great to see one that can moved. This has been one of my biggest question. Sure the bench looks great but what happens when need to moved it? You sir made a bench that can stationary but can also be moved when needed. I see many many people coping your design.
Great job. [emoji481]

Thanks, but I stole that idea from here as well. :bounce: You can thank Robert Haas for this idea.
 
To avoid these ads, REGISTER NOW!

Mohawk Dave

Well-known member
Joined
Oct 7, 2012
Messages
5,068
Location
SoCal
Looking good. :beer: I see you did receivers, as did I. This is how I store my stuff for them.

It has quite a bit more stuff since these photos and I'm actually ready to build a 2nd one.
 

Attachments

  • 20180415_172353.jpg
    20180415_172353.jpg
    94 KB · Views: 194
  • 20180415_184107.jpg
    20180415_184107.jpg
    62.5 KB · Views: 198
  • 20180415_184123.jpg
    20180415_184123.jpg
    65.9 KB · Views: 210
OP
S

ScottsGT

Well-known member
Joined
Jan 1, 2014
Messages
4,883
Location
Lake Wateree, SC
Love your receiver tree! I’ve only got the vise and a buffer, probably keep the buffer elsewhere and i just wanted the vise removable so if i need the table top as a receiver for my table-saw.
It does feel good getting clutter off benches and the floor. Completely changes your attitude about working.
 

buckwheat_la

Well-known member
Joined
Feb 10, 2016
Messages
597
Location
Lethbridge
That looks really nice and well built, but I have a question about something that I just don't understand. What was the point of taking the caters off the tool box to make a frame that rolls around anyways? Not trying to be a ***, genuinely asking.
 
OP
S

ScottsGT

Well-known member
Joined
Jan 1, 2014
Messages
4,883
Location
Lake Wateree, SC
Height. Notice there os only about 1” of clearance now. And the HF casters would allow the bench to move, even locked. You can lock the wheels, but they would still swivel.
 

larry4406

Well-known member
Joined
Jan 27, 2006
Messages
18,979
Location
Northern Virginia
That looks really nice and well built, but I have a question about something that I just don't understand. What was the point of taking the caters off the tool box to make a frame that rolls around anyways? Not trying to be a ***, genuinely asking.

Looking at this build, I am having the same thoughts as well. The "out riggers" allowed him to drop the bottom of the box closer to the floor (reducing toe kick space) which I am not sure of the benefit. It also created the outrigger protrusions which I think could be configured with additional storage space.

I do like those leveling feet. Link? Perhaps these would have made the bench too tall if kept under the boxes.

Nice build.
 
OP
S

ScottsGT

Well-known member
Joined
Jan 1, 2014
Messages
4,883
Location
Lake Wateree, SC
I don’t work from the drawer side, so no toe kick was required. All work will be done standing between the bench and the toolbox like a galley kitchen. I added the 3” of red oak to give myself enough overhang on the working side for toe space.
Tops came in 24” & 36” widths. I wanted it in between and needed a dropped edge on the drawer side, so I went with the 24” and added.

Floor locks were from Northern Tool. They come in various sizes. I had to cut one side of the release bar off to get them to fit.
 

Mohawk Dave

Well-known member
Joined
Oct 7, 2012
Messages
5,068
Location
SoCal
Love your receiver tree! I’ve only got the vise and a buffer, probably keep the buffer elsewhere and i just wanted the vise removable so if i need the table top as a receiver for my table-saw.
It does feel good getting clutter off benches and the floor. Completely changes your attitude about working.

Agreed. As you can see with my Buffers I put big *** ziploc bags over the wheels to keep shop dust/metal off them. :beer:
 

larry4406

Well-known member
Joined
Jan 27, 2006
Messages
18,979
Location
Northern Virginia
@ScottsGT

So at 3+ years how is this build holding up?

What if anything would you change if you were to do it again?

I need to move my boxes off the side wall and configure them into a tool island. Need to reclaim space/consolidate.

Would be a back to back version of what you have - each side having a box and drawer unit. I would add some additional ground clearance compared to yours.
 
OP
S

ScottsGT

Well-known member
Joined
Jan 1, 2014
Messages
4,883
Location
Lake Wateree, SC
What would I change? Ground clearance! I only say that because I moved about 17 months back and to move the box we actually had to remove the castors and put furniture Dollie’s on each end to get it up the truck ramp.
Honestly, garage is a place holder for junk on my benches right now. I’m trying to settle into retirement and the garage has been low on priorities with everything else to do now. I’ve lost my 3 car garage and down to a large single car. No work space now.
 

M635_Guy

Well-known member
Joined
Dec 5, 2019
Messages
4,333
Location
NC
Honestly, garage is a place holder for junk on my benches right now. I’m trying to settle into retirement and the garage has been low on priorities with everything else to do now. I’ve lost my 3 car garage and down to a large single car. No work space now.
Oof.

As we're wandering in that direction (still 5-10 years away), we're talking about where we want to live. A lot of places we both like have have a small or no garage - not sure how that works since I have a car that isn't going to live outside and a bunch of tools that I won't be ready to give up quite yet.

I did recently see a place that has an outbuilding that has 6 spaces. I like that one a lot better :).

Fantastic build! Appreciate all the pix!
 
To avoid these ads, REGISTER NOW!
Top Bottom