To avoid these ads, REGISTER NOW!

My Conestoga Pole Barn 24x32x12' Mustang garage build

Nutty 5.0

Well-known member
Joined
Aug 25, 2008
Messages
250
Location
SE PA
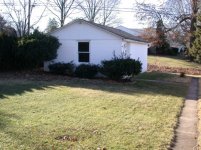
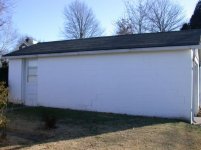
Been here for some time and haven't done my build on here yet. It started out as a 12x20x8 block garage that was getting pushed in from one side. Down low on the right hand side if looking at the garage from the outside the ground is about 1 - 2 foot high and the ground is pushing on it. It wasn't real bad though. We bought the house in Feb. 04 (on a very quaint .18 acre)and I was content with this garage for the time being. I had a two time magazine feature car: 93 Mustang that was done up nicely. So this would work for me.

Then sometime in October of 2004 I went out to the garage for something and found one of the glass panes broken in the old wooden door. It may have been from a stray rock from a mower as I do recall mowing myself that week before as it was warm-ish that fall. Keep in mind that this area is nice and older. There are some punk kids that walk by to and from school as the high school is only a few blocks away. :mad: Not that it was them or anything, but I didn't want to take chances. I guess you could say this was the day I determined I wanted my dream garage.

So I was ticked and even though I had started a new job a month before buying the new house with a slight pay cut to boot, I was on a mission because I could not have a garage that this would happen to. I started my search for pricing and options.

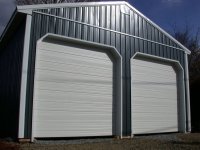
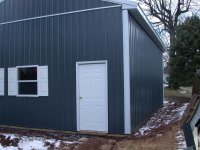
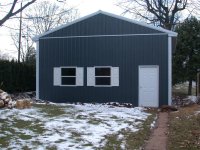
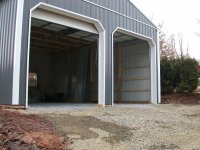
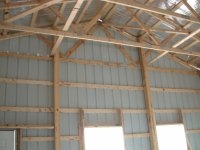
After settling on a pole barn and the local outfits I went with Conestoga for my 24x32x12 with ridge vent, roof insulation (both to keep from sweating) 12" overhang on the 32' sides, two 10x10' doors (Face alley and I'm on a corner with a tight swing) with NO windows! :) They're the commercial versions that I would later regret not springing for insulated. They're not real pretty, but I face the alley so I don't see them. I also went with 4' trusses spread also now wishing I went load bearing, but I'm making do. I had two windows and one man door facing the house. Since this was on an extreme tight budget I also opted not to use Conestoga for concrete which was the best move I will make as you'll learn later. I figured I'd get the structure up and worry about the concrete later as I could afford it.

I also checked with the local borough to see what I can and can't build. I was shocked I could build it as long as it didn't stick out beyond the width of the house (My case was 28') and no higher than 20' total which it was about 18.x'. Permits were given. It wasn't bad at all suprisingly dealing with them but since my property is only 50' wide I was shocked I could build what I did. I knew a lift was my biggest reason to build something and go with 12' ceilings. Should have went at least 12'6" for some extra room, but it worked out. I didn't want to tell the inspector/borough that a lift was planned for fear they wouldn't let me build for some reason. I know now it wouldn't have mattered but it was funny as he said "Why so high ceiling and doors? Do you have a ladder truck or something?" I said, "Yes, I do!" It was no problem. I guess because its such a residential area, etc and this was our first house was the cause for concern.

So I dealt with Don Zook who really made the process easy from Conestoga. They require 1/4 of cost when I approved the plans. Another 1/2 when the drop the material, and the last 1/4 when the build was complete. The papers were signed mid January. Don referred me to a local guy that does excavation and I think it was around a 1k.
 

Attachments

  • housegarage.jpg
    housegarage.jpg
    126.6 KB · Views: 764
  • DSCN2052.jpg
    DSCN2052.jpg
    103 KB · Views: 670
  • DSCN2149.JPG
    DSCN2149.JPG
    118 KB · Views: 814
  • Copy of DSCN2146.JPG
    Copy of DSCN2146.JPG
    112.1 KB · Views: 717
  • Copy of DSCN2147.JPG
    Copy of DSCN2147.JPG
    141.4 KB · Views: 747
  • DSCN2123.jpg
    DSCN2123.jpg
    58.7 KB · Views: 615
  • DSCN2090.jpg
    DSCN2090.jpg
    60.2 KB · Views: 593
Last edited:
To avoid these ads, REGISTER NOW!
OP
N

Nutty 5.0

Well-known member
Joined
Aug 25, 2008
Messages
250
Location
SE PA
I did leave out the part about tearing the old garage down. I got two dumpsters; one for block and one for the wood. I sadly don't have any pics but it was done by me and about a half dozen friends. Remember, very cheap! We started on a early Saturday January morning with snow on the ground. It was miserable! I went against a friends suggestion on renting a little front end loader from Home Depot. Needless to say later that Saturday night after much of it was torn down but some block, I picked one of those little front end loaders up and we spent Sunday knocking down the wall with that and fnishing the job. I should have went with that to begin with.

Some of my friends still hate me for the hard work we did that day but they've all used the garage and have shared many a beer later, so its all good!

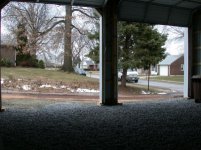
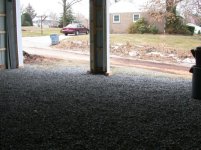
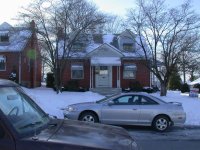
More pics here of the house right before we bought it. I guess this was December 03/January 04. You can see how narrow our lot is and shocking it was/is that I could pull off this garage. Note another issue I wish I did was excavate deeper so the incline isn't so steep to enter the garage. The left side is where the lift is... You know what they say about hindsight!
 

Attachments

  • DSCN2156.jpg
    DSCN2156.jpg
    88.6 KB · Views: 892
  • DSCN2160.JPG
    DSCN2160.JPG
    139.2 KB · Views: 1,001
  • DSCN2162.JPG
    DSCN2162.JPG
    133 KB · Views: 1,256
  • DSCN2165.JPG
    DSCN2165.JPG
    138.5 KB · Views: 1,208
  • DSCN2157.jpg
    DSCN2157.jpg
    89.9 KB · Views: 794
  • houseyard-1.jpg
    houseyard-1.jpg
    140.4 KB · Views: 707
  • housefront-1.jpg
    housefront-1.jpg
    151.8 KB · Views: 793
Last edited:
OP
N

Nutty 5.0

Well-known member
Joined
Aug 25, 2008
Messages
250
Location
SE PA
The garage was completed mid march in 3 days starting on a Wed. I sadly had to work every day and couldn't be there but things went ok. They called me once with an issue as where I had it staked out on of the posts needed to go right where the footer from the old garage was. You can see that in the first set of pics. They moved the garage a little more to the corner of the property to the left if looking at the garage doors. I never mentioned but I really wanted a 28' wide but was told by the borough I couldn't only to later be told I could have. What also screwed me up was even though the old garage was 2' off the property line, they wouldn't grandfather me on the old one which I figured. It now had to be 8'. Not a huge set back, but the plan was to have a driveway off to the left of the garage for parking, but such is life.

I don't have really any shots of the concrete being done, but it was $2050 when I had the cash to do it in April 05. Much sooner than expected. Thank God for overtime!!! Conestoga quoted like 4k! :shocking: Remember the part about the excavator? He saved me a bunch. The concrete outfit he referred I came to find out later that was who Conestoga used so I saved 2k. That was nice and that price was very competitive. Most quotes elsewhere were $3k+. They did nice work and had two friends that had Conestoga build them garages also use the same concrete guys. They still priced around and no one came close. :thumbup:

My concrete was 6" vs. Conestoga's 4" and I had 4500 psi mix too. The extra $50 for the $2050 total was for the little 3'x3' pad outside the man door to meet the old sidewalk. Once again cheap although I can't say I regret that too much. I would have loved to put in all new walkway out to the garage but it was 50-60' plus I'd have to get the old pulled out. It will wait.

I still didn't have the driveway done. Trying to find someone to pour asphalt for only a 24' x 8' section was harder than I thought. No one would even call me back. About a month after the concrete in May a local guy was re-pouring a driveway for a few neighbors and gave me a quick $600 quote if I did it today. I bit as I was told that was a good price after some quick calls to some friends.

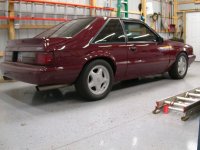
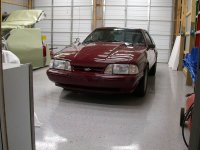
The 89 LX 5.0 mustang here I miss dearly. It was my daily driver. We sold the wife's Beetle to provide a down payment for the house and I gave her my truck to drive. She loved the truck and I could find a beater. Yeah right!, I found a nice score about a year before we bought the house with 38k on the car. After all I couldn't drive a piece of **** every day! We took a couple thousand from her car sale so I can buy this. Its in Kentucky now along with his brother who bought my 93 Mustang show car in 2007. Small world!

I don't have any bare shots here at work of the floor just being painted. I went with U Coat it. I loved it. It went on easy even in the bad July 05 humidity when my father in law helped me put it down. After a couple years and heavy use of the lift though, its starting to really take its toll even after a good scrub. I'm thinking Race Deck in the future although I haven't found a set up to work around the 2 post Bend Pak right now without it looking right. Unless Jorgen has some ideas???!!!

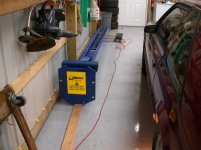
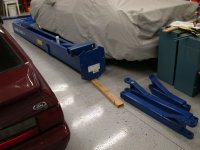
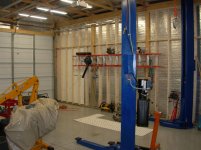
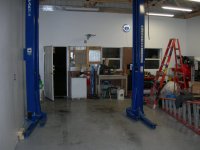
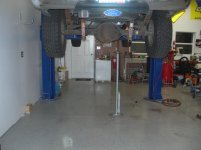
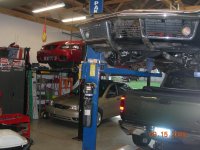
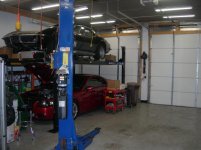
But these shots are from Dec. 05. I had just taken delivery of the MX-10AC Bend Pak lift at this point. Thank you again over time!
 

Attachments

  • DSCN2866.jpg
    DSCN2866.jpg
    133 KB · Views: 634
  • DSCN2865.jpg
    DSCN2865.jpg
    137 KB · Views: 660
  • DSCN2863.jpg
    DSCN2863.jpg
    130.2 KB · Views: 746
  • DSCN2864.jpg
    DSCN2864.jpg
    135 KB · Views: 686
  • DSCN2838.JPG
    DSCN2838.JPG
    118 KB · Views: 797
  • Roll_bar_NMRA_show_055.jpg
    Roll_bar_NMRA_show_055.jpg
    76.4 KB · Views: 675
  • Roll_bar_NMRA_show_053.jpg
    Roll_bar_NMRA_show_053.jpg
    73 KB · Views: 770
Last edited:
OP
N

Nutty 5.0

Well-known member
Joined
Aug 25, 2008
Messages
250
Location
SE PA
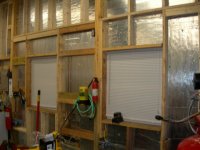
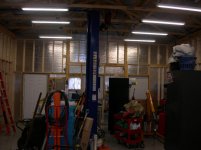
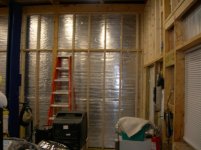
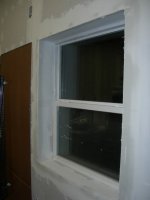
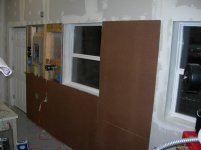
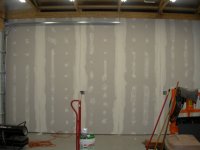
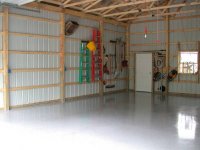
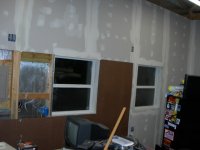
I'll fill in the gaps later, but more progression. Studded out the walls so I can hang drywall. Put up 1/2" thick 12'x4' sheets up right. Ceiling will be just insulation and is now completed.
 

Attachments

  • DSCN0219.jpg
    DSCN0219.jpg
    109.7 KB · Views: 1,314
  • DSCN0218.jpg
    DSCN0218.jpg
    108.1 KB · Views: 1,156
  • DSCN0217.jpg
    DSCN0217.jpg
    118.7 KB · Views: 1,084
  • DSCN0216.jpg
    DSCN0216.jpg
    97.9 KB · Views: 1,148
  • DSCN0215.jpg
    DSCN0215.jpg
    95.3 KB · Views: 1,203
  • DSCN0214.jpg
    DSCN0214.jpg
    86.6 KB · Views: 1,381
  • DSCN0213.jpg
    DSCN0213.jpg
    97.6 KB · Views: 1,437
OP
N

Nutty 5.0

Well-known member
Joined
Aug 25, 2008
Messages
250
Location
SE PA
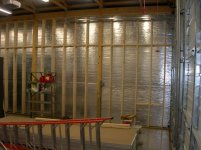
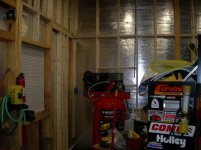
Some more of the studding. I used 4'x8' sheets of 2' thick foil faced foamboard I got from Home Depot by taking advantage of a 10% off when you apply for one of their credit cards. I also bought the CH 80 gallon 2 stage air compressor from HD too on the same deal. This was approximately fall of 2006. Over the past two years I was working my day job which is shift work and pulling as much as overtime as I could. I would work part time for a garage as a mechanic when I wasn't working my day job. And then helping a buddy seal coat driveways any other available days in the summer. Yeah I didn't have much of a life, but I was providing for my garage!!!
 

Attachments

  • DSCN0240.JPG
    DSCN0240.JPG
    106.5 KB · Views: 714
  • DSCN0239.jpg
    DSCN0239.jpg
    120.4 KB · Views: 636
  • DSCN0238.jpg
    DSCN0238.jpg
    92.1 KB · Views: 637
  • DSCN0237.jpg
    DSCN0237.jpg
    96.5 KB · Views: 599
  • DSCN0236.jpg
    DSCN0236.jpg
    88 KB · Views: 630
  • DSCN0234.jpg
    DSCN0234.jpg
    108.5 KB · Views: 739
  • DSCN0235.jpg
    DSCN0235.jpg
    115.1 KB · Views: 773
Last edited:
OP
N

Nutty 5.0

Well-known member
Joined
Aug 25, 2008
Messages
250
Location
SE PA
The rest of the stud pictures. Start of the drywall pictures. :beer:
 

Attachments

  • DSCN0247.jpg
    DSCN0247.jpg
    78.5 KB · Views: 520
  • DSCN0246.JPG
    DSCN0246.JPG
    99.6 KB · Views: 490
  • DSCN0245.JPG
    DSCN0245.JPG
    97.1 KB · Views: 648
  • DSCN0244.jpg
    DSCN0244.jpg
    114.4 KB · Views: 478
  • DSCN0243.jpg
    DSCN0243.jpg
    86.3 KB · Views: 488
  • DSCN0242.jpg
    DSCN0242.jpg
    100.9 KB · Views: 434
  • DSCN0241.jpg
    DSCN0241.jpg
    87.8 KB · Views: 485
OP
N

Nutty 5.0

Well-known member
Joined
Aug 25, 2008
Messages
250
Location
SE PA
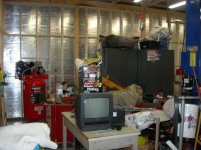
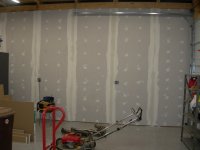
Drywall shots. Its amazing how you can work around the perimter will all the **** in the way!!!

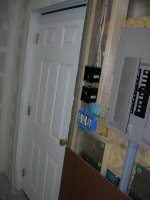
The Cutler Hammer 100 amp service came from the house. It was 1989 era so I thought it would be good to use. Since I had to upgrade anyhow, and this panel was full of misc. sized breakers and you can still get breakers for it, it made sense to keep it. Thanks to my friends TJ, Sean, and Nate who did the 200 amp service for me when I was away at my sister in laws graduation in Houghton NY!
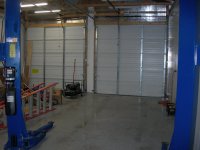
We actually put the service in the garage after the concrete was poured and the floor was painted. It was August of 2004 about when we put the service in. Same friends helped as we rented a ditch witch and buried some coax, phone, elec, and 1/2 copper. Used the cheap $8 Home Depot 4' flor. lights. I put in 16 fixtures which seemed perfect. One on every truss which is at 4' spreads with 8 per side. I ended up putting two more along the side of the 2 post lift for some extra light when a car is up on the lift.

Amazingly since I had all the outlets and lights installed prior to the electric service put it in, when we finally powered up the garage everything worked. This was my first electric job I wired myself (in the garage anyway) other than random little odd jobs.
 

Attachments

  • DSCN0258.JPG
    DSCN0258.JPG
    100.2 KB · Views: 323
  • DSCN0257.JPG
    DSCN0257.JPG
    83.5 KB · Views: 308
  • DSCN0256.JPG
    DSCN0256.JPG
    76.6 KB · Views: 278
  • DSCN0255.JPG
    DSCN0255.JPG
    64.8 KB · Views: 307
  • DSCN0254.jpg
    DSCN0254.jpg
    73.3 KB · Views: 340
  • DSCN0249.jpg
    DSCN0249.jpg
    68.7 KB · Views: 312
  • DSCN0248.JPG
    DSCN0248.JPG
    86.2 KB · Views: 341
Last edited:
OP
N

Nutty 5.0

Well-known member
Joined
Aug 25, 2008
Messages
250
Location
SE PA
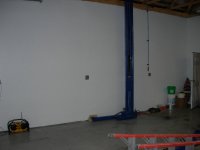
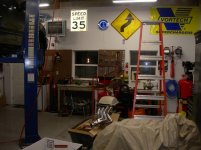
Shots of the drywall painted. Yes, that Mr. Heater 175K was my heat up until last fall. It did its thing, but man its nice to have the heat on and be able to hear and talk! Also note the Garage Pak plumbing I used for the air compressor drops. It supplies an outlet by the two post lift and the hose reel on the ceiling. Eventually I plan to add a drop under the windows by the work benches but I really don't use much more than the hose reel most of the time.
 

Attachments

  • DSCN0265.JPG
    DSCN0265.JPG
    128.1 KB · Views: 525
  • DSCN0264.JPG
    DSCN0264.JPG
    77.5 KB · Views: 467
  • DSCN0263.JPG
    DSCN0263.JPG
    84.4 KB · Views: 497
  • DSCN0262.JPG
    DSCN0262.JPG
    134.5 KB · Views: 444
  • DSCN0261.JPG
    DSCN0261.JPG
    117.5 KB · Views: 458
  • DSCN0260.JPG
    DSCN0260.JPG
    128.3 KB · Views: 639
  • DSCN0259.JPG
    DSCN0259.JPG
    80.4 KB · Views: 424
Last edited:
OP
N

Nutty 5.0

Well-known member
Joined
Aug 25, 2008
Messages
250
Location
SE PA
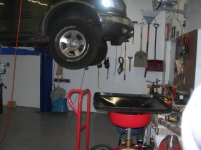
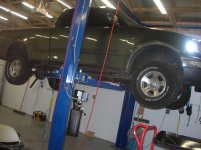
Some shots of my rotted out flowmaster exhaust on my 02 F150. I did this work soon after the painting of the walls. I have not yet put down the black vinyl cove base in these pictures. This new muffler only lasted a year. We drive the truck less than 5k anymore and it shows. I ended up having a shop fab up a stainless exhaust welded in with the now stainless flowmaster muffler.
 

Attachments

  • DSCN0277.JPG
    DSCN0277.JPG
    81.7 KB · Views: 573
  • DSCN0280.jpg
    DSCN0280.jpg
    85.1 KB · Views: 571
  • DSCN0279.jpg
    DSCN0279.jpg
    100.3 KB · Views: 642
  • DSCN0278.jpg
    DSCN0278.jpg
    89.8 KB · Views: 600
  • DSCN0275.jpg
    DSCN0275.jpg
    94.9 KB · Views: 599
  • DSCN0274.jpg
    DSCN0274.jpg
    84 KB · Views: 693
  • DSCN0272.jpg
    DSCN0272.jpg
    82 KB · Views: 796
OP
N

Nutty 5.0

Well-known member
Joined
Aug 25, 2008
Messages
250
Location
SE PA
Some pictures of the garage with my 93 Mustang back after a full repaint and me putting everything back in. It was two tone.
 

Attachments

  • DSCN0441.jpg
    DSCN0441.jpg
    78.8 KB · Views: 542
  • DSCN0439.jpg
    DSCN0439.jpg
    76.1 KB · Views: 646
  • DSCN0437.jpg
    DSCN0437.jpg
    117.6 KB · Views: 533
  • DSCN0434.jpg
    DSCN0434.jpg
    114.6 KB · Views: 487
  • DSCN0429.jpg
    DSCN0429.jpg
    132.9 KB · Views: 576
  • DSCN0428.jpg
    DSCN0428.jpg
    142.9 KB · Views: 580
  • DSCN0333.jpg
    DSCN0333.jpg
    100.6 KB · Views: 580
OP
N

Nutty 5.0

Well-known member
Joined
Aug 25, 2008
Messages
250
Location
SE PA
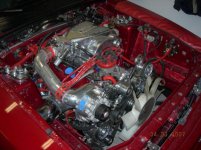
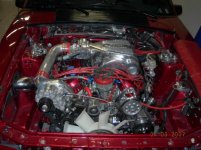
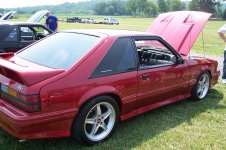
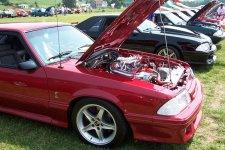
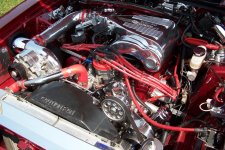
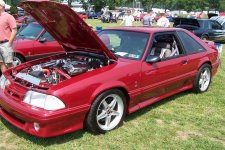
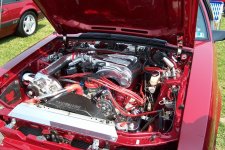
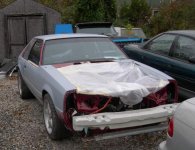
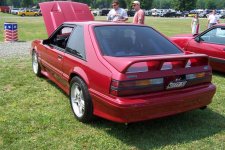
The 93. The last shot is from the body shop. It was there for 9 months or so in "paint jail".:yikes: It placed second in my class at this show.
 

Attachments

  • DSCN0225.jpg
    DSCN0225.jpg
    68.2 KB · Views: 259
  • 100_2225.jpg
    100_2225.jpg
    155.7 KB · Views: 205
  • 100_2226.jpg
    100_2226.jpg
    153.5 KB · Views: 208
  • 100_2227.jpg
    100_2227.jpg
    156.7 KB · Views: 195
  • 100_2229.jpg
    100_2229.jpg
    158.9 KB · Views: 225
  • 100_2223.jpg
    100_2223.jpg
    159.8 KB · Views: 251
  • 100_2222.jpg
    100_2222.jpg
    157.1 KB · Views: 226
OP
N

Nutty 5.0

Well-known member
Joined
Aug 25, 2008
Messages
250
Location
SE PA
Here's one shot I found right after the U coat it:
 

Attachments

  • Roll_bar_NMRA_show_044.jpg
    Roll_bar_NMRA_show_044.jpg
    68.5 KB · Views: 1,001

Drewstang

Well-known member
Joined
Dec 24, 2008
Messages
142
Location
Bedford, KY
Very nice. My garage build starts tomorrow. A new home for the 03 Marauder, two 92 Coupes, 93 Lightning. How did the U-coat it kit work for you?
 
OP
N

Nutty 5.0

Well-known member
Joined
Aug 25, 2008
Messages
250
Location
SE PA
Thanks. Nice collection you have. It's good, but you'll find that there is better options you can find on here. With a lift I find it not able to last another several years.
 
OP
N

Nutty 5.0

Well-known member
Joined
Aug 25, 2008
Messages
250
Location
SE PA
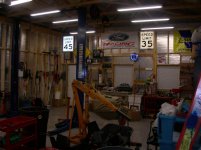
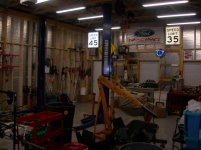
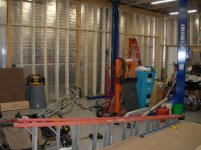
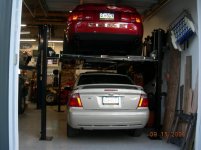
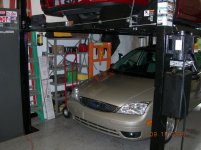
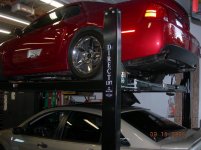
These are from last September. I added a Direct Lift 8 Pro 4 post to house my friends 69 Stingrag project at that time. Its tight, but I now have the best of both worlds. There's still room to get around suprisingly!
 

Attachments

  • DSCN0897.jpg
    DSCN0897.jpg
    117.2 KB · Views: 563
  • DSCN0896.jpg
    DSCN0896.jpg
    84.6 KB · Views: 541
  • DSCN0895.jpg
    DSCN0895.jpg
    88.9 KB · Views: 615
  • DSCN0894.jpg
    DSCN0894.jpg
    113.4 KB · Views: 517
  • DSCN0893.jpg
    DSCN0893.jpg
    95.2 KB · Views: 560
  • DSCN0892.jpg
    DSCN0892.jpg
    117.3 KB · Views: 584
  • DSCN0890.jpg
    DSCN0890.jpg
    142.1 KB · Views: 742
OP
N

Nutty 5.0

Well-known member
Joined
Aug 25, 2008
Messages
250
Location
SE PA
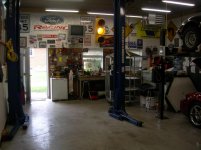
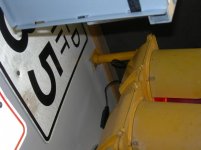
Some shots from today. There's some blow in insulation go in the 4x8x2.5" sheets for just a bit more R value. Waiting for my short friend to get some time to help. Traffic light was put in July.
 

Attachments

  • DSCN0890.jpg
    DSCN0890.jpg
    96.4 KB · Views: 657
  • DSCN0891.jpg
    DSCN0891.jpg
    81.8 KB · Views: 582
  • DSCN0892.jpg
    DSCN0892.jpg
    84.4 KB · Views: 572
  • DSCN0893.jpg
    DSCN0893.jpg
    70.3 KB · Views: 500
  • DSCN0894.jpg
    DSCN0894.jpg
    63.4 KB · Views: 475
  • DSCN0895.jpg
    DSCN0895.jpg
    97.6 KB · Views: 786
To avoid these ads, REGISTER NOW!

PistolWhip

Well-known member
Joined
May 14, 2009
Messages
361
Location
People's Republic of New Jersey
That's an awesome set up bro. That's exactly what I want to do here soon. I'm right over the bridge in Gloucester County NJ, where abouts in SE PA are you?
Love the Redfire Terminator by the way, the Fox is nice too!
 
OP
N

Nutty 5.0

Well-known member
Joined
Aug 25, 2008
Messages
250
Location
SE PA
I will. I'm currently a member of MACA: Mid Atlantic Cobra Association. They're on SVTperformance.com. Sure you're there too?!
 
OP
N

Nutty 5.0

Well-known member
Joined
Aug 25, 2008
Messages
250
Location
SE PA
Very cool, well if you ever want a road trip to see it for some ideas and not good ideas (LOL!) let me know. Nothing more exciting than a new garage build! The things I wish I could have done. Well, hindsight they say is always 20/20.
 

PistolWhip

Well-known member
Joined
May 14, 2009
Messages
361
Location
People's Republic of New Jersey
Yeah, unfortunately my garage build is going to be on a very small budget. I'm probably going to try to hold off until next summer, maybe save a few more pennys so I don't have cut any corners.
 

mslisaj

Well-known member
Joined
Jun 12, 2009
Messages
251
Location
Klamath Falls, Oregon
Hi Nutty...............

Very nice shop. Beautiful fleet of cars too. By any chance you're not located in Klamath Falls Oregon are you?? The outside of your building looks really close to one down the street from me.................

Just curious............

Lisa
 

mslisaj

Well-known member
Joined
Jun 12, 2009
Messages
251
Location
Klamath Falls, Oregon
Okay Nutty, thanks for the reply and I have a neighbor that has a new building and it looks so much alike with the snow and all......... Oh well.............

You have a beautiful shop and it's well equipped too. All the pictures were great.........

Take care........

Lisa :)
 
OP
N

Nutty 5.0

Well-known member
Joined
Aug 25, 2008
Messages
250
Location
SE PA
Thanks Lisa.

Update but no pics unfortunately: we put 3-4" of blown in recycled paper on top of the ceiling foam board. What a mess, but well worth it come heating season which is just about here around these parts.
 

jktruck150

Well-known member
Joined
Oct 19, 2009
Messages
835
Location
Outskirts of Jackson, MS.
Nutty 5.0,
Great looking shop. Looks like it gets a lot of good use! I have to comment on your 02 f150 though, i love that color! I wish they would have made more of those that weren't the high dollar king-ranches. I love my 03 fx4, but sure to wish i could have found one in that green! I love the mustang too! Can't believe they had it in paint jail for 9 months! I would have gone off (then again, i have a 4.6 gt engine sitting on a pallet doing nothing)!
 
OP
N

Nutty 5.0

Well-known member
Joined
Aug 25, 2008
Messages
250
Location
SE PA
Thanks! We love the color too. Its nice that you don't see it much but think it should be used on more vehicles. What's the 4.6 for? Smells like something fun!
 

jktruck150

Well-known member
Joined
Oct 19, 2009
Messages
835
Location
Outskirts of Jackson, MS.
Nutty 5.0,
The 4.6 was bought for 75 bucks for me just to rebuild for fun (because I didn't have a project car/truck at the moment). I figured it would be something I could work on here and there and not cost me lots of dollars! Then, when I was done, I could find me a vehicle to put it in. Well, I should have done what I am doing now, and get my shop in order first (concrete floors, correct wiring issues, re-finish rolling cabinet etc) so that I could actually use my shop. Didn't really understand the value of an engine stand either, did you know they are slightly helpful? -extreme sarcasm there- So, in the end, I just sprayed WD40 and put oil on it to keep it from rusting and started wiring my shop. Concrete is a long way off... Long answer for a short question.! -Jason :)
 
Last edited:

346ci

Banned
Joined
Jan 1, 2010
Messages
265
Location
NC, lower part
Nice shop! Almost like mine except it will be a 30X30X14 Camaro garage.:bounce:

I got a question on how you built your studs, how did you connect them to the top? Toe nail? It is my understanding that the thin foil stuff that the pole barn companies isn't worth a poo correct? I like the way you studded yours out and did the R30. I plan to do the same to help keep heat and a/c in better. I hope it cuts down on condesation also.

Thanks
:beer:
 
OP
N

Nutty 5.0

Well-known member
Joined
Aug 25, 2008
Messages
250
Location
SE PA
Thanks!

Toe nailed just as you said. The stuff they use is only 1/2", but in my roof they sandwiched it between trusses and the roof, so you may only be able to get away with the 1/2". I'm not sure, but it does very little. I know that Conestoga generally when you get one of their insulated barns, they use the same metal on the outside on the inside and flow in the voids/celing. It def. cut down on condensation. It stays cooler even in the summer.
 

zkslawn

Well-known member
Joined
Jan 23, 2010
Messages
53
Some shots of my rotted out flowmaster exhaust on my 02 F150. I did this work soon after the painting of the walls. I have not yet put down the black vinyl cove base in these pictures. This new muffler only lasted a year. We drive the truck less than 5k anymore and it shows. I ended up having a shop fab up a stainless exhaust welded in with the now stainless flowmaster muffler.

Hows does this setup work.. Louder than when you add more pipe after the muffler? and how is it under the car.. no burn marks or anything to worry about?
 

rieferman

Well-known member
Joined
May 18, 2009
Messages
2,586
Location
Collegeville PA (30 min west of Philly)
Somehow I never saw your thread before, it all looks great!

Near Pottstown in Berks County by French Creek park

wow! we should link up somtime. I'm over in Collegeville, my mother in law is in Pottsgrove. PM me if you're ever coming down this way, or if it's ok for me to do the same if I'm headed your direction.
 
To avoid these ads, REGISTER NOW!
Top Bottom