To avoid these ads, REGISTER NOW!

Organizing My Work Shop - 8 Years Late

MWMWMW

Well-known member
Joined
Sep 2, 2019
Messages
89
Location
WV
Thank you to everyone who has posted so many awesome ideas on GJ. I want to give back some for everything I’ve gotten so far. This is my first post with some build stuff.

I’ve got a real estate investment company and we use the basement in one of the buildings for our shop. I have a mentor who has been in real estate for much longer than me and gave me a tour of his shop in ~2015 and he has a great set up that I’ve wanted to replicate myself. I got this building in 2012 and it’s only taken me until now (8 years later) to start to get my shop in order. As the company has grown, the shop has become unwieldy and stuffed to the brim.

This is just the beginning, but already I’ve “found” probably $1000 in stuff in the bottoms of boxes. So far I’ve organized about 20% of the shop. I don’t expect to find tons more valuable stuff, but anything is a bonus. Really the value is time savings from not having to go to Lowe’s everyday.

This is pretty much what the shop has looked like for the last year or so... basically useless.
6ZKFsxG.jpg


YfBozOd.jpg


Cutting everything.
owWij16.jpg


Starting to build the shelves.
NIYN3JU.jpg


j8EFVru.jpg


Getting the shelves built.
9AtgsWh.jpg


2xSe4MS.jpg


I bolted the shelves to the wall with some blue tapcons. They are wildly solid now. I’m not sure I could yank them off.
EPyLxoH.jpg


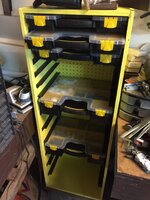
Getting things ready for sorting.
H9VkFT9.jpg


More to come.
 
Last edited:
To avoid these ads, REGISTER NOW!
OP
M

MWMWMW

Well-known member
Joined
Sep 2, 2019
Messages
89
Location
WV
After building the shelves and putting stuff on them, I realized I was wasting a lot of space by using 2x4s to hold the shelves so I switched to little metal elbows. Obviously a lot more efficient. I don’t know why I didn’t think of this the first time, but oh well. Ended up with 40% more storage in the same space with the lowered shelves. I had them closer together, but it was too tight so I raised them an inch.

One thing I’m glad to be fixing is the wave in the original shelves. Somehow I was 1/2” off on one part. If I’m organizing everything the shelves gotta be straight!

There’ll probably be more upgrades and reorganizing as time goes by.

Metal elbows and 1/2” screws (so they don’t go through the plywood).
pbkzE7S.jpg


Shelf not screwed in yet, but you get the point.
p35h66q.jpg


The lowered shelves compared to the old ones. Can fit seven shelves where five were before.
SqNHtHK.jpg


Despite being lowered, you can still see everything and get your hand in there.
bJJZohn.jpg


You can still see inside the bins easily with the lowered shelves compared to the original ones.
jFOT7Ga.jpg
 
Last edited:
OP
M

MWMWMW

Well-known member
Joined
Sep 2, 2019
Messages
89
Location
WV
Budget Post - I’m making this to try to keep rough track of the shop organizing costs. Based on the other options I’ve seen, this provides the most storage for the buck and it’s custom for my space. I’ll continue to update this budget as time passes.

$215 ——- Lumber (had a little bit left over)
$12 ——— 1/2” screws (500 pieces from amazon)
$173 ——- Cardboard bins (~$0.50 - $1 each depending on size. The plastic ones seemed to be ~4 each)
$73 ——— Metal elbows ($0.63 each at Lowe’s)
———————————
$473 - Total Spent on Supply Shop

As of 01/01/2020 I’ve got probably 15 hours into this on nights and weekends.

Fab Shop:
$140 ——— LEDs from amazon
$90 ———- Winch
$9 ———— Capacitor for drill press
$135 ——- Lumber for tables
$60 ———- Casters
————————————-
$434 - Total spent to build Fab Shop
 
Last edited:
OP
M

MWMWMW

Well-known member
Joined
Sep 2, 2019
Messages
89
Location
WV
What's the same for these storage boxes (on the shelves)?

Sent from my MI PAD 4 PLUS using Tapatalk

Cardboard bins: Aviditi BINMT412 Corrugated Open Top Bin Box, 12" Length x 4" Width x 4-1/2" Height, Oyster White (Case of 50) https://www.amazon.com/dp/B00BT53K3E/?tag=atomicindus08-20

These come in a ton of different sizes. For my set up I prefer the 4” wide ones, but also have 8” wide bins. They make 2” - 12” wide bins of various depths, and wall heights so you can get whatever you need for pretty cheap.
 
OP
M

MWMWMW

Well-known member
Joined
Sep 2, 2019
Messages
89
Location
WV
I’m going to follow along. Are you planning on placing like supplies together? Plumbing with plumbing, electric with same etc?

Do you have to worry about dampness in the basement?

Yes I’ll be putting the supplies in sections once I’ve got things in bins. Right now I’m just trying to get stuff out of the old big boxes. Doing it in two steps.

There’s very limited dampness in the basement. It’s sealed, heated, and I run dehumidifiers in the summer. While I was in the shop today, a hot water heater failed and started leaking, hence the water on the ground... Merry Christmas to me oh joy lol
 
Last edited:

BD1

Well-known member
Joined
Mar 18, 2007
Messages
4,602
Location
north side
That's makes a huge difference .
I stop a garage sales and buy those metal bread pans, cooking sheets, and even Tupperware type containers. Works great for storing goodies in. There all different but works well.


Sent from my iPhone using Tapatalk
 

John in OH

Well-known member
Joined
Jun 2, 2007
Messages
2,444
Location
SE Ohio & Eastern Virginia
Really like the idea of the cardboard storage boxes! Obviously, the plastic ones are nicer, but much more expensive.

I have quite a few tubs full of "stuff" that would definitely benefit from being more accessible via the cardboard box approach.
 
OP
M

MWMWMW

Well-known member
Joined
Sep 2, 2019
Messages
89
Location
WV
I got an hour or two in the other day. Finally finished the first wall of bin storage. Am really making more progress on the organizing things too. There are so many similar parts all over everywhere. It's like boxes of screws/bolts/misc/etc were opened and thrown everywhere.
KdKxx8k.jpg


cDq9UVS.jpg


4N8l5Kj.jpg


The leaky hot water tank was also changed so there's less moisture in general (and a lower water bill).
C7NOwXd.jpg


I cut a 2x4 down to make lips for the front of the shelves and to add some rigidity to them, but I didn't write the measurements down and forgot by the time I got over the wood shop. They were about a 2/3" too short. That was a waste of an hour, but I did get more experience on the table saw.
HYN3bok.jpg


Also, I got some of the classic harbor freight bins to build a fastener collection. It's quite a bit more space efficient than the cardboard bins for all the different fasteners that I don't have many of. To see what I'm planning see this thread. See post #86 by dfenderman and/or photo below. No drawer slides, just old angled bed frame metal to support the shelves. I'll probably paint it. I'm pretty sure mine will be made from wood too.
TNiYCXM.jpg


Below photo credit to dfenderman. This is what I'm going to build, but only with 10 bins.
885a3cb6da290cb97513384645a34fef.jpg
 

Attachments

  • 885a3cb6da290cb97513384645a34fef.jpg
    885a3cb6da290cb97513384645a34fef.jpg
    256.8 KB · Views: 0
Last edited:

crazybrit

Well-known member
Joined
May 29, 2013
Messages
341
Location
Portland, OR
I had a huge bag of screws that I'd let get all mixed up. I procrastinated for years on sorting them all into bins.

I admire you bringing order out of chaos.

Sent from my MI PAD 4 PLUS using Tapatalk
 
OP
M

MWMWMW

Well-known member
Joined
Sep 2, 2019
Messages
89
Location
WV
I had a huge bag of screws that I'd let get all mixed up. I procrastinated for years on sorting them all into bins.

I admire you bringing order out of chaos.

Sent from my MI PAD 4 PLUS using Tapatalk

Yea it’s a major pain sorting screws, but I’ve found, ironically, that if I dump them on the ground it’s faster to sort them into piles, then pick them up in handfuls you put in the cardboard bins.

The other surprising thing is that I’ve sorted out $200+ worth of GFIs, and probably $200-$300 just in different screws with lots more to come. At this point it’s like picking up lost money. As I mentioned earlier though, the real savings is from the time savings from not needing to go Lowe’s everyday for that inevitable $1 part needed to finish a job.
 
Last edited:

matt_i

Well-known member
Joined
Mar 14, 2008
Messages
10,729
Location
SE Michigan
That's outstanding! Having everything sorted and labeled is fantastic. I often go to 5 locations to find what I really want.... I'm finding that the shop almost needs 2 hours of "maintenance" for every week I work out there...restoring order and putting things away. Keep up the good work! :thumbup:
 

vette-kid

Well-known member
Joined
Jul 21, 2008
Messages
3,636
Location
Navarre, FL
Great progress! Your giving me hope! My garage is becoming a nightmare! Those cardboard bins are a great find!

Sent from my Moto Z (2) using Tapatalk
 
To avoid these ads, REGISTER NOW!

drivesitfar

Well-known member
Joined
Oct 23, 2013
Messages
36,034
Location
Pacific Northwest
MWM: thanks for all the pictures and good luck on your quest to GET ORGANIZED.

ALL: maybe more of us will get organized and avoid FSD with more threads like this.
 
OP
M

MWMWMW

Well-known member
Joined
Sep 2, 2019
Messages
89
Location
WV
I wouldn't call that first picture a work shop, just saying. Much improved thus far tho. Keep going!

There are aisles there, but they got filled with **** as time went by. Once a little is there, it’s super easy to throw more on top at the end of a long day. Certainly a bad habit that both me and my guys are guilty of. Hopefully this changes it.
 
Last edited:
OP
M

MWMWMW

Well-known member
Joined
Sep 2, 2019
Messages
89
Location
WV
That's outstanding! Having everything sorted and labeled is fantastic. I often go to 5 locations to find what I really want.... I'm finding that the shop almost needs 2 hours of "maintenance" for every week I work out there...restoring order and putting things away. Keep up the good work! :thumbup:

I can relate; just before this we had both supplies and tools in two shops and it was impossible to find anything. Now we’ll have a shop for supplies only and a wood/metal shop for fabrication and all tools. This keeps dust out of the supplies shop (no cutting allowed), and in the fab shop every tool will have a labeled spot so there’s no excuse not to put things away. Plus it’ll be easier to see what is missing. I’m hoping this’ll solve a lot of problems and make the company more efficient in general.
 
Last edited:
OP
M

MWMWMW

Well-known member
Joined
Sep 2, 2019
Messages
89
Location
WV
Well we finally got some time to begin working in the Fabrication Shop for the company. I’ve made the decision to move all the tools to the Fab Shop and keep the old shop only for supplies. There a few goals for this:
  • Get all the big tools (20 ton press, band saw, drill press, table saw, miter saw, etc) permenantly set up for easier use (this will be very nice)
  • Have a space where we can easily bring in and take out the various ladders and the aluminum brake and store them effectively
  • Stop saw dust from getting into all of the supplies and all over everything
  • Have a labelled spot for all tools so it’s easier to see if something is missing (i.e. stolen)
  • Have an uncluttered, organized and clean Supply Shop

I have to say, already the amount of time and money I’ve saved so far has made all of this work organizing worth it. I cannot recommend organizing enough.


Somehow I forgot to take photos, but so far we’ve:
  • Removed all the **** from the space for the Fab Shop
  • Installed new lighting
  • Moved duct work out of the way (it was hanging below the floor joists going around the basement ceiling and we got it up in the joists for our part of the space)
  • Began plumbing for the sink
  • Moved a lot of the big tools to the Fab Shop

We’re using the basement of one of the other buildings and the space for the Fab Shop is about 12’x31’. There is more space on the other side but it’s mostly taken up by the stairwell, water tanks and electric panel.

My favorite bit - there is a huge cellar door to get into the Fab Shop and we’re going to install a winch to raise and lower it! Should be fun!
 
Last edited:
OP
M

MWMWMW

Well-known member
Joined
Sep 2, 2019
Messages
89
Location
WV
Intermittently we’ve been making more progress in between maintenance calls.

We’ve made more progress clearing out the Supply Shop. We started here:
6ZKFsxG.jpg


Going to this:
ZudBOJo.jpg


Built a new door into the Fab Shop:
Yxp5m06.jpg


The huge cellar door that will be hooked up to a winch. It probably weighs 75 pounds. We’ll be able to open and close the winch from inside and outside so we can close it for heavy rains etc.
aaJcjXi.jpg


Here are some shots of the Fab Shop finally. Lighting and outlets are up. Most heavy tools and some small tools are in there and we plumbed up the sink so it can be moved a little if needed.
r73WrGx.jpg


B77oRMI.jpg


WvSfI0E.jpg


mi3vK1d.jpg


xig1DeM.jpg
 
Last edited:
OP
M

MWMWMW

Well-known member
Joined
Sep 2, 2019
Messages
89
Location
WV
The guys made lots more progress on the Supply Shop today. They did a lot more clean up of trash in general, built more shelves, moved tools to the Fab Shop.

Because we now have a Fab Shop, I’m thinking I’ll keep general lumber and metal stocked in the Fab Shop and not the Supply Shop. After all, that is where we’ll be making stuff and not just pulling a few supplies for a job.

What kind of building materials do you guys think we should keep in the Fab Shop?

More shelves built:
DMEhUFD.jpg


cX1jFDA.jpg


Even more organization in the aisle. One shelf was moved out of the way as part of the organization. That shelf will be modified a lot or rebuilt to suit our needs more. I’m not sure yet. Originally it was built to store plywood on the bottom and 2x4s and scrap on the top. It didn’t really work. Just got cluttered with ****.
b8u3aFK.jpg


We also moved the gas line up close to the ceiling so we can install metal rack to store long pipes etc. It’s hard to see the full gas line in the photos because it blends into the corner. Here are some close ups. Not crazy but you get the point.
U9i39rO.jpg


hPsfWdo.jpg
 
Last edited:
OP
M

MWMWMW

Well-known member
Joined
Sep 2, 2019
Messages
89
Location
WV
Today I had a little bit of time to begin making the metal pipe racks that’ll go above the storage shelves in the Supply Shop. They’ll go in the red space. It looks cramped in the photo, but it’s enough space for two shelves.
uirw4TM.jpg


I’m using old bed frames I’ve collected from apartments. Some of the older frames are actually quite stout. The new ones are decent too. They’re free so I’ll use them all.

The space between the top of the shelves and the ceiling in about 21”. I cut the vertical piece to be 20” long. The two horizontal shelf pieces will be 19.5”. They’ll come close to the edge of the front of the shelves but not stick out. I don’t want anyone to hit their head or eye on the pointy ends. Just in case, I’ll be rounding off the edges at the end. Better safe than sorry.

I have a 12’ span so I’ll bolt 4 metal shelves to the wall. One for 8’ pieces and a shorter section for 3-4’ pieces.

There are some windows in the mounting spots so I’ll also be adding some bed frame rails across the windows to have mounting points.

Below are some photos of the cutting process. I don’t have a work table, nor is the band saw set up yet so I used the stairs and a vise as I could. Cutting with a grinder is quite tedious. I really need to get the band saw set up on a stand. It took two hours to cut off the useable parts and then cut the metal to the needed distances.

Otr6MK6.jpg


PbkmdeY.jpg


My cheap little welder ready for action. Didn’t make it that far today though :/
CnI8abR.jpg


Tomorrow I’m going to grab one of these harbor freight sanders to clean the edges and prep for paint. I **** at painting and I’m aiming to do a decent job on these. It’s better to practice on things that aren’t particularly important.
Ak2gdSt.png
 

FANTM58

Well-known member
Joined
Feb 21, 2015
Messages
575
Location
Brighton, Co
Great progress, just be realistic in what are keeping, you don’t want to take the time and space for parts you’ll never use...
I’ve learned this the hard way....and I’m still learning...
 
OP
M

MWMWMW

Well-known member
Joined
Sep 2, 2019
Messages
89
Location
WV
I woke up really early this morning and headed to the shop. I couldn’t sleep last night. This morning I finished putting on the front shelf lips. The lips keep everything from sliding off, and adds some rigidity. It’s not as rigid as I anticipated. The shelves are strong enough though so I don’t think it’ll be a problem.

i8r9fZd.jpg


Getting some plumbing sorted on the new shelf too.
xzbzTpW.jpg


An update on the cleanliness of the aisles. Making more progress!
iGoMDAc.jpg


uN2Q0MZ.jpg


FbpXs5R.jpg


WosaQ42.jpg


Yesterday I was going to buy the bigger HF sander from a guy on Facebook but it fell through. After doing some research and stopping at the store to look at the difference between the big sander and small sander, I decided just to buy the bigger sander new. It has a stand, bigger motor and bigger sanding areas. As things break I’ll make upgrades to it.

Here is a link to a guy making some upgrades to his sander: https://weldingweb.com/showthread.php?291041-Un-Chinese-ing-a-Harbor-Freight-6x48-belt-sander

This is the sander: https://www.harborfreight.com/6-in-x-9-in-combination-belt-and-disc-sander-61750.html
kPIK0UT.png
 
OP
M

MWMWMW

Well-known member
Joined
Sep 2, 2019
Messages
89
Location
WV
After basically things going wrong every single step of the way, I have finally gotten the pipe racks welded, painted and installed. I usually only have one, maybe two hours at most to work on projects. Also, this process sucked, but I’m an optimist and the shop is getting better and better!

First the welder broke and I ran out of time that day. The next time, the welder ran out of wire. I ordered the 10lb roll and it didn’t fit in my welder, so I returned it and ordered a 2lb roll. Still haven’t finished welding. This should have been maybe a one hour job. Took probably four hours. Welds finally finished.

Then I went to sand things down. This actually wasn’t too bad except I missed quite a few spots that I didn’t see until paint.

Ok on to painting. I like bright neon green. It’s odd, but hopefully it’ll help people not poke their eye out in the shop. Anyways, I had to make 4 separate trips to Lowe’s over two weeks as 1 out of 7 cans of spray paint actually worked. No joke. I bought paint on three different occasions from three different Lowe’s locations and all but the first can were defective. On the fourth trip I decided to try a different brand. Anyways, I put on primer, which actually went well. Then with the final set of spray paint, it covered the metal quite nicely. Unforgivably as soon as it touched anything the paint would just come right off. Painting was a total waste of time.

Anyways, here they are in all their glory. Finally lol!
RMVNWfG.jpg


7tcyy9h.jpg


MhsxOzl.jpg


On the other hand, I found an auction and got a ton of great tools for so little. One of the good finds; seven boxes full of black iron gas pipe fittings in all sizes. Perfect for my supply shop and repairs. Best of all, it was about $60 for all of it. We have lots of sorting to do!
W277Zfp.jpg


QMVxueJ.jpg


0MvZsKF.jpg


Also scored a 10” south bend lathe for $300! 48” wide and super heavy. It took three of us two hours to get it unloaded. I’m really excited to learn about this thing! (Photo credit to the auctioneers)
LMLILq1.jpg


SS6eiqk.jpg
 
OP
M

MWMWMW

Well-known member
Joined
Sep 2, 2019
Messages
89
Location
WV
We’re making some more progress on the shop. Got most of the auction black iron pipes sorted out. We also moved a little bit more to the Fab Shop too. That made some more space. We’ve begun organizing some more shelves that store paint and cleaning supplies. One last thing; we finally had some time to get the small parts storage cabinet built. All from scrap wood and bed frames. One set of bed frames had some solid casters on it so we used those. All of the case supports are made out of bed frame rails as well. Bed frames are very hard steel and are difficult to drill through. Drilling slowly and using oil helped a lot. If you drill too fast, then it heats up and fails.

Black iron pipes mostly sorted:
tzapARU.jpg


GolOkRG.jpg


Small parts storage cabinet:
5nINjD5.jpg


y0pNAvq.jpg


m0r1C3C.jpg


jkDZ06Z.jpg


urPEYDb.jpg


General shop cleanliness:
lwV3Pkg.jpg


gybDzrA.jpg


We’re still probably only about 35-40% of the way done, but we’re making lots of good plans for the rest of the shop!
 
OP
M

MWMWMW

Well-known member
Joined
Sep 2, 2019
Messages
89
Location
WV
Just a small update. Made a few shop tables. Only two of three made so far. Total dimension is 4’x8’. There’s one section that is 4’x4’. The other two sections are 2’x4’. They’re set up on casters so they can be moved around as needed. I have some toggle latch clamps coming to hold them together if needed. The tables are the same height as my table saw so it’ll be easier to push longer pieces through the saw as needed. It seems like having a table that is adjustable will definitely be helpful at some point. If this is a bad idea I can just clamp them together and push it against the wall. All that being said, the Fab Shop really needs a thorough cleaning!

One other update - I put a piece of plywood under the sander to add support for the casters. The metal legs on the sander are ver flimsy. This worked well except one of the caster failed from a previous use so I need to change it out.

Photos of the tables:
oxGcJuy.jpg


fQNy4Kd.jpg


uylMplr.jpg


5ijvwcc.jpg


Table Clamps:
xhftEQy.png
 
Last edited:
To avoid these ads, REGISTER NOW!
Top Bottom