babzog
Well-known member
Not really a shop, but it'll let me get stuff outa my shop which is how I'm gonna justify this thread's existence! LOL
First, planning. This was originally to be a woodshed, both for firewood and for storage of rough-sawn lumber. I was gonna build a separate garden shed for all that stuff but figured that costs being what they are, coupled with the fact that I don't have much rough lumber (and none of which is furniture grade anyway), I might as well combine the two purposes for now and maybe build something else down the road. Size is 12' deep by 16' wide. Depth was chosen basd on the length of rough sawn boards I have... after the change of plan, it still struck me as a good size.
Anyway, as this is a shed, it's purpose is to keep weather off stuff as cheaply as possible, practical, reasonable, etc. To save some costs, I cut posts from cedar that grew in the back of my property. Not having any equipment, I hauled the buggers out by hand (and a few with the help of a buddy). I called a local to come and remove a stump in the way and dig the post holes down to clear the frost line (about 4').

After the poles were set in place, he came back with a couple of loads of cheap pit run to build up the area enough to not have standing water in my woodpile. He brought it up about 14-16"! Don't think there will be problems now!


What I need to move inside when it's complete (about 8.5cords of hardwood). More pit run will be spread around here once the woodpile is moved.

Approach to the shop:

Front posts are notched for the beam:

The beams! 18' piece of 3x10 ash that the local mill had lying around in the "odds n ends" pile. I guess these'll work! Price was the same as buying 2x10 lumber and making up a beam so .. score!


Front beam hoisted up and lashed in place after getting the final fit of the posts just right:

After I got the cleats secured to the front beam, my buddy arrived and together we got the rear beam erected and secured (that's him nailing this one - 5" spikes are a bear to drive into dried, hard ash):

This coming weekend, weather permitting, the roof will go up. I decided to use dimensional lumber for the framing since a) hauling poles out of the bush without proper equipment to do so, just ***** and b) I was having trouble locating enough straight and suitably sized poles to do the job. This is a time saver for me - I need to get this done before the snow flies as I need the area where the wood is for the winter snow dump. As well, I couldn't find a single scrap of used tin in the area (not even crappy rusted tin - seems it all just goes straight to the recycling yards now) so I had to buy new stuff. That should hopefully be delivered this week.
First, planning. This was originally to be a woodshed, both for firewood and for storage of rough-sawn lumber. I was gonna build a separate garden shed for all that stuff but figured that costs being what they are, coupled with the fact that I don't have much rough lumber (and none of which is furniture grade anyway), I might as well combine the two purposes for now and maybe build something else down the road. Size is 12' deep by 16' wide. Depth was chosen basd on the length of rough sawn boards I have... after the change of plan, it still struck me as a good size.
Anyway, as this is a shed, it's purpose is to keep weather off stuff as cheaply as possible, practical, reasonable, etc. To save some costs, I cut posts from cedar that grew in the back of my property. Not having any equipment, I hauled the buggers out by hand (and a few with the help of a buddy). I called a local to come and remove a stump in the way and dig the post holes down to clear the frost line (about 4').
After the poles were set in place, he came back with a couple of loads of cheap pit run to build up the area enough to not have standing water in my woodpile. He brought it up about 14-16"! Don't think there will be problems now!
What I need to move inside when it's complete (about 8.5cords of hardwood). More pit run will be spread around here once the woodpile is moved.
Approach to the shop:
Front posts are notched for the beam:
The beams! 18' piece of 3x10 ash that the local mill had lying around in the "odds n ends" pile. I guess these'll work! Price was the same as buying 2x10 lumber and making up a beam so .. score!
Front beam hoisted up and lashed in place after getting the final fit of the posts just right:
After I got the cleats secured to the front beam, my buddy arrived and together we got the rear beam erected and secured (that's him nailing this one - 5" spikes are a bear to drive into dried, hard ash):
This coming weekend, weather permitting, the roof will go up. I decided to use dimensional lumber for the framing since a) hauling poles out of the bush without proper equipment to do so, just ***** and b) I was having trouble locating enough straight and suitably sized poles to do the job. This is a time saver for me - I need to get this done before the snow flies as I need the area where the wood is for the winter snow dump. As well, I couldn't find a single scrap of used tin in the area (not even crappy rusted tin - seems it all just goes straight to the recycling yards now) so I had to buy new stuff. That should hopefully be delivered this week.


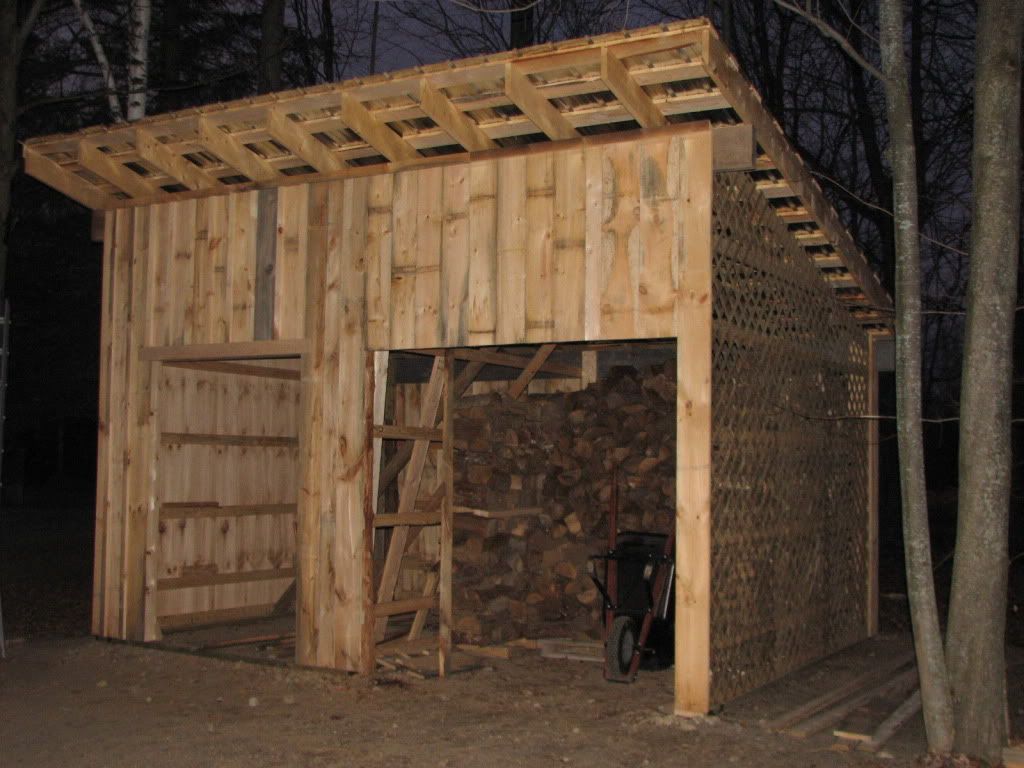
 This shot is with the flash on (it's not that dark yet) but shows it off well.