To avoid these ads, REGISTER NOW!

Sandblast Cabinet air venting.

trooper1954

Well-known member
Joined
Nov 4, 2016
Messages
197
Location
Salmon Arm, BC, Canada
Hi all,
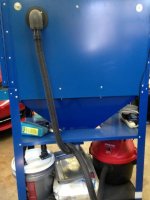
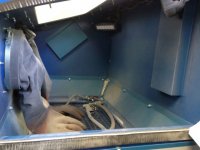
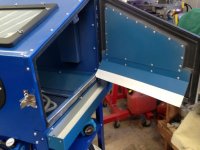
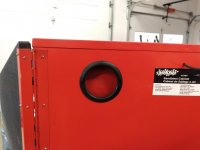
Just wondering if those of you who use a cheapo HF blast cabinet have changed the cabinet vents from what it comes like from the factory? There's numerous youtube vids saying that HF has the vacuum port on the wrong side, and that the pickup for the vacuum port should be lower down to create a cross flow?
I'm thoroughly confused, and looking for some help?
Thanks.
 
To avoid these ads, REGISTER NOW!

Cabane

New member
Joined
Apr 10, 2015
Messages
4
One mod is to bolt baking pan over vent. Cut bottom out so pulls from bottom.
 

Jswain

Well-known member
Joined
Apr 26, 2013
Messages
2,449
Location
Calgary, AB
I hook the vacuum to the back and I sealed off the top of the baffle so it ***** from the bottom. Then I also have the intake on the side baffled and a filter on it to keep any dust from escaping. The baffles will help from sucking the media out of the cabinet or getting out of the cabinet. The important thing is to have a vacuum hooked up for visibility the baffles will just prolong the time in between having to clean out your shop vac filters.

If you only use it every now and then hook a vacuum up and sandblast. If you use it quite a bit spending some time making the baffles will pay off from sucking out your media/cleaning out your filters
 
OP
T

trooper1954

Well-known member
Joined
Nov 4, 2016
Messages
197
Location
Salmon Arm, BC, Canada
Thanks to all for the responses....Jswain, just confused as to why you need to switch the vacuum connection from the left side to the rear opening? Surely if the intake and outflow are closer to the bottom of the cabinet that means they're closer to the media.....does that not get vacuumed up as well?
Thanks for everyone's patience...new to this and want to get it right as I have about 300 rusty horseshoes to clean!! :-(
 

csp

Well-known member
Joined
Mar 23, 2010
Messages
5,719
Location
Franktown, CO
Did mine just like Jswain did.

Blocking the top of the baffle and forcing it to pull off the bottom creates more of a cross flow across the cabinet interior, since the intake is at the upper top third of the cabinet. If you leave the top of the baffle open air will come in the top, move across the top and get sucked out of the top, leaving the dust behind.
 

Jswain

Well-known member
Joined
Apr 26, 2013
Messages
2,449
Location
Calgary, AB
I can sandblast for 6-8 hours straight and basically have 0 media sucked out other than very fine pulverized dust. The suction being on the bottom and the intake being higher up seems to pull the dust down away from the window, but to be honest I never ran it the other way as I did that from the beginning.
 
OP
T

trooper1954

Well-known member
Joined
Nov 4, 2016
Messages
197
Location
Salmon Arm, BC, Canada
Thanks guys,....I guess I should have thought to mention that the cabinet I have is a Samona bought in Canada at least 15 years ago...not made anymore. The baffle inside on the air intake side is already sealed at the top, and the vacuum attachment is fairly high up on the opposite side of the cabinet....I've attached two photos....do you think I need to mess with this arrangement, as it seems this would create a draft from bottom to top across the inside?
Thanks.
 

Attachments

  • IMG_20210109_145045.jpg
    IMG_20210109_145045.jpg
    112.9 KB · Views: 312
  • IMG_20210109_145108.jpg
    IMG_20210109_145108.jpg
    73.6 KB · Views: 272
OP
T

trooper1954

Well-known member
Joined
Nov 4, 2016
Messages
197
Location
Salmon Arm, BC, Canada
And one other question that's bugging me...if Harbour Freight and up here in Canada Princess Auto have the vacuum port and air intake the wrong way round, why are they still producing cabinets like that? From what I've seen other manufacturers cabinets have the ports designed in the same way as HF....surely they can't ALL be wrong??
 

Jswain

Well-known member
Joined
Apr 26, 2013
Messages
2,449
Location
Calgary, AB
It's not like they are wrong it's just that one way works better. Your arrangement is identical to the PA / HF cabinets.
 
OP
T

trooper1954

Well-known member
Joined
Nov 4, 2016
Messages
197
Location
Salmon Arm, BC, Canada
Thanks Jswain...just so I'm clear, even tho my cabinet has air flow going from the bottom right to the top left it will work better the other way round?? Surely the mods simply reverse this process, or am I missing something?
Thx
 

Jswain

Well-known member
Joined
Apr 26, 2013
Messages
2,449
Location
Calgary, AB
As it stands yours will pull the dust up making it harder to see. Reversing it will pull the dust down making it easier to see. Block off the top of the baffled box at the back to make this even better as although it is close to the top it is still open. Baffling the intake and closing off the bottom of it will also help as mentioned before. Try it both ways and see what you prefer
 

zippyslug31

Well-known member
Joined
Jul 11, 2017
Messages
207
Location
Central Oregon
Sorry to hijack OP's thread, but I have a question. I'm literally in the middle of modifying a new HF cab (agree that it's almost identical to OP's Samona pic). I plan on upgrading the lights, like most do, but why are folks placing their additional lights up in the rear corners?

I'm thinking I'll use some 12v LED strip lights, but will instead be placing them on the wall that has the glove holes, light facing away from where I'd be located. To me this makes tons more sense since it will be illuminating the work surface that I'm staring at, not behind it. Am I missing something in this regard?

OP, as others mentioned, I think the real point of having the air inlet/output is have it lower in the cabinet thus pulling the dust away from the window. If you just plugged in your vac to the upper port on your left, it would tend to pull the dust UP. I suppose if you were to construct a "shield" for your side port, as what a modification videos show, then it probably doesn't matter a ton which port you plug your vac into. It might just be to draw any dust as far away from you as possible.
Also, on your comment about media getting sucked up, it sounds like you might be filling your hopper full. A number of people have mentioned the need for only adding a small amount of media, letting it recycle, and then dumping this once it's worn out... no need to fill it to capacity.
Having not used my cabinet yet, I'm just going off of assumptions so take all of this with a grain media. ;)
 
OP
T

trooper1954

Well-known member
Joined
Nov 4, 2016
Messages
197
Location
Salmon Arm, BC, Canada
Thanks guys.....zippyslug31, as you suggested I had already decided to keep the existing vacuum port but to put some sort of baffle on it so that it goes down the wall of the cabinet the same side but opens at the bottom instead of the top. To me that's just exactly what the suggested mod does, but I'm just doing it in reverse.
Don't have problems with my lights...they're led, and run off a 12 volt battery....don't have any shadow problem:)
Will update as to how my mod works....hope to get it fired up tomorrow.
 
OP
T

trooper1954

Well-known member
Joined
Nov 4, 2016
Messages
197
Location
Salmon Arm, BC, Canada
One other question I have.....on the metering valve that I'm building I need to drill and tap a hole for a 3/8NPT thread on a ball valve....anyone have an idea what size drill bit I should use for the hole before I tap?
Thanks
 

didit

Well-known member
Joined
Feb 11, 2020
Messages
892
Location
S.W. Ontario
I built this for sucking some of the dust out of my blast cabinet. It hooks to the shop vac. filling the bucket half full with water. Along with the new lights, visibility is much better. I change out the media more often when using the cabinet as well.
 

Attachments

  • water filter 011.jpg
    water filter 011.jpg
    149.2 KB · Views: 253
Last edited:

ZRX61

Well-known member
Joined
Aug 15, 2006
Messages
28,716
Location
Solar Blight Valley, SoCal
Stuff a piece of foam in the vent on the right side, it will prevent a bunch of dust escaping into your shop/garage as air flows both ways depending on vacuum on the other side & how much air you're introducing into the cabinet from the gun. It won't have much (if any) effect on air flow, but it sure as hell will keep the dust inside the cabinet so it will go out the other side into the vacuum.
 

pepi

Well-known member
Joined
Mar 27, 2013
Messages
2,883
Location
Woodstock, GA
I can sandblast for 6-8 hours straight and basically have 0 media sucked out other than very fine pulverized dust. The suction being on the bottom and the intake being higher up seems to pull the dust down away from the window, but to be honest I never ran it the other way as I did that from the beginning.

Exactly, air intake above the cabinet top.
 

Jswain

Well-known member
Joined
Apr 26, 2013
Messages
2,449
Location
Calgary, AB
The lights being in the front is good. I put a 12v LED fog light pod in each front corner but the kicker is a lot of the time your hands / the gun will block your light... It's still 100x better than stock but eventually I will either add one more in each corner or a LED light bar in the stock position.
 
To avoid these ads, REGISTER NOW!

zippyslug31

Well-known member
Joined
Jul 11, 2017
Messages
207
Location
Central Oregon
what size drill bit

Looks like 37/64 or 9/16. Probably not critical since (1) NTP bodies are tapered so they should fit the hole the further in you screw the part, and (2) the intention is to let a tiny amount of air into for mixing so any "leaks" shouldn't be a huge problem.
Any reason why you went with a 3/8 valve? I had a 1/4" valve laying around so I used that... from what a lot of ppl report the amount of air required is pretty minimal so I figure this should suffice.
What size of pipe are you building your mixing "chamber" from? I saw some use 1", others use 3/4". I just started with the smaller 3/4" and will replace with 1" if needed.
 
OP
T

trooper1954

Well-known member
Joined
Nov 4, 2016
Messages
197
Location
Salmon Arm, BC, Canada
zippyslug31, I had some 1 1/4" pipe laying around so I went with that, and also already had the 3/8ths ball valve hence the request for size of drill bit. The downside was I didn't have a 3/8ths NPT tap in my tap and die set,and was shocked at the price I paid....it's a Jet so it's a good one but it still cost me $25CAN.....more than all the parts for the mixing valve!!!!
Probably will never use it again now!!!;)
 

zippyslug31

Well-known member
Joined
Jul 11, 2017
Messages
207
Location
Central Oregon
I hear ya. I recently plumbed air with 1/4" line all over my shop. Since a few of the work stations needed custom-threaded items I, fortunately, had already picked up the 7/16-18 tap. Since I had the spare 1/4" ball valve laying around, I just tapped my 3/4" pipe.
It's so damn nice to have the specific tool on hand when you need it!!! Normally never works out that way. Ha
 
OP
T

trooper1954

Well-known member
Joined
Nov 4, 2016
Messages
197
Location
Salmon Arm, BC, Canada
And so onto another question. The metering valve I've made for the cabinet wont be installed until I get the upgrade Eastwood gun and foot pedal kit. In the meantime I tried the cabinet yesterday "as is" so to speak. The siphon tube on this Samona cabinet is a two tube setup with one slightly shorter than the other. I placed 3 x32oz cups of glass bead media in the bottom and the ends of the tubes were well covered. I ran the cabinet at 90 psi, but was disappointed with the lack of media exiting the gun...it seemed extremely sparse....basically I could see the minimal amount of beads coming through.
My question is does the volume/weight of the media in the hopper have any bearing on how well the media gets sucked up? I realize it's the volume of air that moves the media, but don't get why there wasn't a better discharge at the gun? Of course, that's why we do the gravity feed upgrades...but in the meantime I'm curious as to why this didn't work better? I backchecked the hose...no blockages in either.
 

Jswain

Well-known member
Joined
Apr 26, 2013
Messages
2,449
Location
Calgary, AB
Those guns run better at lower pressure and with a 6-7mm nozzle. Try 40-60psi to start and add more media. 1/4 or a half bag. While the 3x32oz cups works great with a metering valve it won't be as effective with a siphon tube, think pouring sand through a funnel vs sucking it up with a straw that has a slight vacuum
 
Last edited:

csp

Well-known member
Joined
Mar 23, 2010
Messages
5,719
Location
Franktown, CO
trooper the siphon tube used in the Chicom cabinets is a **** design. That's why TP Tools makes an improved one. I remember seeing a video on YT where someone modified the HF tube to work much better. I don't recall the details though as I did not intend to keep it in mine.
 
Last edited:

NUTTSGT

Super Moderator
Staff member
Joined
Sep 14, 2009
Messages
50,855
Location
Northern Central Ohio
Interesting guys. I never thought about the airflow with the dust. I have the vac hooked to the left side to pull the dust out.

I'm going to have to look at mine in the next few days to see how hard it would be to swap them around and still use the small shop vac set up I currently have.
 
OP
T

trooper1954

Well-known member
Joined
Nov 4, 2016
Messages
197
Location
Salmon Arm, BC, Canada
Thanks guys.....so here's the latest. As mentioned, I have a Samona cabinet similar to HF/Princess Auto in Canada....it has the original two tube syphon system....and I mean two separate tubes spot welded together. I'm running a 60 gal CH compressor rated at 15cfm. The air supply to the gun is 3/8th....the media supply tube is 1/2".
I tried today with varying nozzle sizes from 3.5mm up to 8mm, and tried different pressures ranging from 45 to 100 psi. My conclusion? This thing is ****!!!
No matter the nozzle or the air pressure, it took me a good 10 minutes to effectivly clean a rusty horseshoe!! During that process sometimes the media was very visible in the cabinet.....other times there didn't appear to be any coming through.....I backchecked the nozzle with air regularly but it didn't seem to matter. The media is 20-30 crushed glass.
It just seems that either there isn't enough media coming through, or not enough pressure. It doesn't hardly register against my finger in the glove....seems weak. Also, it only removes a small pinhead of rust at a time......I guess never having worked a sandblasting cabinet before, I was expecting better.
I'm now into this cabinet for a few bucks....eastwood gun and foot pedal on it's way, and I've made a gravity fed mixing valve that will be installed when the gun and pedal arrive. My concern now is that the mods I make will not change the cabinets performance much. Cleaning a pin head at a time? Is that normal performance?
I'd appreciate anyone's thoughts on this....of course I will try the mods, but does anyone have an idea as to why this cabinet "AS IS" is such a poor performer?
Thanks to all who have contributed so far.
 

csp

Well-known member
Joined
Mar 23, 2010
Messages
5,719
Location
Franktown, CO
Mine works great at 40 psi

The biggest problem with yours as it sits is the craptastic siphon tube. It does not allow enough airflow to create a consistent suction to pull media off the bottom.
 

Moss

Well-known member
Joined
Dec 21, 2013
Messages
148
Location
Ontario Canada
Thanks guys.....so here's the latest. As mentioned, I have a Samona cabinet similar to HF/Princess Auto in Canada....it has the original two tube syphon system....and I mean two separate tubes spot welded together. I'm running a 60 gal CH compressor rated at 15cfm. The air supply to the gun is 3/8th....the media supply tube is 1/2".
I tried today with varying nozzle sizes from 3.5mm up to 8mm, and tried different pressures ranging from 45 to 100 psi. My conclusion? This thing is ****!!!
No matter the nozzle or the air pressure, it took me a good 10 minutes to effectivly clean a rusty horseshoe!! During that process sometimes the media was very visible in the cabinet.....other times there didn't appear to be any coming through.....I backchecked the nozzle with air regularly but it didn't seem to matter. The media is 20-30 crushed glass.
It just seems that either there isn't enough media coming through, or not enough pressure. It doesn't hardly register against my finger in the glove....seems weak. Also, it only removes a small pinhead of rust at a time......I guess never having worked a sandblasting cabinet before, I was expecting better.
I'm now into this cabinet for a few bucks....eastwood gun and foot pedal on it's way, and I've made a gravity fed mixing valve that will be installed when the gun and pedal arrive. My concern now is that the mods I make will not change the cabinets performance much. Cleaning a pin head at a time? Is that normal performance?
I'd appreciate anyone's thoughts on this....of course I will try the mods, but does anyone have an idea as to why this cabinet "AS IS" is such a poor performer?
Thanks to all who have contributed so far.
I have had the PA cabinet for many years. I'm not sure I've ever tried to run 20-30 in it. I've also never had much luck using any blasting media without screening it myself first. There is always big particles in it that clog the nozzle.

Sent from my SM-G930W8 using The Garage Journal mobile app
 

ZRX61

Well-known member
Joined
Aug 15, 2006
Messages
28,716
Location
Solar Blight Valley, SoCal
Those guns run better at lower pressure and with a 6-7mm nozzle. Try 40-60psi to start and add more media. 1/4 or a half bag. While the 3x32oz cups works great with a metering valve it won't be as effective with a siphon tube, think pouring sand through a funnel vs sucking it up with a straw that has a slight vacuum


I always run mine with a 4-5gal bucket of glass bead in the hopper.
 

Jswain

Well-known member
Joined
Apr 26, 2013
Messages
2,449
Location
Calgary, AB
I always run mine with a 4-5gal bucket of glass bead in the hopper.

With a siphon tube you pretty much have to lol.

As for the OP with the new gun/foot pedal/metering valve I'd bet you will be much happier with the performance. It will pickup more media and mix it with the air much smoother without clogging and will make your sandblasting much more efficient.

Start at lower pressures(40psi) and work your way up from there. Start with your metering valve all the way open and close it until your gun starts to slug the media and then open it back up slightly until it smoothes out.
 

islandkent

Well-known member
Joined
Jan 29, 2009
Messages
281
Location
PEI,Canada
I have the PA version blasting cabinet and I run my vacuum off the back. Went to CT picked up a adapter that fits the rear hole perfectly for the shop vac / home made dust collection . I bent up a baffle for my intake on the far left side of the cabinet. I would never run it the way it was meant to be used. Shooting media right at the vacuum. I built a proportioning valve and did all the goto mods off of you tube. It's so nice to run. It's as hard as turning on a radio. I only use a margarine dish of media worth at a time, and reuse it until it disintegrates. Love the glass beads. While your at it go to PA and get those LED lights. Come on sale for 14 bucks. I have three installed. Getting old. I can't get enough light. lol
Here's a few shots of my Canadian version of the HF cabinet.
 

Attachments

  • 25.JPG
    25.JPG
    26.6 KB · Views: 223
  • 28.JPG
    28.JPG
    30.7 KB · Views: 206
  • 20.JPG
    20.JPG
    48.5 KB · Views: 226
  • 19.JPG
    19.JPG
    34 KB · Views: 219
  • 17.JPG
    17.JPG
    36.9 KB · Views: 216
  • 16.JPG
    16.JPG
    40.5 KB · Views: 199
  • 4.JPG
    4.JPG
    49.4 KB · Views: 187

islandkent

Well-known member
Joined
Jan 29, 2009
Messages
281
Location
PEI,Canada
I just reread the whole thread. Trooper you won't believe the difference once you hook up your valve and run it. I'm just using my original gun. I bought the pedal and stuff off of amazon but never had the need to change over to the foot. I like the gun the way it is?? I might make one of those homemade guns some time I'm bored. But like I say I love my set up. I never even attempted to use the cabinet till I was done. I don't have the patience for that. lol I used one of those siphon tubes years ago for about 5 minutes. Nuff said. I must be into my cabinet for around 5 bills but well worth it. I'm restoring my 70 Charger and I have put all of the small parts through her in the last year(every nut and bolt) and I'm still on my first bag of glass beads with lots left. Like 3/4 of it. I have experimented with quite a few different media and I like the glass beads the best for paint removal. Crushed glass for rust. Soda for the rubber parts. I have many many hours at that window. Put the headphones with the tunes cranked and let her pound.
Here are few pictures of before and after shots with the glass beads. You'll know what I'm talking about when you hook up your valve.
 

Attachments

  • sb hinges.JPG
    sb hinges.JPG
    40.8 KB · Views: 139
  • brackets.jpg
    brackets.jpg
    154.1 KB · Views: 123
  • body color1.jpg
    body color1.jpg
    157.3 KB · Views: 124
  • 3.JPG
    3.JPG
    35.8 KB · Views: 126
  • 1.JPG
    1.JPG
    40.9 KB · Views: 125
  • hinge.jpg
    hinge.jpg
    148.2 KB · Views: 113
OP
T

trooper1954

Well-known member
Joined
Nov 4, 2016
Messages
197
Location
Salmon Arm, BC, Canada
Thanks guys....islandkent....nice mods to your cabinet. I have installed those exact LED lights, and my metering valve looks to be exactly the same also. I'm expecting the foot valve/gun kit tomorrow, so hopefully I will be able to compare "factory" with "mods" sometime this week. I'm frustrated at this point, but your comments have given me a boost and I'm hoping I'll have the same positive experience after the mods that you had. Can you tell me what the fittings are from CT that you see in the photos for the vacuum? And what did you use for the baffle on the left hand port.....just a loaf tin like other's have used on YT?
I was thinking of just putting a 90 elbow on the left on the inside, and then attaching a piece of vacuum tube with the end cut at 45 at the bottom. That way I've created crossflow from right bottom to left bottom rather than what most have done...
Thanks for the input
 

islandkent

Well-known member
Joined
Jan 29, 2009
Messages
281
Location
PEI,Canada
I knew you'd ask about the vacuum port. And I've been thinking ever since I posted that photo. I remember that it was a 90* brush attachment. I fits right in the hole once you pull the bristles off. They just pull off as a single strip. I checked their site out but it's not there. Here is a picture of it off the web. I took my time and pieced it together the way I wanted. No rush. Then I bought another hose attachment for the shop vac. to go to the dust recovery bucket, then to the vacuum. As far as the baffles goes. My son just happens to work at a sheet metal shop. So there you go! lol All the custom bent metal in different colors to choose from. Not the right shade of blue but it will do. He bent me up the metal for the baffle and the metal slopes around the whole blasting cabinet(the ledge where all the media collects), the door metal and the little box to catch the mess that always falls off the door when you open it. Like I said I wasn't in a rush and took my time to make it the way I wanted. Have it on wheels so I can move it around my shop. And that bottom shelf holds everything for the cabinet. Hope this helped. That was alot of pecking lol
 

Attachments

  • Brush.jpg
    Brush.jpg
    8.9 KB · Views: 100
  • Back cabinet 1.jpg
    Back cabinet 1.jpg
    76.8 KB · Views: 111
  • Back cabinet 2.jpg
    Back cabinet 2.jpg
    81.1 KB · Views: 105

islandkent

Well-known member
Joined
Jan 29, 2009
Messages
281
Location
PEI,Canada
Here are the hose attachment that go to my recovery bucket before the vacuum. And for the hose I used a sump pump kit. A lot cheaper than the proper hose. And yeah I bought a extra accessory kit also for the attachment fitting. Like I said I have 500 bucks in this thing. But it's a 10 out of 10 in my mind. Guys come over and are just amazed how well it works and easy to set up. Push it over to the compressor hook up the air. Dedicated 1/2 inch inside diameter air hose. Even though I only use 40-50 psi. The copper slag/crushed glass take more air. Heavier right? Then plug in the power bar into the wall and turn the power bar switch on which in turn turns on the lights and the vacuum. Bam your in business! Oh I have researched this cabinet to the fullest. Once you get yours geared up you will have to experiment with nozzle sizes. I like the 4mm the best which soon becomes a 5mm after a few hours. lol
 

Attachments

  • vacuum adapt.jpg
    vacuum adapt.jpg
    29.5 KB · Views: 58
  • hose adpt.jpg
    hose adpt.jpg
    3.6 KB · Views: 89

larry4406

Well-known member
Joined
Jan 27, 2006
Messages
18,966
Location
Northern Virginia
This has been a very good read and thanks to all that have posted.

I have a slightly off topic question and hopefully I don't derail this thread.

I have a large TP cabinet (960?) that I bought used and have used it very little (other projects in the way). What little I have used of it, the pickup tube seems to get plugged frequently (I think there is perhaps too much abrasive in the unit, not even sure what it is).

Those of you that have a TP cabinet, have any of you switched to a metering valve from TP's suction tube setup?
 

OccupantRJ

Well-known member
Joined
May 15, 2009
Messages
10,918
Location
Eastern North Carolina
If you have not seen it, check out my “Abrasive blasting resource thread” sticky. There is a ton of abrasive blasting info in it.
One thing most people seem to not realize is that no matter what vacuum source you are using on a cabinet, it must have enough volume to overcome the air being injected into the cabinet by the gun airstream. The vacuum must exceed this amount or you will not have a negative pressure in the cabinet to evacuate anything. A few cabinets have the air intake above the glass to produce an air wash effect as the incoming air flows across the viewing window. My large cabinet is like this, and has a 4” vacuum tube in the bottom of the hopper with a helluva air flow. It is clear as day in it during blasting, with absolutely no issue seeing anything. I would try two vacuums on the cabinet as a test if you have the capability, or either a woodworking type dust extractor. The increased negative pressure in the cabinet also likely improves performance of a suction gun. I use a vacuum gauge to make air jet adjustments to obtain the highest vacuum on my guns. I hope this will help someone.
 
To avoid these ads, REGISTER NOW!
Top Bottom