To avoid these ads, REGISTER NOW!

Cutting Garage "Curb" Flush with Floor

adsinnott1

Well-known member
Joined
Feb 16, 2021
Messages
134
Location
Kentucky
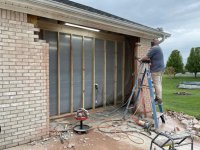
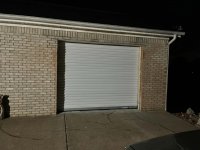
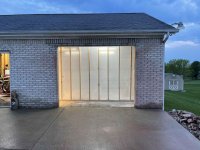
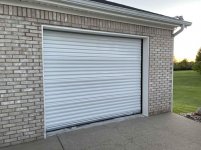
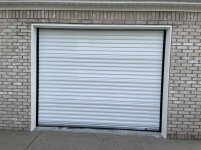
I have a raised edge/ curb on all 4 sides of my detached shop, about 6" tall, except for where there are 2 french door openings. I am installing a 9ft wide roll up door where one of the french door opening is and will need to cut the sill plate wall/ curb about 3 ft to be flush with the garage floor . The best readily available tool I can find to rent is a Husqvarna cut and break saw which can be set up for flush cutting.

Has anyone done something similar? Is this the correct tool for the job?
 
To avoid these ads, REGISTER NOW!

Renegade1LI

Well-known member
Joined
Mar 11, 2018
Messages
4,938
Location
long island ny
Sounds like it will do the job, cut all around and you just might need a lump hammer to brake some out if it doesn’t cut all the way.
 

Retroman

Well-known member
Joined
Jan 21, 2018
Messages
1,364
Location
Mojave Desert
Probably your only option for DIY. Be careful of the fumes cutting inside. Been in the concrete cutting business 35+ years but have never used or seen one of these machines being used. Hand sawing concrete is not easy work. Other option hire a cutting company and have them do a flush cut with a wall saw. With probably a $500 to $750 minimum charge to cut that stem wall.
 

csi123

Well-known member
Joined
Mar 26, 2013
Messages
97
You may want to consider renting a respirator to go with it. Breathing in concrete dust is not good for your lungs.
 
OP
A

adsinnott1

Well-known member
Joined
Feb 16, 2021
Messages
134
Location
Kentucky
Will definitely use a respirator. The saw I am planning to rent is the electric version and it also has a hose hookup that should help with keeping the dust down. I will also be cutting right near the door opening in the wall.

https://www.sunbeltrentals.com/equipment/detail/929/0200095/electric-cut-and-break-saw/

The saw is also set up to plunge cut up to 16" so I should have no issue getting all the way through the 8" or so of stem wall. Thanks retro for the correct nomenclature.
 

Retroman

Well-known member
Joined
Jan 21, 2018
Messages
1,364
Location
Mojave Desert
A helper would be nice with a wet vac and wand for cleaning up the slurry the cut will produce. Hopefully there isn't a piece of horizontal rebar on your cut line as trying to rip it with a hand saw will be almost impossible.

Good luck keep us posted on how it went.
 
OP
A

adsinnott1

Well-known member
Joined
Feb 16, 2021
Messages
134
Location
Kentucky
Will be a few weeks before I make the cut. Just wanting to have my ducks in a row. Will definitely update with pictures and how it goes.

Thanks for all the advice!
 
To avoid these ads, REGISTER NOW!
OP
A

adsinnott1

Well-known member
Joined
Feb 16, 2021
Messages
134
Location
Kentucky
Cutting Garage "Curb" Flush with Floor

IMG_5560.jpg
Maybe I should start a new thread now for the actual shop progress. Getting there


Sent from my iPhone using The Garage Journal mobile app
 

Attachments

  • IMG_5555.jpg
    IMG_5555.jpg
    158.1 KB · Views: 38
Last edited:
OP
A

adsinnott1

Well-known member
Joined
Feb 16, 2021
Messages
134
Location
Kentucky
Final update on this thread. The door is up minus the trim and I have to replace the motor that I dropped....
IMG_5653.jpg
IMG_5655.jpg
IMG_5572.jpg
IMG_5644.jpg
IMG_5651.jpg
IMG_5652.jpg


Sent from my iPhone using The Garage Journal mobile app
 

Attachments

  • IMG_5653.jpg
    IMG_5653.jpg
    154.4 KB · Views: 52
  • IMG_5655.jpg
    IMG_5655.jpg
    130.5 KB · Views: 58
  • IMG_5572.jpg
    IMG_5572.jpg
    151.3 KB · Views: 53
  • IMG_5644.jpg
    IMG_5644.jpg
    153.1 KB · Views: 46
  • IMG_5651.jpg
    IMG_5651.jpg
    80.4 KB · Views: 60
  • IMG_5652.jpg
    IMG_5652.jpg
    74.6 KB · Views: 62
OP
A

adsinnott1

Well-known member
Joined
Feb 16, 2021
Messages
134
Location
Kentucky
Looks good. Will you post finished daylight photos after all the trim is installed? I would be interested in how you completed the brick work after the wall was removed.

I sure will take and post some pictures once it is all buttoned up.

As for the brick... We planned to be able to remove from underneath and hope that the brick above held while we slid the new steel lintel in. That did not work and the stuff above the opening started to fall so we just knocked it down and took it out piece by piece. Then we stacked/ laid the brick on the sides and set the lintel. Once that all set up we stacked the rest and the soldier course on top.
 
OP
A

adsinnott1

Well-known member
Joined
Feb 16, 2021
Messages
134
Location
Kentucky
Automatic Technology America is the manufacture of the motor. I told them what happened (I dropped it) and they sent me a replacement housing piece for free and sold me a new motherboard that the buttons popped off of for $130 shipped. Very nice and customer service oriented.
 
OP
A

adsinnott1

Well-known member
Joined
Feb 16, 2021
Messages
134
Location
Kentucky
Trim complete. I used pvc trim board and the hidden screws with plugs. No paint required.
I installed the aluminum rail for the brush guard and the 7 inch header seal under the trim board to make them as invisible as possible. Turned out pretty decent for a commercial door in a residential setting. Will make a thread for the entire project.
IMG_5673.jpg
IMG_5672.jpg


Sent from my iPhone using The Garage Journal mobile app
 

Attachments

  • IMG_5673.jpg
    IMG_5673.jpg
    153.9 KB · Views: 31
  • IMG_5672.jpg
    IMG_5672.jpg
    153.5 KB · Views: 31

captain14

Well-known member
Joined
Dec 19, 2012
Messages
7,028
Location
Near College Park Maryland 20740
The finished door looks good. I’m starting to like the PVC trim products more and more.

If you do another thread on the entire project, make sure you add the link to this thread to tie everything together.

Thanks
 
To avoid these ads, REGISTER NOW!
Top Bottom